I did not grow up in a family that ate lasagne much – but my husband did! It was my lovely mother-in-law’s go to dish!
He has missed it since we were married, so I’ve worked hard at making a dish that we both enjoy AND fits all of our dietary needs. This one is also a winner with the kids – and the left overs taste even better the next day!
Heads up – this is in no way a traditional lasagne, I’m not event pretending it is … in fact I have had friends tell me that I am not allowed to call it lasagne if it doesn’t have either pasta or cheese … sorry … I’m going do it anyway!!
**Check out below the main recipe to see how I make this one completely plant based**
This is a meal that takes a little more time and fiddling in the kitchen than I normally like, but the end result is worth it and it does make 10 large and very filling servings, so I’ll allow it!
- 1 tbsp garlic olive oil
- 1 small brown onion, diced (about 125g)
- OPTIONAL: 1/2 tsp dried chilli flakes
- 1kg beef mince
- 400g tin brown lentils, drained and rinsed
- 1 medium zucchini (about 1.5 cups chopped)
- 150g fresh spinach
- 200g button mushrooms
- 400g tin red kidney beans, drained and rinsed
- 70g tomato paste,
- 1 tsp dried oregano
- salt to taste
- Large egg plant (about 1kg)
- spray olive oil
- 125g grated cheese (dairy or vegan)
For the Sauce:
- 1 large cauliflower (approx 900g-1kg), roughly cut up
- 1 tbsp olive oil
- 1 tsp dried onion flakes
- 1/2 tsp dried garlic flakes
- 1 cup high protein almond milk (or soy or dairy milk if they suit you)
- 1 cup hot veggie stock
- 4 heaped tbsp nutritional yeast
- Salt to taste
Heat the olive oil in a large saucepan. Add in the onion and garlic flakes. (Steam Temp, speed 1, set for 15 minutes)
Then add in the cauliflower and stir well to coat in the oil. (Turn up to speed 2)
Add in the milk and stock and cover, allowing to come to a gently simmer. (Leave in Steam temp, speed 2 with the m/c off)
Simmer for 10-15 minutes or until the cauliflower is soft and you can easily pierce it with a fork.

Add in the nutritional yeast and then use an immersion blender to mix until smooth – you can transfer to a blender if you need to but be VERY careful! (Start by turning off the temperature function and gradually build to speed 8 until very smooth).

Taste the sauce and add a little salt to taste (dairy cheese is quite salty and when you remove it you need to add in a little salt to help with flavour). Set the sauce aside.
Onto the meat mix:
Start by creating the veggie mix you’ll stir in to the meat.
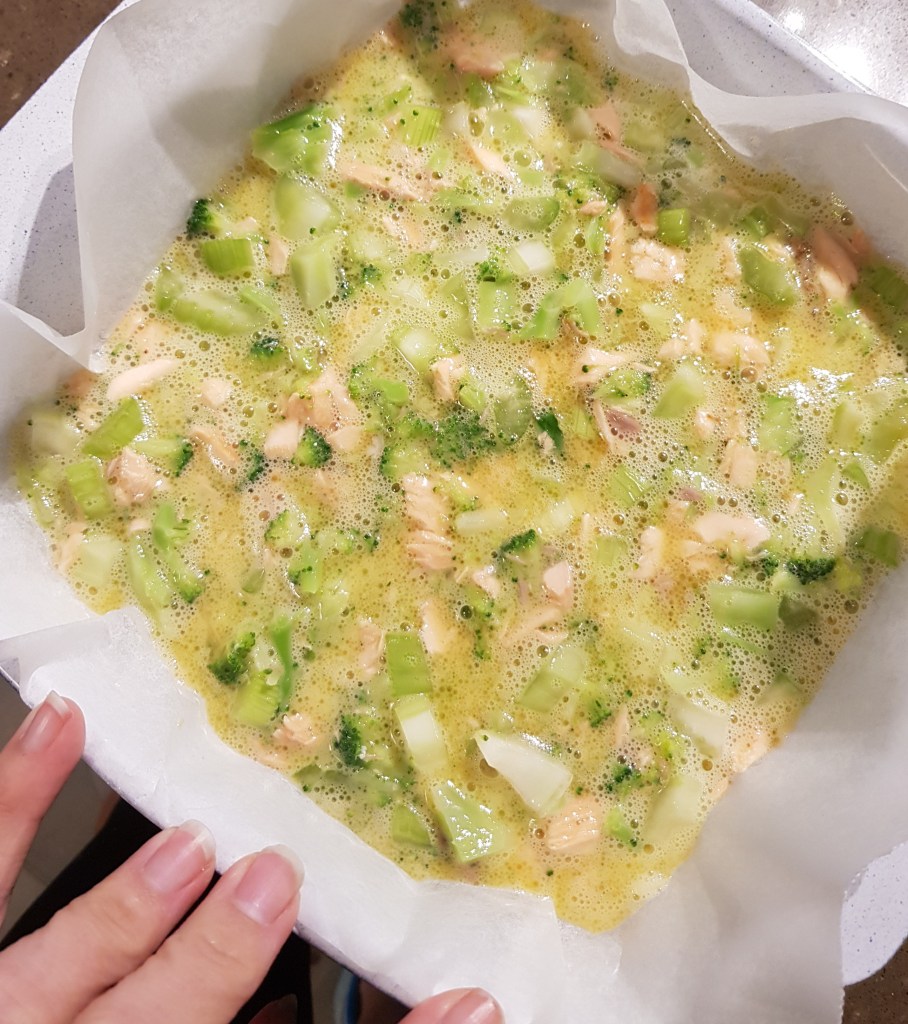
In your food processor or thermo cooker, add in the zucchini, spinach, mushrooms, kidney beans and tomato paste, then blitz until quite fine. (Speed 6, 8 seconds, scrape down and repeat until you get your desired consistency). Set aside.
In a large frying pan heat the olive oil then add in the diced onion and cook, stirring until translucent.
Add in the beef mince and herbs/spices. Break it up well and when it has roughly browned, add in the lentils and mix well.
Now add in the whole processed veggie mix to the meat mix and stir very well.

Bring to a gentle simmer for about 15 minutes.
Now the egg plant while the meat is simmering:
Slice finely. Lay on a baking tray, spray with a little olive oil, sprinkle with a little salt and place under the grill in your oven.

Once the top side is golden brown (it only takes a few minutes), turn over and cook the other side.
The remove from the oven and set aside.
Now build the layers:
Lightly grease a large baking dish (I actually use 2 – awesome for freezing one too!)
Layer half of the meat mix into the bottom, then lay down half of the egg plant, then half of the cheese sauce and then repeat.


Then sprinkle either dairy or vegan grated cheese over the top.

Pop into the preheated 180C oven (fair warning …. you’re best to place it on a baking tray to catch any drips or bubbling sauce!) for about 30 minutes or until golden and bubbling – a quick minute under a grill at the end really helps to give you golden cheese, especially if you are using a plant based cheese.

Slice and serve…. and Enjoy!


**If you want to make this meal completely plant based: I use my lentil bolognese recipe but I omit the pasata (other wise there is too much liquid)**
*Of course, if you just want dairy free but you still love your pasta, then go ahead and use whichever lovely, fresh sheets suit you.
*And if you are not an eggplant fan but you still need a Gluten Free option, then I have used both of these Orgran and San Remo Lasagne sheets in the past.


If Macros are important to you here are the details for 1 serve – that is 1/10th of the meat based meal (I have kept the cauliflower ‘cheese’ sauce separate as I know people like to use it in other dishes!). You will just need to additionally factor in whichever cheese you use on top.