Pumpkin pastry parcels

I guess this one isn’t so much as recipe as an idea or a suggestion!

We do our very best to reduce waste from our kitchen.

So many ways to make some little changes that help –

  • We menu plan,
  • Cook in bulk,
  • Freeze leftover for work lunches,
  • Make soup to use up veggies that are past their best
  • All veggie peelings and scraps go to our worms and so back to the garden,
  • Do a swap – we give out overload of veggie scraps to friends with chooks (and sometimes get eggs in return!)

One of the other ways to reduce waste is to get a bit creative when you’re down to the last few bits of veg before shopping day!

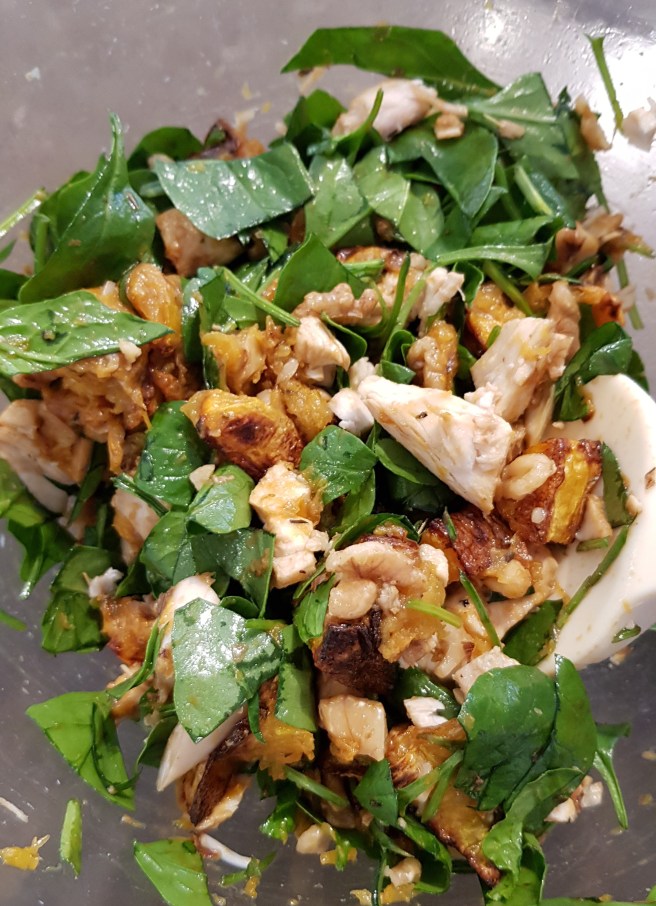
I had about 1/4 of a butternut pumpkin, a couple of handfuls of spinach, a small handful of left over roast chicken and the dregs of my walnut container left. Together with a few basic pantry staples – that sounds like weekend lunch!

My husband reckons they are better than a bought pie (and his body feels better afterwards) and he says they’re much nicer than the ones he can buy at a cafe in the city – for an obscene price!

We used: Pumpkin, spinach, walnuts, cooked chicken, puff pastry, Italian herbs, salt pepper, olive oil (garlic infused) and coconut aminos.

But use whatever left overs you have and enjoy and get creative!

*If you don’t eat meat – we often us about half a tin of butter beans or cannellini beans instead – just pop them in the oven together with the pumpkin in the last 10 minutes of roasting time.

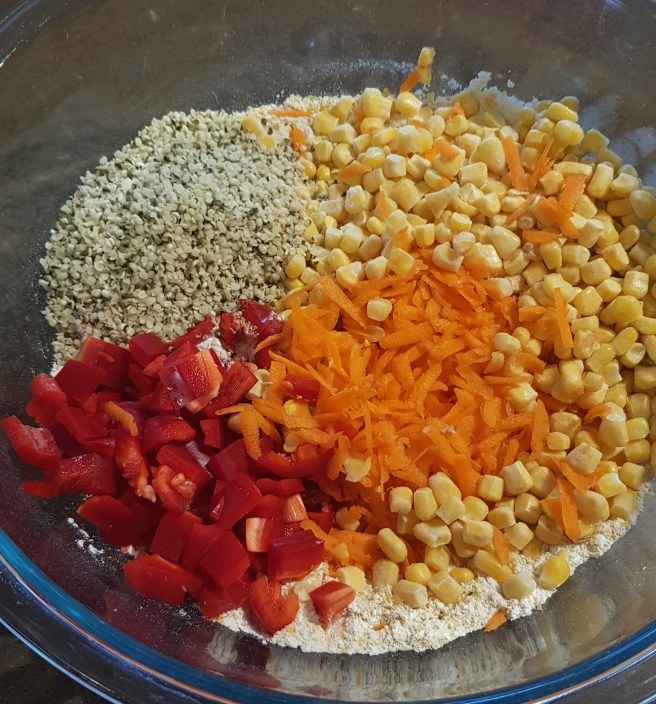
*If you don’t eat nuts – pumpkin seeds or hemp seeds work really well here too – use them in exactly the same way as the walnuts.

20190802_131923.jpg

Dice the pumpkin into small pieces.

Then roast the pumpkin with some garlic olive oil, salt, pepper and Italian herbs (about 200C for 35-40 mins).

Place pumpkin in a bowl together with the chopped chicken, walnuts and spinach and then add about 2 tsp of coconut aminos. Mix well so that the pumpkin gets a bit mashed up.

20190802_132017

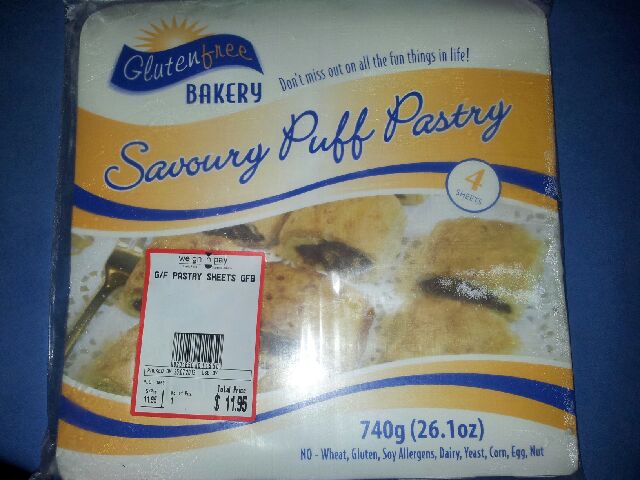
Place mixture into the centre of pastry squares (obviously – use whichever pastry suits your diet)

Fold the pastry over the mix to form a parcel and then use the fork to press the edges of the pastry together.

Bake in a 200C fan forced oven for about 25-30 minutes, or until golden, puffed and flaky.

20190804_121328

Enjoy 🙂


Simple egg slice

This is such an easy way to get in some extra veggies. It’s fast to make, really flexible and works well to use up veggies that might otherwise be past their best.

It does contain egg so this is not a meal that we can eat as a family … but the biggest little one loves to take it in his lunchbox and I like it on standby in the freezer for days when I’m really rushed and need to grab something to take to work for breakfast.

  • 8 eggs
  • 1/4 cup olive oil
  • 1 cup SR flour (we use spelt or GF)
  • 1/2 cup nutritional yeast
  • 4 cups chopped/grated veggies*
  • 1/3 cup hemp seeds (optional)
  • 1/2 tsp of salt and 1 tsp of mixed Italian Herbs
  • OPTIONAL: 1 cup grated cheese

*We use up what we have in the fridge. Mostly it is a mix of carrots, zucchini, corn but often we chuck in capsicum, pumpkin or event asparagus and sliced mushrooms.

Place flour, nutritional yeast, salt and dried herbs in a large bowl and use a whisk to combine evenly.

Add in grated/chopped veggies and seeds.

20190526_143922.jpg

Fold through veggies and seeds so that they are evenly coated in the flour mix.

In a separate bowl, beat together the eggs and the oil.

Pour the wet mix into the veggie mix and fold through until there is no dry flour visible.

20190526_144924.jpg

Pour into a lined baking dish, smooth out and place into a preheated moderate oven for about 40 minutes or until cooked through.

20190527_111230.jpg

20190527_111213.jpg

Eat warm, or slice and freeze.

20190527_111307

Serves 8

Enjoy 🙂

Thai pumpkin soup

Hello soup weather!

I’ve been making this delicious, comforting soup for the past couple of years.

It is an absolute winner with Peter and I and Will. I’ll be honest though … It isn’t a favourite with the other small ones. 2 of them tolerate it … One of them will have a taste but that’s as far as it goes. 🤦

Ah well, you can’t win ’em all … And I’m delighted to have a freezer stocked with lunches!

  • 1.5kg butternut pumpkin
  • 400g sweet potato
  • 2 heaped tbsp sunflower seed butter
  • 1 heaped tbsp red thai curry paste (I like the Ayam brand)
  • 200ml coconut cream
  • 2L hot veggie stock

Place the curry paste into a hot saucepan and stir until fragrant.

20190520_183609
Home grown veg plus curry paste home made from homegrown lemongrass, chillies, onion and garlic – makes me SO happy!!

Add in the diced pumpkin and sweet potato and stir to coat the veggies in the paste.

Add in the stock and bring to a gentle simmer for about 20 minutes, or until the veggies are very soft.

Remove from the heat. Stir in the coconut cream and the seed butter.

Use an immersion blender to blend until silky smooth.

20190520_183657

We like to serve with fresh damper 😋

20190520_183716

Makes about 10 serves and it freezes and defrosts well.

Enjoy 😊

Chicken, black bean and carrot burgers

Building your own burger is always a fun, messy, dinner.

Mostly we go with a veggie burger patty but we mix it up sometimes with this chicken burger.

The beans and carrots work to bind the patty without egg and they also mean you can spread the meat further and significantly boost your fibre intake too.

  • 4 large chicken thighs, boneless and skinless
  • 420g tin black beans, drained and rinsed
  • 2 medium carrots
  • 1 tsp fresh chopped thyme
  • 1 tbsp coconut aminos
  • 1/2 cup nutritional yeast
  • 1/3 cup hemp seeds
  • olive oil to cook

Chop and steam the carrots until they are soft.

Place the chicken thighs in your food processor and process until chicken is evenly minced (speed 5, 10 secs)

Add in beans and carrots then aminos and thyme. Process further until well combined (speed 4, 10 secs)

Add in the nutritional yeast and hemp seeds and process until just combined. (Speed 4, 5 secs)

If you have the time pop the mixture in the fridge for half an hour before you make patties. It will help them hold together better when you cook them.

20190503_171948
Ready for the frying pan

Form heaped tablespoons of the mixture in to patties and place into a hot, greased pan.

Cook until golden on one side, then flip and cook on other side until cooked all the way through.

You can also spray with a little olive oil and bake in a 200C oven for about 20 minutes, flip them over and cook for a further 10 mins or until cooked through (keeps the stove top much cleaner! 🤣)

20190629_164848.jpg

Serve on your bread of choice with your favourite burger toppings.

20191002_180457


20190503_184753
He likes his with pineapple, tomato, capsicum, lettuce, cheese and egg. The lot!

I like a leftover patty on its own topped with avo for lunch.

Makes about 12

Enjoy 🙂

Lemongrass Ginger cordial

Cordial is not a regular feature in our house, but as a treat at a birthday party, or mixed with sparkling water as a non alcoholic drink, it’s pretty special to have your own home made, and home grown option!

We had abundant lemongrass this year, so we have made a huge batch of Thai curry paste, propagated more for next year and shared loads with our community but we still had more left – we decided to go with some deliciously fragrant cordial!

  • 5 cups water
  • 2.5 cups lemon juice*
  • 2.5 cups raw sugar
  • 6-7cm root of ginger
  • 4 stalks of lemongrass

*Orange and grapefruit juice or any combination of the above work really well too.

Place the water juice and sugar in to a large saucepan, mix well and place on the stove over a medium heat. (In your Thermal cooker place on 90C Sp 1)

Slice the ginger and cut and bruise your lemongrass.

Add both to the liquid mix and turn heat up to bring to a rolling boil. (Increase to ST temp for a few minutes until boiling)

Stir regularly.

Turn heat down to a gentle boil for 10 minutes (decrease to 90C).

20190407_153126

Remove from heat but allow to sit for a further 30 minutes – 1 hour to steep and cool, before sieving the solids from the liquid.

20190407_165353

Pour the liquid into a sterilised glass container and use as you would any cordial. This one is particularly delightful with lots of ice and a few mint leaves on a hot summer day!

20190407_170054

Will last a couple of months in the fridge.

Enjoy 🙂

Cranberry & White Choc Muesli Cookies

My big boy has been having a tough time lately. So when we have an afternoon at home (which is rare!) he is pretty keen to spend one on one time with me.

Pre-teens often don’t want to sit and talk in a formal, eye contact kind of way … so cooking and working along side each other provides a really good opportunity to talk and try to sort somethings through.

Today he asked to make cookies. We’d tried a white choc cranberry cookie from the shops recently but they were SUPER sweet and his tummy didn’t feel so great after them (probably would have been ok if he had one and not three though!!)

So we adapted our regular choc chip cookies and came up with these beauties.

  • 3/4 cup sugar (we like the caramel taste of coconut sugar)
  • 1 1/3 cup plain flour (half wholemeal) OR 1 1/4 cup GF Flour plus 1 tsp psyllium
  • 1/3 cup rolled oats OR shredded coconut
  • 1 tsp GF baking powder
  • pinch pink salt flakes
  • 1/2 tsp mixed spice or cinnamon
  • 1/3 cup dried cranberries
  • 1/3 cup pumpkin seeds
  • 1/3 cup hemp or flax seeds
  • 1/3 cup white choc chip (which ever suit your diet – Sweet William is a winner for us)
  • 150g vegan butter, melted (but not too hot or it will melt your choc chips!)
  • Optional: zest of 1/2 an orange, finely grated

In your food processor or thermal cooker place the flour, baking powder, salt, sugar, oats and cinnamon. Blitz to a coarse flour (speed 8, 8 secs)

Add in the cranberries and seeds and mix again until combined (Speed 4, 6 secs). Blitz for longer if you want less obvious ‘bits’

Add in the butter through the chute at the top whilst mixing (on Speed 4) and mix until well combined (about 10 seconds)

Add in the chocolate and mix until just combined (Speed 4, 6 seconds)

20190403_164956

Form a teaspoon full into a ball and spoon onto a lined baking tray, allowing space to spread. Press down gently.

20190403_164933

Cook in a preheated moderate oven for 14-15 minutes.

They will be soft when you remove them from the oven. Allow to cool on the tray for 10 minutes before transferring to a wire rack to cool completely. They will be crunchy on the outside and chewy on the inside.

20190403_164900

Makes about 20.

Enjoy!!

Frozen yoghurt ice creams

I don’t remember any family from my childhood that didn’t have Tupperware icy pole moulds!

There are loads of different moulds you can buy now, but whichever you choose to use, they are fabulous for making simple, healthy, tasty, waste free desserts.

This recipe is very flexible. Make it more or less creamy depending on the amount of yoghurt you use. It’ll be less ice creamy and more of an icy pole if you leave out the banana and switch to other fruit.

In our freezer we had a heap of mango left over from a self picking expedition where we went slightly (*understatement!) overboard! And then we had 2 bunches of our homegrown bananas ripen very quickly so we’d peeled and frozen them too. So when we were after dessert these were a no-brainer!

  • 4 mango cheeks, frozen or fresh (tinned peaches or apricots are a great alternative here)
  • 2 medium frozen bananas
  •  approx 400g of yoghurt of choice (dairy, soy, coconut and almond all work well)
  • Optional: 1 tbsp honey or maple syrup

Put everything in a high powdered blender/bullet/thermo machine and blitz until very smooth. If you’re using a thermo machine, make sure you drop frozen chunks of fruit through the top on to already spinning blades. Start at Speed 4 and then work up to 8 for a smooth finish.

Pour into your moulds. This quantity fills 12 of the Tupperware moulds pictured.

20190127_114004

Stick in the freezer for 4 hours, or until frozen.

20190127_182226

Enjoy!

20190127_181339

P.S. Our Dairy and soy yoghurt recipe is linked above, but if you can have tree nuts, and you want yo buy your yoghurt, we have recently found a GF, DF almond milk yoghurt that is really yummy

20190127_110228

Maple, banana and cinnamon Weetbix slice

We share supper in the evening after church each Sunday.

This week it was my turn on roster. I always try to make sure that I cater for as many food allergies and intolerances as I can so that, at least sometimes, those who might otherwise be left out can join in.

This recipe was a hit – free from gluten, eggs, dairy, nuts, soy, legumes and also vegan… but delicious enough that the non-food allergy folk enjoyed it and several requested the recipe. Winner!

Weetbix slice was a childhood favourite – a regular feature in our school lunchboxes. I’m sure the slice came about as a budget-stretching way of using up the inevitable crumbs at the end of the pack!
July 2014 377

The gluten free version of Weetbix is made with sorghum and although I’m not the biggest fan of the original as such a nutritious cereal, it fits our allergy requirements, my kids are excited and I’m pleased to be able to use them in baking!

  • 160g vegan butter, melted
  • 6 weetbix, crushed (regular or GF)
  • 1 cup plain flour of choice (I use spelt or the White Wings GF blend)
  • 1 rounded tsp GF baking powder
  • 1/4 cup coconut sugar
  • 1/4 cup flaked quinoa (or rolled oats if it suits you)
  • 2 tbsp each flax seeds and hemp seeds
  • 1/4 cup maple syrup
  • 1 tsp ground cinnamon
  • 1 medium overripe banana

Mix together all dry ingredients (Sp 4, 8 seconds).

In a separate bowl mash the banana well, add in the maple syrup then pour in the melted butter and mix until well. (Butter in first, Sp 3, 100C for 60 seconds, then add in remaining wet ingredients and use Sp 4, 20 seconds, scrape down and repeat if required)

Pour the wet mix into the dry mix and fold together until well combined (Sp 3, 15 secs).

Press firmly into a lined baking tray (mine was 20x20cm).

Bake in a preheated 180C oven for 25 minutes.

All to cool and then ice with maple icing – made with 1 tbsp soft vegan butter beaten into 2 tsp of maple syrup, a pinch of cinnamon and several tbsp of pure icing sugar (add more as required to reach your desired consistency).

20181111_164912

Slice and store in airtight container in the fridge. Makes 16-20 slices.

20181111_195058
Ready to share

Enjoy 🙂

P.S. I’ve had a query about replacing the banana … simply switch it out for about 1/3 of a cup of apple sauce … add a teaspoon more at a time if the mixture seems too dry.

Simple Cinnamon Granola

Mmmmmm granola. Fabulous crunchy texture that adds interest to breakfast.

It is so versatile and you can really load it up with great stuff to boost your fats and protein – nutrients that are missing from most store bought cereals!

I do make a yummy crunchy granola (that you can find here) but I was after an even quicker and more simple granola that I could make in bulk and have on standby in the pantry for everyday breakfast (or dessert!).

I am conscious that it is really easy to eat sweet granola, so for another option, I am using cinnamon here instead of a sweetener (although there is an option to add more sweetness if you are so inclined!). Cinnamon is so light and fragrant that it works well to give the perception of sweetness without the sugar.

I make this one in a double batch, but the ingredients listed below are for just a smaller single batch.

See below the main recipe for ideas on making this granola Gluten free and Grain free

  • 1 cup rolled oats**
  • 1 cup mixed seeds (or nuts if you like) – I love a mixture of pumpkin, sunflower, flax and hemp seeds.
  • 2 tsps good Olive oil
  • 1 tsp ground cinnamon
  • OPTIONAL: 2 tsps honey/maple syrup

Mix together dry ingredients.

Sprinkle with cinnamon then mix well to evenly coat.

20180818_161828

Drizzle over oil and mix well to evenly coated. If you’re adding honey or maple syrup, drizzle it over here, together with the oil – it helps to spread further if it is warmed first.

Place under a hot grill and bake until  golden. Shake the tray several times during

20180818_165502

Allow to cool completely before storing in an airtight container.

**To make this one coeliac friendly, use a mixture of puffed rice and shredded coconut, in whichever ratio you like best. For grain free use a mixture of buckwheat groats and coconut flakes.

Throw it in your yoghurt, eat it with milk or with some stewed fruit – my favourite is with yoghurt and a few berries!

20180820_110759

Enjoy 🙂

Butternut butter bean sausage rolls

Sausage rolls are a massive favourite with my kids … and husband!

They are easy to make in bulk, and freeze and they are perfect for hiding veggies, so it is nice to know that they can be a slightly healthier option for my family – Obviously they’re still wrapped in pastry so they’re definitely a ‘sometimes’ food!

This is a simpler version of my veggie loaded sausage rolls and are Harry’s current favourite 🙂

I use Chevup sausages in my mix. They are a skinless, gluten free, Aussie beef sausage with about half the saturated fat of normal sausages – I feel much happier about using them than the questionable sausage mince that is commercially available. You can find more details about them here.

The sausages I use have great flavour, so if you are using regular beef mince, there is a note below the main ingredients for a couple of extra things for you to add.

Gluten, egg, dairy, nut and soy free pastry is the next issue. There are many GF pastries out there but they are often really disappointing. Obviously use the one that suits your diet and that you enjoy.

I have used this pastry from the Gluten Free Bakery:
7-20130806_133713

And it does a pretty good job. But ….

if you live in WA you really, REALLY have to check out Busy Bees Gluten Free pastry (I buy from Weigh n Pay in Woodvale)! It is amazing! It comes in a long roll and it handles just like wheat based pastry. It is soft and easy to work with and even non GF people have been happy to eat it!

  • 8 Chevup sausages
  • 250g butternut pumpkin
  • 400g tin butter beans (drained)
  • 1 tsp dried Italian herbs
  • 1/2 tsp pink salt
  • 1/3 cup nutritional yeast
  • 1/3 cup hemp seeds
  • 2 tsp coconut aminos (or soy sauce)
  • 4 sheets of your puff pastry (1 used 3 regular and 1 ‘everything free’)

If you are not using the Chevup sausages, use

  • 450g beef mince, plus
  • 2 tsp olive oil
  • 1/4 tsp mild paprika
  • 1/4 tsp garlic flakes
  • 1 tbsp coconut aminos

Finely blitz the pumpkin. (Speed 6 for 8 seconds, scrape down and repeat).

Add the additional flavourings and oil, if not using chevvups and process again (Speed 5, 8 seconds)

Add the sausages or mince, to the processor and process until it is quite smooth (Speed 6, 10 seconds at a time, scrape down in between).

Add the butter beans and process until well combined (speed 5, 10 seconds, scrape and repeat)

Add the nutritional yeast, hemp seeds, salt, aminos and herbs and then process again until evenly combined and fairly smooth (speed 6, 10 secs, scrape and repeat)

20180716_135344

Cut the pastry sheets in half and divide the mixture up between the sheets.

I find it is best to place it in a thin line down the middle of the pasty.

20170316_104105

Roll the pastry over the top of the mix to form long cylinders.

Lay on a lined baking tray with the join side facing down (helps the join to hold together as it puffs).

20180716_140709

Cook in a preheated 210C oven until meat is cooked and pastry is puffed and golden brown. (Use a short burst under the grill to get them extra golden and flaky). Takes about 35-40 mins in my oven.

20180716_143512

20180716_150458-1

Enjoy 🙂