Slow cooked Lamb Curry

I love lamb … but it is seriously pricey! So as I continue my search for filling and inexpensive meals for my growing family, my slow cooker and stewing bones are getting more and more of a work out!

This curry is delicious, easy to make in very large quantities and it freezes well … and best of all for the budget, the stewing bones I used cost me under $5. Awesome!

  • 1 tbsp rice bran oil
  • 1 brown onion, finely diced
  • 2 tbsp minced garlic
  • 1 tbsp minced ginger
  • 2 tsp minced chilli
  • 2 tsp ground coriander
  • 1 tsp ground cumin
  • 1/2 tsp tumeric
  • 1 tsp sugar/honey/agave
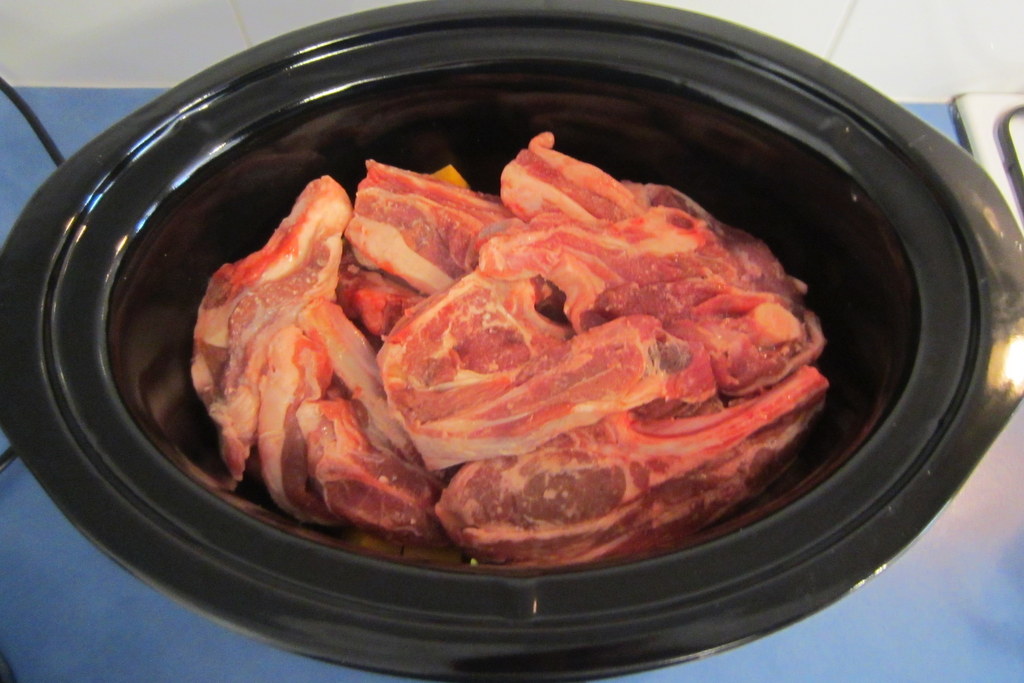
  • lamb stewing bones/offcuts, about 800g-1kg
  • butternut pumpkin, about 1kg, diced into roughly 2cm cubes
  • green beans, about 600g cut into roughly 3cm peices
  • spinach, about 3 large handfuls, roughly chopped
  • 800g tin of crushed tomatoes
  • 200g coconut cream
  • Cauliflower rice/brown rice to serve.

Place the pumpkin in the bottom of the slow cooker and turn on to low.

Heat the oil in a frying pan and saute the onion until it is slightly translucent. Add in the dry spices and cook for another 2 minutes.

Add in the garlic, ginger and chilli and cook for a further 2 minutes.

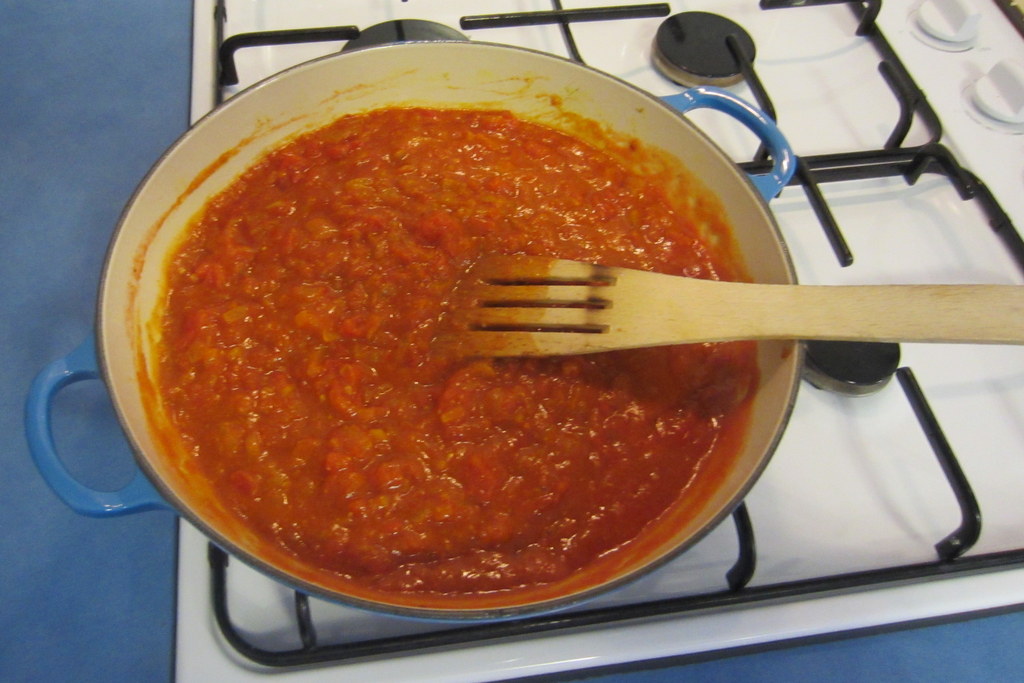
Add the tomatoes to the pan and stir until well combined with the spices. Add sugar and stir.

(For a Thermal Cooker: Chop the onion on speed 5 for about 10 seconds,scrape down sides and add oil. Cook on steam temp, speed 1 for 5 minutes. Add in dry spices and cook for a further 2 minutes. Add in Garlic, ginger and chilli and cook on steam temp, speed 1 for 2 minutes. Add tomatoes and stir on speed 4 for 10 seconds, then cook on steam temp, speed 2 for 3 minutes)

August 2014 059

Place the stewing bones on top of the pumpkin and pour the tomato and spice mix over the top of the lamb.

Return the lid to the slow cooker and cook on low for about 5 hours.

August 2014 058

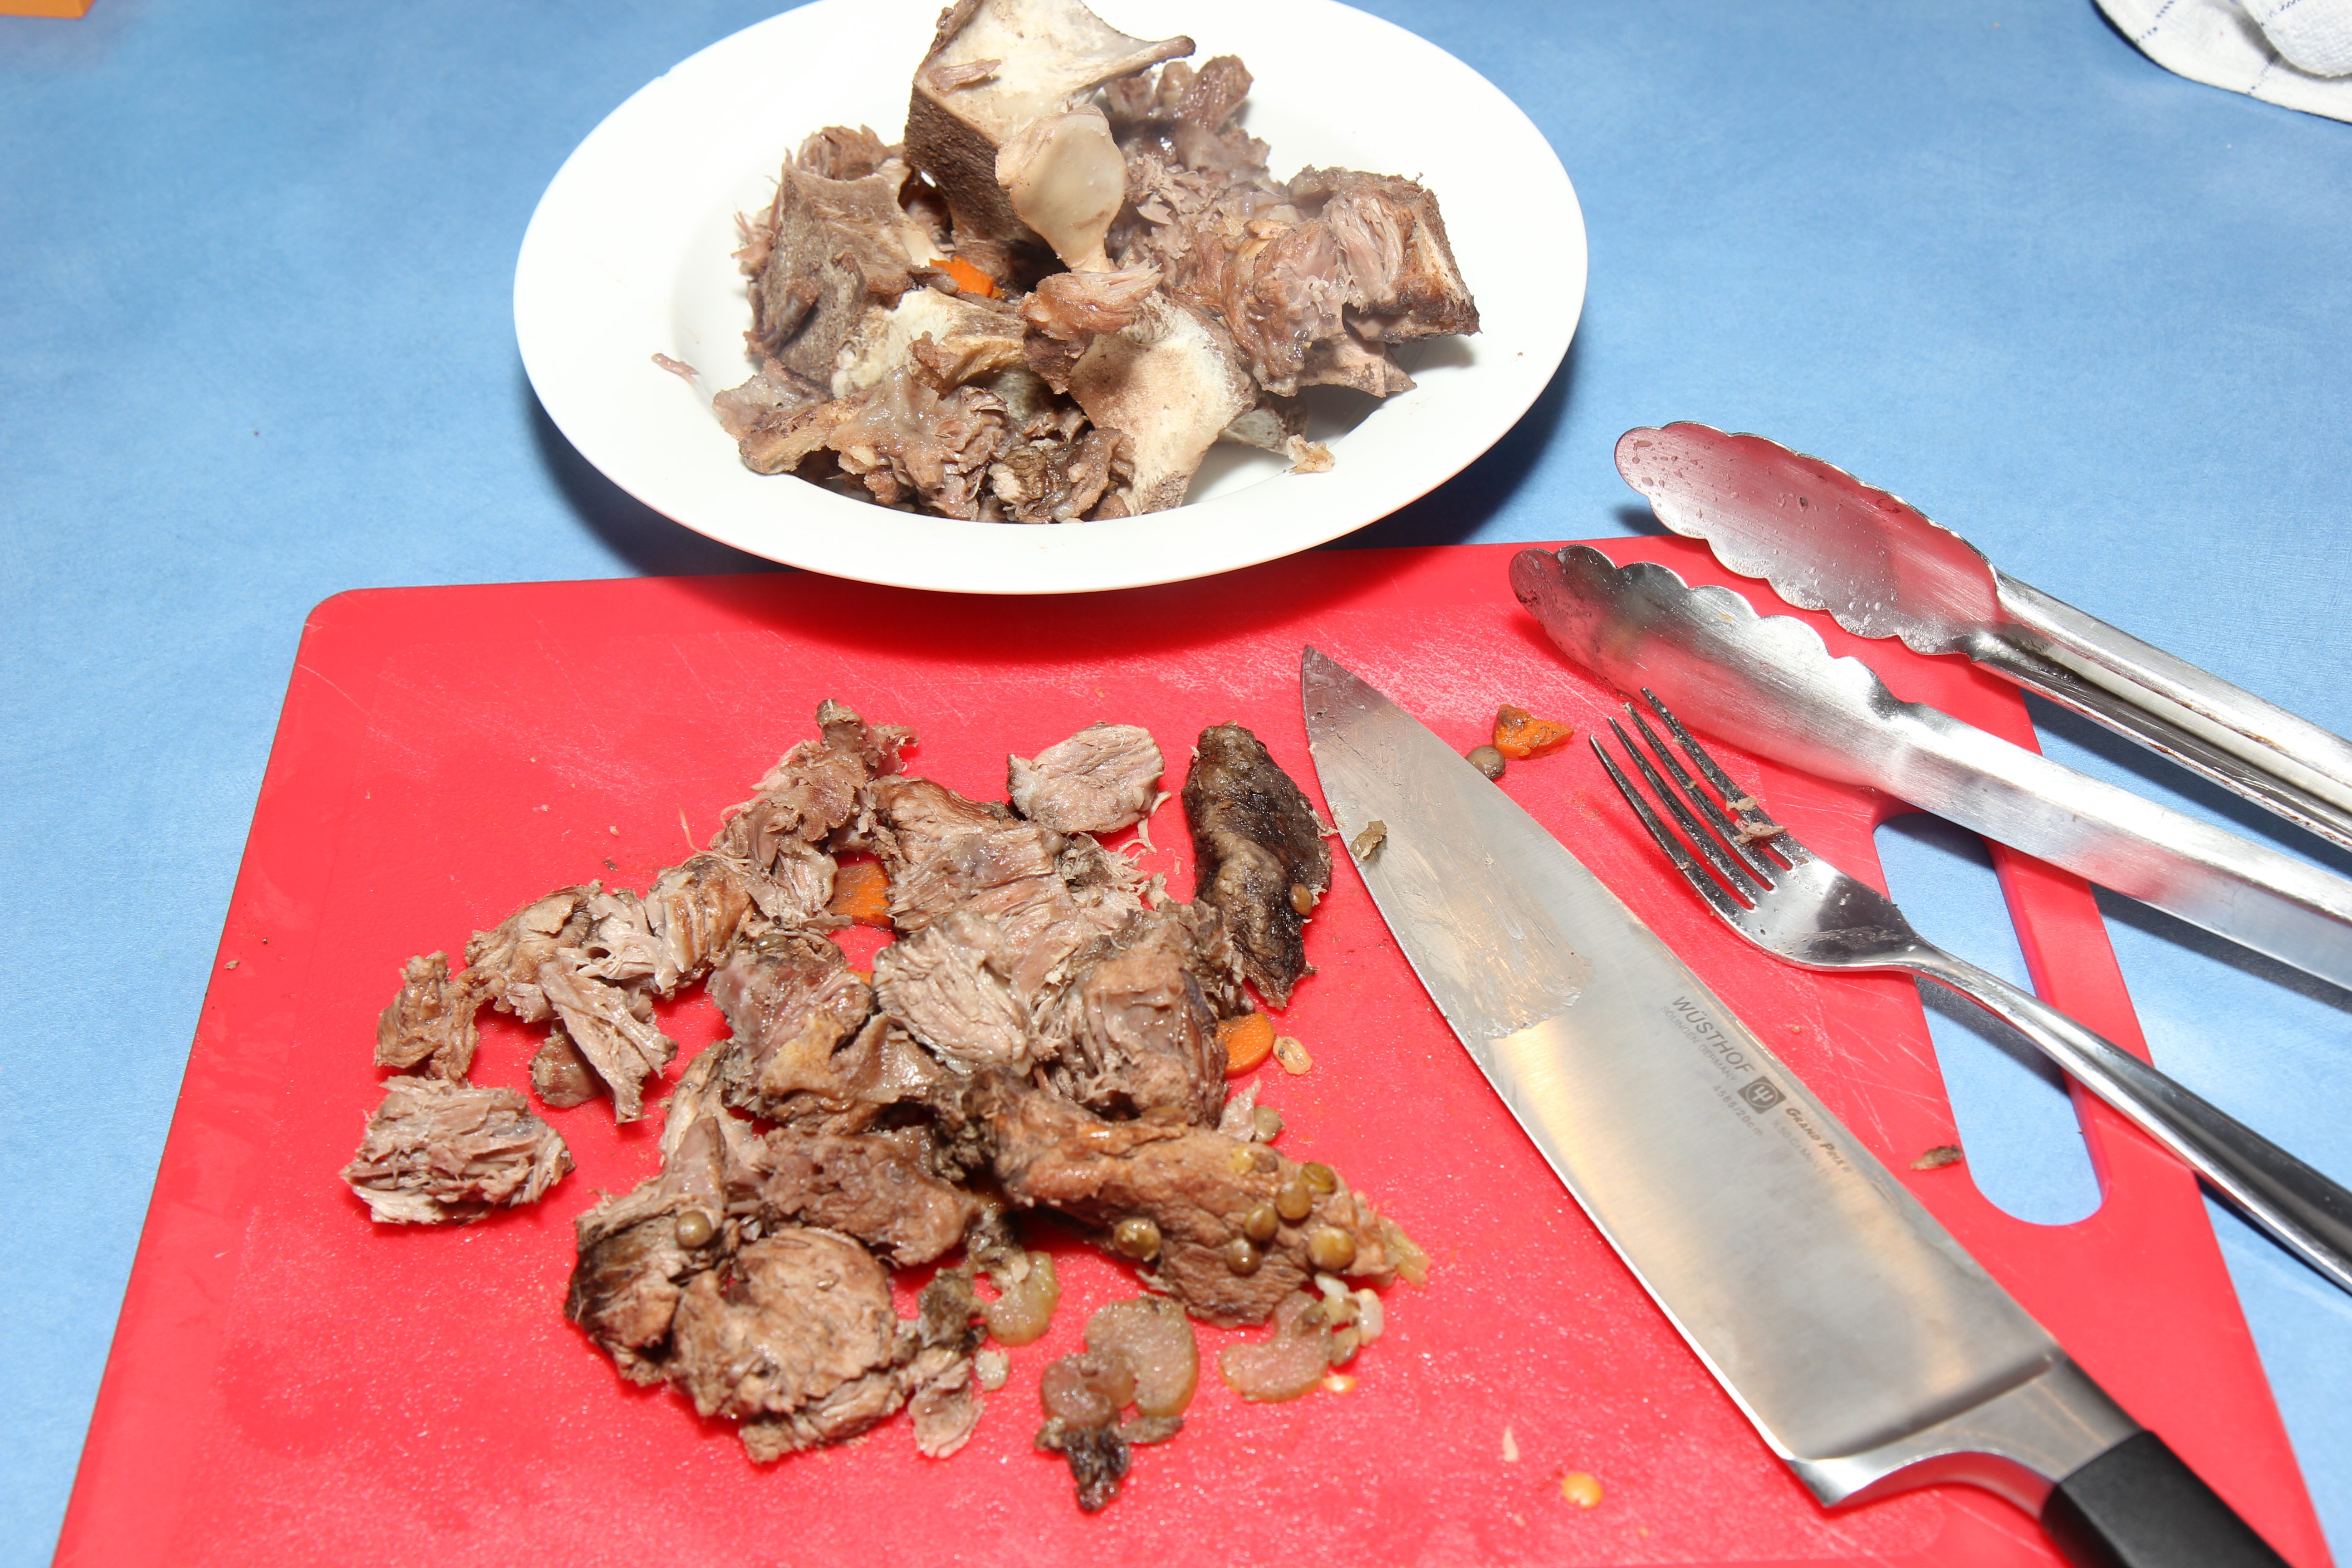
Remove the bones from the slow cooker and strip the meat. Dice the meat and return it to the slow cooker along with the green beans and stir well. Discard the remainder of the bones.

Place the lid back on and cook for a further 2 hours.

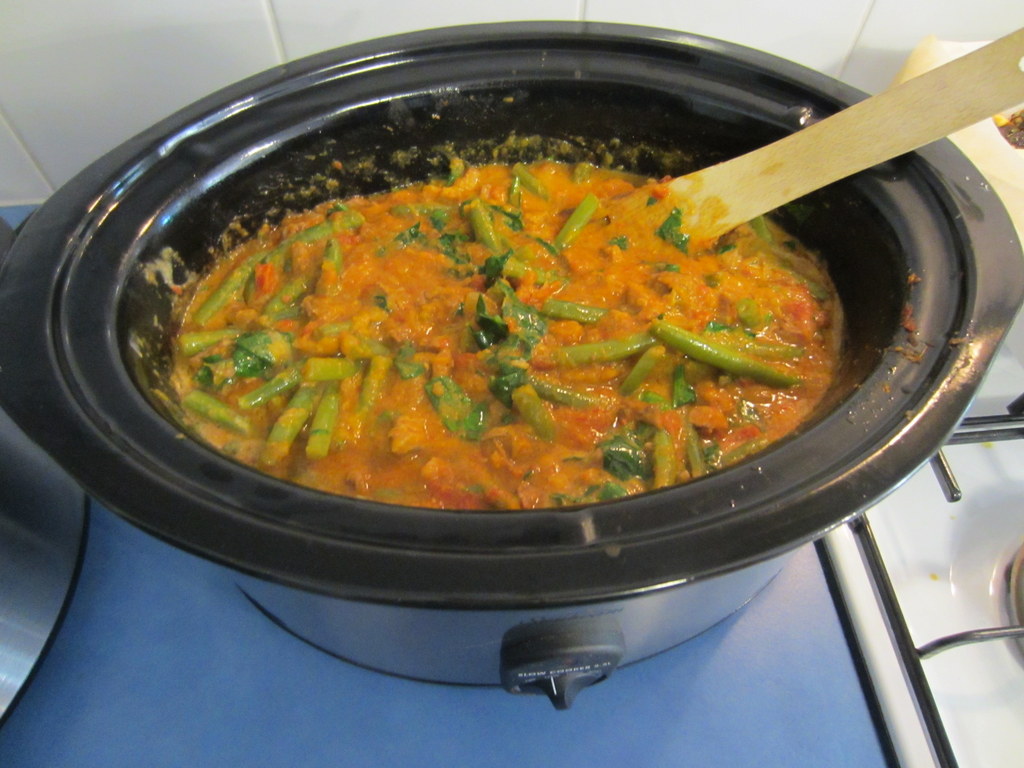
About an hour before serving, stir in the spinach and coconut cream (don’t shake the can, but use the thickest part at the top of the tin for a creamier sauce). Turn the cooker up to high but leave the lid off the slow cooker to allow some of the liquid to evaporate, stirring occasionally.

August 2014 060

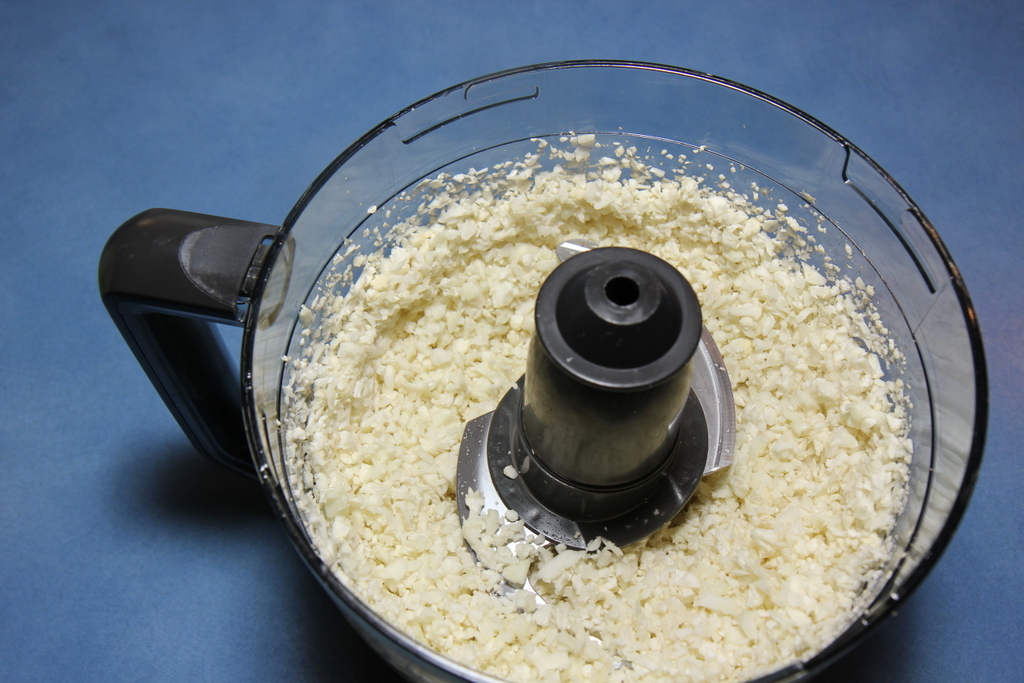
Serve with cauliflower rice. To make this I simply place the cauliflower in the food processor and process until fine, then steam and use in place of rice.

July 2014 009

This quantity of curry serves about 10-12. I make it in my 6L slow cooker.

Freezes and defrosts well.

Enjoy 🙂

Orange Weet-Bix slice

The original version on this slice was another childhood favourite of mine. It was a regular feature in our school lunchboxes. But until today it hasn’t been possible to pass it on to my kids. But we have discovered this new product:


July 2014 377

It’s made with sorghum and although I’m not the biggest fan of the original as a cereal, it fits our allergy requirements, my kids are excited and I’m pleased to be able to use them in baking!

  • 160g Nuttelex, melted
  • 4 weetbix, crushed
  • 1.5 cups SR GF flour
  • 1/3 cup sugar
  • 1/2 cup flaked quinoa or rolled oats
  • 1 tbsp chia seeds
  • 5 tbsp orange juice

Mix together the dry ingredients then pour in the Nuttelex and juice and mix well.

Press firmly into a lined baking tray (mine was 20x20cm).

Bake in a preheated 180C oven for 25 minutes.

Cool and then ice with orange icing, made with the finely grated rind of one orange, a tsp of melted Nuttelex, a couple of tbsp of orange juice and pure icing sugar.

Slice and store in airtight container in the fridge. Makes 16 slices.

July 2014 375

Enjoy 🙂

To adapt for a Thermal cooking machine (Thermomix, Bellini, Mistral etc):

Add Nuttelex and sugar and melt at 100C on speed 3 for 1 minute.

Add in the quinoa, chia, flour and weet-bix. Mix on speed 4 for 20 seconds.

Pour in the orange juice and pulse 3-4 times to combine, the mix on speed 6 for 20 seconds.

The Chocolate Cake

Growing up, my mum was famous for her chocolate cake. So much so that it was known simply as ‘The Chocolate Cake’.

It was the base for most (if not all!) of mine and my brother’s birthday cakes and it made an appearance at a lot of special family occasions. Since our diet has had to change I have so missed that cake! So since we are off to a birthday party tomorrow where we will need to take ‘safe’ cake along for Ellie … here is my attempt at living up to Mum’s cake!

See below the recipe for a coeliac friendly version.

  • 1 3/4 cups flour (half wholemeal)**
  • 2 tsp GF baking powder
  • 1/2 – 3/4  cup sugar (use more or less depending on your sweet tooth!)
  • 2 tbsp cocoa
  • 125ml light olive oil
  • 1 cup milk of choice
  • 1 tsp vanilla bean paste
  • 3 tbsp aquafaba (liquid drained from a can of chic peas)/one medium (overripe) pureed banana/ 1 whole egg

** To boost the nutritional value of this cake, I often leave out 1/2 cup of flour and replace it with 1/2 of almond meal cup or milled seeds (I like a mix of chia, flax and pepita) – the ground chia and flax also help the bind the cake without an egg present too.

Mix together the oil, milk and vanilla until well combined.

In the large bowl of your mixer mix together the flour, sugar, cocoa and baking powder.

Mix the wet mix into the flour mix and beat until to combined. While the mix is beating, add in the aquafaba or egg.

Pour into a lined cake tin or 14 regular muffin holes.

Bake in a preheated moderate oven for approx 45 minutes (for the cake) or 20 minutes for the muffins, or until a skewer comes out clean.

Allow them to cool and then ice as desired.

I have made a simple icing from 1 tbsp melted Nuttelex, 1 tsp cocoa, a splash of milk and pure icing sugar. But my kids enjoy them equally un-iced.

It’s not quite the same as Mum’s but it is a pretty close substitute and the kids seem to agree!

It freezes and thaws well too.


20170929_081017-1-1


To adapt for a Thermal cooker:

Place the oil, vanilla and milk in the jug mix on speed 4 for 5 seconds.

Add in the sugar, baking powder and cocoa and mix on speed 4 for 15 seconds.

Add the flours and mix on speed 4 for 30 seconds. Whilst mixing, add the aquafaba or egg through the opening in the top of the lid.

Enjoy 🙂

To make this into a coeliac friendly version make sure you use an appropriate milk and replace the flour with 1 1/2 cups of a plain GF flour mix and 1 tsp psyllium husk. Reduce the mixing time when  you’ve added the gf flour so that you mix just until the flour in combined.

I recently made a double mix of this cake for miss Ellie’s 3rd birthday party. And it worked well as a based for the fondant icing too.

Ellie's 3rd 080

Pumpkin pan bread

My little Harry has a serious infatuation with bread. He would eat it for breakfast, lunch and dinner every day if he was allowed! In fact recently when I was writing our menu and shopping list I asked the kids for their input and Harry’s response was “Mummy, I’ve told you what I like; bread, salt, cake, butter and enchiladas. Don’t keep asking me again, just make ALL the dinners from that!”.

However, he does not like ‘yucky seedy bits’ or ‘pooey vegetables’ … so when I served this bread up he was highly unimpressed that I had sullied his precious bread with both seedy bits and vegetables!!!

After quite a bit of encouragement he tried some … then scoffed the whole piece and promptly asked for another. Then he ate another piece with his dinner and gave me 100 out of 10 – I am claiming victory!!!

It is based on a pan bread from the ‘Multi-allergy cookbook’ by Lola Workman.

See below the recipe for a conversion for Thermal Cookers.

  • 1 tsp sugar
  • 2 tsp gelatin (kosher gelatin or agar-agar if you need to make it vegan)
  • 1 tsp salt
  • 2 tsp dried yeast
  • 1 tbsp olive oil
  • 4 tbsp warm mashed pumpkin
  • 2 cups flour of choice – Wholemeal spelt or a combineation of oat and rye are great.  (For GF flour mixes, use 1 3/4 cups plus 1 tsp psyllium)
  • 1 tsp chia seeds
  • 1 tsp flax seeds
  • 1 tbsp sunflower seeds
  • 1 tbsp pepitas
  • 1 tbsp rolled oats (omit these or switch for rolled quinoa for GF)

Place 1/2 a cup of warm water in a mixing bowl and add the sugar, gelatin and yeast. Whisk until well combined

Stir in the mashed pumpkin and leave to sit for 10 minutes.

Place your seeds into a processor and process until finely chopped.

Add the flour, salt and seed mix to the pumpkin mix and fold together. Start with 3/4 of the flour and gradually add a bit more if the mix is too wet.

Tip the dough on to the floured board and gently knead until the flour is absorbed. Shape to a rough ball.

Pour the oil into you hands and rub it all over the ball of dough.

Place the dough back in to the mixing bowl, cover with a tea towel and leave in a warm place to rise for 20 minutes.

Before rising...
Before rising…


20 minutes later
20 minutes later

When the dough has risen, warm a heavy based pan on the stove, spray the base with some oil and sprinkle the oats and extra pepitas on the bottom.

20140716_113621

Tip the dough into the middle of the pan and, using your fingers, spread the dough to fill the pan. Cook for 3-4 minutes, then turn the bread and cook for a further 10 minutes until both sides are golden brown and sound hollow when tapped.

20140716_113812

20140716_114318

Can be eaten warm or cold, on its own or with a spread.

We cut it into wedges and it makes 12 wedges.

20140716_122054

To convert for a Thermal cooker: 

Place your seeds into bowl and process on speed 6, 6 seconds. Set aside.

Place 1/2 a cup of warm water into mixing bowl and add the sugar, gelatin and yeast. Speed 2, 5 seconds. Allow to sit.

Stir in the mashed pumpkin (Speed 3, 15 seconds) and leave to sit for 10 minutes.

Add the flour, salt and seed mix to the pumpkin mix and mix on Speed 4 for 10 seconds. Start with 3/4 of the flour and gradually add a bit more if the mix is too wet.

Tip the dough on to the floured board and gently knead until the flour is absorbed. Shape to a rough ball.

—–

Enjoy 🙂

French style Banana Toast

This is a recent addition to our ‘special breakfasts’ and it is a hit!

  • 2 overripe b2-Blog 105ananas, very well mashed
  • 1/2 tsp ground cinnamon
  • 1 tsp honey
  • 2 tbsp milk of choice
  • bread of choice
  • rice bran oil

Mix together the bananas, cinnamon, honey and milk. Make the mixture as smooth as you can –  the smoother it is, the better the mix sticks to the bread when you turn it in the fry pan.

Place 1 tbsp of oil in the frying pan on a high heat.

Roll the bread in the mix and place in the frying pan. Turn to the next side when it is golden brown.

3-Blog 107

Serve warm, with extra sliced bananas if you’d like.

Enjoy!

Beef, barley and lentil stew

I love winter time – the cold, grey days give me energy … I know, I’m strange!

One of the things I love is making delicious comfort food that warms and fills you up. I love that I can cook huge quantities of soups, curries, stews and casseroles that are packed with veggies and freeze them for easy meals. This is one of those meals.

It is quick and easy to make (about 10 minutes to start and another 5 later), is really cheap – about $8 for the entire 6L pot and the left overs freeze and defrost really well.

  • 800g beef soup bones20140608_084430
  • 3-4 carrots, diced (skin on is fine)
  • 3-4 large sticks of celery, diced
  • 3 potatoes, diced (skin on too) OR 1 medium sweet potato
  • 2 cups dried lentils
  • 1 cup pearl barley
  • 400g tin crushed tomatoes
  • 1/4 cup red wine
  • 2 sprigs fresh thyme
  • approx 2L water
  • Salt to taste

Mix all of the ingredients together in the slow cooker and fill with water to cover. Place lid on and cook on low for 8 hours.

Remove beef bones and strip the meat. Remove sprigs of thyme. Dice the meat up and return to the pot, stirring well. Add salt to taste.

June 2014 040

That’s it!

June 2014 041

Enjoy 🙂

Apricot and Date quinoa biscuits

You might have already guessed from many of my previous posts that I have a bit of a sweet tooth. I love bikkies and cakes and almost anything sweet, so I am always looking for ways to make yummy snacks that also have a bit of extra fibre and protein in them … these are my latest experiment and happily they have been very well received.

William says they are ‘even better than ones from a packet’ and even my husband’s work colleagues have been enjoying them, so I hope you do too!

  • 250g NuttelexBlog 100
  • 2 1/4 cups rolled oats
  • 2 1/4 cups plain GF flour
  • 1/4  cup coconut sugar
  • 2 tbsp maple syrup
  • 2 tsp bi-carb soda
  • 4 tbsp boiling water
  • 1 cup flaked quinoa
  • 100g diced dried apricots
  • 100g diced dried dates

In a medium saucepan melt together the Nuttelex and syrup. You don’t want it to boil, just to be all melted and well combined.

In a large mixing bowl place the oats, flour, quinoa, sugar and dried fruit. Mix well.

In a glass or small container mix together the bi-carb and boiling water. Immediately add this mix to the syrup mix. It will froth and bubble to about twice its volume.

Pour this mix into the dry mix and stir until well combined.

Place heaped teaspoon fulls on the mix onto a lined baking tray.

Press down gently with a fork before baking in a slow oven (150C) for about 25 minutes or until golden brown.

These will be soft when you take them out of the oven but will harden as you allow them to cool on the tray.

Makes about 36 (although … I suspect it might have been slightly more if it wasn’t for the quantity of dough eaten by my little helper!).

Keeps for about a week in an airtight container.

Blog 102

Enjoy 🙂

Choc Oat Slice

IMG_2815
Ready!

After a simple afternoon tea slice straight from the pantry? Here’s one I cooked up this week that was free of our allergens and delicious too.

(See below Libby’s recipe for a Coeliac Friendly version from Jess)

It made enough for a piece each for two afternoons with one or two left over (hmm, not sure where they went…?!) but it is easily doubled so that it lasts longer (or serves more people).

125g Nuttelex
1/2 cup sugar (I used raw sugar and just didn’t fuss that it wasn’t all dissolved)
1/2 cup oats
1/4 cup cocoa
1 cup SR flour

1. Mix cocoa and oats together in a bowl (whilst preheating the oven to 180C)
2. Melt the Nuttelex and sugar together in a saucepan until sugar dissolved (or almost!)
3. Remove from heat and pour it over the cocoa and oats and mix them together.
4. Mix in self raising flour.
5. Press into a 20cm x 15cm baking dish (I used a small pyrex dish lined with baking paper)
6. Bake for 15min at 180 degrees Celsius. Cool in the dish.

Yum! For regular people, just change the Nuttelex to regular margarine or butter.

Verdict
5 thumbs up! Crumbs devoured.

IMG_2816
Yum. Love baked treats.


For a coeliac friendly option: replace the flour with a standard gluten free flour mix plus 1 tsp GF baking powder. Replace the oats with crushed GF weet-bix, shredded coconut, or rolled quinoa.

Ice if you like.

20160130_184727-1

Enjoy 🙂

Mulberry Jam

I should start this post by saying that I am a total jam novice …. this is my first ever go at making jam but it was much less scary than I thought and it tastes so yummy that I am inspired to make more.

I am very fortunate that my parents-in-law have a sprawling, very heavily laden mulberry tree in their backyard, so picking over 2kg of berries to have a go was very easy (and fun!).

I have made this one with quite ‘Christmassy’ flavours so it is another great gift to give for teachers  (or even those great Aunts and second cousins once removed that are really tricky to buy for 😉 )

  • 1.3kg Mulberries
  • 1.5kg jam setting sugar (made by CSR, it already has some pectin in it)
  • finely grated zest of 2 large oranges
  • 1 heaped tsp of ground cinnamon
  • juice of 1 lemon
  • 8-10 glass jars, scrubbed clean

Wash berries and drain very well. Remove any obvious stems and place in a large saucepan.

1-Blog 078

Crush with a potato masher. How much you crush depends on how smooth or lumpy you like your jam … I like some lumps so I didn’t mash too much.

Tip in the zest, juice and cinnamon and mix well.

2-Blog 080

Turn on the stove to a low heat and add the sugar.

Stir continuously over low heat, until ALL of the sugar has dissolved.

Turn up the stove to a high heat and bring to a rolling boil. And continue the boil for 4 minutes.

3-Blog 082

Remove from the heat.

During these 4 minutes boil the kettle and soak the jars and lids in the boiling water. Dry the outside of the jar with a clean tea towel.

As soon as you have removed the jam from the heat, use a jug, like a pyrex style measuring jug to scoop out the jam and pour it into the jars. Please be very careful with this part … it is a really hot mixture and you will need to protect your hands.

Fill the jars, place the lids on and immediately invert them. Allow them to stand upside down for an hour. This allows the jars to reseal and keeps them airtight.

Then turn the jars up the right way and wipe them … it is a messy process! Allow to cool and set overnight – don’t put them in the fridge as you might crack the glass. Only use jars with a plastic lid if you are going to use it straight away or if you have jam seals underneath.

4-Blog 084

You can easily decorate the jars to give as gifts. We did a pretty label and some glossy red and green bows. They look great!

Delightful!
Delightful!

He has waited a looong time for this jam!

Stained Glass gingerbread

One of my favourite things to do leading up to Christmas is baking!! The kids enjoy helping and sharing their spoils too.

This year my William is in kindergarten and has asked to take in Christmas treats for all of his little friends, and I was on roster to do craft for the kids at our Bible study break up … so I made a (huge!) batch of Libby’s yummy gingerbread and we turned them into stained glass biscuits. Fun to make for the kids, yummy to eat and they make lovely presents with a bit of cellophane and bright ribbon!

Please note that the gingerbread recipe itself is soy free but there is a small amount of soy in the only boiled lollies I was able to find, so the stained glass part is not soy free.

You will need 2 packets of boiled lollies and gingerbread as per this recipe: https://itchinkitchen.com/2012/12/03/gingerbread-cookies/

Split the colours of the lollies up into bags then smash them up on a hard surface with a hammer. Best to have a tea towel folded around the bags so stop all spillage if you split the bags!

4-crushed lollies

Remove the gingerbread dough from the fridge and cut out the gingerbread shapes.

On a lined baking tray (it must be lined with baking paper and not just greased as the boiled lollies will stick like rocks without the baking paper!) place the shapes and then use an apple corer (or similar) to cut out holes.

1-Blog 070

Fill the holes with the crushed lollies – careful not to overfill them as they will turn to liquid and overflow during baking!

2-Blog 071

Bake in a moderate oven for about 10-15 mins or until golden brown.

Leave them to cool for at least 15 minutes on the tray before attempting to remove them to a wire rack – the liquid ‘glass’ centre needs time to harden and stick to the biscuit.

3-Blog 072

Allow to cool completely before wrapping and sharing as gifts … or enjoying at Christmas parties 🙂

1-snow man stain glass