I think will be a recipe that divides you!
I adore it and my husband is totally won over (despite the way he looked at me when I first told him about it!). But I think it might be the worst thing he’s ever heard of, according to my dad!
Where will you sit I wonder? Are you game to give it a try?!
Lots of people choose not to eat traditional bread, because they are wary of carbohydrate levels, or their bodies don’t respond well through either allergies or intolerances.
Me? I love bread. I don’t eat it often, but when I do, I relish it! Seeded sourdough rye is my favourite!!! Especially with avo ….yuum!
So why this recipe then? Well I have seen recipes around for wraps or bread sticks or pizza bases using cauliflower (like this one … but too much dairy for us) and you know that I LOVE anything that involves cauliflower!
I love to include a variety of veggies in our meals and since there is more and more information around about the potential benefits of fermented food, I’ve been playing more with Miso paste.
I think it’s quite possible that the outrageous health and healing claims that abound about the miracle properties of fermented food could be over-stretching it! But it does seem likely that there is certainly some health benefit to these foods. Since, due to allergies, cabbage is right out for us (no kimchi or sauerkraut here!), yoghurt and miso are our go-to ferments.
The recipe isn’t going to replace your morning toast but it is a great option if you need a naan bread type option for curries or if you want to change up your lunches a bit.
- 350g cauliflower
- 150g broccoli
- 1/2 cup (20g) Nutritional yeast
- 40g white miso paste
- 2 medium eggs
Wash the cauliflower and broccoli and let it drain before patting it dry – you don’t want any extra moisture in this recipe.
Put it in to the food processor/blender/thermo machine and process until fine (Speed 4, 10 seconds, scrape down and repeat)

Add in the nutritional yeast and miso and process again until the miso is well combined (Speed, 4, 6 seconds)
While the machine is still processing add in the 2 eggs through the top chute and continue to process.
It won’t initially look like enough egg … but keep processing (on Speed 4 or 5) for a little longer – it will come together!

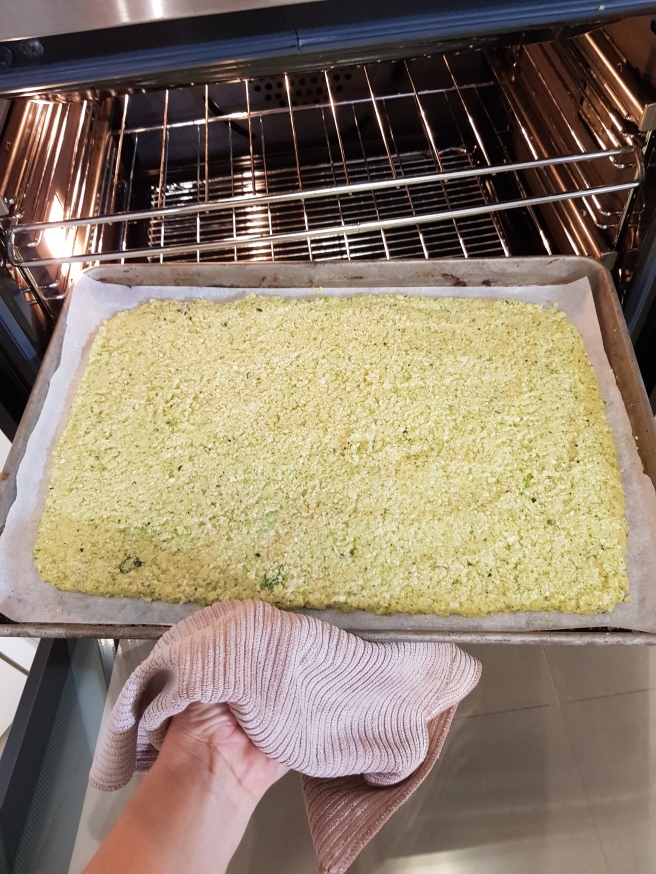
Spread the mixture out onto a large, lined baking tray. It needs to be even and fairly thin spread – about 3 to 4mm thick. Then place in to a preheated 180C oven

Cook for about 20 minutes before removing from the oven and gently scoring into 8 pieces – this make it much easier to flip and helps with even cooking.

Flip the pieces over and return to oven for a further 10 minutes. Until golden brown.
Remove from oven and allow to cool on tray for 10 minutes.

Serve warm or cold.

Our favourite way to eat it is slightly warm, and layered with a bit of tinned salmon or topped with some avocado and tomato. Yum!
If you aren’t using this all straight away, it does not freeze well, but it does keep well in the fridge for a couple of days – place some kitchen paper in the air tight container to help absorb any moisture and then reheat gently.
**If you don’t have a food processor, or similar: Grate the veg as finely as you can, mix the yeast and miso well, then whisk the eggs well before adding in and keep stirring until you bring it all together
If Macros are important to you, here are the details for 1 slice, that is 1/8th of the recipe:

Enjoy …. and let me know if you were brave enough to try!!
J


