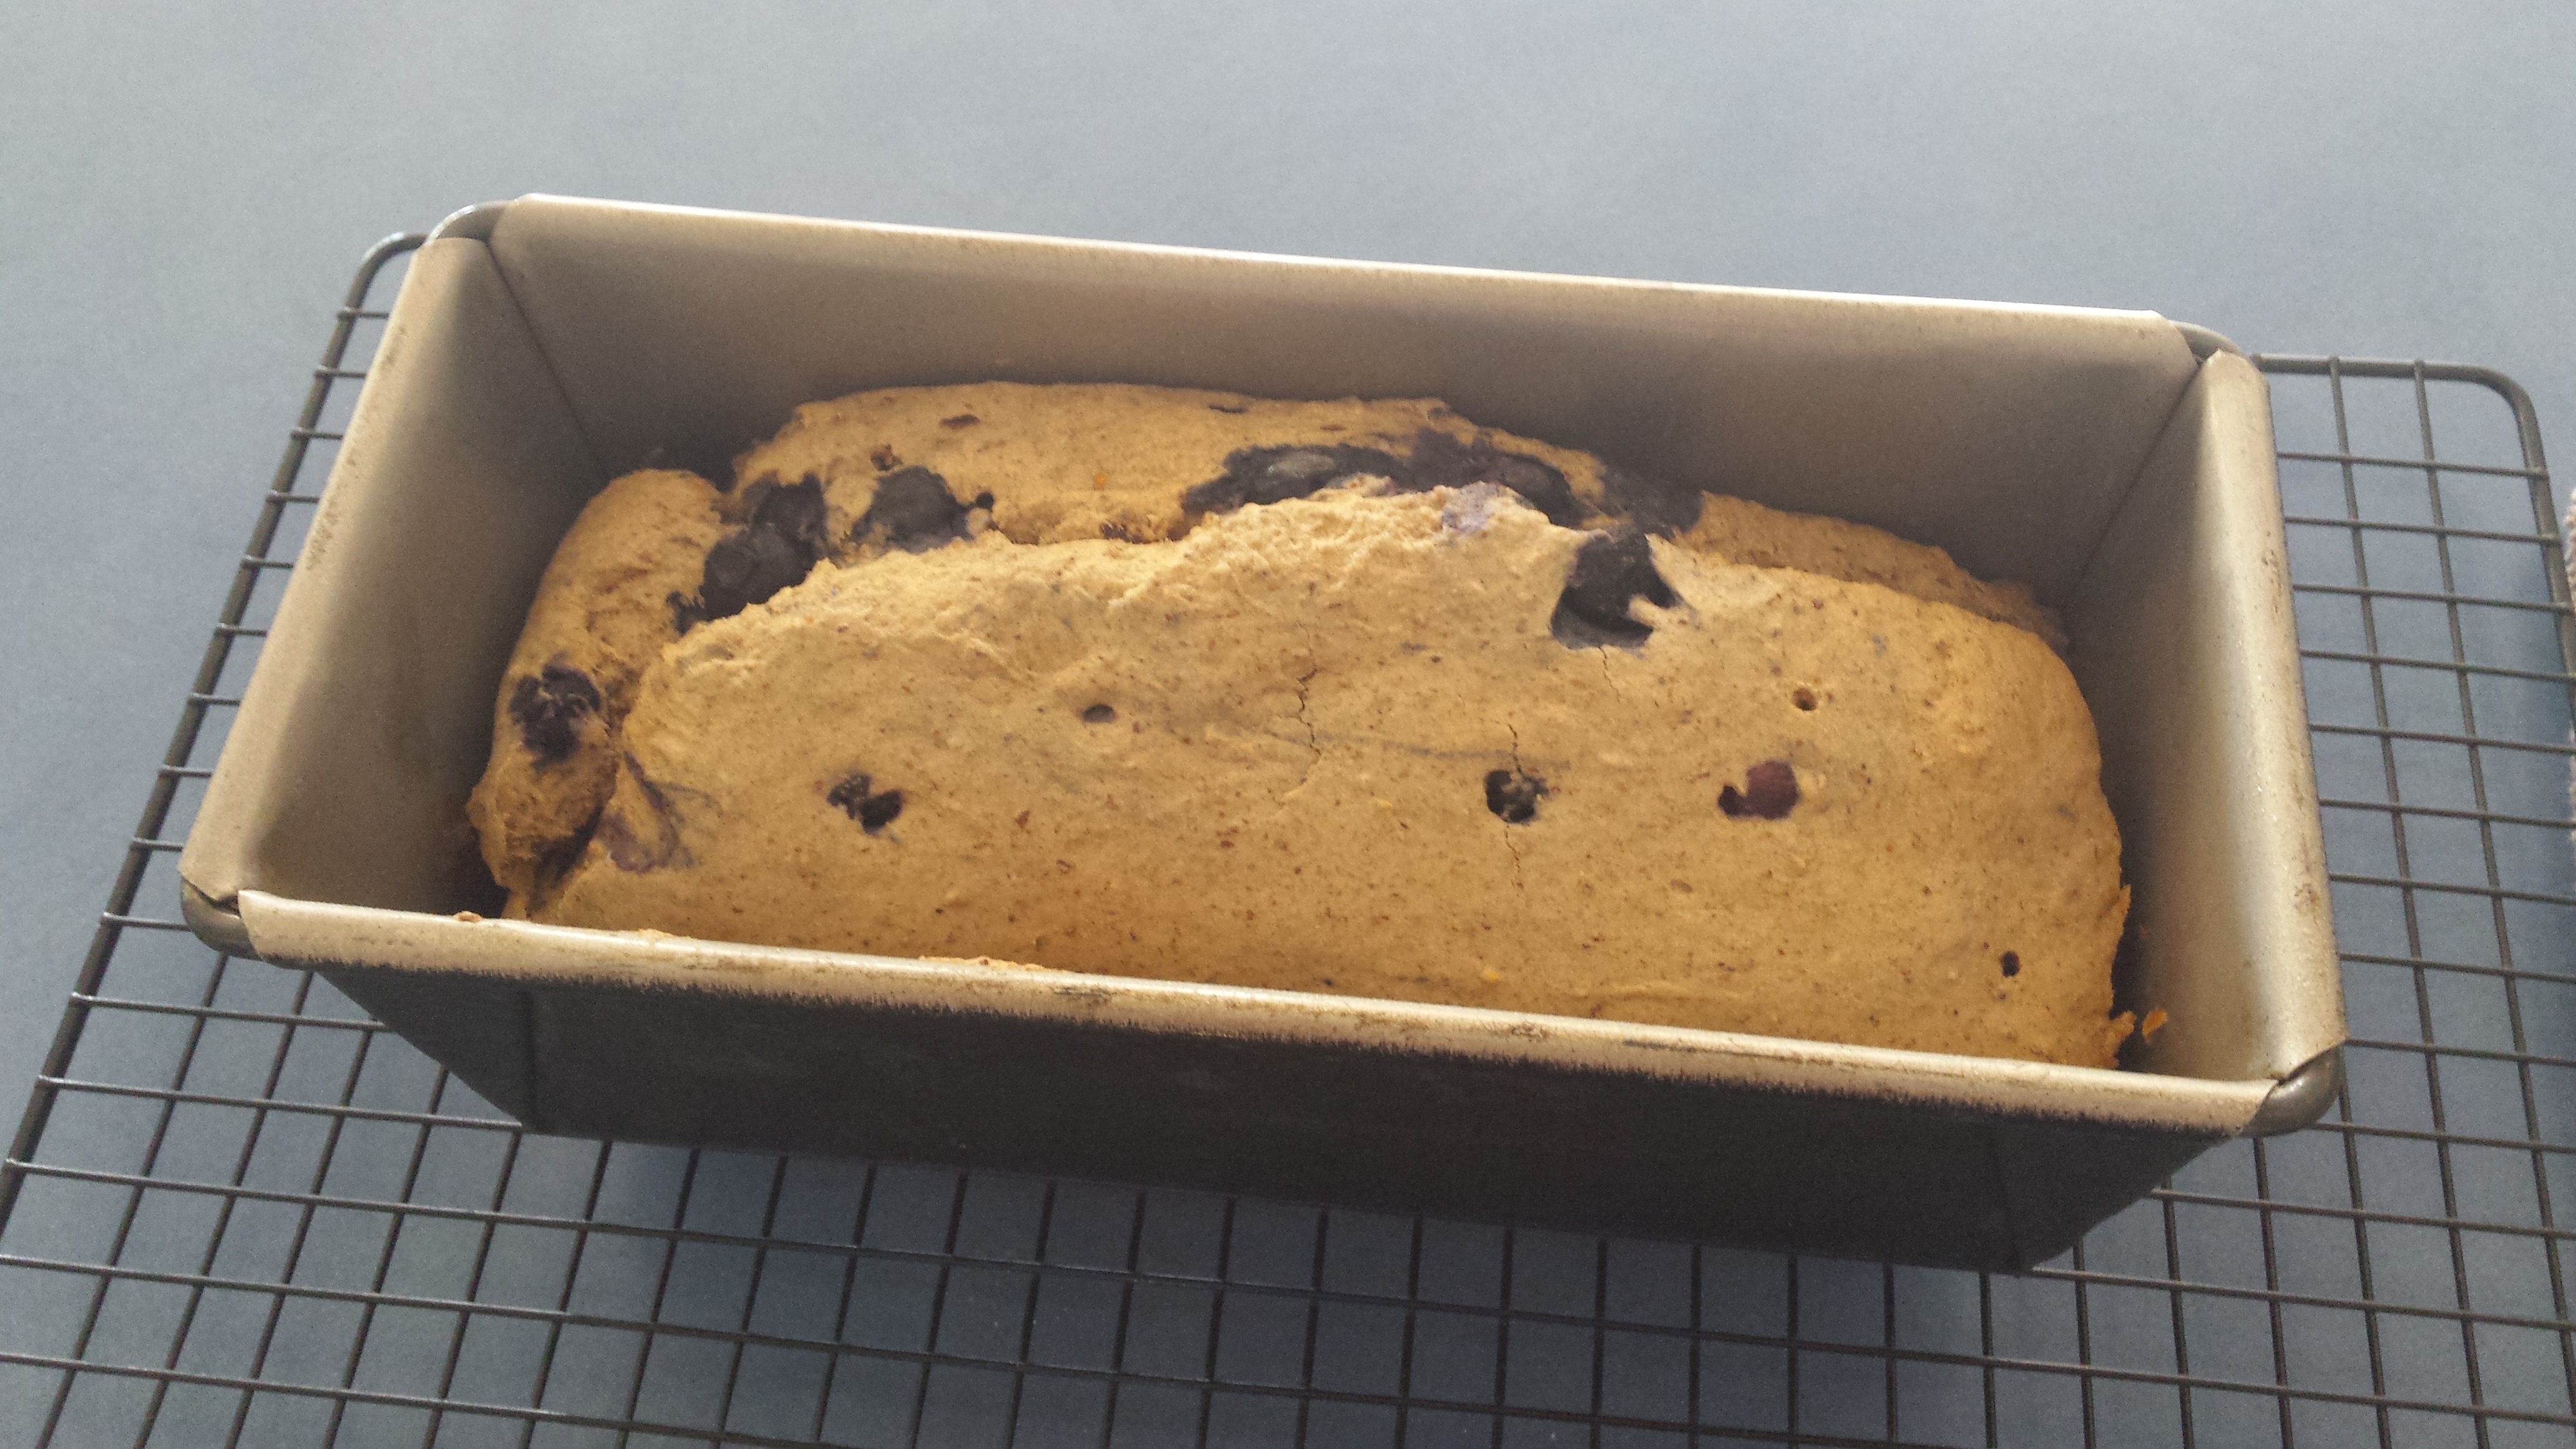
The recipe for this lovely, sweet, dense bread came about after we picked over 5kg of Mulberries …. and then my Harry declared that he didn’t like them, that blueberries were his favourite and please could I make him blueberry bread instead?
That gorgeous face is pretty hard to refuse sometimes!
45g light tasting oil (or use a melted butter that suits)
40g sugar OR 1/4 cup honey/maple syrup
1 cup milk of choice
6tbsp aquafaba OR 2 whole eggs
1 tsp vanilla bean paste
1/2 tsp ground cinnamon
2 tsp GF baking powder
1 1/2 cup spelt flour (half wholemeal) OR 1 1/3 cup GF flour mix
1/2 cup almond meal OR seed meal
1 cup blueberries (fresh or frozen).
In a large bowl (or your processor) mix together all of the dry ingredients (Speed 4, 8 seconds), then set aside.
Now place all of the wet ingredients in your processor/blender/nutribullet/thermal cooker and process until well combined (Speed 6, 6 seconds).
Mix the the dry and wet ingredients until combined – don’t over beat them.
Then add the berries – if you are doing this in a food processor, tip mixture into a bowl and fold through blueberries. In a Thermal Cooker, use speed 4 for 8 seconds. Or for ease, sprinkle them on top of the batter once in the pan.
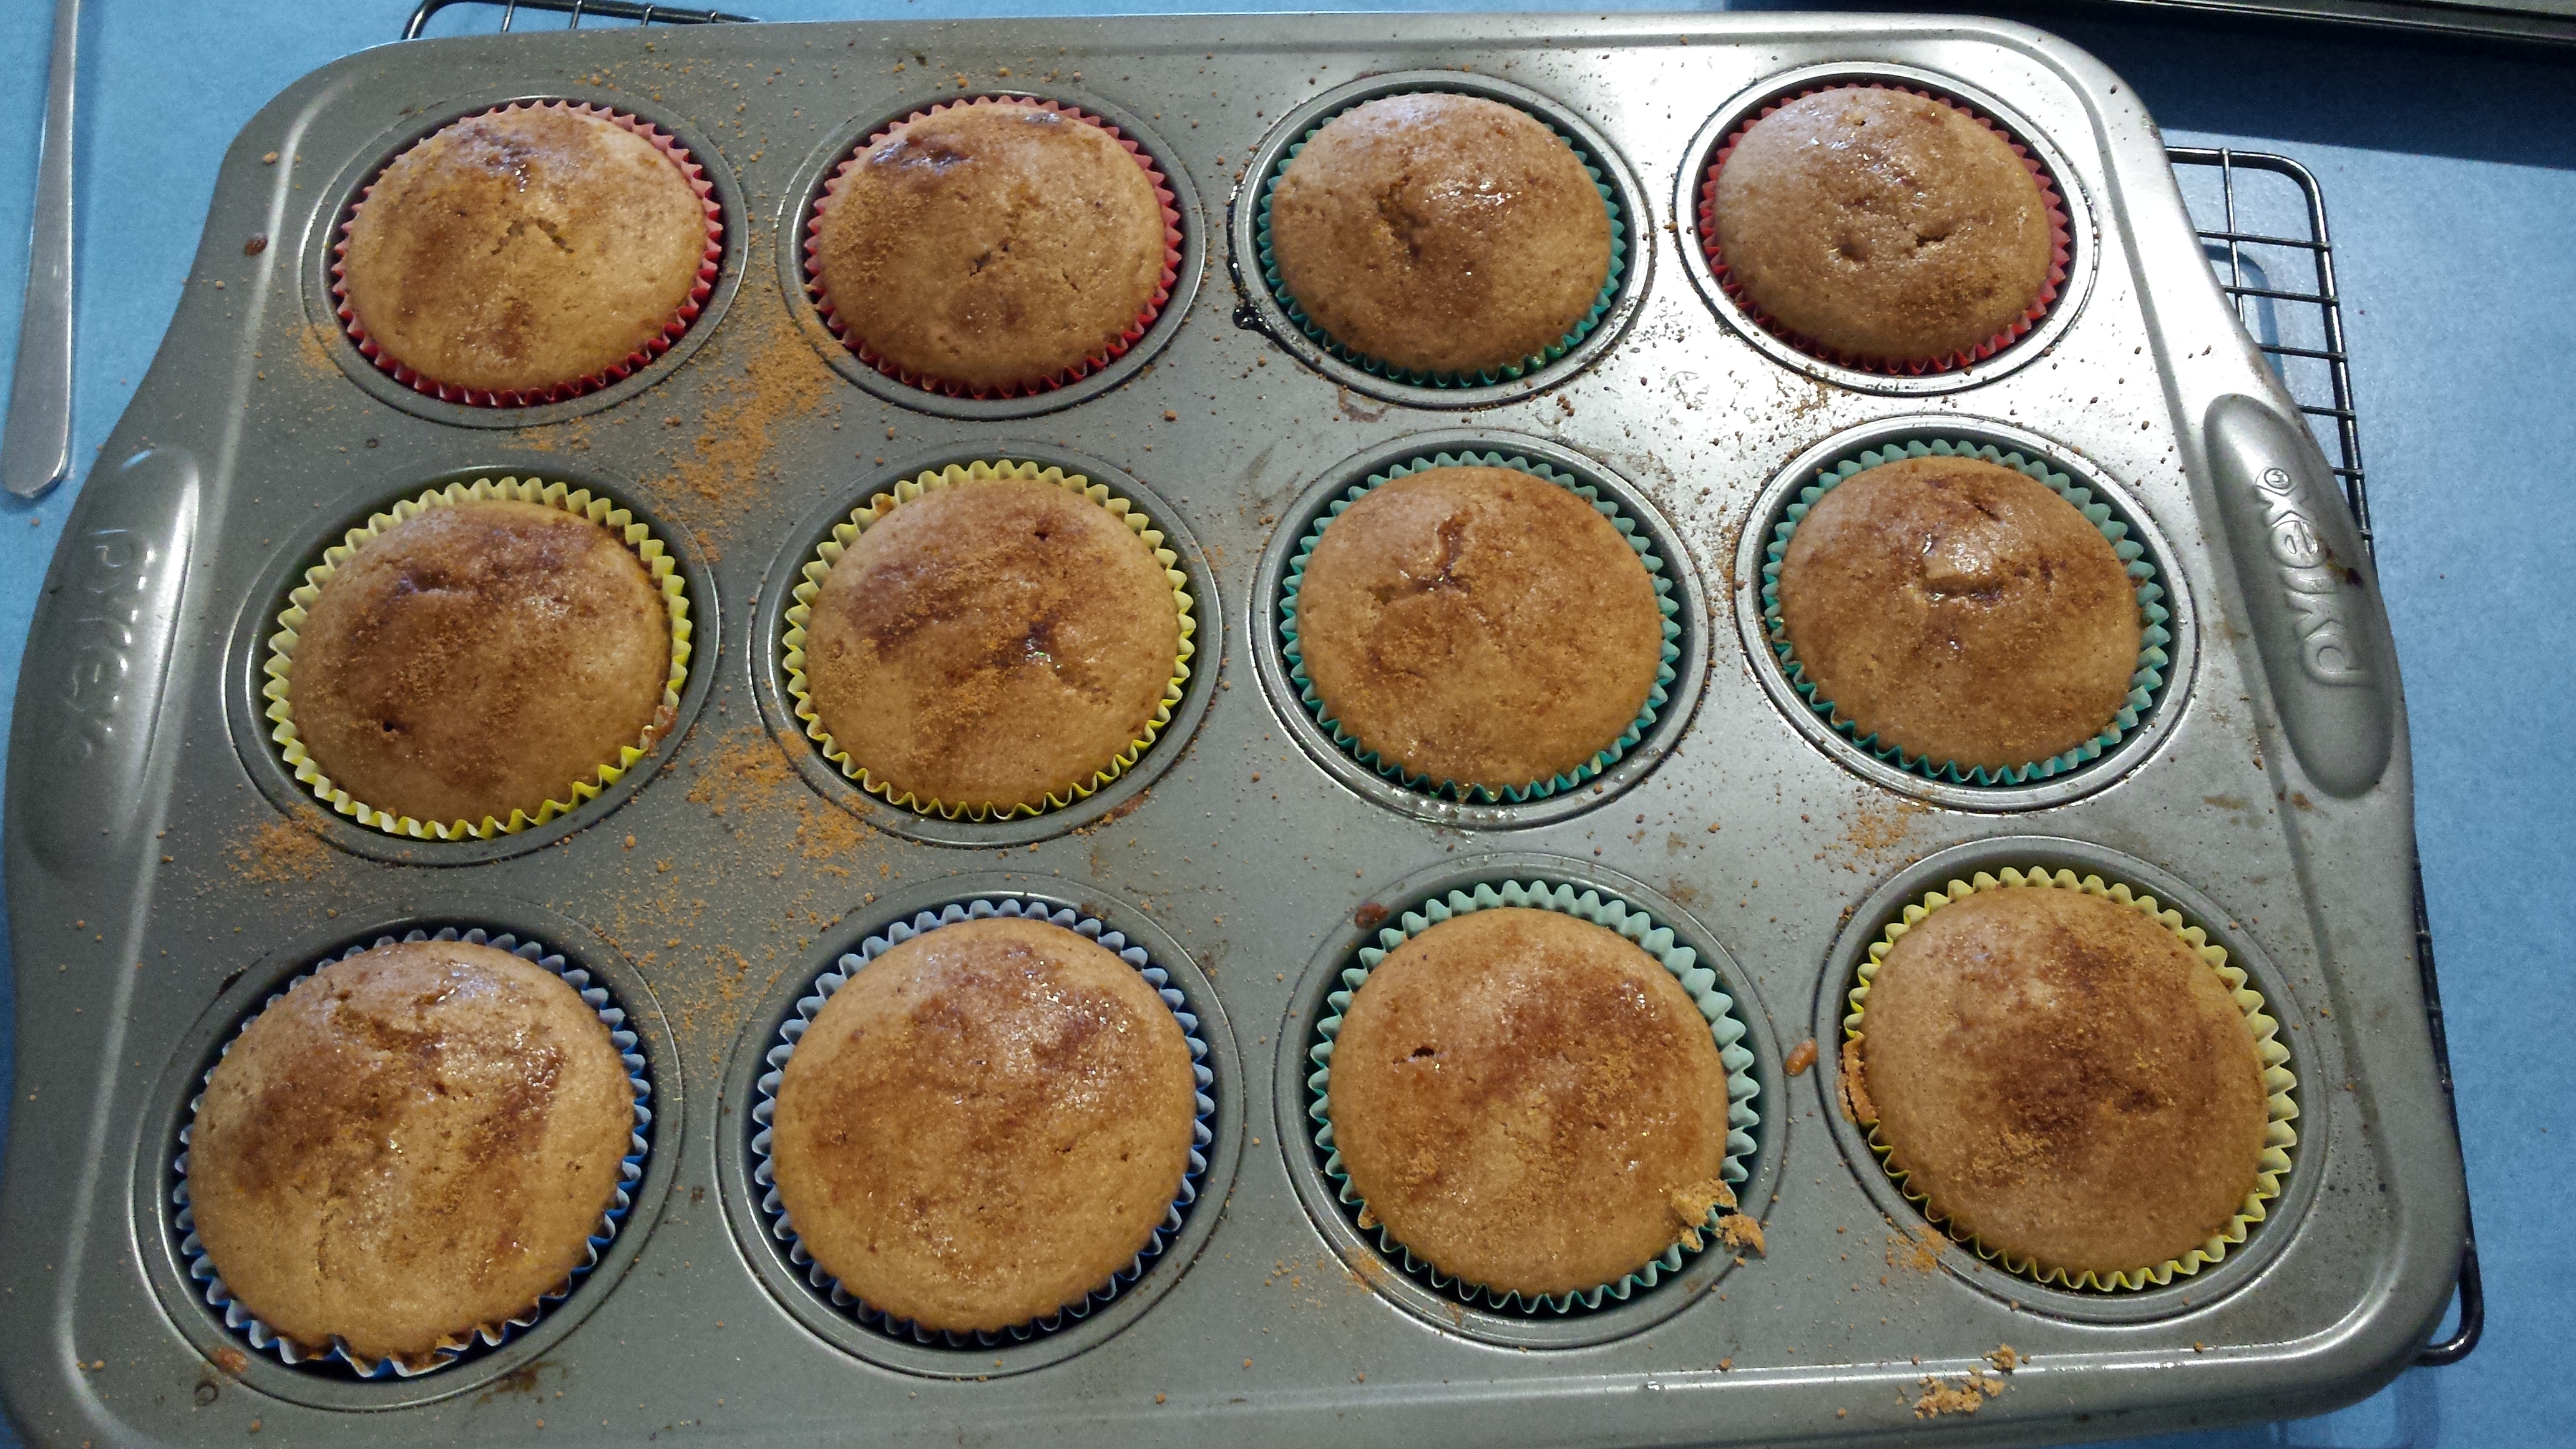
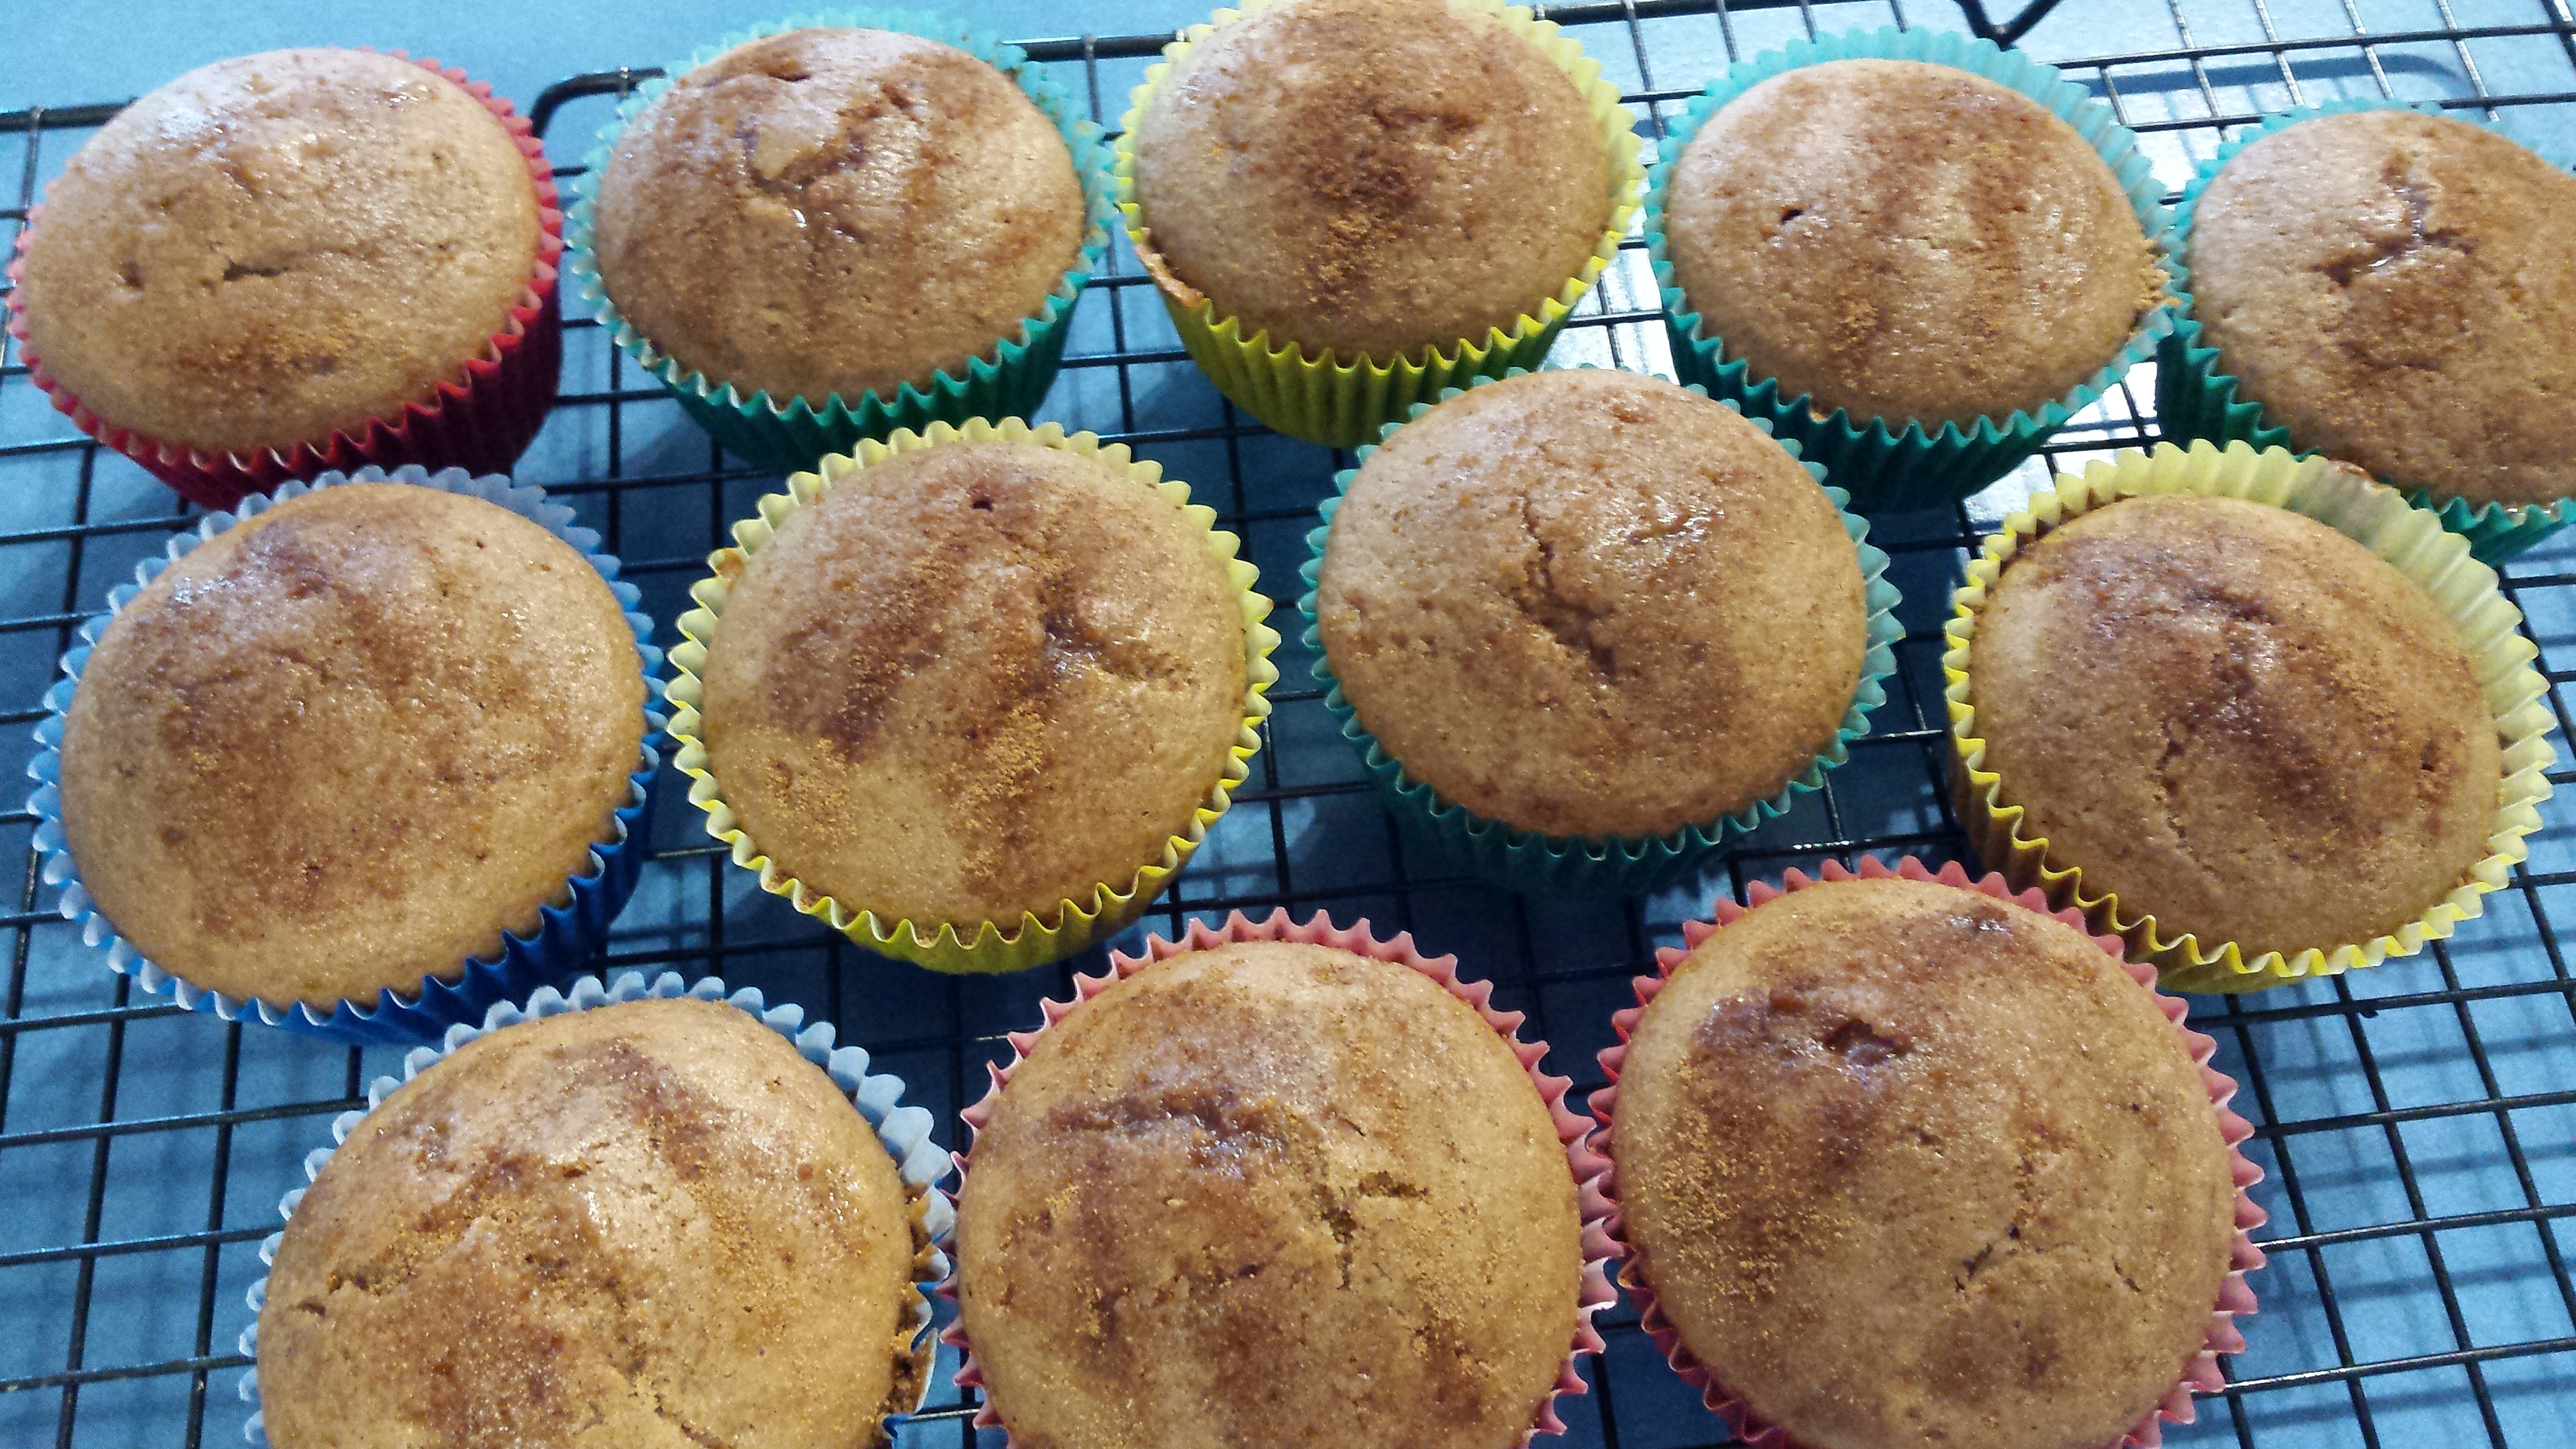
Pour into a small greased loaf pan and bake in a preheated 170C oven for about 1hr, or until cooked through.
Or pour into lined muffin tins and bake for about 25 minutes or until cooked through (makes about 18).
Allow to cool before slicing.
This recipe freezes and defrosts well, and is particularly lovely when slightly warmed (and even toasted!).
I know … beetroot and spinach (or pumpkin and chick peas!) are not ingredients you would normally associate with a chocolate muffin – but trust me, it works!
My tribe wolf them down and have no idea of the goodies hiding inside – yay! They are a standard lunchbox favourite – I even use this recipe to make the base of our birthday cakes now and everyone digs in!
See below the recipe for the coeliac friendly option and some different veggie variations
1 large cooked beetroot (approx 225g)*
2 handfuls of baby spinach
40g cocoa/30g cacao powder
70ml tasteless oil (rice bran oil, melted vegan butter & coconut oil work well) OR 70g sunflower seed butter
150ml oat/rice/soy/almond milk
2 tsp apple cider vinegar
90g maple syrup OR coconut sugar
280g spelt flour (half wholemeal)
2.5 tsp GF baking powder
6 tbsp aquafaba OR 2 whole eggs
1 tsp vanilla bean paste
pinch Himilayan salt
*If you don’t have access to fresh beetroot, use an equal weight of tinned beetroot and omit 1 of the teaspoons of vinegar), or when my garden gives us an abundance, I puree and freeze in batches to add in instead.
In your processor/blender/bullet/thermal cooker place the milk, beetroot, vinegar vanilla, oil, spinach and aquafaba and blitz until the mix is smooth with no obvious ‘green bits’ 😉 (Speed 5, 10 seconds, scrape down, then speed 8 for 10 seconds, scrape and repeat if required). Then set the wet mix aside.
Mix together the flour, cocoa, salt, sugar and baking powder until evenly combined (speed 4, 8 seconds).
Whilst mixing the dry mix (use speed 4), gradually pour in the wet mix until well combined. Don’t over mix.
Scoop batter into lined muffin tins and bake in a preheated 180C oven for about 20 minutes or until top springs back when gently pressed.
Makes about 14, they freeze and defrost well and are especially delicious when slightly warmed.
To make these coeliac friendly: use rice, almond or soy milk and replace the spelt flour with 1 1/2 cup plain GF flour and 1/4 cup almond/seed meal.
To make a little variation on these, I switch out the spinach for a large handful of steamed sweet potato or 1/3 of a tin of chick peas. Just add them into the wet mix and blend at the same time as the beetroot. Yum!!
We go through quite a lot of yoghurt in this house.
All 6 of us enjoy it, so it is a standard dessert with berries, we use it to make pizza dough and scrolls, plus cakes, smoothies and fruit icy poles and the kids all like to take it to school.
To cut down on costs we used to buy in large tubs and spoon into our reusable squeezey pouches. But it is still not cheap, and unless you are buying plain natural yoghurt, then it is full of sugar and flavourings, which I don’t love!
Soy yoghurt in Ellie’s Lunchbox – We’ve been using these Sinchies containers for over 5 years!
The push for me to make my own was when I realised that 350g of the soy yoghurt that Ellie eats was costing almost $4 but I could buy 1L of Soy milk for just over $2 – Yikes!
I did a bit of research and found that I could buy a non-dairy culture as a starter online. This is the one I use, from Green Living Australia. It was about $22 to buy, but contains enough starter to make 100L – not too bad!!
You can use the non dairy starter to make dairy yoghurt too – but their Dairy Starter does a better job as they work at slightly different temperatures.
The starters do need to be kept in the freezer.
I adapted the instructions from Green Living Australia to make a couple of recipes that suit our family.
If you don’t have access to the starter, you can use simply use 1 heaped tablespoon of your last yoghurt into the milk at the same point the started would go in then whisk it to combine it evenly and continue on with the rest of the steps as per the recipe.
The simplest way to go is to use UHT milk because it has already been heat treated. If you want to use fresh milk then you will need to heat the milk to 90C for 8-10 minutes and then allow to cool to between 37-42C before adding the culture. This allows only the bacteria that you want to culture to be left over.
You will need an accurate cooking thermometer for this recipe. A digital candy thermometer is ideal (they cost under $15 in most big Supermarkets)
Dairy Yoghurt:
1L full cream UHT milk
1/3 cup milk powder (optional, but gives a thicker yoghurt)
1 tbsp sugar (optional, we don’t use it for the dairy milk)
1 dose starter culture
In a large saucepan place the milk, sugar (if using) and powder and whisk to ensure even distribution.
Heat on a gentle heat until it reaches between 41-43C. Remove from heat and tip in culture. The amount required is very small!
this quantity of powder is enough starter for 1.5L!
Whisk again to ensure even distribution.
The idea now is to keep the milk mix at this temperature for the next 18-24 hours. I use both the Easiyo container and my regular thermos (warmed with boiling water before tipping the yoghurt in) – both work equally well. An Electric yoghurt maker is a fancier option but essentially does the same job of keeping the mix at a stable warm temperature.
After about 18-24 hours, check to see that the yoghurt is set, flavour it as you wish and then store in a clean container in the fridge for up to 10 days. We tend to leave the yoghurt plain in the fridge and then flavour it as we choose when we’re serving to allow for more variety – and for no flavour when we’re using it in dough.
If you have tummy difficulties with lactose, then leave the yoghurt fermenting for the full 24 hours and the bacteria will have eaten almost all of the milk sugars (lactose) and you will essentially have a lactose free yoghurt.
The sugar is optional in dairy milks since there is already lactose available to feed the culture, however, adding a simple sugar increases the carbohydrate available for the culture to eat and improves the end result. Green Living Australia say that the sugar is used up by the bacteria and won’t be there in the end.
Soy yoghurt:
1L soy UHT milk** (opt for the no added sugar, organic version if you can so you can control the quantity of sugar)
1 tbsp sugar
1 dose starter culture
**I buy a ‘protein rich’ Soy milk which has the bean content upped to 21% and it makes for a really amazing thick yoghurt – much closer to the store bought variety!
In a large saucepan place the milk and sugar and whisk to ensure even distribution.
Heat on a gentle heat until it reaches between 37-41C. Remove from heat and tip in culture. The amount required is very small!
Whisk again to ensure even distribution.
Place in Thermos/Easiyo container and follow same storage and flavouring guidelines as for Dairy yoghurt.
The sugar isn’t optional when you are making soy yoghurt as the soy bean doesn’t have the same natural sugars to feed the cultures.
The enrich the calcium content you can add a few drops of calcium carbonate before tipping in to the thermos, which also helps with giving a thicker yoghurt.
To get a Greek style yoghurt you need to strain the end yoghurt through a nut milk bag.
We don’t have very much white bread in our house. But occasionally, a soft white bread sandwich (with cheese and gherkin as my preference!) is amazing.
The base for all the recipes is below.
500g white spelt
1 heaped tsp yeast
1 heaped tsp coconut sugar
15g olive oil
275g luke warm water
1 tsp salt
olive oil to cover
1 heaped tsp pea protein powder OR 1 tsp apple cider vinegar (optional but acts as a bread improver)
To make the Sandwich Loafor rolls seeded add: 20g flax seeds and 20g chia seeds
For Fruit Toast: remove 100g of white spelt and replace with 100g wholemeal spelt and add 2 tsp mixed spice, 1 tbsp extra coconut sugar and 3/4 cup dried fruit of choice.
For the Sticky Finger Buns: add 1 tsp of mixed spice, 1 tbsp extra coconut sugar, optional 1/2 cup of sultanas and icing (1 tbsp melted Nuttelex whisked together with 4 tbsp pure icing sugar, few drops food colouring and topped with GF sprinkles).
Place the water, yeast and sugar in the food processor and pulse briefly to combine or speed 2 for 6 seconds). Allow to stand for 5 minutes (a good time to check that your yeast is still active. Look for it foaming).
Add seeds (milled first if you’d prefer less obvious ‘bits’) and spices if applicable and pulse again to combine.
Add flour, pea protein, salt and oil (in that order) and process to bring together (speed 6 for 15 seconds).
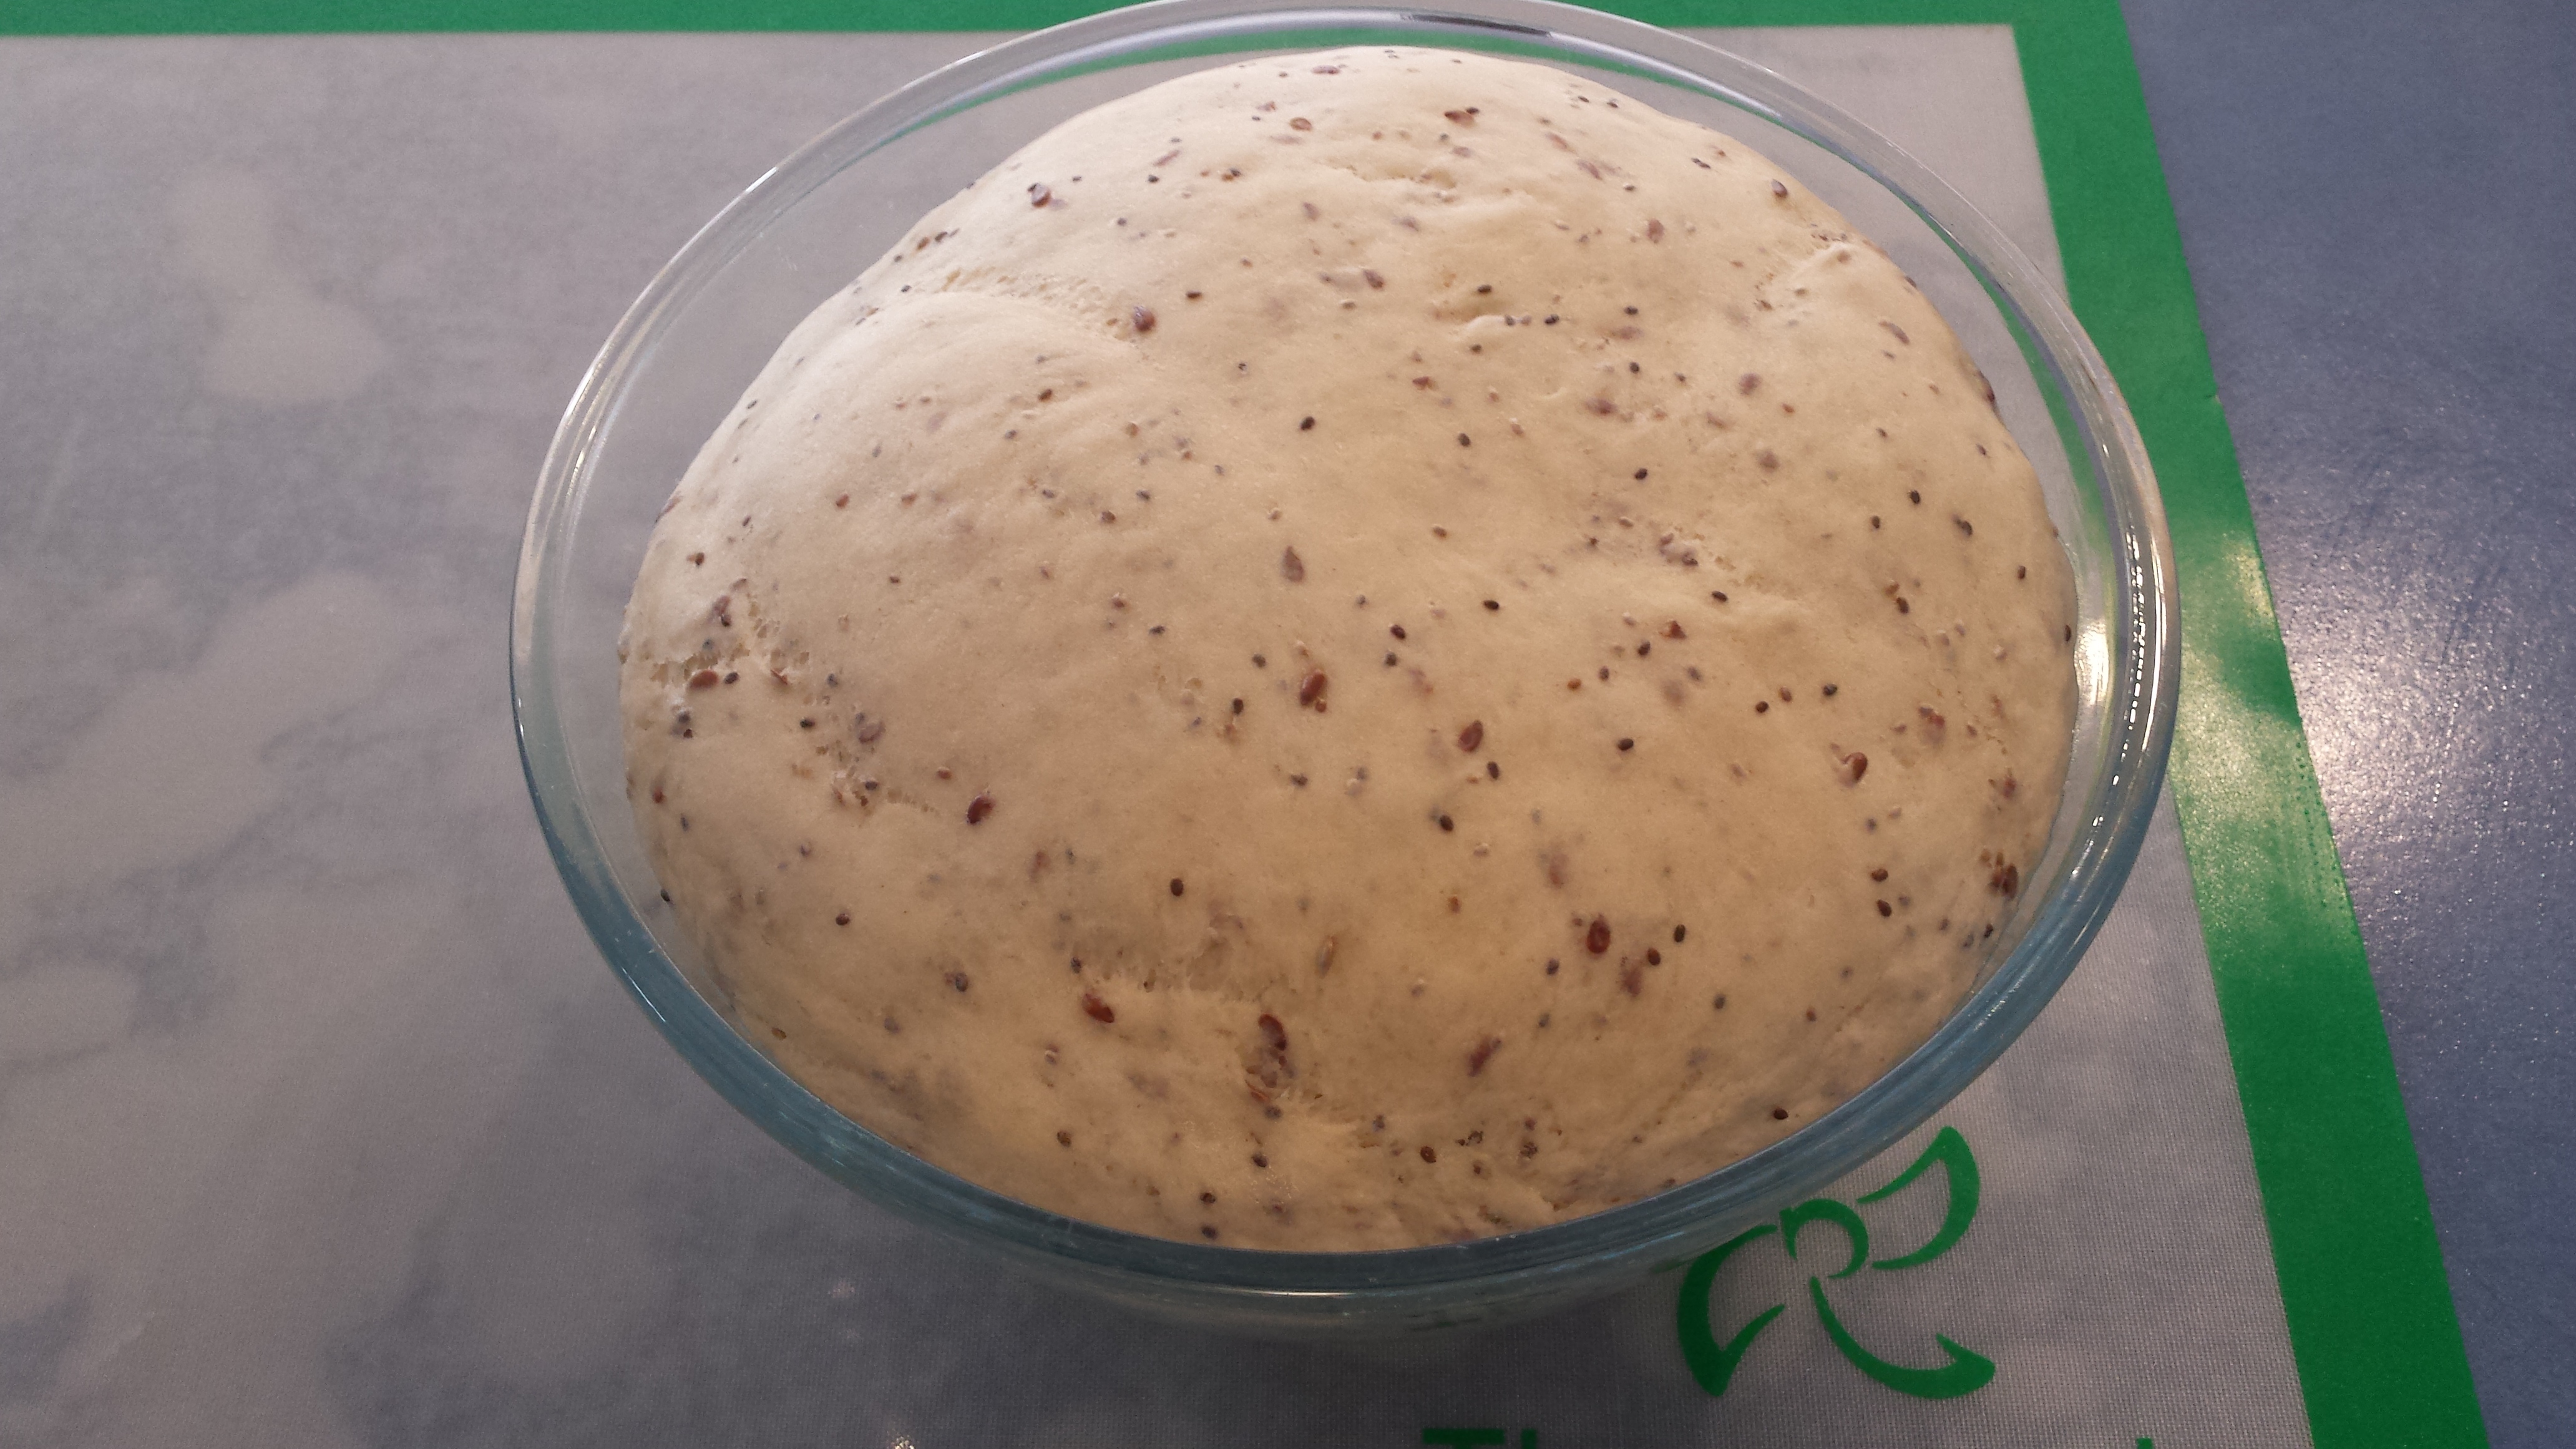
Tip onto a lightly floured mat and knead until dough is soft and elastic.
Add in fruit and knead at this point if using.
Cover with oil, using hands and place in a clean oiled bowl, cover and place in a warm place to double in size (about – 45 mins-1 hour).
Knock back the dough and place into oiled loaf tin or break into bun size (about 10-12 rolls or finger buns of equal weight – rolled tightly for buns) and place on a lined baking tray. It is a very light and fluffy dough so be careful not to over work it.
Need to work on making them more finger like!
Leave to double in size again (approximately another hour).
Place into a preheated 250C oven for 10 minutes, then drop temperature to 190C and cook for a further 25 minutes, or until golden on top and bottom sounds hollow when tapped. Leave to cool before slicing.
Sandwich loaf and rolls (plus some Yoghurt Dough Cheeseymite scrolls!)
Harry the ‘Carbivore’!!
For the sticky finger buns and bread rolls, place into a preheated 190C oven and cook for about 15-18 minutes or until bottoms sounds hollow when tapped. Ice while warm.
I’ve made allergy friendly custards before, like this one, but I’ve been looking for a plain custard to use with cakes and puddings for desserts.
This is version I have come up with – so far I have only made it in my Bellini – so I’m not sure about stove top conversion, sorry.
The base for both flavours is:
30g gluten free cornflour
500g milk (to suit diet – but pick a high protein version if it is a plant based milk)
1 tsp vanilla bean paste
1 heaped tsp of No Egg powder
For the vanilla version add:
1 extra tsp vanilla bean paste
80g milled coconut sugar
For the chocolate version add:
60g milled coconut sugar
50g dairy free chocolate bits
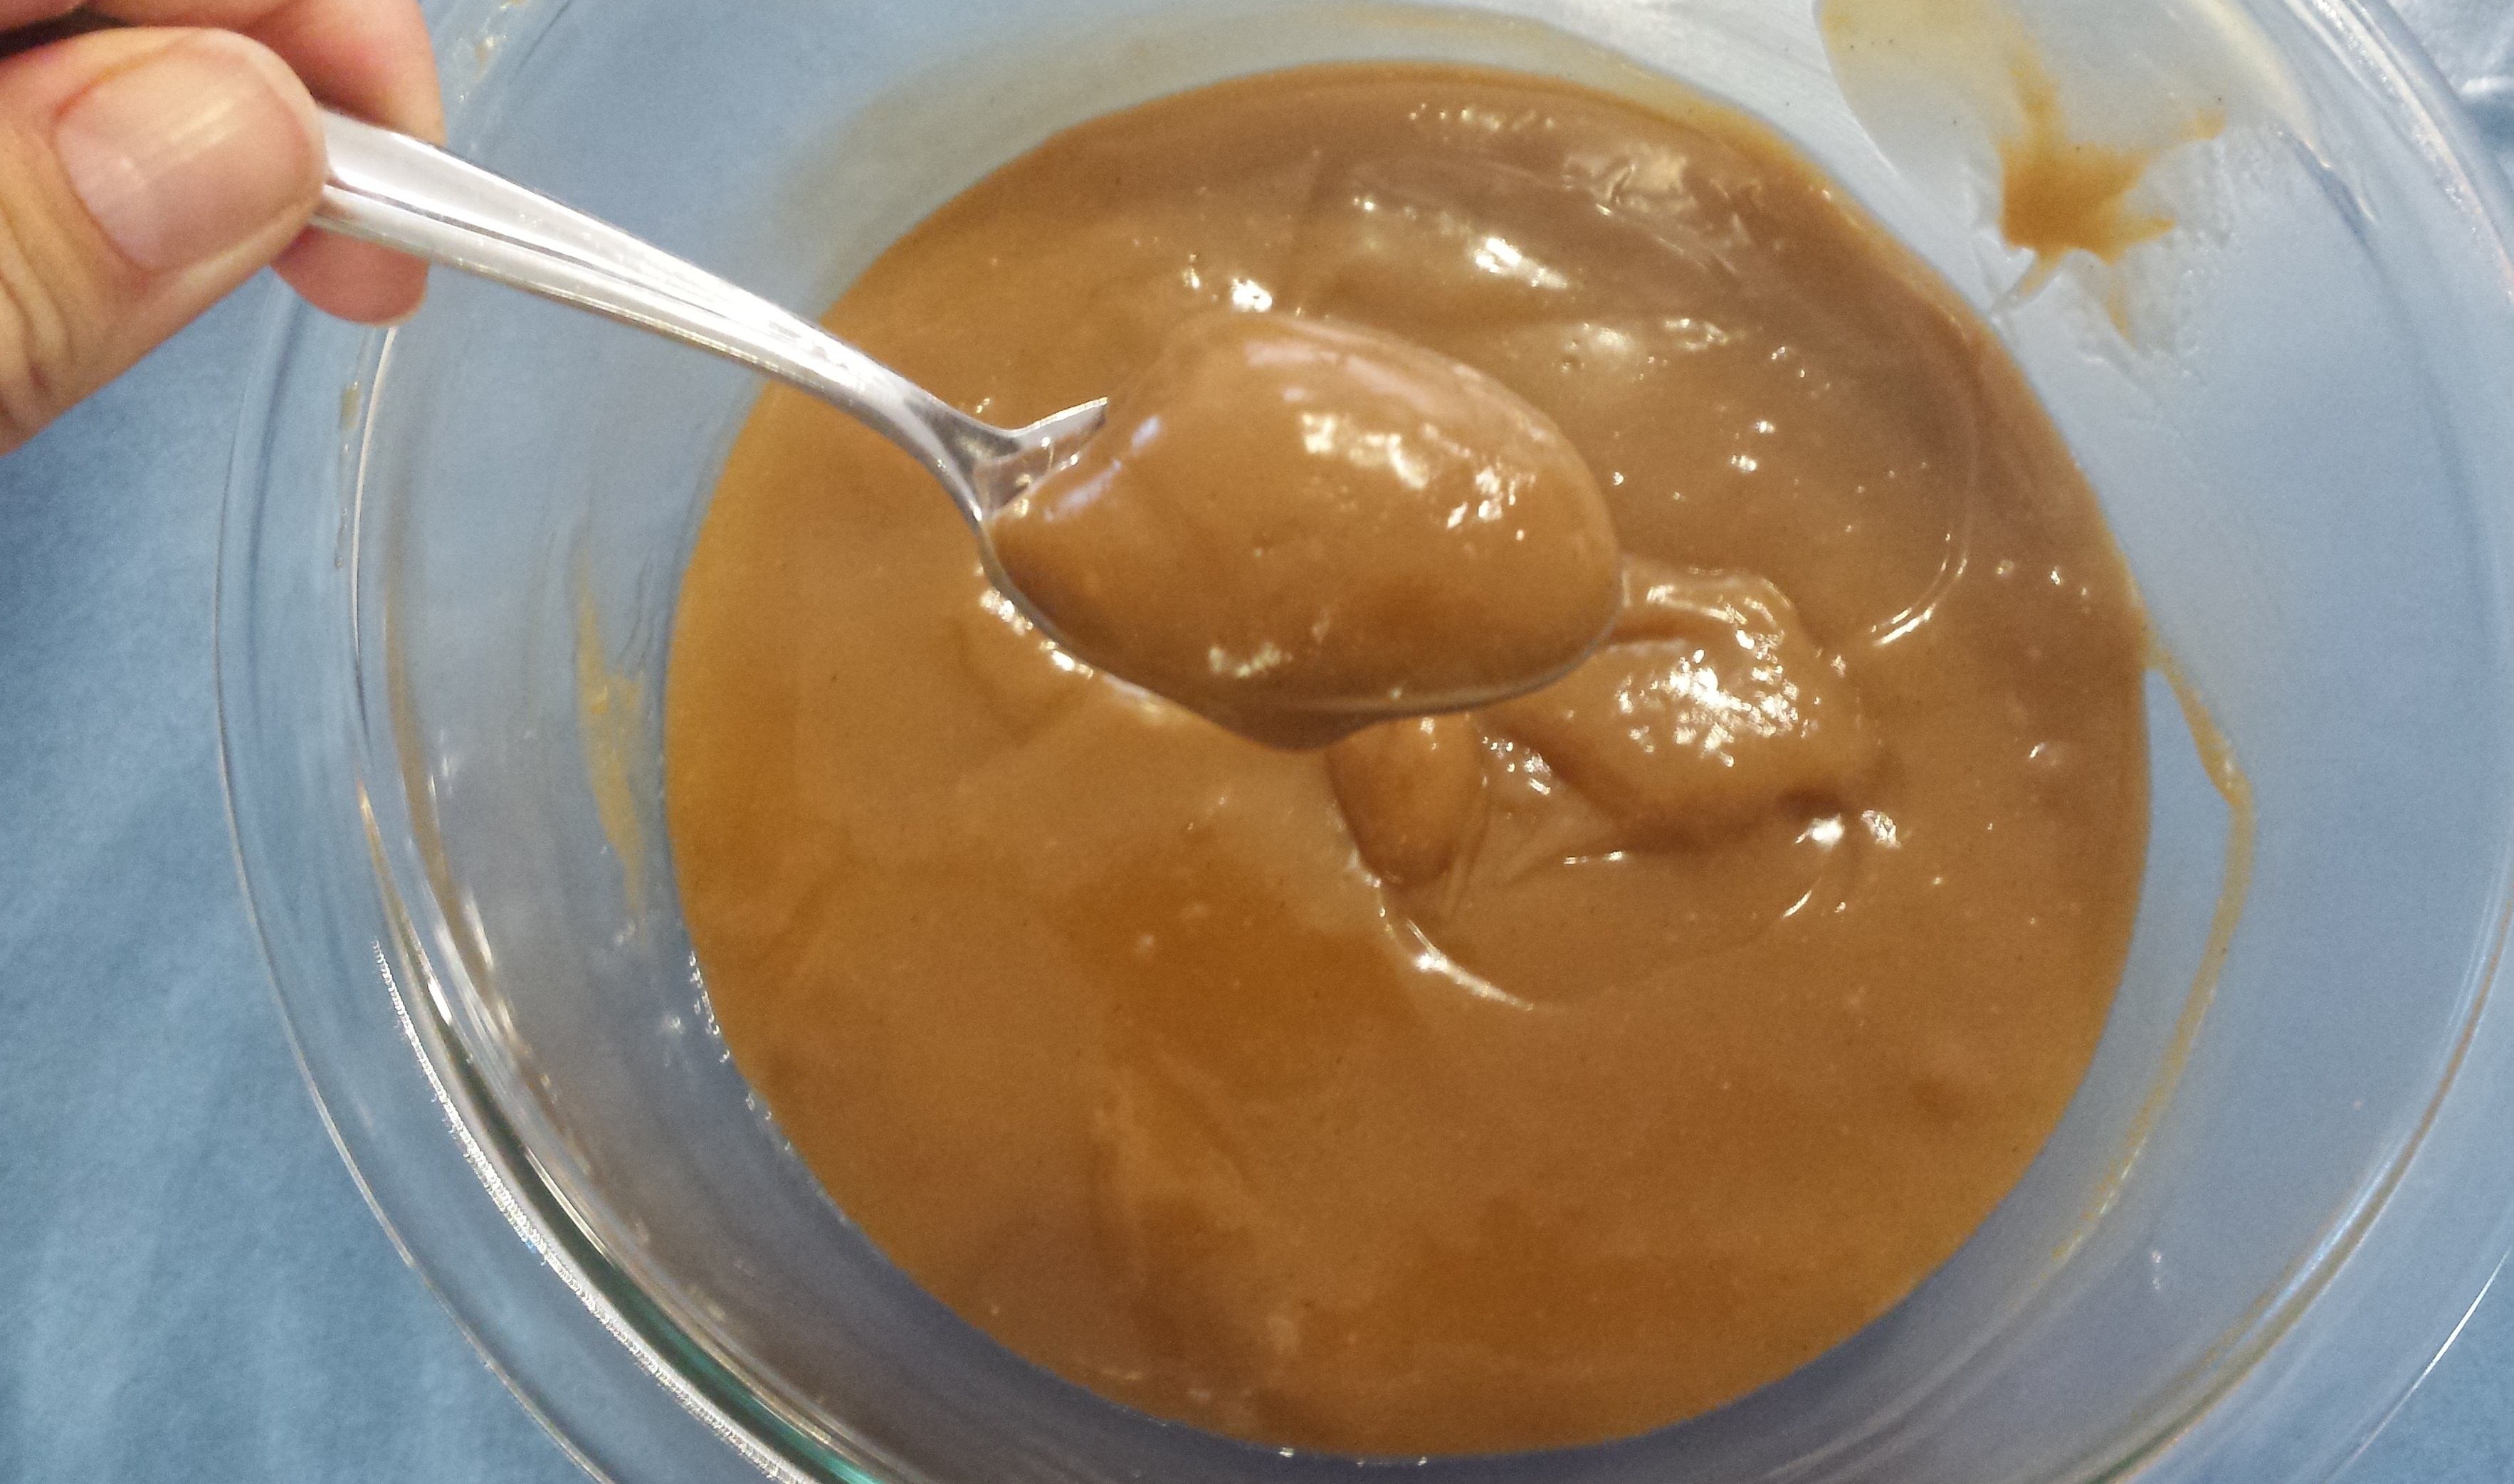
Place 100ml of milk into a measuring jug, add to it the flour and No egg. Whisk well until well combined and smooth.
Put the mixing tool (butterfly attachment) in place and in the jug of the thermal cooker place the remaining 400ml of milk, vanilla and sugar (or syrup). Add in the floury milk mix.
Tilt the measuring cup on top of the machine so that it is cracked open.
Cook for 17 minutes at 100C on Speed 3.
For the Vanilla version, add both lots of vanilla at the same time. (Because of the coconut sugar and the lack of egg, the vanilla version is more a brown colour than regular vanilla custard).
For the Chocolate version, add the chocolate at the end and mix through gently until melted and evenly distributed – speed 3 for about 20 seconds.
The mix will thicken further as you let it cool.
If you are using a Thermomix instead of a less powerful version of the machine, you may need to adjust the cooking time to a minute or 2 less.
Makes enough for our family (2 adults and 4 kids) for dessert.
The ice-cream van came around, and as a school holiday treat, for only the 2nd time in their lives, my kids were allowed to go. They waited ages, just bursting with excitement, but when we got to the front, their snow cone machine was broken and so there was nothing that Ellie could eat. She was crushed and cried quietly by my side while the boys got their treats. Thank goodness for a stash of special treats at home!!
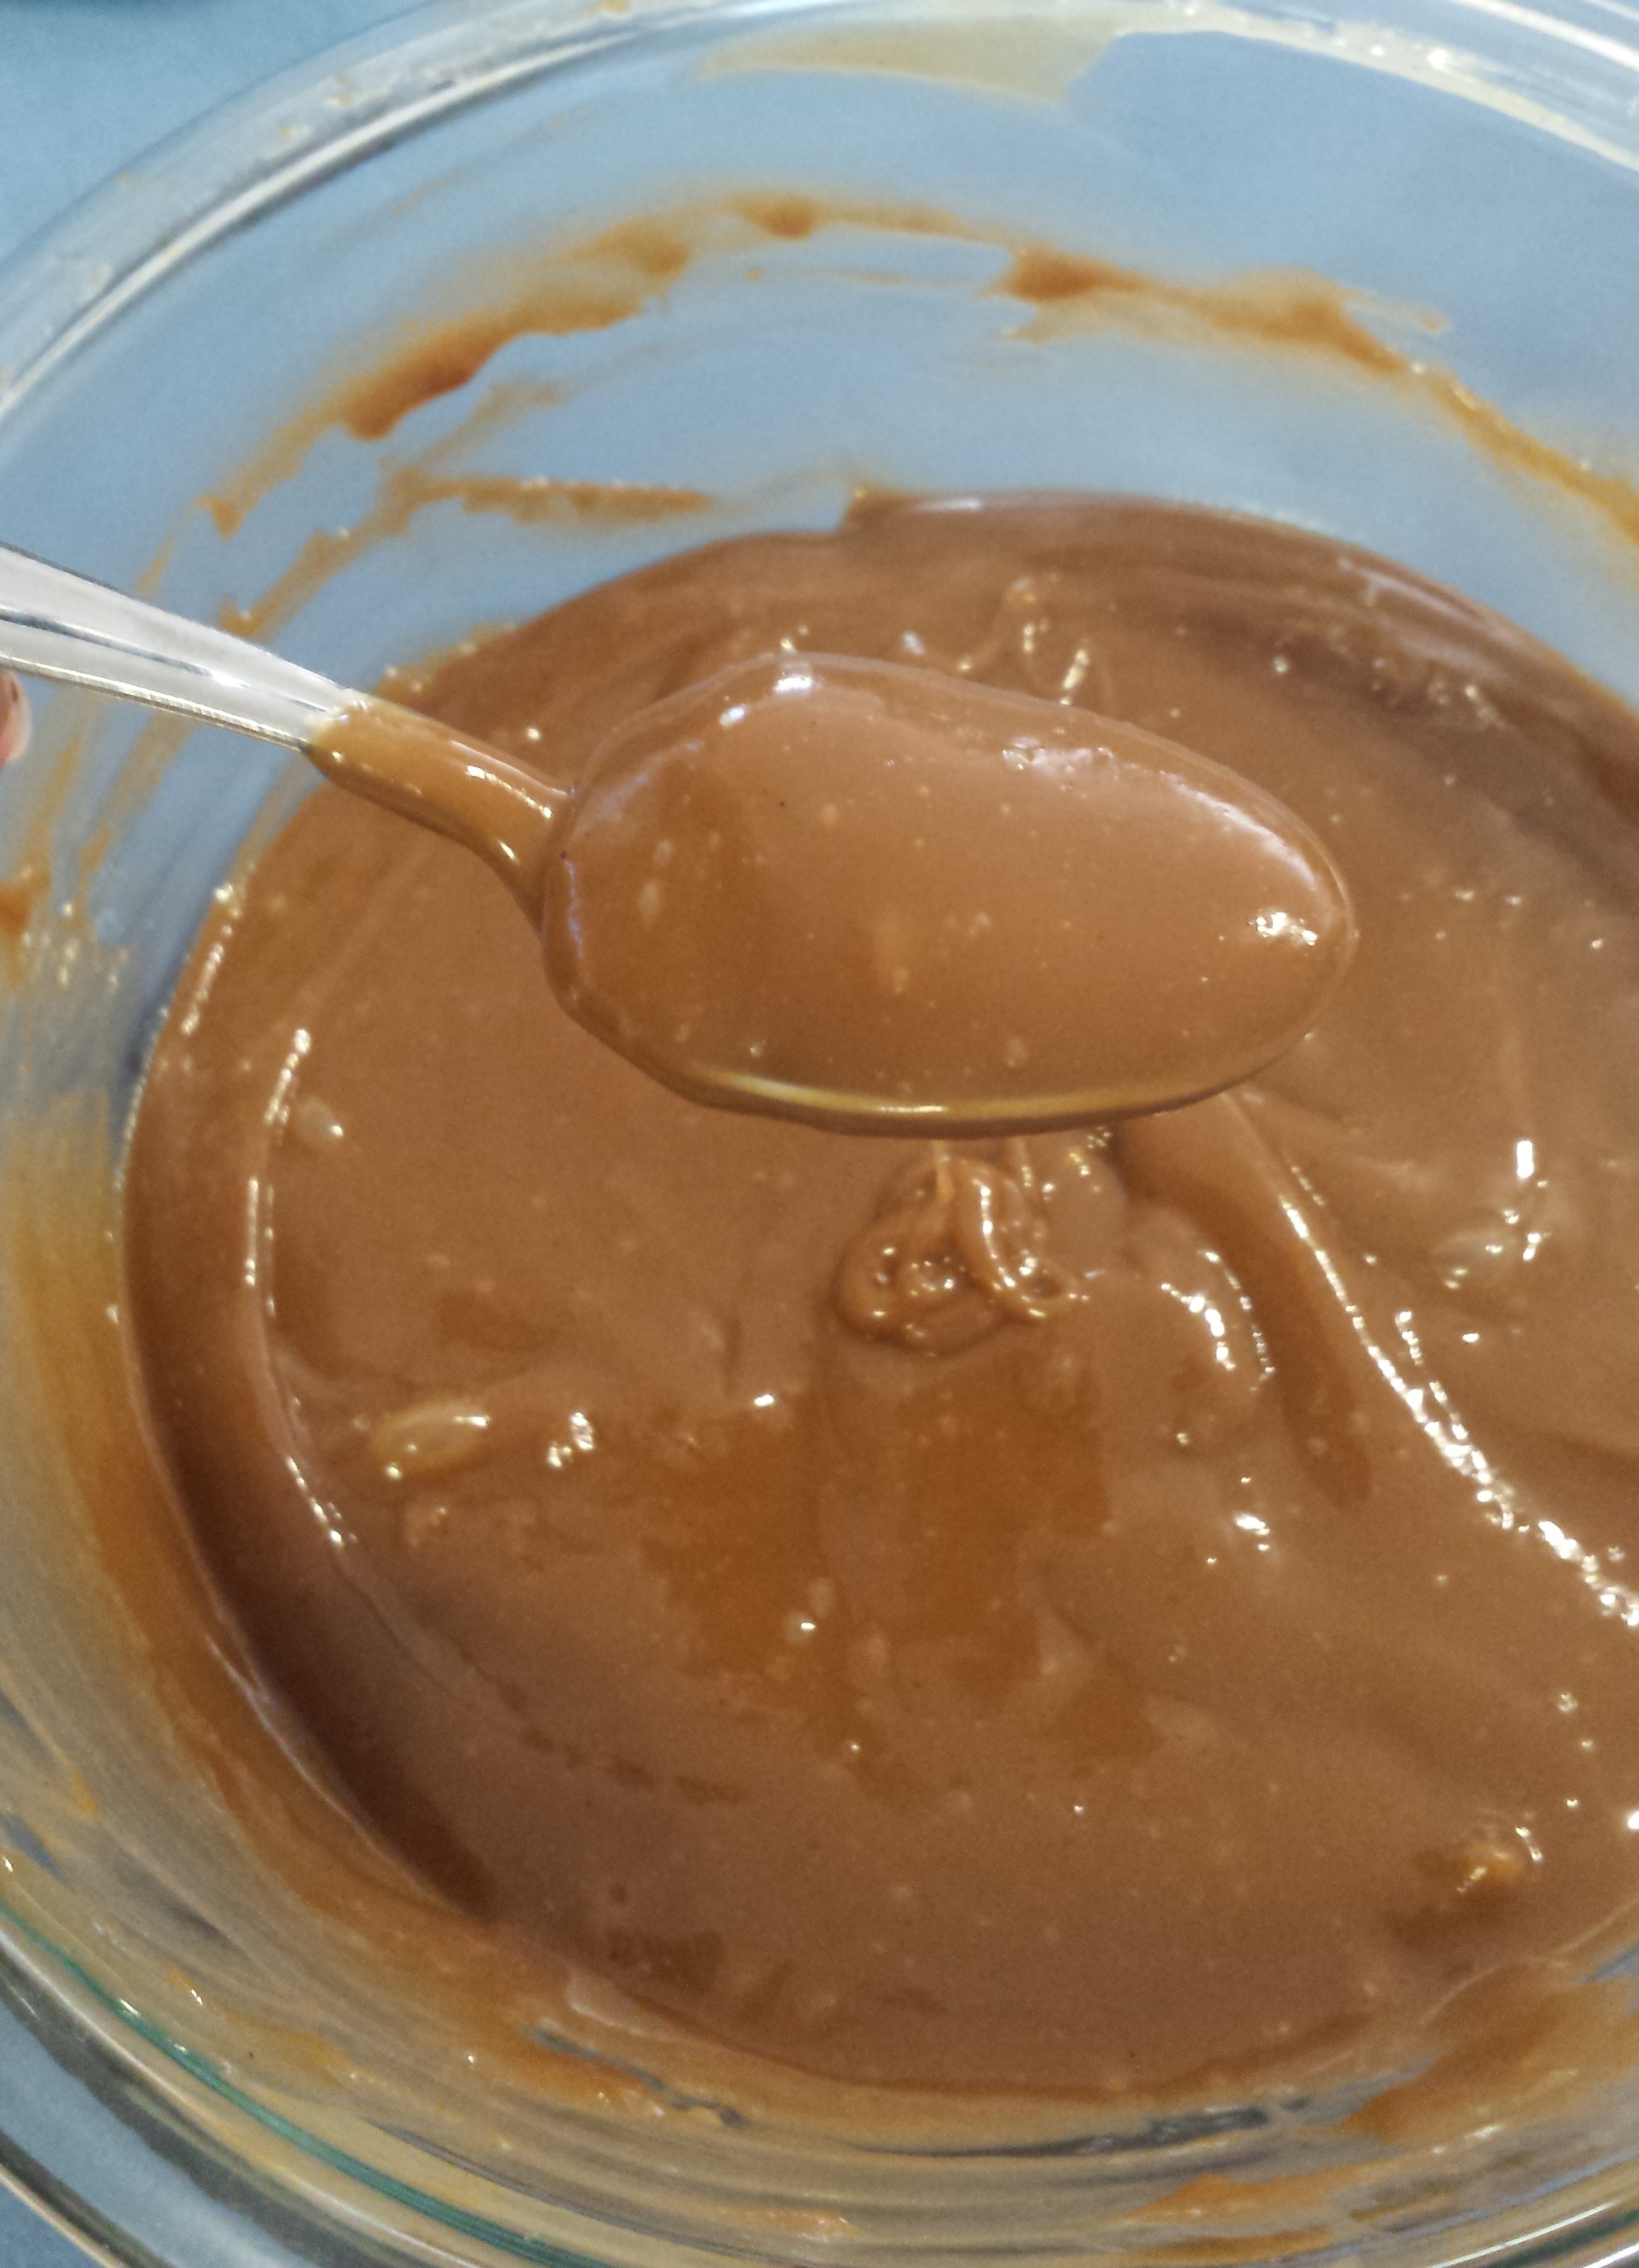
I felt so bad for her and I was so pleased with the way that she didn’t make a fuss that when she asked for ‘special chocolate bikkies’ to take to morning tea at the park, I was pretty well inclined to make her anything she wanted!!
I’ve seen lots of recipe for chocolate ripple biscuits so I decided to give them a go for her.
*You can use equal quantities of shredded coconut to replace the psyllium and quinoa if they aren’t pantry staples for you.
In your processor, grind down the sugar to resemble castor sugar (Speed 8 for 10 seconds in a thermal cooker)
Add in the baking powder and soda, cocoa, salt, psyllium, quinoa and flax and blitz until fine (speed 10 for 10 seconds)
Add in the flour and mix again (speed 6 for 10 seconds)
Add in the Nuttelex and seed butter and pulse several times to combine.
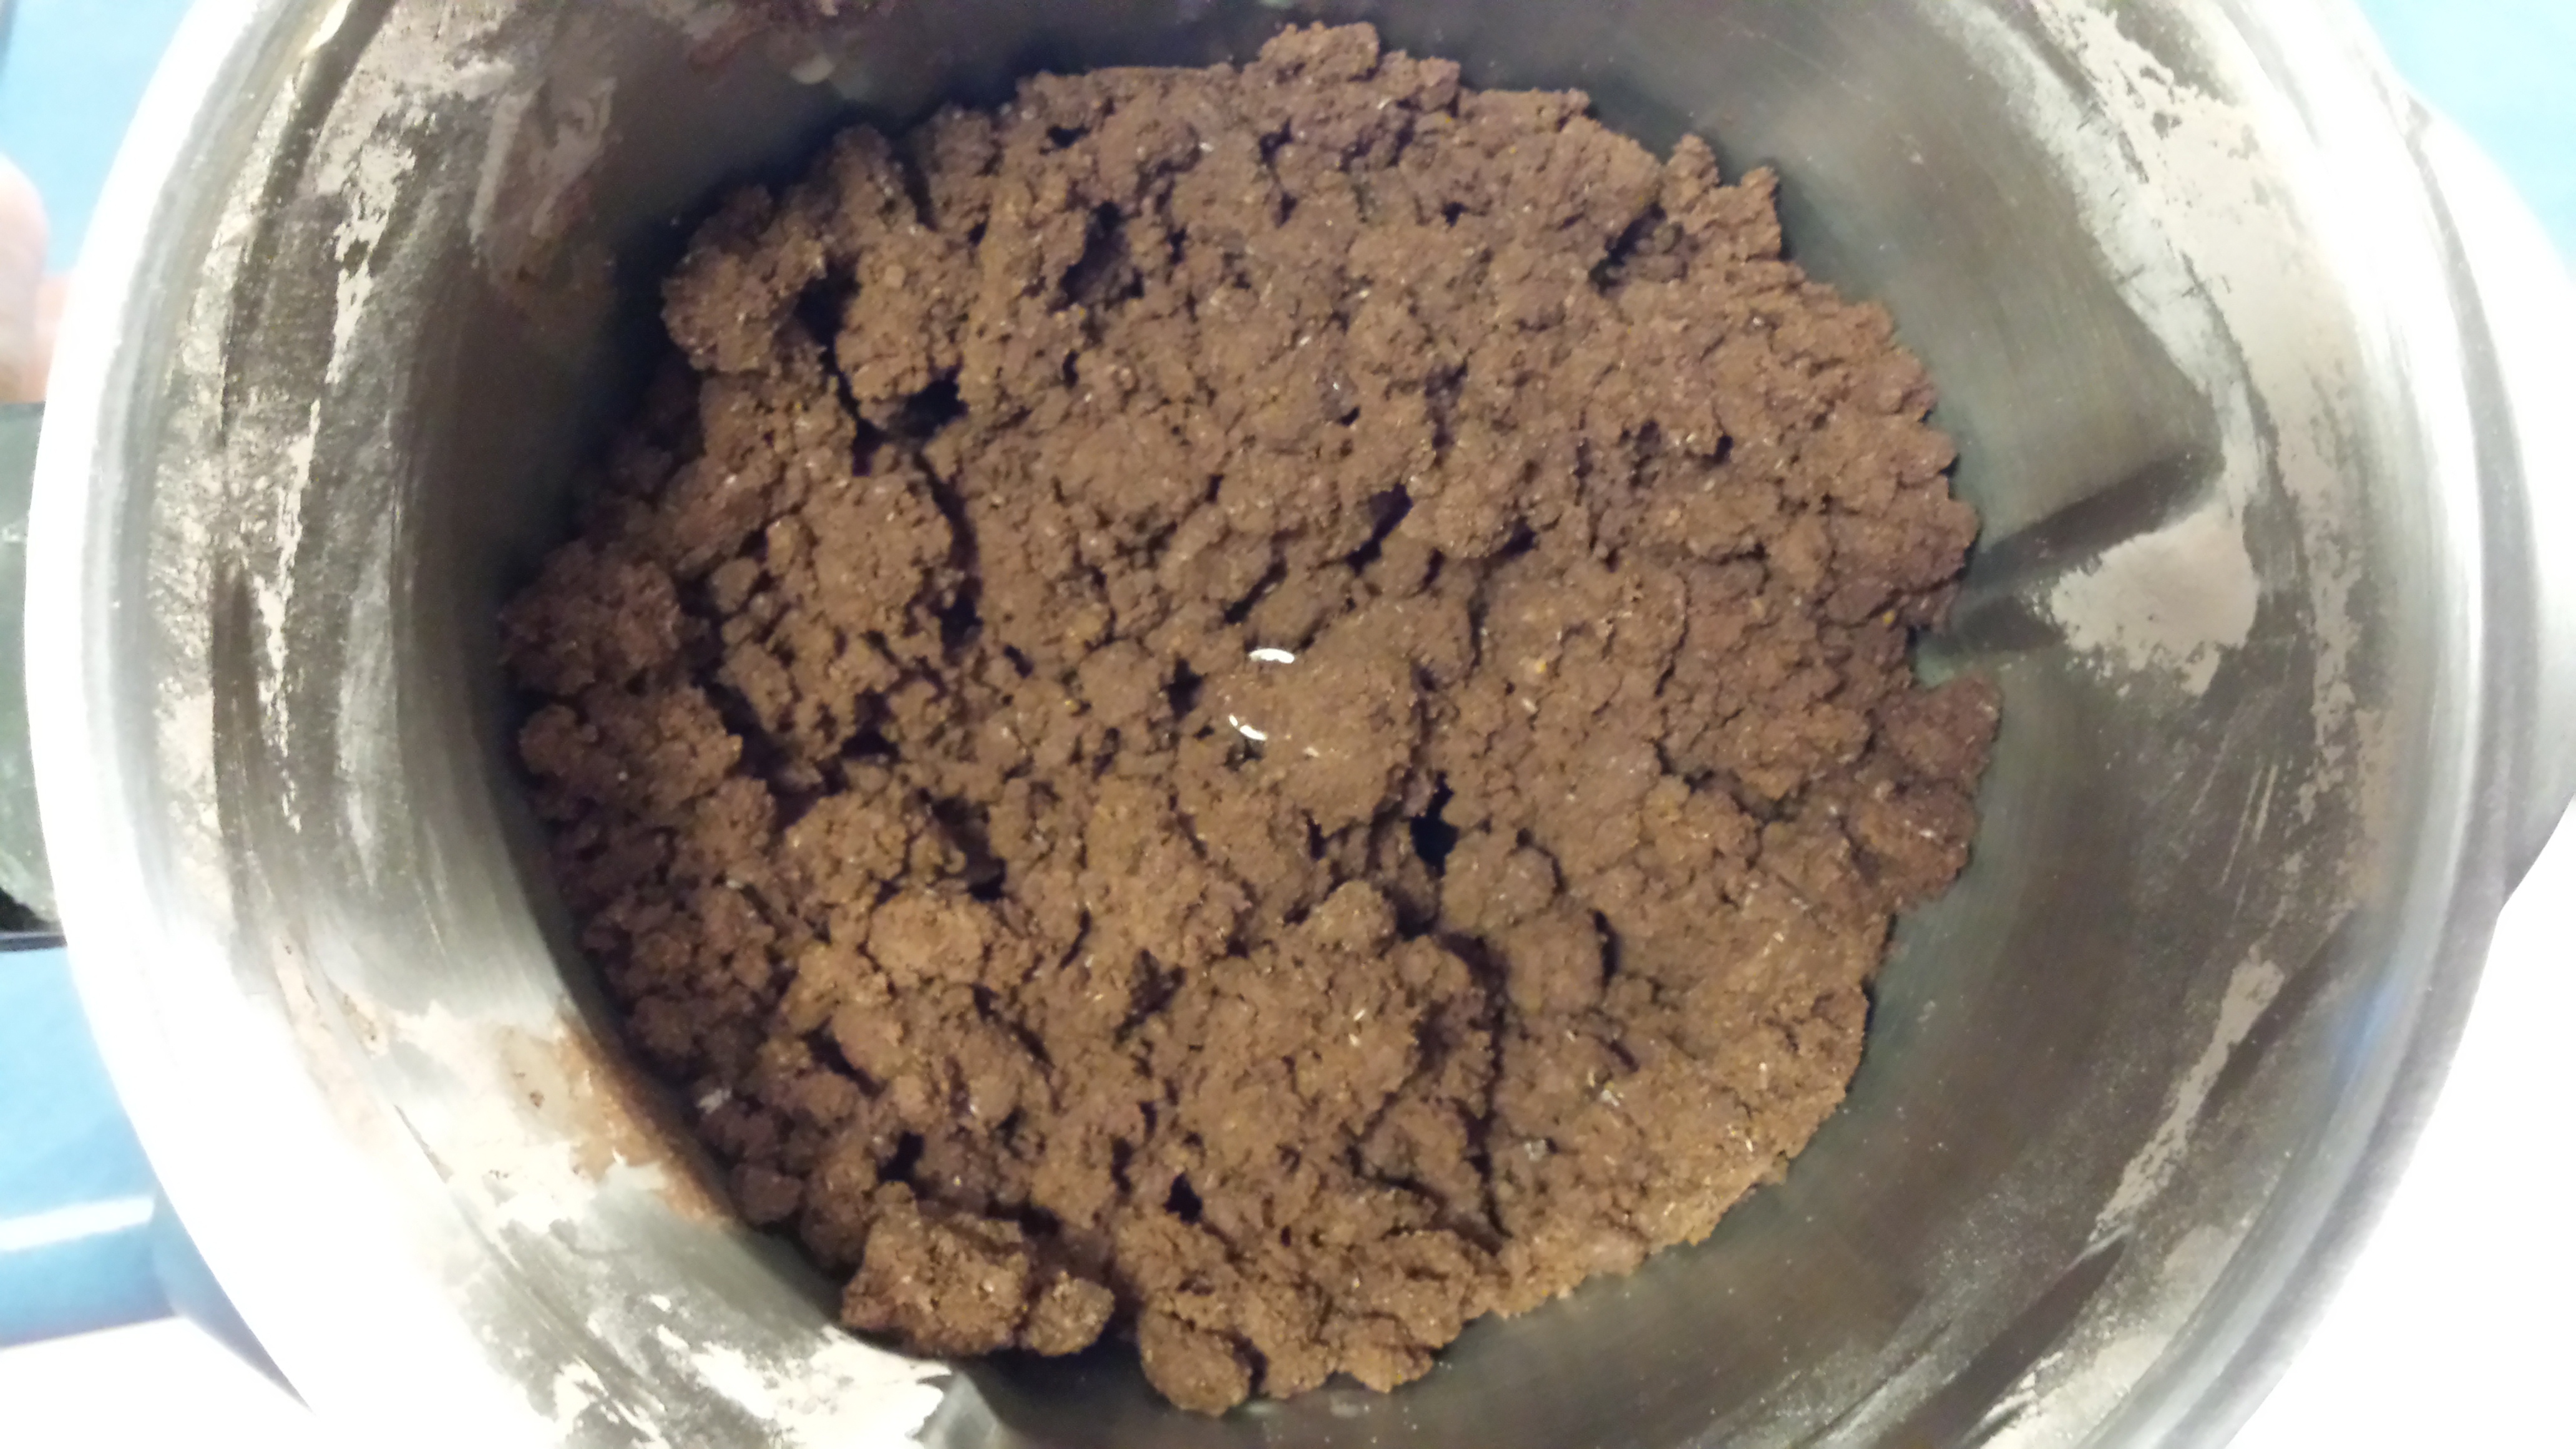
Add in the egg replacer and pulse to combine, then scrape down sides and process until mix resembles wet sand (speed 5 for about 20 seconds).
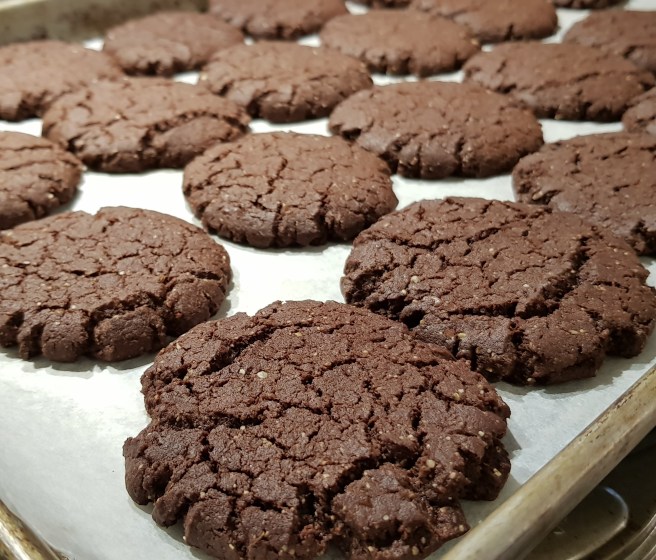
Form teaspoons of mix into balls and place on lined baking tray.
Press down with hands and place into pre heated 180C oven for about 12 minutes.
Biscuits will be soft when removed from oven, but harden on cooling. My kids (and husband!) are so delighted -they are delicious and are honestly one of those times you can’t tell that something is ‘everything free’!
Makes about 24 biscuits – store in an airtight container for about a week.
Enjoy – like my very happy girl did!!
** Recently I’ve had a few questions about the egg replacement options. I have tried flax eggs but they don’t work so well here. If you can’t use any of the above, suggestions then leave out the egg replacement and increase your vegan butter and seed butter each by 25g… Works really well!
They were a really easy (and VERY popular!) school holiday treat to bake with the kids, and I have done my best to make it a little healthier than the original, which you can find here.
See below the recipe for a gluten free Coeliac friendly version and several options for a nutrition boost.
Also see below the recipe for how to make mini baked doughnuts with this recipe.
200g SR flour (half wholemeal)
90g sugar
1/2 tsp flaked salt
1 tsp mixed spice
1 egg worth of egg replacer (OR 3 tbsp aquafaba OR 1 whole egg)
65g light olive oil/melted butter or nuttelex
240g milk of choice
Melted nuttelex/butter to top
extra sugar and spice to top (mix in a 10:1 ratio)
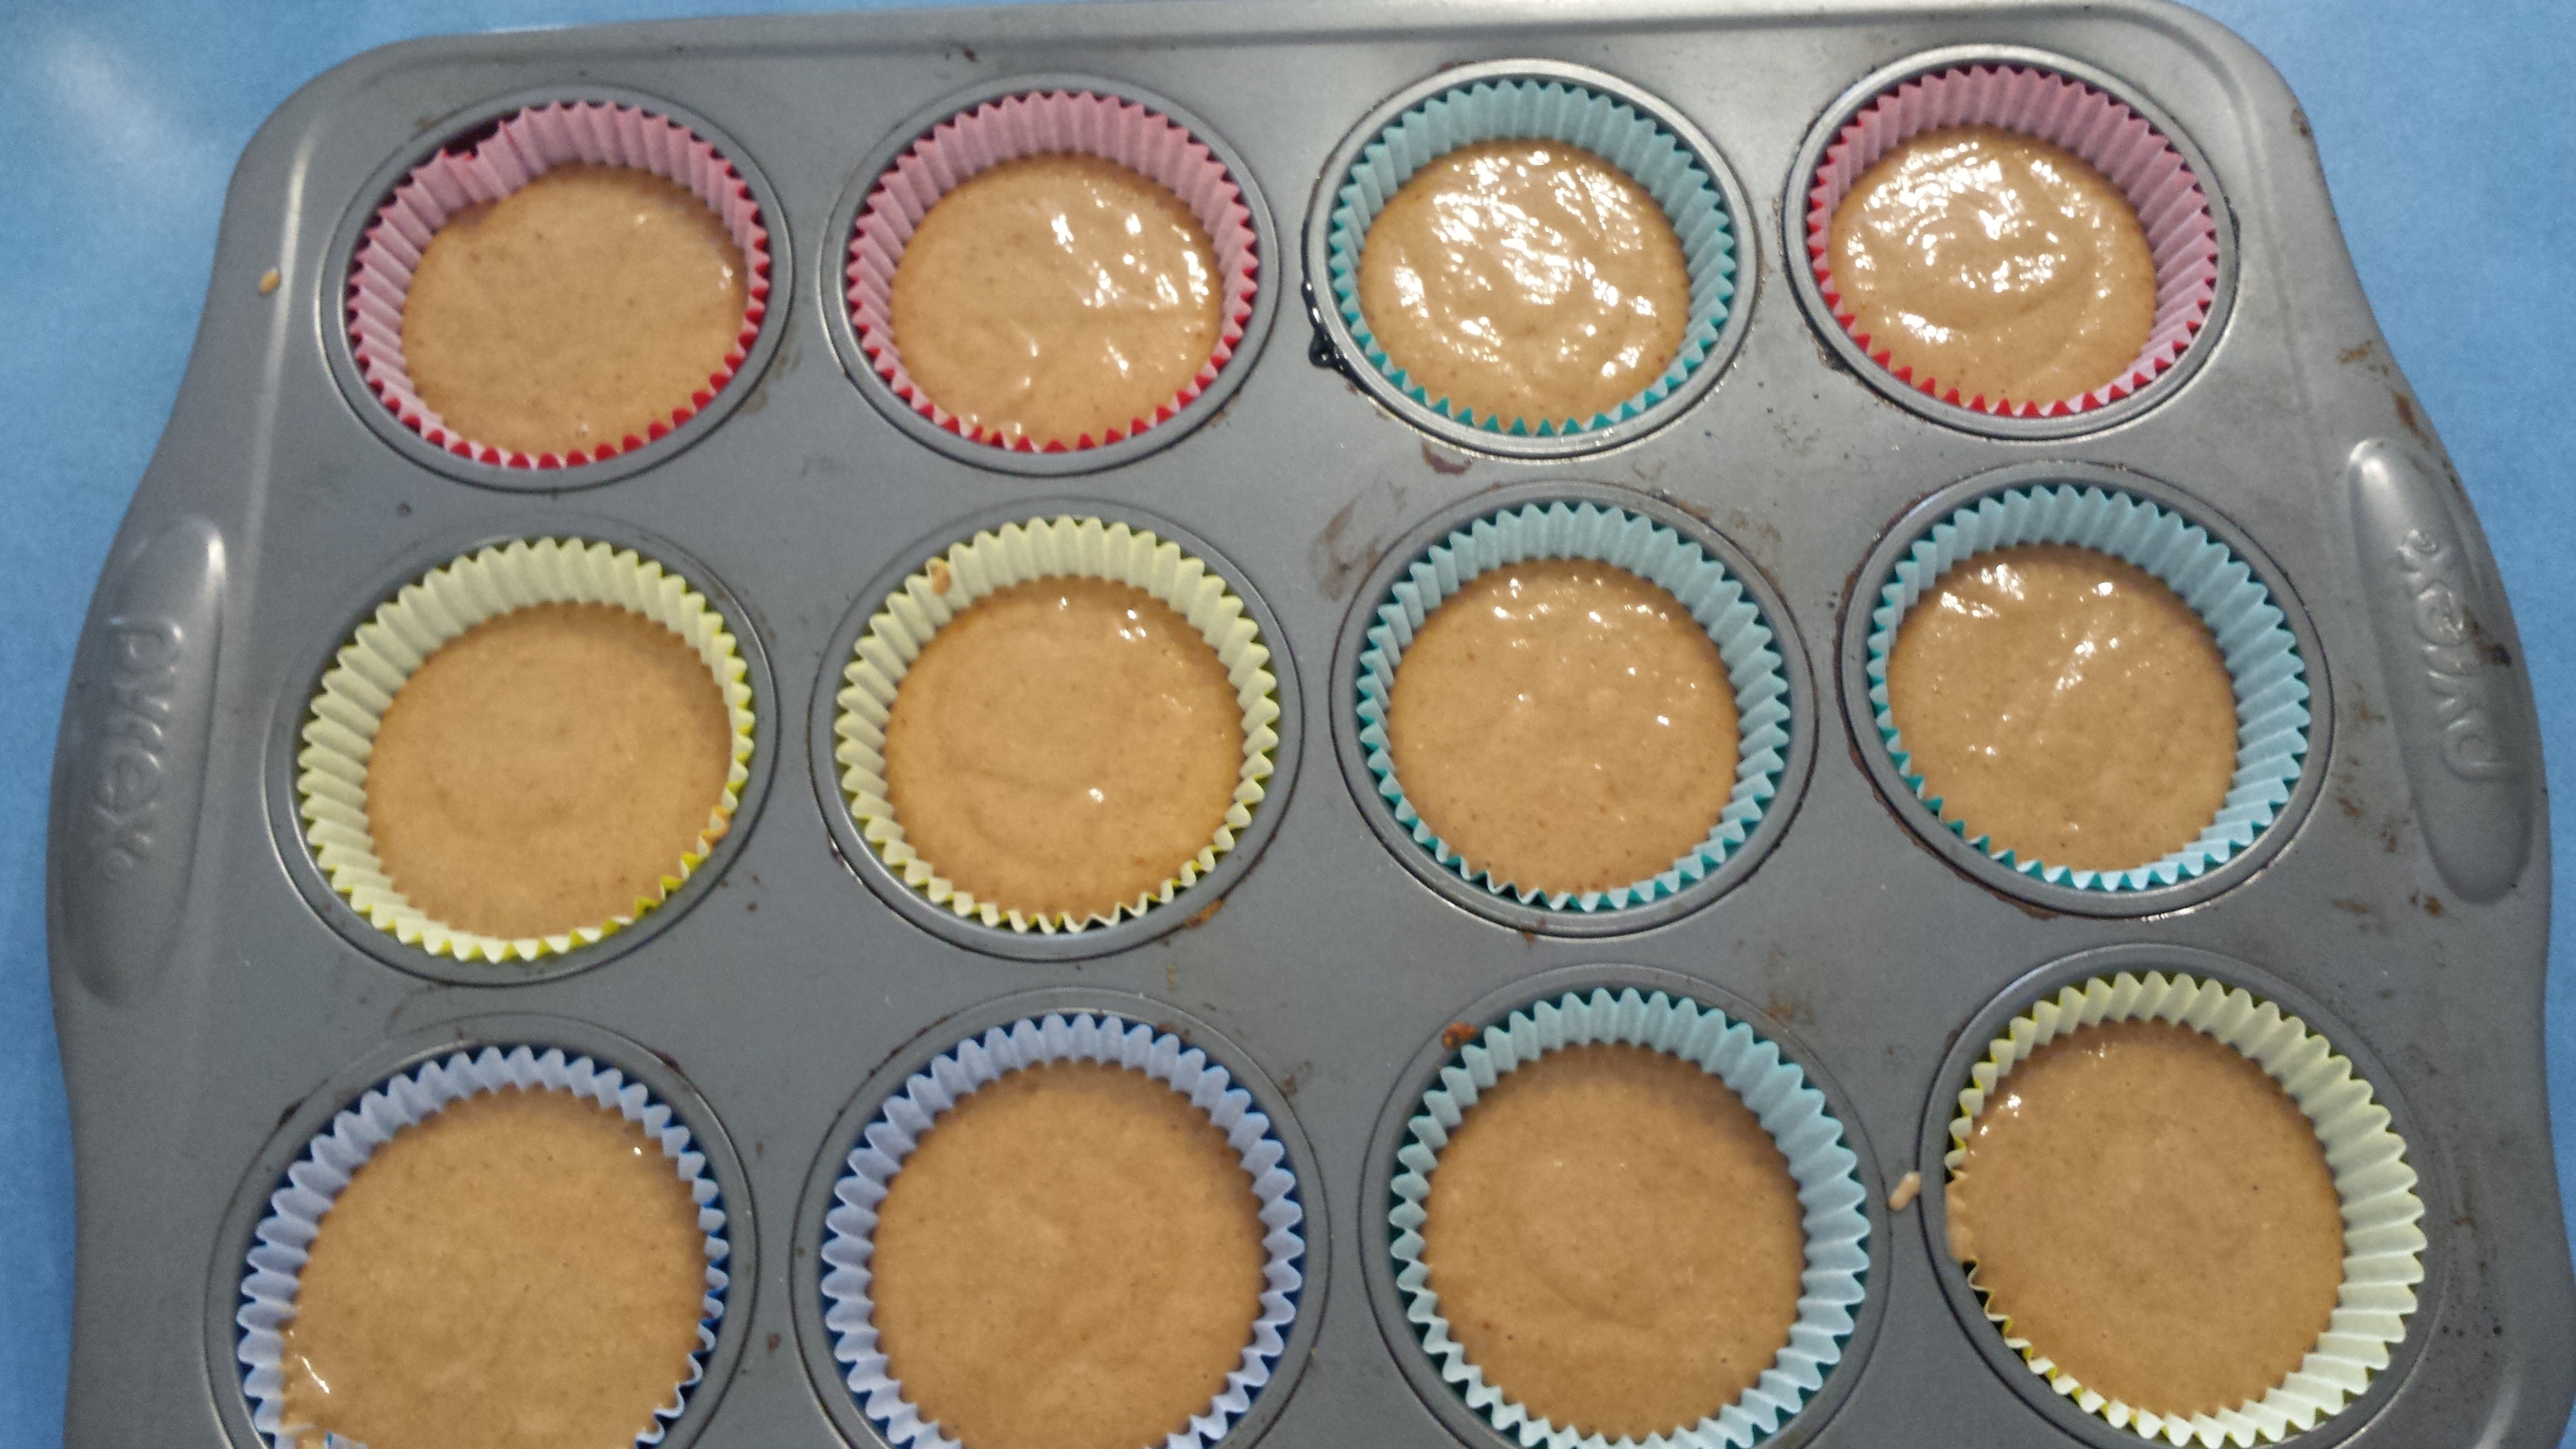
In a large bowl place the flour, sugar, salt, spice and egg replacer (if using). Use a whisk to combine the dry mix. (Speed 4, 8 seconds)
In a separate smaller bowl whisk together the oil and milk. Add in aquafaba or whole egg at this point if using. (If using a thermal cooker, add the liquids to the dry mix here)
Pour the wet mix into the dry mix and whisk vigorously to combine mix until smooth. (Speed 4, 8 seconds)
Place into lined muffin pans and bake in a preheated 180C oven for about 20 minutes.
As soon as you remove the muffins from the oven, brush them with melted Nuttelex/butter and sprinkle with a mix of sugar and spice.
Makes 12 …. did not last long in my very busy, hungry house!! Now I just make double batches and freeze 😉
Enjoy!!!!!
To make these Coeliac friendly replace the spelt flour with 1 1/4 cup of a gluten free flour mix plus 1 tsp psyllium.
For a more filling version, I replace 50g of the flour with 50g of nut/seed meal.
You can also also replace the oil with a very well mashed medium overripe banana.
Boost the protein with 1/4 cup of hemp seeds.
Add some more fibre with 1 medium grated apple (or blitz it in your machine) – if you use this option, you will need to reduce the milk to 200g.
To make these into mini doughnuts you need an appropriate tin, very well greased.
Place the mixture into a piping bag and pipe the mixture into the tin.
Cooking a moderate oven for about 8-10 minutes. Allow to cool in the tin for a few minutes before removing to a wire rack.
For a spiced doughnut, brush the tops with a melted vegan butter and sprinkle with the same sugar and spice mix as above.
For an iced doughnut, melt some dark chocolate of choice, then drop the doughnuts into it and then sprinkle with your choice of decorations. We use the Hoppers 100s & 1000.
So, after recent skin prick tests and blood tests came back showing that my biggest boy’s reaction to hazelnuts had decreased, he was booked in to the children’s hospital for a food challenge.
Scary but exciting. We were asked to bring along some Nutella … not something we have ever had in our house. So I dutifully bought it and Will ate it with great gusto! He was absolutely delighted to have a new food – especially such a sweet treat one – in his diet! Thankfully he passed the challenge and now needs to include hazelnuts in his diet at least once a week for the next couple of years.
Given that the first ingredient in a jar of Nutella is refined sugar, then followed by oil, it is not something I really want to feed to him on a regular basis! So I set about making a sweet choc nutty spread of my own, without all of the added extras.
2 cup hazelnuts (toasted and skin off – or follow the instructions below)
1 heaped tbsp cocoa (or 1 flat tbsp cacao)
1 tsp vanilla bean paste
1/2 tsp flaked pink salt
120 mls boiling water (or up to 160 if you want a thinner spread)
8 medjool dates (pick the big fat juicy ones!)
Optional: 1-2 tbsp maple syrup
If you bought raw nuts, roast them first. I did mine on a tray under the grill (and watched them very carefully!!!)
While the nuts are roasting, seed the dates and cover them with the boiling water. Add the vanilla and salt to the water.
Process the hazelnuts (after rubbing them in a towel to remove skin) for 10 seconds on speed 10. (This will take longer in a food processor). Their oils release best while they’re hot so if you’ve bought roasted nuts, place them in a hot oven for a couple of minutes first. Scrape down sides and repeat.
Add the date mixture, water and all, to the hazelnut mixture and process again until well combined (10 secs on speed 8, scrape and repeat twice).
Depending on the level of sweetness you enjoy add the maple syrup here and process again to combine well (Speed 7, 10 seconds).
Store in a clean, airtight glass jar in the fridge for a couple of weeks.
Yep – you can eat this one by the spoonful too!!
Enjoy 🙂
P.S. If you enjoy cheesecakes, leave about 1/3 of a cup of this mixture in your processor and blitz it together with 200g of your favourite plain biscuit (we used LEDA arrowroots) to make a great crumb base. It heads to the freezer until needed!
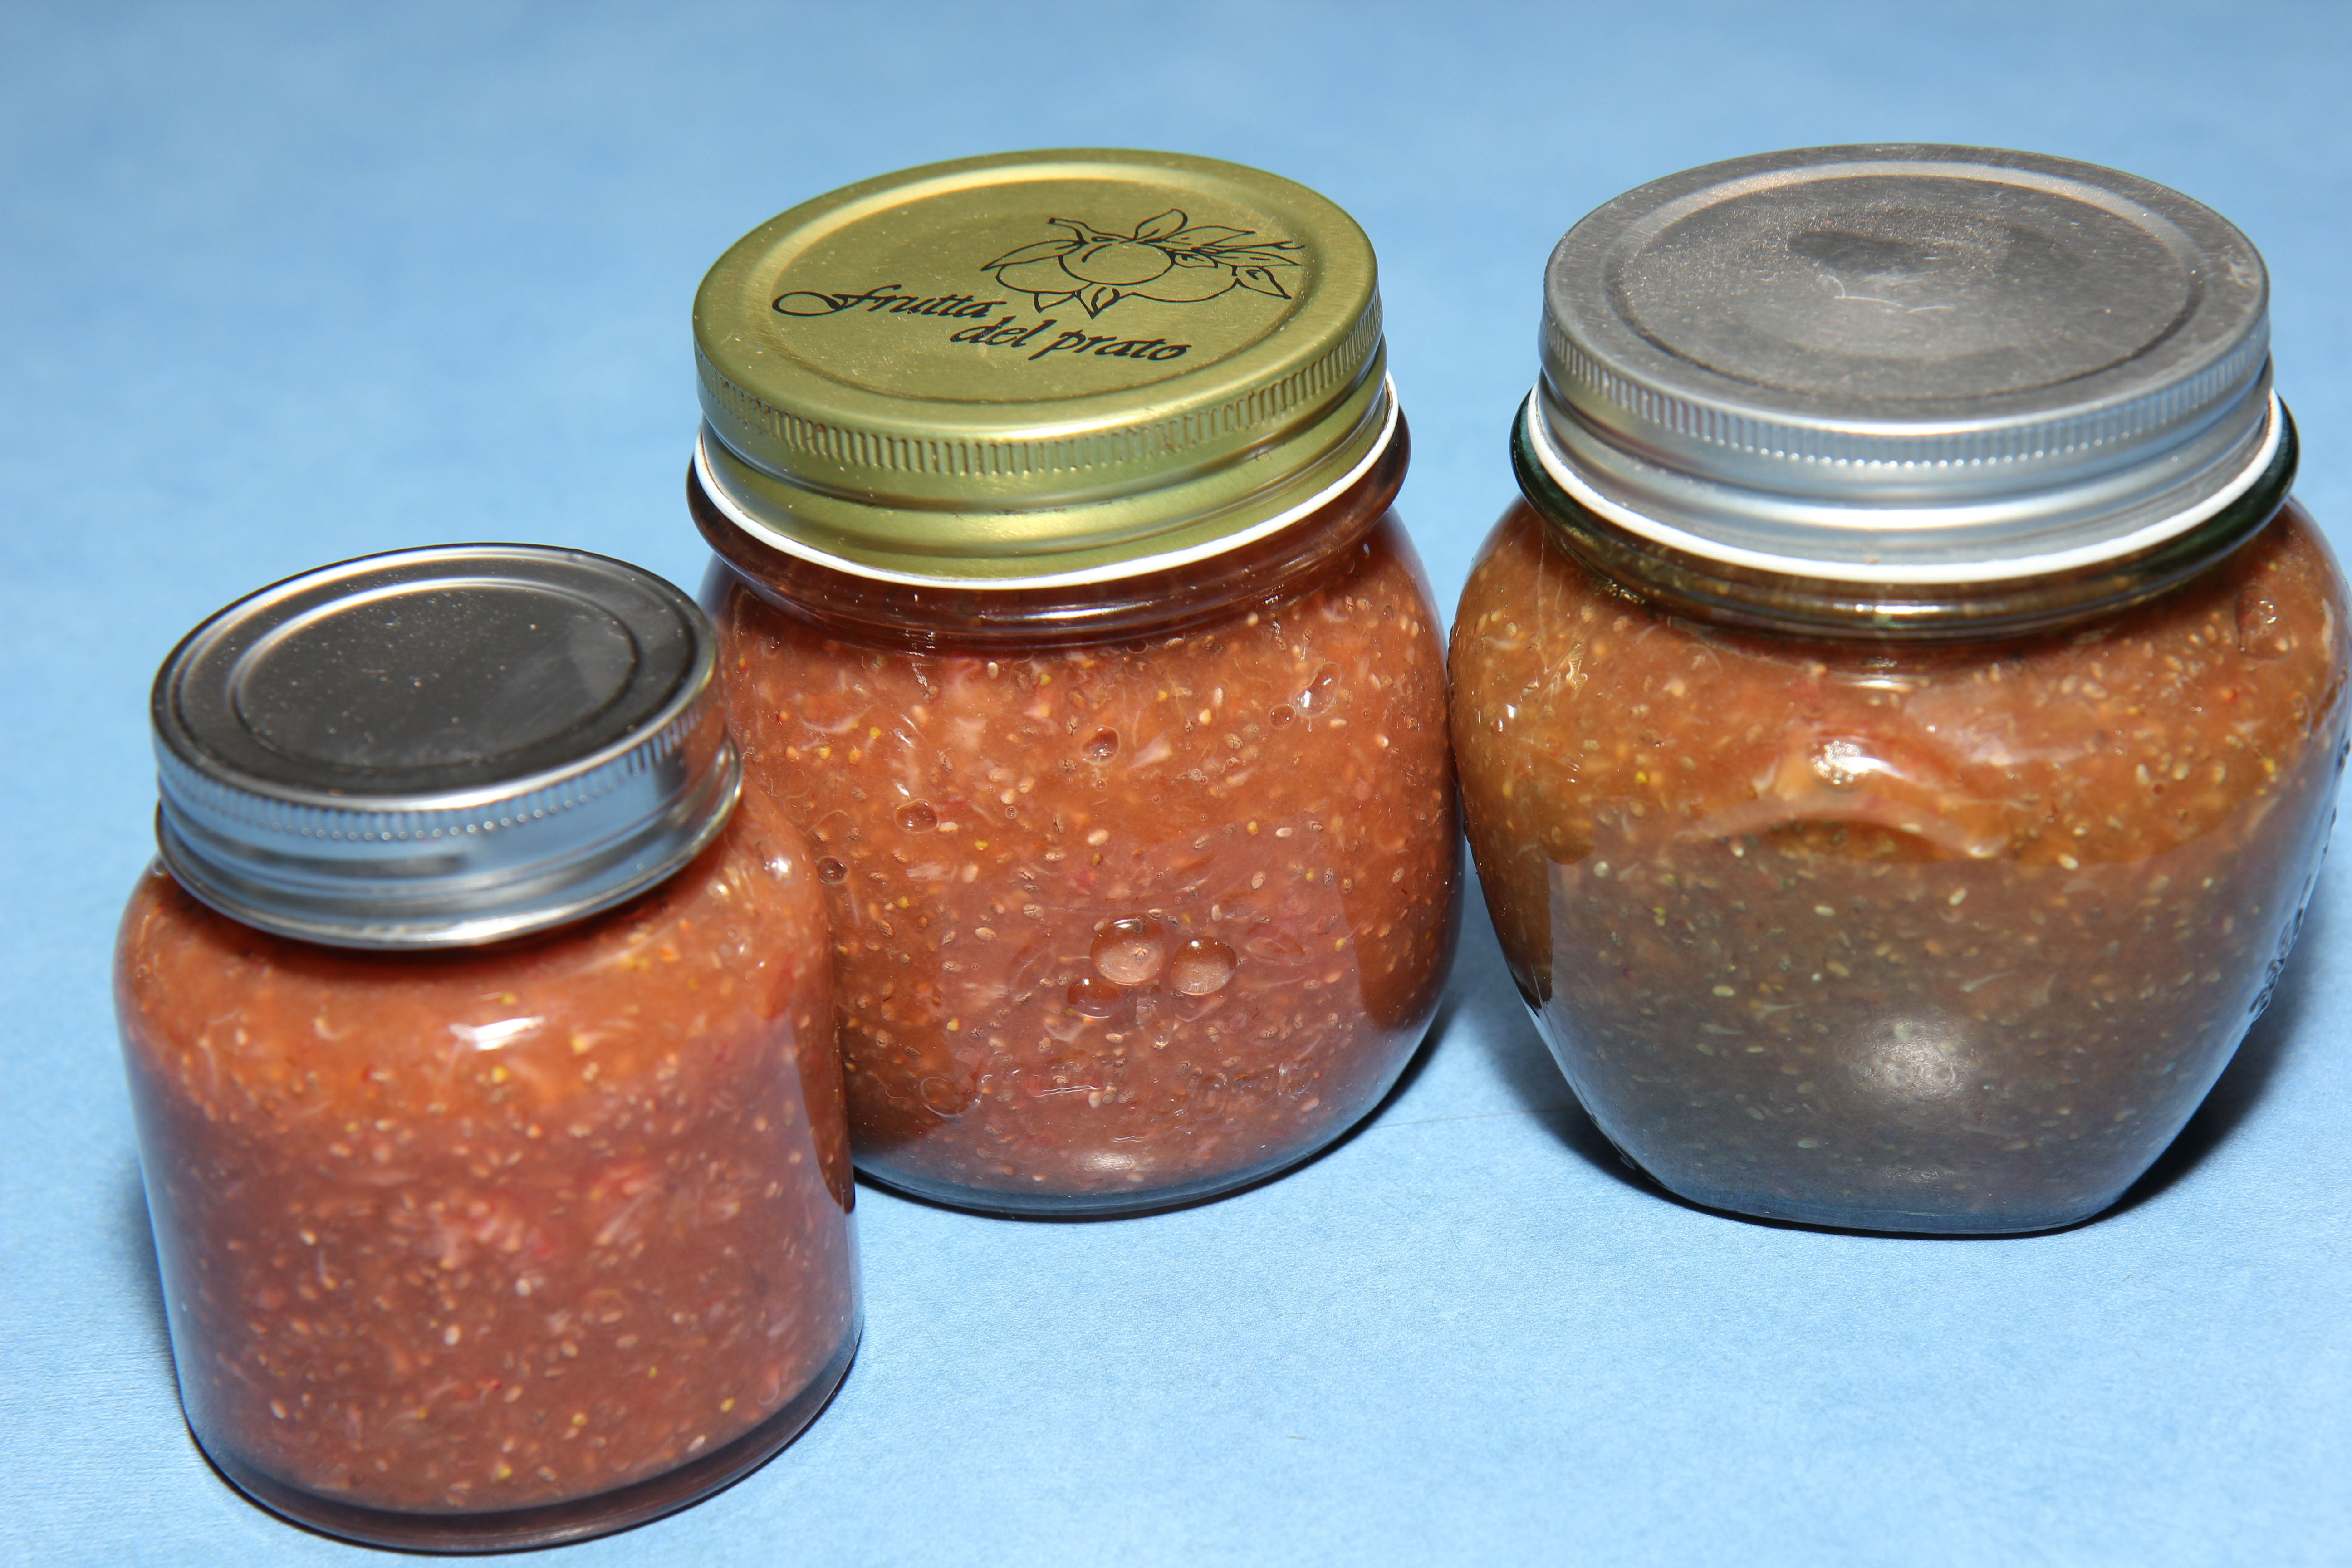
I love that it is healthier and much faster than the normal jam making process!
4 small apples, peeled and cored
3 cups strawberries, hulled
4 tbsp coconut sugar/maple syrup (Optional)
40ml water
4 tbsp chia seeds
Stew the apples together with the water and sugar (if using). (100C on speed 2 for about 10 mins in the Bellini)
Add strawberries and blend until you reach your desired consistency for jam
Add the chia seeds and stir until well combined.
Pour into sterlized jars and place in the fridge. The chia will swell and help the jam to set.
This jam doesn’t have nearly as much sugar as regular jam so it will not keep as long, but that’s not so much of an issue when you can make it so quickly and in smaller quantities!
This also works well with mulberries in place of the strawberries. For the mulberry version I add in the sliced skin of a lemon or an orange to the stewing apples, then remove then skin when I put the jam into jars.
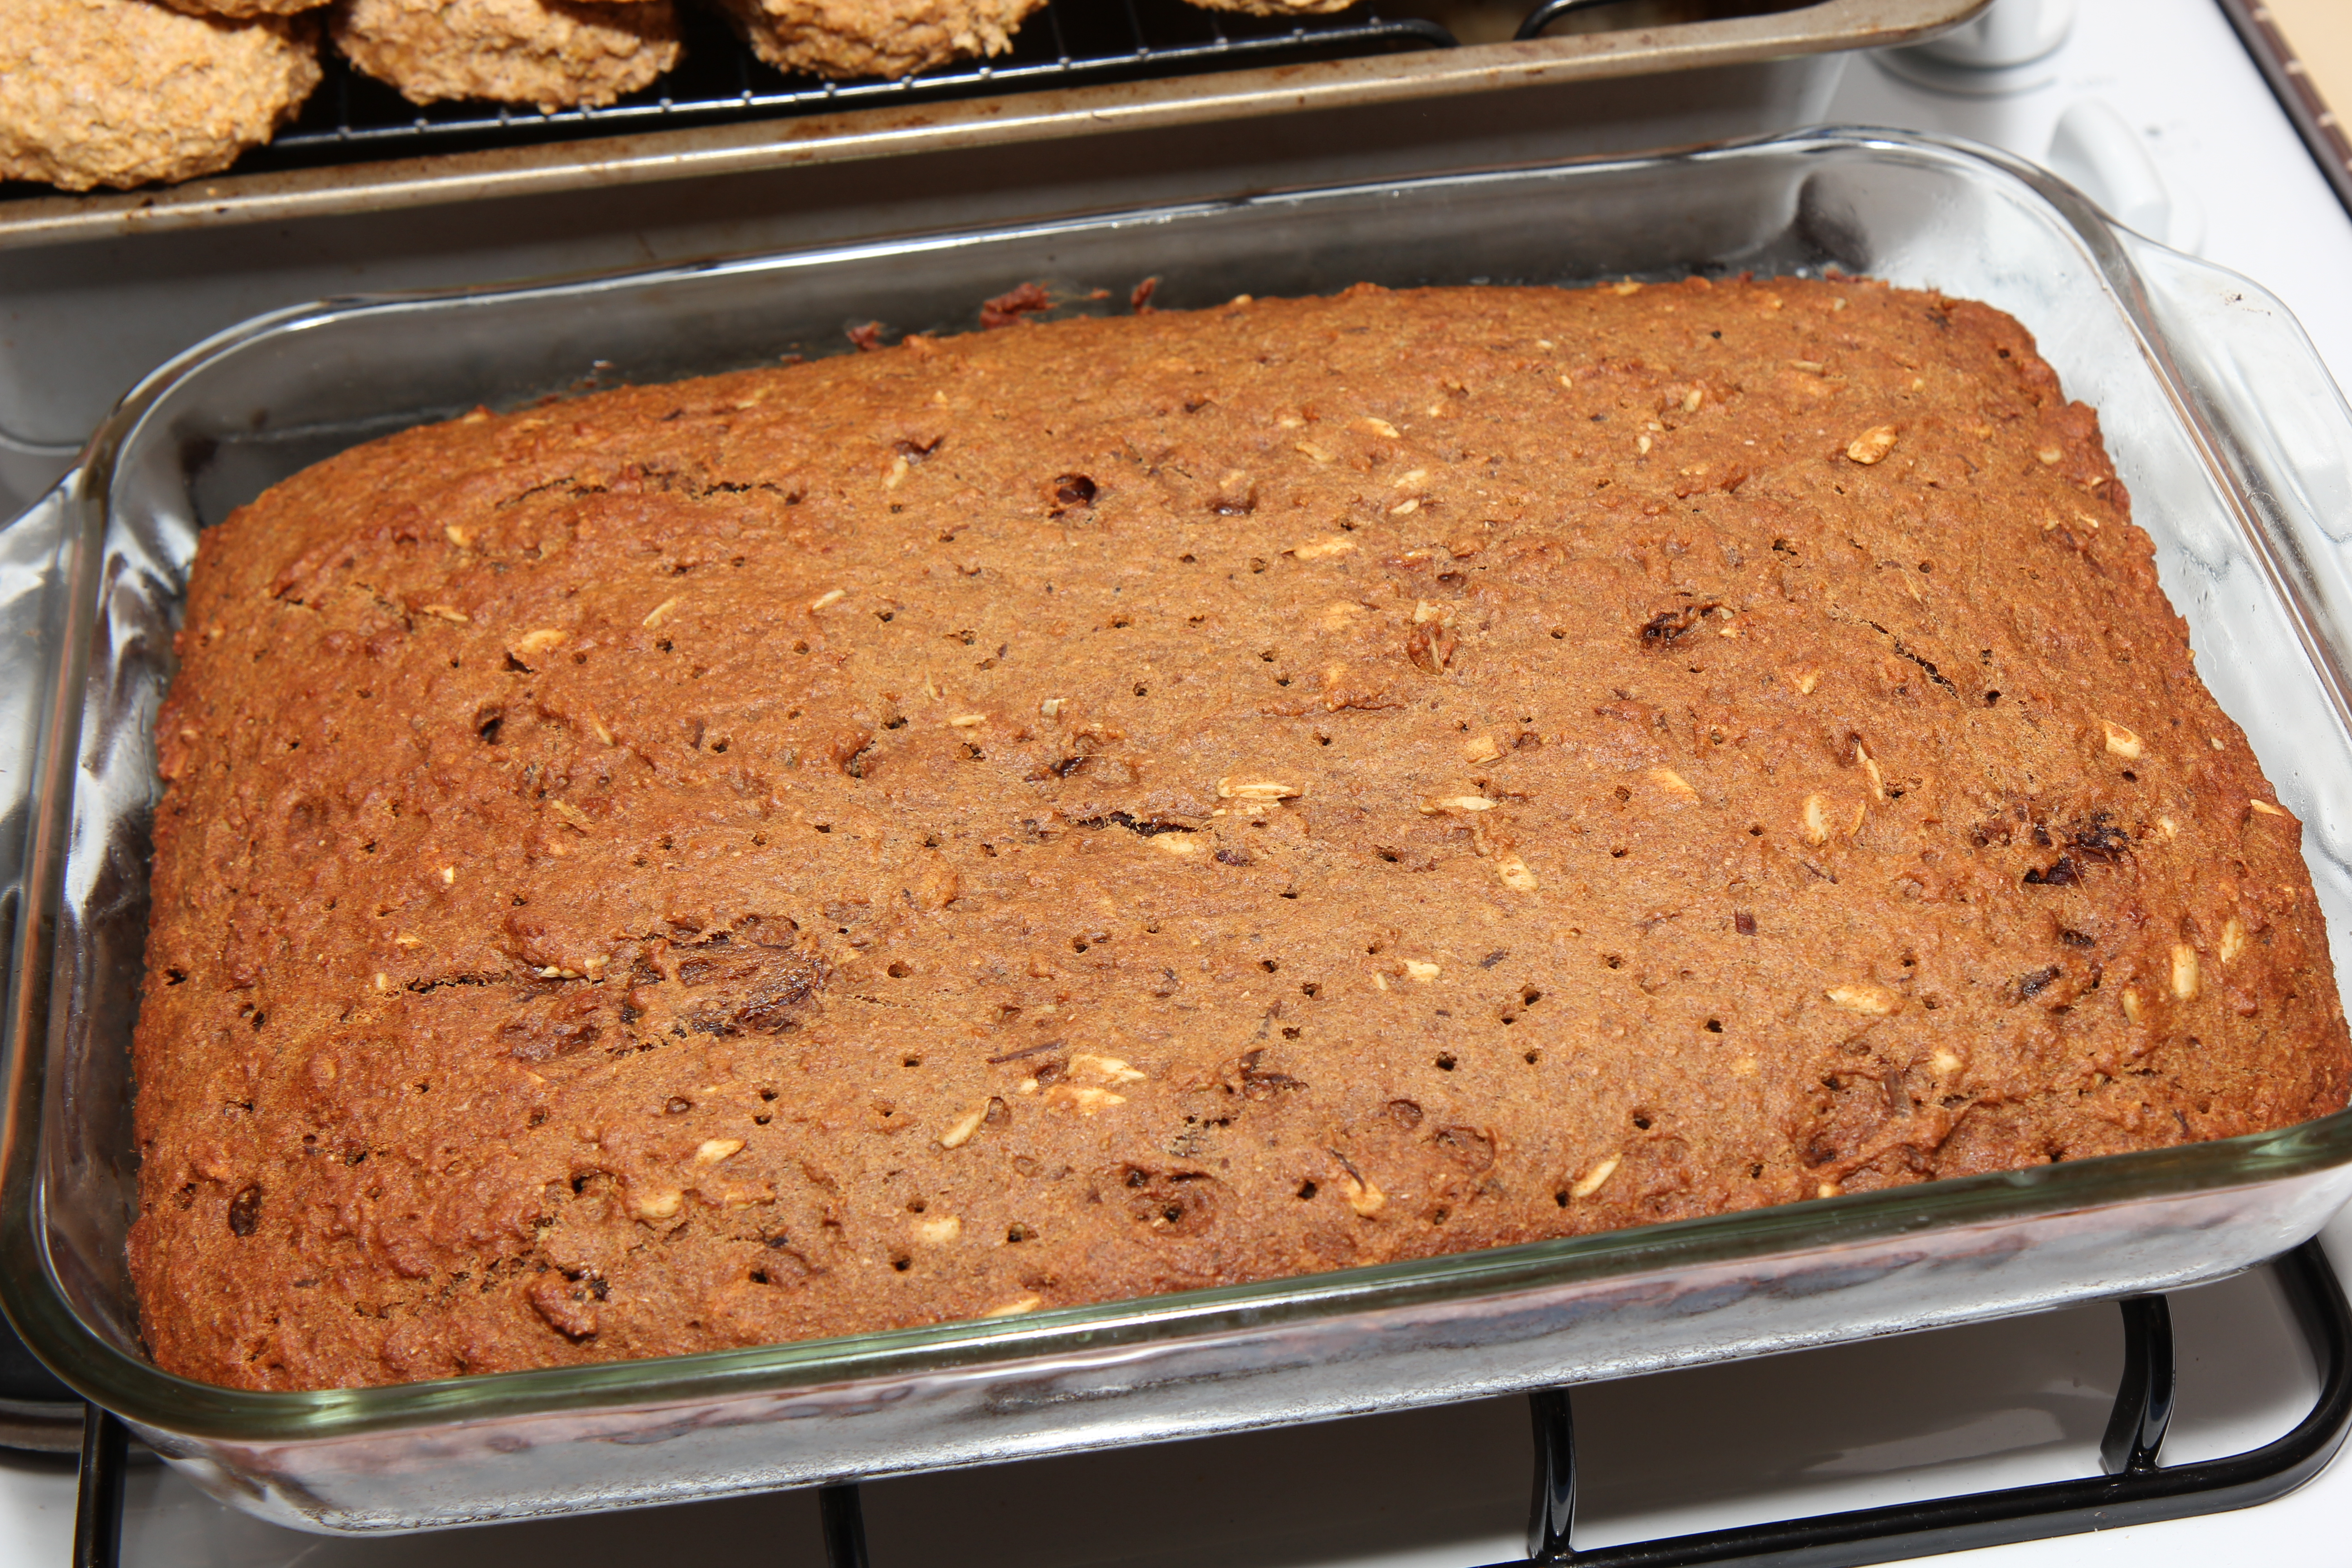
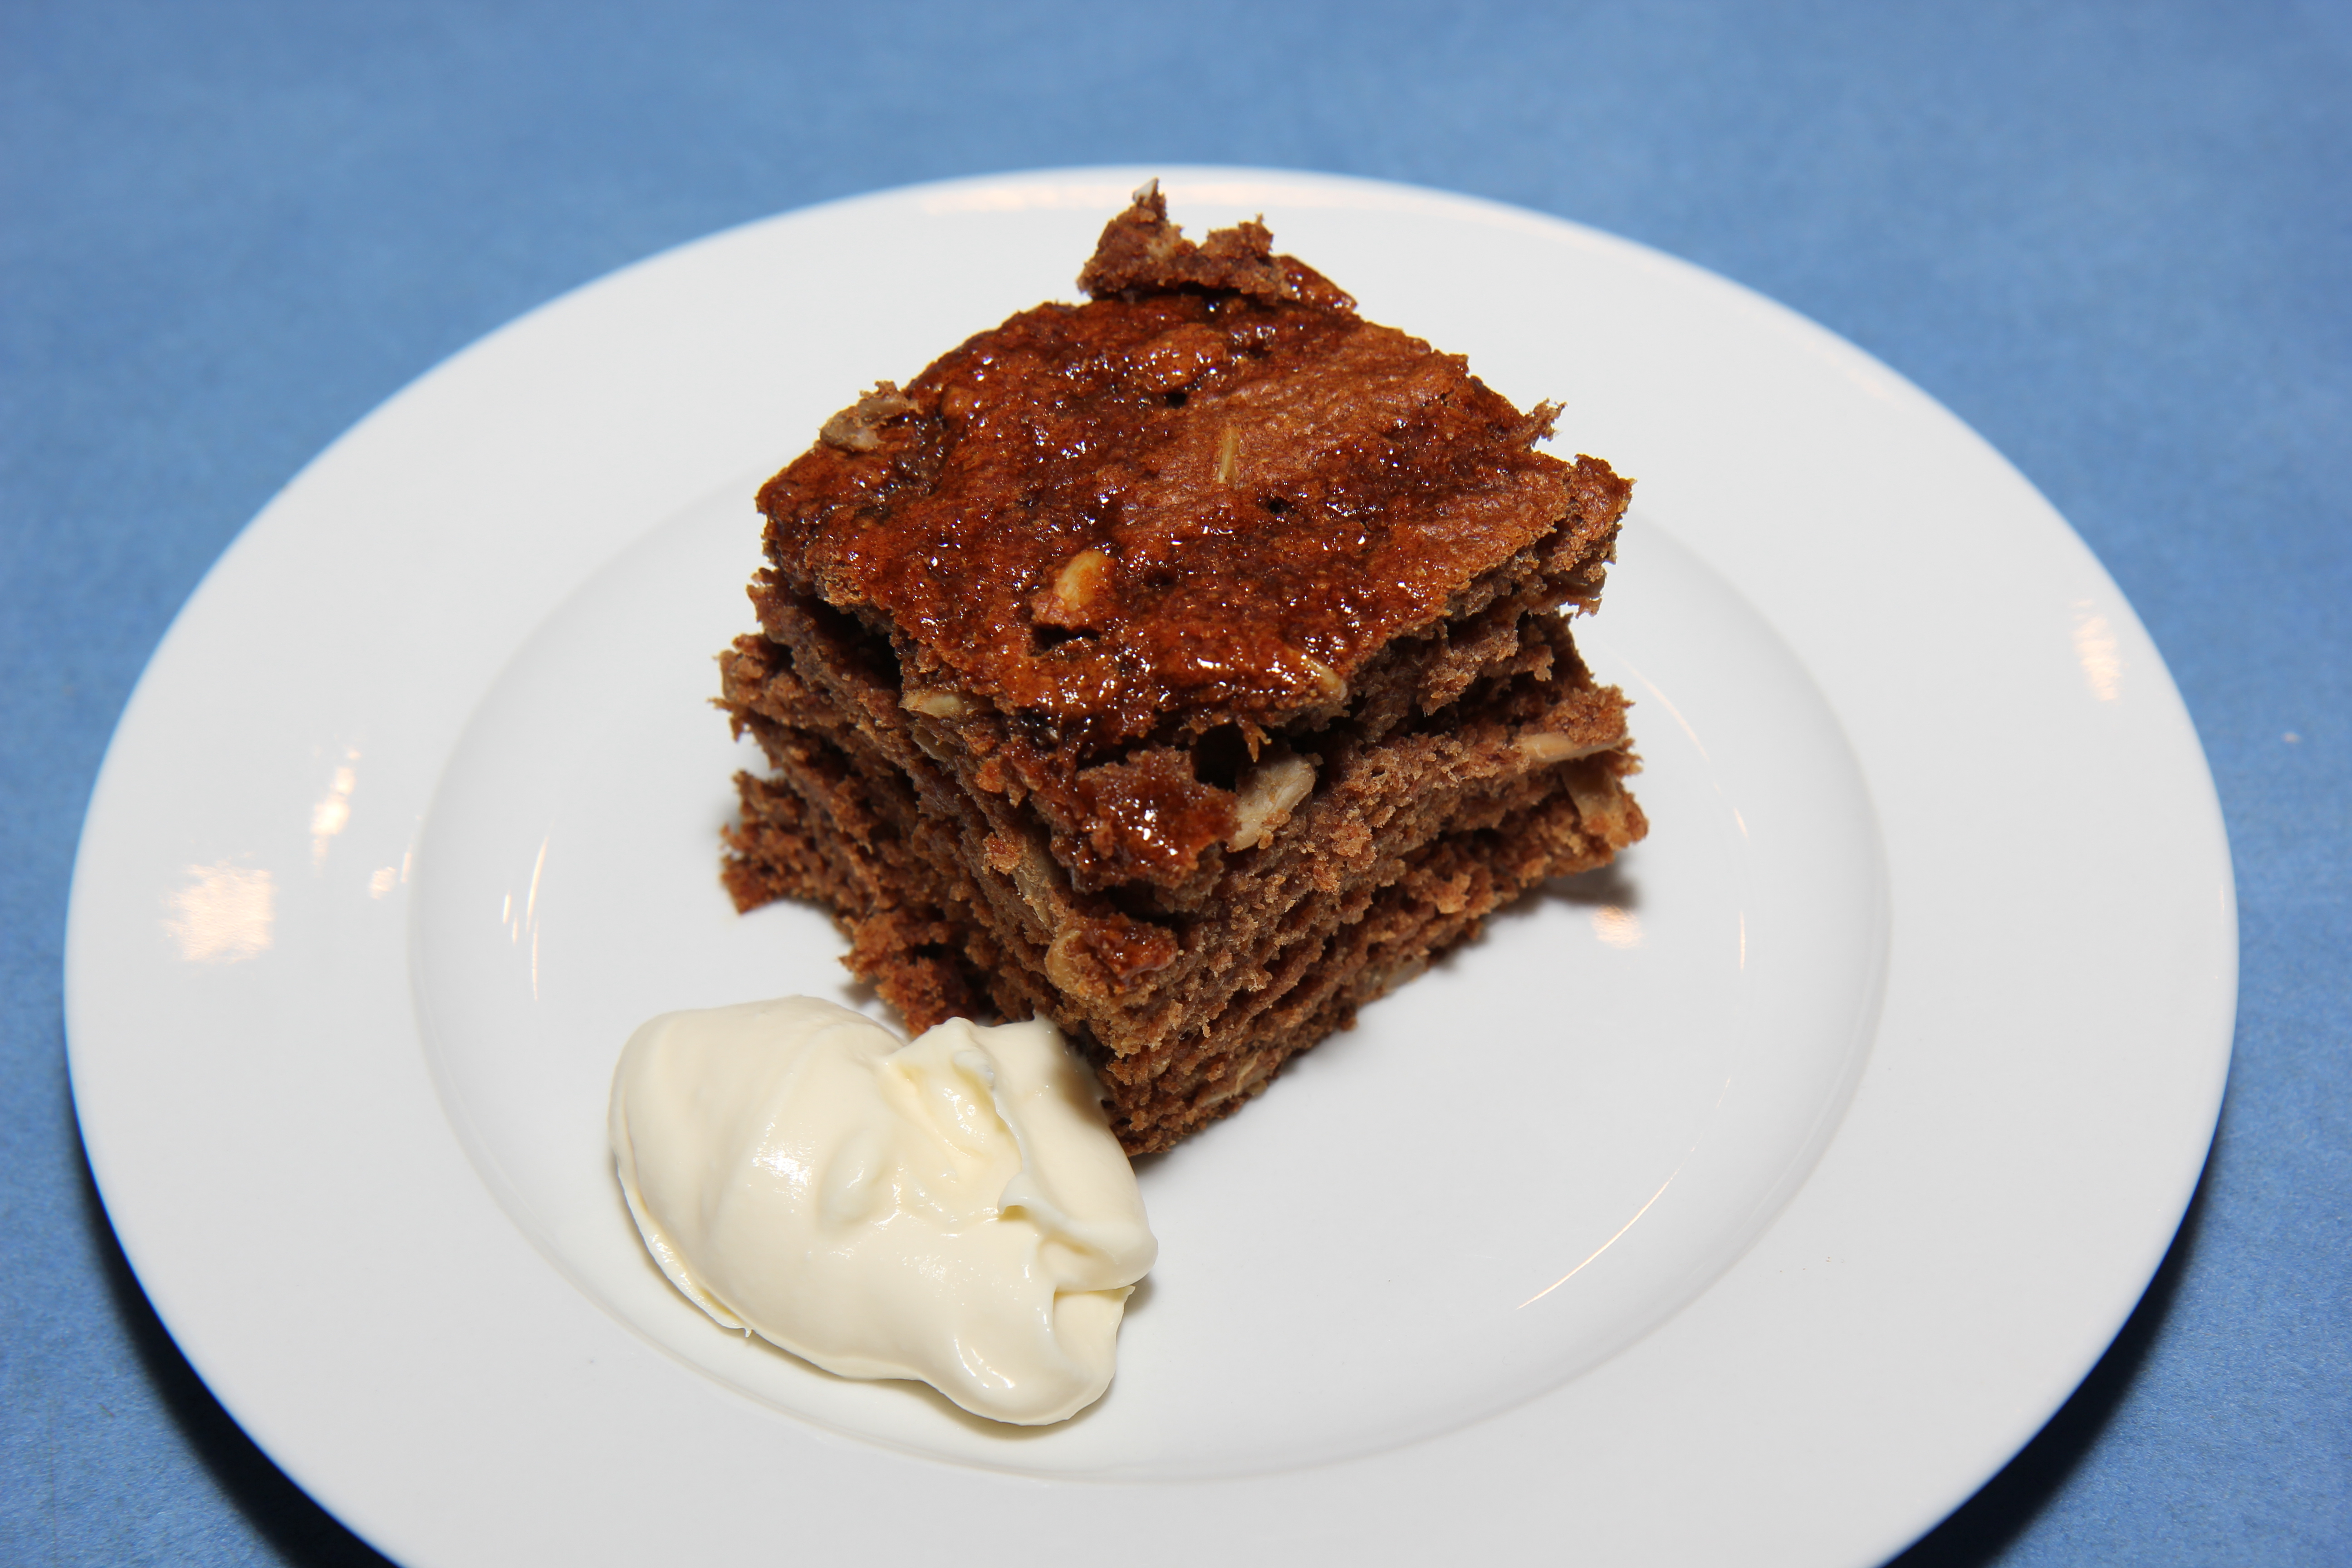
My mum makes the most amazing Sticky Date puddings. They truly are a decadent ‘sometimes food’ but the amount of cream and butter in the sauce means that they have been out for us for the past few years. I’ve missed the sweet warm stickyness so with this dessert I aimed for something similar but a lot healthier!
See below the recipe for a Coeliac friendly option too.
20 medjool dates, pitted and halved
2 cups very hot water
1/2 cup coconut sugar
120g vegan butter or sunflower seed butter
1 teaspoon bicarbonate of soda
4 cups wholemeal spelt flour
4 tsp GF baking powder
3 teaspoons ground mixed spice
2 medium, very ripe bananas
1 cup sunflower seeds
150ml maple syrup
2 tsp tasteless coconut oil
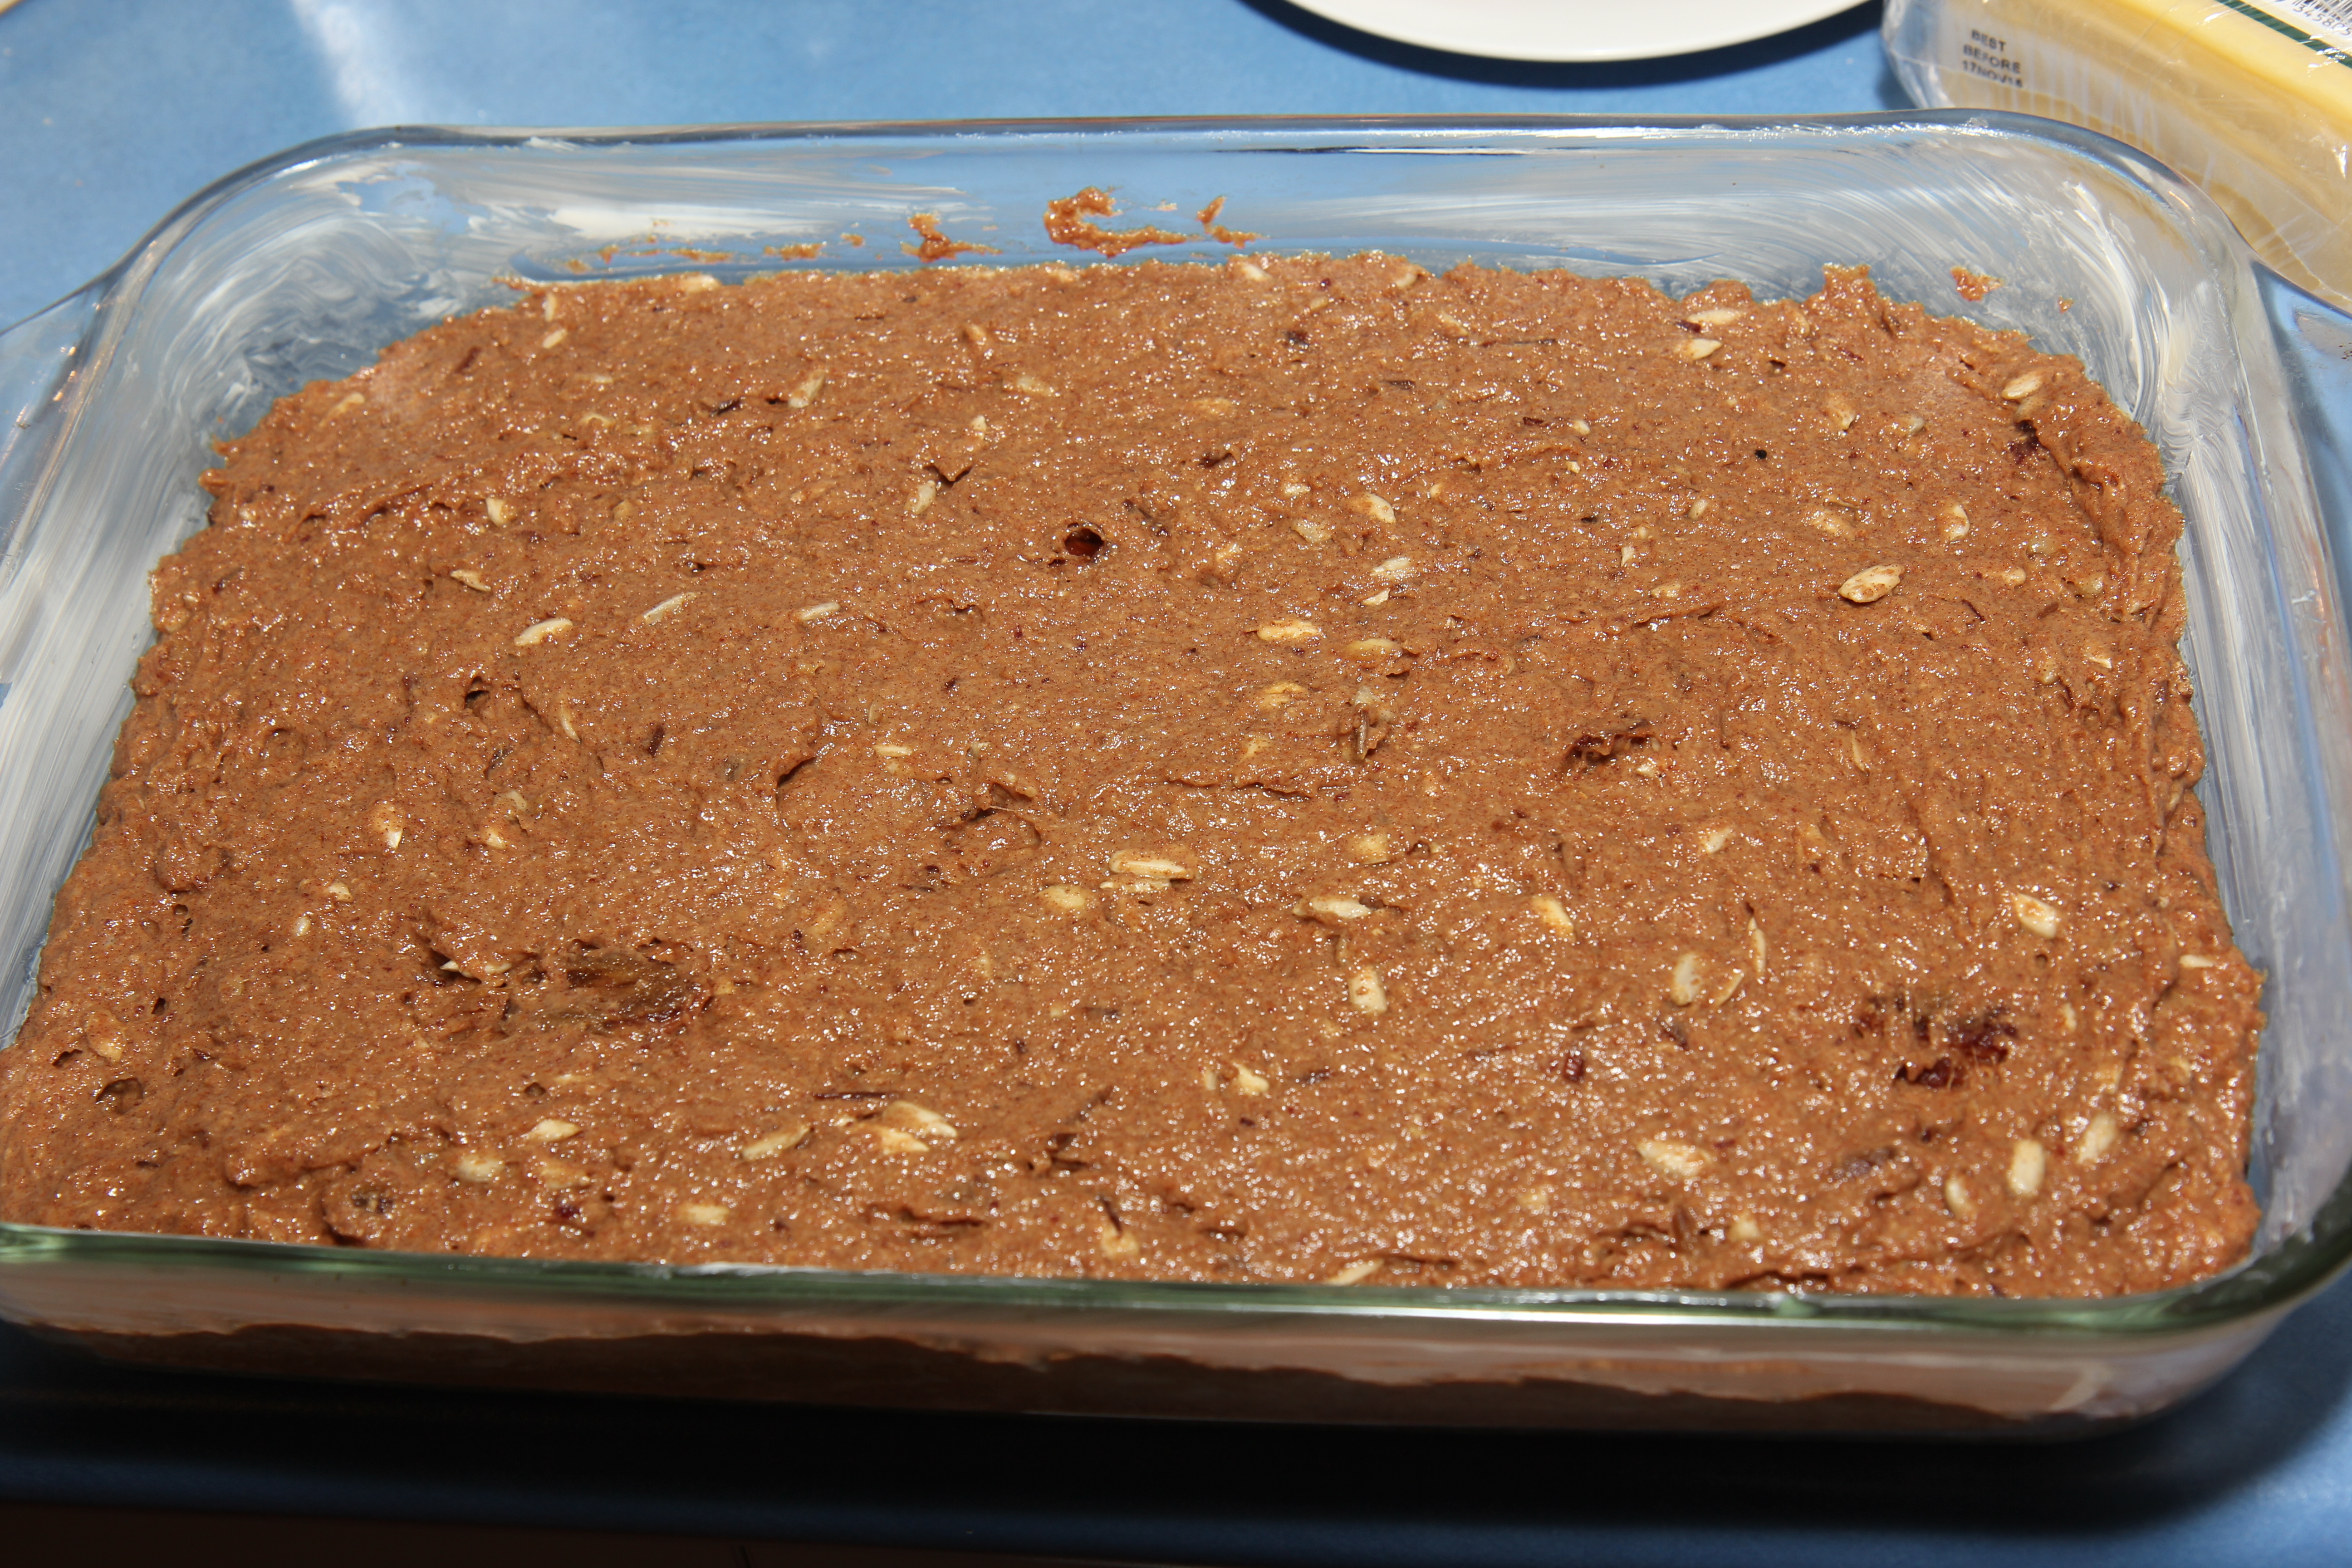
Place dates, water, butter, sugar and bicarb in the Thermal cooker and cook at 100C on speed 2 for about 6-7 minutes, or until the mix comes to the boil. Add in the bananas and start processing on speed 3 and working your way up to speed 5 for about 20 seconds, or until the mixture is fairly smooth and consistent. (Do this in a saucepan over a medium heat with regular stirring and then transfer to a food processor or blender to do this without the thermal cooker) In a large separate bowl mix together the flour, baking powder, spices and seeds. Pour the date mix into the flour mix and fold together until all combined. Grease a large baking dish (this is a big cake!) and pour the mixture in. Cook in a preheated 150C oven for about 45-50minutes. As soon as you remove it from the oven, use a skewer to poke holes all over the cake. Mix the syrup and coconut oil together and heat gently until it is melted. Pour it evenly over the top of the cake. Best eaten warm (and with just a little cream or ice cream if your diet allows!)
To make this cake Coeliac friendly replace the spelt with 3 cups of plain GF flour mix and 1 cup of almond/seed meal.
Makes about 20 serves. This cake is quite moist and so freezes well and a half mixture works well too.
If you aren’t going to eat the cake straight from the oven, poke holes in the cake but leave the syrup off, then warm the cake and the syrup and pour over just before serving.


