Chocolate Bliss Bars

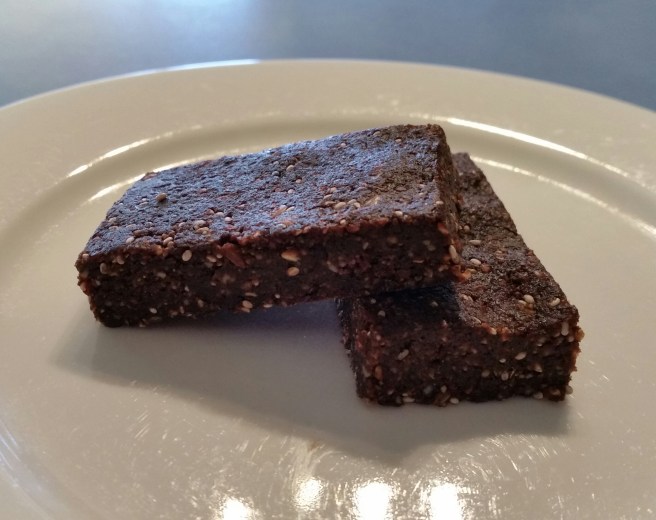
These delicious little bars are a cross between my chocolate bliss balls and my muesli bar slice.

So very yummy, loaded with great stuff to keep you going and really easy to make – and my little Miss Fussypants loves them …. in fact, she had one for breakfast this morning (together with a banana and a glass of oat milk!).

  • 12 medjool dates, pitted
  • 1/2 cup nuts of choice (I used almonds and hazelnuts)
  • 1 tbsp, heaped, sunflower seed butter (or other nut butter to suit your diet)
  • 1/4 cup rolled oats/desiccated coconut/rolled quinoa
  • 2/3 cup mixed seeds (I use a mix of pumpkin, flax, chia and hemp)
  • 2 tbsp cocoa
  • 1/4 tsp pink flaked salt

To make these Nut Free simply replace the 1/2 cup of nuts with an additional 1/2 cup of seeds – roast the seeds first for a ‘nuttier’ taste.

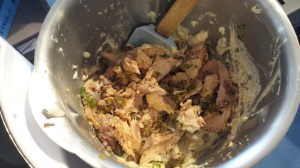
Place all of the ingredients, except the seed butter and the dates into your processor/thermal cooker and process until fine (Speed 8, 8 seconds)

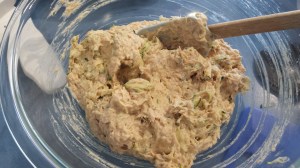
Add in the seed butter and begin processing again (speed 4), then drop the dates one at a time through the chute at the top. Process until dates are totally combined (increase to speed 7 for a thermal cooker once dates are all added). At the right consistency the mixture will clump together in the mixer.

The moisture content of your dates will have quite an effect on the mix. If it is too crumbly, the add a tsp of cold water at a time whilst mixing until the clumping begins.

20161220_094812

Tip the mix into a lined baking tray and, using damp hands, press down firmly.

20161220_095109

Place into the freezer for 30 minutes before removing from the tray and cutting into bars.

20161220_105443

20161220_105656-1

These need to be stored in the fridge (or even the freezer) – and they work better if there is a sheet of baking paper between the layers.

20161220_105843

Makes 15-18 bars depending on the size you cut them.

Enjoy 🙂

Crispy Potato Bites

Hot potato chips and any of their close cousins are a big win with my kids – in fact, with most kids I think! Ok, ok …. with me too!

The kids occasionally have baked potato gems (Tater tots?!) with a meal, but, as with all things, I’d prefer to go with a home made, less processed version if possible. And since we’ve just had a bumper crop of potatoes what better time to give my own version a go?!

This version was hugely successful with my kids – and the biggest kid too 😉  They loved that they were eating ‘their veggies’ and I loved that they were getting the vitamins and minerals found in the potato skins. No need (or time) for peeling or grating here 😀

20161129_171908-1
He was very proud of the results of his digging efforts!
  • 5-6 baby potatoes
  • 1/4 cup flour of choice (GF/Spelt etc)
  • 1/4 cup GF breadcrumbs
  • 1 tbsp nutritional yeast
  • 1 tsp pink flaked salt
  • 2 tbsp aquafaba (OR 1 whole egg, well whisked)
  • spray olive oil
  • OPTIONAL: any fresh chopped herbs or dried spices to complement your meal – rosemary, thyme or dill work beautifully.

20161205_100553-1

Give your potatoes a good scrub, but don’t peel them.

Cut them into bite size pieces and place into a saucepan of boiling salted water.

20161205_100748

Boil for a couple of minutes until they are just becoming tender.

Drain and rinse well. Blot them dry.

20161205_165141

In a separate bowl mix together the flour, crumbs and yeast. Add the herbs or spices at this point if you’re using them.

Coat the potato in the aquafaba (or egg) and then toss in the crumb mix to coat all sides.

Place them pieces on a line baking tray, spray them with oil and sprinkle with the salt.

20161205_171855

Place into a preheated, very hot (220C) oven for about 30 minutes, shaking the tray to toss them after 20 minutes.

20161205_175107-1

This makes about 4 side servings.

Hope you enjoy them as much as this guy …..

20161205_180053-1
‘These are even better than shop chips Mum!’
20161205_175928-1
The biggest kid enjoyed them too 😉

Bulk cooking/prep tip: If you have a bumper crop of potatoes like us, you can pre-prepare a heap of them, by cleaning, cutting and par boiling them, then blotting dry and freezing in an airtight bag. Then just defrost when you’re ready, add the crumb and bake away.

Apricot walnut loaf

Our garden is giving us an absolute abundance of beautiful apricots at the moment. We are so thankful!! It is my biggest boy’s tree and he has been helping himself to the fruit at the rate of about 5 or 6 a day!!!!!! So when he walked inside with 9 more of them last night I had to put a stop to it for fear of a boy with a very sore tummy!!!

fb_img_1480486878300

We decided instead to tweak our blueberry almond loaf to suit this bounty – and this was Will’s review “Oh! Except for the Masterchef guys, no one makes better food than you mum! This is way awesome apricot loaf!”. High praise indeed!! Hope you like it too.

  • 45g light tasting oil (tasteless coconut or rice bran work well)
  • 40g coconut sugar OR 1/4 cup honey/maple syrup
  • 1 cup milk of choice
  • 2 chia eggs OR 6tbsp aquafaba OR 2 whole eggs
  • 1 tsp ground ginger
  • 1/2 tsp ground cinnamon
  • 2 tsp GF baking powder
  • 2 cup wholemeal spelt flour (or a good GF flour mix)
  • 1/2 cup chopped almonds (omit or swap to pumpkin seeds for a nut free version)
  • 1 cup chopped apricots (lightly stewed or tinned).

*if you are a real sweet tooth, you might want to up the sugar quantity to 80g.

In a large bowl (or your processor) mix together all of the dry ingredients (Speed 4, 8 seconds), then set aside.

Now place all of the wet ingredients in your processor/blender/nutribullet/thermal cooker and process until well combined (Speed 6, 6 seconds).

Mix the the dry and wet ingredients until combined – don’t over beat them. Then fold through the walnuts (Speed 3, 8 secs)

Then add the apricots – if you are doing this in a food processor, tip mixture into a bowl and fold through blueberries (recommended method for pieces of fruit that hold together better). In a Thermal Cooker, use speed 4 for 8 seconds.

20161130_123752

Pour into a greased loaf pan and bake in a preheated 170C oven for about 1hr 15 mins, or until cooked through.

20161130_124010

20161130_135624

Or pour into lined muffin tins and bake for about 25 minutes or until cooked through (makes about 18).

Allow to cool before slicing.

20161130_150556

This one freezes and defrosts well.

Chocolate Hazelnut Banana Bread

I was doing the green groceries at the markets with my tribe the other day, when William came up to me holding a package of something cakey looking. Preempting the spiel that he knew I was about to give he said ‘chocolate, choc chip banana bread – I know that you won’t buy this – but could you make me some?’ …. How could I refuse that?!

So here you go Will. You wish is my command (this time anyway!). This is the chocolate/dessert version of my normal Banana Bread.

  • 1 3/4  cups wholemeal spelt flour (a Barley/Rye mix works well)
  • 1/2 cup rolled oats/quinoa/desiccated coconut
  • 1/2 cup coconut sugar (optional, but add it in if you’re a sweet tooth!)
  • 2 rounded tsp GF baking powder
  • 1/2 tsp pink salt flakes
  • 1 tsp cinnamon
  • 1/4 cup cocoa
  • 1/2 cup milk of choice (oat, almond and rice work well – but unsweetened vanilla almond milk is my favourite)
  • 1 tsp apple cider vinegar
  • 2 medium, very ripe bananas
  • 1/4 cup tasteless coconut oil/vegan butter
  • 3 tbsp sweetened condensed almond milk (use a dairy/soy/coconut variety to suit)
  • 1 tsp vanilla bean paste (omit this if you use the vanilla almond milk)
  • 80g toasted hazelnuts (or toasted mixed seeds for a nut free option)
  • 4 squares dark chocolate (Optional)

Process the hazelnuts (or seeds) until they are a fine crumb (Speed 6, 5 seconds at a time). Be careful – don’t go too far and wind up with a paste.

Into a large bowl add all of the dry ingredients, including the nuts/seeds . I don’t do sifting (ever if at all possible!), so I use a whisk to gently mix this dry mixture until it’s even (or speed 4, 8 seconds)

In a large measuring jug, mix the milk and the vinegar and whisk vigorously for a minute. It should become slightly thicker and have lots of frothy bubbles on top. Then set aside for a few (3-4) minutes. Or you can blitz in your blender/nutribullet/thermal cooker for a few seconds (Speed 6, 6 seconds)

To the milk mix, add the banana, oil, condensed milk and vanilla and whisk until well combined. (or another few seconds in the blender/nutribullet)

Add the wet ingredients to the dry, folding them in until just combined – don’t over mix.

Fold through your choc chips or finely chopped chocolate.

Pour batter into a large lined loaf pan, bake at 170C for about 45 minutes, or until a skewer, inserted in the middle comes out clean.

20161114_203223

20161114_212004.jpg

Allow to cool in the tin for 10 minutes before transferring to a wire rack for another 10-15 minutes.

20161114_212213.jpg

You can also make these into muffins if you don’t have as much baking time, takes about 20 minutes and makes 18-20.

This bread is yummy as is, or with a bit of Nuttelex, or even toasted. It freezes and defrosts well, just slice and wrap individually before freezing.

20161115_063636-1

Enjoy 🙂

To make these coeliac friendly, do a straight swap with (Bobs Red Mill All purpose) GF baking flour plus 1 tsp of psyllium.

Strawberry boost muffins

Sometimes you just really need cake.

Yesterday was one of those afternoons.

And since I had a mountain of rapidly deteriorating strawberries and I wanted something that would actually fill me up long enough to last until dinner, I made up these little guys. They are sweet and filling – a few tweaks on my pear surprise muffins (I made the ‘surprise’ dark chocolate part with half of the batch for the kids too).

  • 125g stewed/tinned pears (drained from their juices)
  • 115g ripe strawberries
  • 50g vegan butter/tasteless coconut oil, melted
  • 160g milk of choice (I love unsweetend vanilla almond milk here)
  • 1 medium overripe banana
  • 1 tsp vanilla bean paste (omit this if you use the vanilla almond milk)
  • 1 1/2 cups wholemeal spelt flour OR 1 1/4 cups GF flour mix (I like Bob’s Red Mill All Purpose) plus 1/4 cup almond/seed meal
  • 1/2 cup rolled oats OR desiccated coconut OR rolled quinoa (mill these first if you want to hide the ‘bits’) – you can also use nut or seed meal here
  • 2 tbsp flax seeds (Optional)
  • 1.5 tsp GF baking powder
  • pinch pink salt flakes
  • OPTIONAL: 2-4 tbsp coconut sugar or maple syrup – if you have a sweet tooth.

Into your blender/processor/nutribullet/thermal cooker place the strawberries, pear, banana, Nuttelex/oil, vanilla, milk and syrup (if using). Blitz until smooth (Speed 7, 12 seconds)

In a separate bowl, whisk together all the dry ingredients (Speed 4, 6 seconds)

Add the dry mix to the wet and mix to combine (Speed 4, 8 seconds, scrape down and repeat). Don’t over beat. I often just tip the wet mix into the bowl with the flour mix and combine by hand.

Spoon mix into a lined standard muffin tin and place in a preheated moderate oven for about 20 minutes or til golden and they spring back to a light touch.

20161111_155233

20161111_161412

Allow to cool on a wire rack … then enjoy in peace with a cuppa …wishful thinking?!

20161111_161528

Makes 12 and they freeze and defrost well.

20161111_162410-1

Enjoy 🙂

Chicken Enchiladas

Every time I ask my kids for dinner ideas when I’m writing the monthly menu ‘enchiladas!!’ is the first thing Harry shouts at me 🙂 I honestly can’t keep up with how many he wants to eat!

Everyone else agrees with him, so they are a regular feature on our menu.

As with most of our Mexican inspired food, these are not very authentic…But they are very yummy  so I hope your family enjoys them as much as ours.

Please see below the recipe for our vegan alternative

  • About 1kg chicken thighs (or you can use a whole chicken)
  • 2 tbsp Mexican seasoning
  • 2 heaped cups Salsa
  • 1 tbsp tomato paste
  • Tortillas of choice (check out our masa ones here)
  • Cheese, that fits your diet (we do dairy and bio cheese), grated.
  • OPTIONAL: 1 large carrot, 1 large zucchini and 1 tin kidney beans.

Place chicken into the  slow cooker, sprinkle over seasoning and half of the salsa.

Finely grate the veg if you are using them and then blend together with the drained and rinsed kidney beans. Add to the slow cooker and stir though well.

Place lid on slow cooker and cook on high for 4.5 hours, or 8 hours on low.

Remove and discard the skin of the chicken (if using a whole chicken) then shred the meat.

20161102_135112

To the juices, veggies and salsa in the cooker, add in the paste and whisk to combine. Remove about 1/3 of this sauce and keep aside (for topping the tortillas later).

20161102_135431

Then return the shredded chicken to the slow cooker and fold through the remaining sauce.

20161102_135551

Place spoons of the chicken  in the tortillas, then roll.

20180425_161808
These ones have the added veggies and are made with seeded whole grain wraps.

20161102_152254

Fill your baking tray with the filled and rolled tortillas, then cover with the rest of the salsa and veggie mix and sprinkle with cheese.


20161102_153056
These are plain white tortillas without the added veggies …. They were added as a Mexican bean side salad instead!

Bake in a preheated moderate oven for about 25 minutes, until cheese is melted and the tortillas are golden.

20161102_165019.jpg

If you’re a fan of the shredded chicken and the flavour of the meal, but would prefer a lighter option without the cheese and tortillas, then it is delicious and refreshing served with my Mexican Bean Salad.

20161102_153847

And, if like my husband, you are a fan, go ahead and add a dollop of either dairy or soy based sour cream (it’s not my thing so I always forget it – much to his disappointment!)

To make our vegan version of these enchiladas we leave out the chicken and instead add in a large can of mixed beans and another can of kidney beans. The dish then needs to be cooked for only 3 hours on high or about 5 on low. Top with your favourite vegan cheese. I’m looking forward to experimenting with jackfruit here as another alternative too and will update the recipe when I do!

Enjoy 🙂

Spinach and Basil Pesto

Pesto is such a yummy addition to so many meals, but with pine nuts and parmesan being a standard in most recipes, it’s normally not an option for us.

But this year my both my basil and my spinach are growing great guns so I was inspired to make a pesto that would use our fresh produce and be safe.

  • 1 packed cup fresh basil leaves
  • 1 packed cup fresh spinach leaves
  • 1 tsp minced garlic
  • 1/2 tsp pink salt flakes
  • Juice of half a lemon
  • 1/4 cup pepitas (50g)
  • 1/4 cup sunflower seeds (40g)
  • 1/4 cup hemp seeds (40g)
  • 50g extra virgin olive oil

Dry fry the seeds in a hot frying pan. Keep a close eye on them, stirring regularly, as it only takes a couple of minutes for them to go golden brown.

20200102_122217

Add all ingredients, except the olive oil to your blender/processor/thermal cooker and process until quite fine (speed 8, 6 secs, scrape down and repeat).

20200102_122608.jpg

Process again as you slowly drizzle the oil through the top opening of the machine (speed 4). Process until oil is well combined.

20180108_152916


Use immediately or freeze in ice cubes for future use. Makes about 1 cup.

20161031_100724.jpg

Some ideas for use:

  • Rub onto chicken pieces or salmon before baking
  • Add in a handful of sun-dried tomatoes at the processing stage and stir through pasta (Especially awesome if you top with some crispy bacon and home made garlic croutons!)
  • Fold through some cream cheese (soy based or dairy) or a ripe, mashed avocado as a great dip.
  • If you enjoy the Parmesan flavour that a lot of pesto has, add in a tbsp of Nutritional Yeast

20161122_131746


Enjoy 🙂

Strawberry, apple and chia jam

Yesterday I did our markets shopping was seriously delighted to find a tray of strawberries for $8.

20161014_133202-1

15 punnets of those bad boys – that’s a lot of berries!

We have several punnets in the fridge, I hulled 6 punnets and froze them for smoothies and baking and use another punnet in my morning muffins …. and there was still more.

So … jam it is – why not get a head start on teacher’s Christmas gifts?!

I’ve never made a preserved jam in my Bellini (Thermal Cooker before) so this was my first go …. and it so very easy!!

Now – this is lower in added sugar than most jams, and it is unrefined sugar – but it is still a lot of sugar… so, you know – be sensible 😉

  • 600g punnet strawberries, hulled
  • 400g sugar of choice (I used coconut sugar)
  • the juice of 1 lemon
  • 1 green apple, chopped (skin on)
  • 1 tsp vanilla bean paste
  • 2 tbsp chia seeds

Place the strawberries in the bottom on the machine, then add all the other ingredients, except the chia seeds.

Set the machine to 100C, Speed 2 for 15 minutes.

Then turn the temp up to ST (Steam Temp), but the speed down to 1 for a further 15 minutes.

Add in the  chia seeds and and cook on ST, Speed 2 for a further 8 mins.

Check that it is ready (Check out these tips from Taste on checking for setting point)

Pour into hot sterilised jars and seal.

*If you don’t have a thermal cooking machine, check out my Mulberry jam post for a traditional jam making method*

20161015_103018-1

Enjoy!!

Salmon and Zucchini Tart

A long time ago (and it may as well have been in a galaxy far far away!!), before kids and before food allergies, Libby made us a delicious salmon tart. Goodness it was wonderful but since it was full of sour cream and egg whites it has been off our menu for 8 years.

Then I made some Pumpkin Tarts for my Mum’s birthday and the filling for them gave me an idea!!!

So I set to work to try and re-create Lib’s amazing Salmon Tart and we ate the results tonight. Result – amazing!!!!!! The texture and flavour were SO similar and everyone loved it (well, ok, except my little miss … but … really, if I only cooked what she loved, we’d live on sausages!). Peter ate seconds and thirds, Harry gave it 99%, Will licked his plate clean and asked for it in his lunchbox and George demolished it (but to be fair, he does that with almost everything).

I’m so excited to have little versions of these that I made with the left overs for lunch tomorrow!

  • 300g silken tofu (medium firm)
  • 3 tbsp hummus
  • 2 tsbp nutritional yeast
  • 1/2 tsp pink salt
  • few grinds of black pepper
  • 1 tsp fresh chopped dill
  • 1 tbsp rinsed and chopped capers
  • 400g tin of salmon, skinned and boned
  • small zucchini, grated and squeezed of its liquid
  • 1/3 cup aquafaba (liquid drained from a can of chick peas)
  • 1 sheet of shortcrust pastry*

*today I made a spelt pastry by pulsing together 200g flour, 1/2 tsp pink salt and 120g cold vegan butter into a crumb. Bring it together to a disc, cover and place in the fridge for  half an hour. Roll out to dish shape/size on a floured surface and then blind bake in a moderate oven for 20 minutes.

Remove the tofu from it’s package, drain and pat dry.

Into your blender/food processor/thermal cooker place the tofu, hummus, nutritional yeast and salt. Process until smooth (Speed 4, 20 seconds).

Add in the salmon, dill, pepper and capers. Process until smooth (Speed 4, 20 seconds).

20160920_111925

Pour into a large bowl and stir through the zucchini.

20160920_112753

In a stand mixer place the aquafaba in a small, clean bowl and mix on highest speed for about 4-5 minutes or until you get soft peaks (not as stiff as for a meringue).

Tip the whipped aquafaba into the salmon mix and gently fold through until incorporated – go gently, you don’t want to lose all of that lightness.

20160920_123409

20160920_123501

Pour the salmon mix into the blind-baked pastry and return to the preheated oven for 35 minutes.

20160920_123643

20160920_132416-1.jpg

The filling will still be quite soft on removing from the oven, but will firm up more as it cools.

20160920_181816.jpg

Slice and serve with salad or veg.

It does well being reheated and last a couple of day in an air tight container in the fridge.

Enjoy!!

Roast pumpkin tarts

My wonderful mum – who has been the inspiration for much of my baking, and certainly gave me her love of cooking – recently turned 60.

vickis-high-tea-078
With my Mum, my Nanna and my little miss – all frocked up to celebrate.

She had a most delightful High Tea at her home to celebrate and I was asked to do the baking for those with special needs. So much fun to make little treats!

high-tea

One of the ‘normal’ foods that was served was quiche. Quiche is delicious, no question, but normally full of gluten, egg and dairy – So I came up with my version and it was really well received …. even my carnivorous husband who knew what was in them!

The filling for the tart was based on this one from Minimalist Baker.

  • 2 handfuls of diced pumpkin
  • garlic olive oil
  • 1 tsp fresh, chopped rosemary
  • 1/2 tsp pink salt
  • a few grinds of black pepper.

Preheat your oven to 200C, brush the pumpkin with the oil and sprinkle with rosemary, salt and pepper.

Bake for about 40 minutes or until golden and roasted.

20160916_115820

  • 2 sheets ready bought puff pastry (that fits your diet)
  • 300g silken tofu (medium firm)
  • 3 tbsp hummus
  • 2 tsbp nutritional yeast
  • 1/2 tsp pink salt

Remove the tofu from its package, drain and pat dry.

20160916_111314

Into your blender/food processor/thermal cooker place the tofu, hummus, nutritional yeast and salt. Process until smooth (Speed 4, 20 seconds)

20160916_112339

Cut the pasty and place into greased muffin tins.

Spoon the tofu mixture into the pastry cases.

Top with pumpkin, pressing it down into the mix, and add some pine nuts if your diet allows.

20160916_121101

Place into a preheated moderate oven and bake for about 25 minutes.

20160916_141006-1

Serve warm or cool. These also reheat well and will last 2-3 days in an airtight container in the fridge.

You can make a bigger version too – blind bake your pastry in a pie dish, add in your desired veggies (I added spinach to this version)  and then top with the tofu mix.

20161015_175039-1

20161015_191107-1Enjoy!