Almost ANZAC biscuits

This week in Australia we remember ANZAC day.

It marks the anniversary of the landing at Gallipoli of the Australian and New Zealand troops during WW1. It is a time when Australians give thanks for the sacrifices that our service men and women (including both of my beloved Granddads) have made for our country. We remember with the Dawn Service, the March and ANZAC biscuits.

The biscuits were originally sent in care packages to troops far off because they were cheap to make, didn’t contain any eggs and they kept well for a long time – after the end of the war they were sold as a fundraiser and today they are the only commercial good allowed to carry the name of ‘ANZAC’. They are delicious and thankfully, very easy to make into an allergy friendly version – plus, you can be very flexible with them based on what you have in your pantry.

See below the recipe for a *coeliac friendly version.

  • 1 cups rolled oats
  • 1 cup plain flour  (GF flour, spelt, wheat – all work)
  • 1/4 cup desiccated coconut
  • 1/4 cup of almond meal (or seed meal)**
  • 5 tbsp coconut sugar (or other sugar)
  • 125g melted butter or oil (coconut oil, olive oil and melted vegan butter all work well, as does a nut oil if it suits you)
  • 50g golden syrup/honey/maple syrup
  • 1 tsp bicarb soda
  • 2 tbsp boiling water.

*For a Coeliac friendly version: you can replace the oats with a mix of rolled quinoa and puffed rice.

**to omit the almond/seed meal, replace it with an extra 1/4 cup coconut.

Mix together the dry ingredients, except the bicarb soda, in a large bowl. (Speed 4, 10 seconds). Then set aside.

In a medium sized saucepan (or microwave), melt together the oi/butter and syrup. (Speed 2, 100C for approx 2 mins)

In a separate bowl, mix together the bicarb and boiling water and then add to the butter/syrup mix. It will froth up to about double the volume.

Add the wet mix to the dry mix and combine well (Speed 4, 8 seconds, scrape down and repeat).

On a greased baking tray place heaped teaspoon-fulls of the mixture and flatten down slightly. They need to have quite a bit of space in between.

20170423_120254

Cook in a preheated oven at 170C for about 15-20 mins or until golden brown.

20170423_122521

When you remove them from the oven they will be quite soft. They will harden as they cool. Leave them on the tray for 10 minutes before transferring to a wire rack to finish cooling.

20200415_104919
These have extra oats replacing the coconut and almond meal – based on what was in my pantry!


20190726_115017
These ones have puffed rice replacing the coconut.

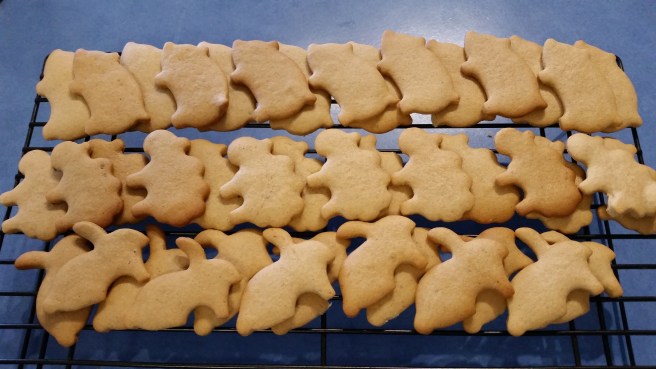
Makes about 18 biscuits and they keep well in an air tight container for a couple of weeks … but they never last that long in my house!

A double batch of these bikkies is a great solution for Church suppers or bulking up for lunchboxes.

20200424_100816


Enjoy 🙂


Oat Milk

My little miss loves her oat milk. We have found a great brand that is unsweetened and free from weird additives …. my only problem is the price. $3/L or more …. eek!!!!! Works out to over $430 a year!

Not helpful for this tight budget. So, for this month we are leaving those 12L on the shelf and making them ourselves.

So easy and so cheap!! You do need a good high powered processor and a nut milk bag or a cheese cloth for straining.

  • 1/2 cup rolled oats
  • 1 cup boiling water
  • 4 cups water (boiled and cooled)

Optional extras:

  • pinch pink salt
  • 1 tsp vanilla beans paste
  • 1 tsp maple syrup OR date paste

Place oats in a bowl and pour over the boiling water. Allow to sit for about 15 mins before draining and rinsing gently. ** You can skip this step if you are in a hurry, but you might find that your milk is a little slimy in texture.

Place soaked and drained oats and all remaining ingredients into your blender/processor and blend on high speed until very smooth. (Start on speed 5, working up to speed 7 for about 20 seconds).

Strain the mix through the milk bag into your milk bottle/container and use your hands to squeeze out any excess.

20170405_141406

You can discard the remaining pulp, or to get the very most of your money and your food, spread it out on an oven tray and dry it out on a low heat in the oven then use it in baking (works like almond meal).

Just like the life of the store bought milk, this will store in the fridge for 3-4 days – shake well before use.

20170405_141618-1

lIt is creamier and thicker than the store bought variety so you may want to thin it out by adding a little extra water if that suits your taste preference.

20170408_094524-1

This makes 1L.

Enjoy 🙂

Choc Banana Breakfast Bars

Well, breakfast, or any time you need a filling snack to fuel you well!

These are a twist on my Banana Oat Biscuits. Super easy to make from stuff I always have in my pantry and quick enough that you can have a batch knocked up for breakfast in 5 minutes!

The fibre, great fats and protein help to boost your energy levels and keep you full for a while and the cinnamon in the mixed spice is useful for stabilising blood sugar levels … what’s not to love?!

See below the recipe for a Coeliac version and a few extras.

  • 2 large bananas, very ripe
  • 3 cups rolled oats
  • 1 tsp mixed spice
  • 1 heaped tbsp sunflower seed butter (or other nut butter)
  • 1tbsp cocoa
  • 1tbsp honey/maple syrup
  • 2tbsp almond meal
  • 3 tbsp milk of choice (unsweetened almond is great here)
  • 3 tbsp aquafaba OR 1 whole egg
  • Pinch salt flakes

In your blender/processor/bullet/thermal cooker add the bananas, milk, aquafaba, honey and seed butter until smooth. (Speed 3 working up to speed 5 for 15 seconds).

In a large bowl use a whisk to mix together the remaining dry ingredients.

20170405_065045-1

Pour the wet mix into the dry and fold together until well combined.

20170405_065251

If using your blender or thermal cooker or processor to combine the two mixes use a low speed, so that you don’t shred the oats.

Place into a lined baking dish (mine is 25cm x 18cm), smooth and press down firmly.

Place into a preheated moderate oven for 20 minutes.

20170405_065826

Allow to cool before slicing. Makes about 12 bars.

20170405_074542

Store in an airtight container in the fridge or even in the freezer.

20170405_074743

Extra Options:

To make these coeliac friendly use 2 cups puffed rice and 1 cup rolled quinoa in place of the oats.

For nut free use a seed meal OR replace with 2 tbsp of wholemeal flour

For a sweeter option you could mix through some chopped dried fruit (dates or sultanas are my favourite but cranberries or apple work too)

20170405_081134-1
This little dude takes aaaages to get going in the morning so breakfast is often ‘on the go’ for him – these are perfect!

Enjoy 🙂

Honey Biscuits

These ones are a little twist on my Tiny Teds.

They’ve had a bit of a nutritional boost but they still passed the taste test from my very perceptive and discerning Harry 😉

No-one messes with his favourite bikkies and gets away with it …. or do they?! He has happily eaten many of these and literally jumped up and down in the kitchen when he has seen that there were more stashed away in the pantry!!

See below the recipe for a Coeliac friendly version and a ginger snap option too.

These are super delicious and quick to make – and everyone loves home made bikkies!

  • 30g plant based Butter
  • 30g Sunflower seed butter (or other nut butter that suits)
  • 140g honey/maple syrup/golden syrup
  • 1 tsp vanilla bean paste
  • 220g plain flour of choice (I use spelt and do half wholemeal)
  • 50g almond meal OR 60g hemp seeds
  • 3/4 tsp bicarb soda
  • 1/4 tsp cinnamon

In a saucepan, over a medium heat, melt together the butter, honey and vanilla (100C, speed 2 for 2 11/2 mins or until completely melted). Remove from stove.

Use a whisk to mix the bicarb, almond meal, cinnamon and flour together and then add to the wet mix (Speed 4 for 8 seconds with the bicarb, then add flour and speed 5 for 15 seconds). If your mix feels too wet, add in 1 tsp more of flour at a time and pulse to combine).

Mix gently until combined.

Tip out on to a silicone mat and allow to cool for 5 minutes.

20170331_124319-1

Roll out the dough into a large rectangle about 2-3mm thick (much thicker and you get a softer biscuit rather than a crunchy one).

20170331_124527

Use a shaped cutter to cut our your desired shapes (today we went with farm animals) and lay on a lined baking tray.

20170331_125148

Place in a preheated moderate oven for about 8-9 minutes, or until golden brown. They will be soft when you remove them from the oven.

Leave on tray to harden and cool. Store in an airtight container for about a week.

20170331_131928

Makes about 40-50, depending on the sized cutter you use … and how much dough your 3 year old helper eats in the process 😉

*Some tips

  • If this dough cools too much it can become a little stiff and crumbly, a couple of seconds in the microwave will soften it and make it more workable.
  • If you don’t have time to cut out the whole batch (it happens!), you can save half of this dough, tightly wrapped in the fridge for several days, before bringing it back to room temperature and gently warming it.

Enjoy!

For a Coeliac friendly option: switch to a gluten free flour mix, and use only 190g and add 1 tsp of psyllium husk.

To make a ginger snap version of these bikkies: Replace the honey with equal weight of maple syrup and replace the vanilla with 1.5 tsp ground ginger and an 1/2 tsp ground cinnamon. These are a much quicker to make than traditional gingerbread but very similar in taste.

Chocolate protein hotcakes

Hotcakes are a very popular weekend breakfast in our house. I love that they can be loaded with goodies to make them nutritious and filling. This version is a twist on my Vanilla Almond hotcakes.

They got absolutely demolished …. 4 very full little people at the end of breakfast!!

  • 1 1/2 cups, wholemeal spelt flour OR 1 1/3 cups plain GF flour mix
  • 1/2 cup of my chocolate protein drink mix*
  • 2 tsp GF baking powder
  • 1 1/2 cups milk of choice – I like unsweetened vanilla almond milk (add an extra splash if you use GF flour)
  • 1 small overripe banana
  • 1 heaped tbsp sunflower seed butter (or other nut butter that your diet allows)
  • 1 tsp vanilla bean paste
  • 3 tbsp aquafaba (liquid drained from a can of chick peas) OR 1 whole egg
  • vegan butter/butter/nut butter to serve

*If you haven’t made the Choc Protein Drink – then you can roughly replicate it with 1 tbsp cocoa, 1 tbsp coconut sugar and 2 tbsp almond or seed meal.

20151025_130237

For a nut free/lunchbox safe version make sure you follow the nut free version of the Protein Drink mix

For a more chocolately version, replace the sunflower seed butter with some of my chocolate seed spread or choc hazelnut paste!

In a large bowl whisk together all of your dry ingredients (Speed 4, 10 seconds). Then set aside.

In a blender/food processor/bullet/thermal cooker, place the banana, milk, sunflower seed butter, vanilla, aquafaba/egg and blend until well combined (Speed 6, 10 seconds)

Pour the wet mix into the dry mix and whisk well to combine. (Speed 4, 10 seconds, scrape down and repeat).

Pour the batter into a hot, lightly greased frying pan, wait until bubbles appear on the surface, then flip and cook until both sides are a deep golden brown.

20170326_083924

Top with butter of choice and serve warm.

20170326_090538

They freeze well too – I make double batches and freeze sandwich style with a filling in between for an easy, filling, low mess snack.

Enjoy 🙂

Date and carrot loaf (or muffins)

We have busy afternoons after school most days. Filled with activities for very boisterous, active kids! The parents at these activities are forever digging into their bags for goodies to fend off the cries of “I’m huuuuuungryyyyyy”. A while ago, a friend had date loaf for her kids to keep them going at Jujitsu (Hi Kylie!).

It inspired me to have a go at my own. I’d grown up with my Mum’s version, but these days I’m after less oil, sugar and refined ingredients …. and look for any excuse to hide bonus goodies. So these ones were created. Hope you enjoy them – they’re are like a cross between traditional date loaf and a carrot cake!

  • 10 medjool dates
  • 1 tsp bicarb soda
  • 1tsp instant coffee (optional)
  • 1 cup boiling water
  • 2 medium carrots
  • 1/4 cup unsweetened applesauce*
  • 1 tsp vanilla bean paste
  • 1 1/4 cup wholemeal spelt/ rye flour
  • 1/2 cup rolled oats/quinoa/desiccated coconut
  • 1 rounded tsp GF baking powder
  • Pinch pink salt flakes
  • 1/2 cup chopped walnuts OR 1/4 cup each roasted sunflower seeds and pumpkin seeds.

* To make my apple sauce I just core my apples and cut them into quarters (don’t peel – keep the benefit of the skin’s nutrients!) and steam them until soft with a little bit of water and a pinch of cinnamon and then blend or process until you reach the consistency you like. (Speed 2, Steam Temp for about 10-12 minutes, then turn off temperature and increase speed gradually up to 6). I make it in bulk and store it in reusable squeezy pouches in the freezer.

20170325_085713

Remove and discard the seeds from the dates, then place them in a bowl, sprinkle over the coffee (if using) and bicarb soda and then pour over the boiling water. Set aside.

20170325_084014

Use your processor to blitz the oats into a flour (Speed 6, 8 seconds) then set aside

Grate or process the carrot until fine (drop onto blades spinning on speed 5, then up to speed 6 for 8 seconds).

Add the apple sauce, vanilla and all of the date mixture to the processor and process until smooth and well combined (start on speed 4 then gradually work up to speed 6 for 15 seconds).

20170325_085721

In a separate bowl, whisk together the oat flour, flour, baking powder, salt and seeds/nuts. If you haven’t used the coffee, an added teaspoon of cinnamon here.

20170325_090215

Pour the wet mix into the dry mix and fold together until combined.

20170325_090244

Spoon into a lined loaf tin or muffin holes. Place into a pre heated moderate oven, until well risen and golden. Takes about 25 minutes for the muffins or 50 minutes for the loaf.

20170325_090629

20170325_094913

Allow to cool. Makes about 14 muffins.

20170325_095356-1
Toddler tick of approval – My cheeky boy as he pinches his 3rd one!!

If you want a sweeter more desserty kind of treat, you can top them with an icing made from whipped cream cheese (dairy or soy), sweetened with maple syrup and a pinch of cinnamon. A scattering of extra nuts or seeds on top is yummy too.

Enjoy 🙂

I haven’t made a coeliac friendly version of this one yet. I’d try 1 cup of a GF flour mix, and maybe have another tablespoon of flour to add in if it looks too thin. Let me know if you try!

Roasted pumpkin pastry rolls

Years ago, many years ago(!), when I was a poor uni student, there were a few things that sucked me right in at the campus cafes – $1 student guild coffee, $2 Coke zero and the vegetarian sausage rolls.

The Coke Zero addiction is well and truly beaten, the coffee … well …. let’s not go there! And as for the vegetarian sausage rolls – I’ve never seen another one like it after Graduation. I have seen vegetarian ones around but they are usually loaded with dairy and nuts and, since pastry doesn’t feature very often in our diets, I just haven’t considered them.

Recently, with my desire to add variety to our diets, but decrease our meat consumption, I’ve been playing around with a vegan and nut free version and I think we have a winner!

Obviously you need to use a puff pastry that suits your dietary needs, but if you need a mutli-allergy suitable pastry and live in WA you really, REALLY have to check out Busy Bees Gluten Free pastry (I buy from Weigh n Pay in Woodvale)! It is amazing! It comes in a long roll and it handles just like wheat based pastry. It is soft and easy to work with and even non GF people have been happy to eat it!

  •  3 sheets puff pastry of choice (GF if required)
  • 1 medium butternut pumpkin, peeled and seeds removed
  • 400g tin chick peas, drained and rinsed
  • 1 tbsp garlic olive oil
  • 3 sprigs fresh rosemary
  • 1/2 tsp pink salt flakes
  • 1/2 cup cooked brown rice
  • Optional – 1 large handful chopped spinach (frozen is fine)
  • Optional – add in a fist sized piece of diced sweet potato too

Dice the pumpkin and toss it in the olive oil. Place it in a lined baking tray and sprinkle with the rosemary and salt.

20170322_061005

Place in a preheated 200C oven for about 45 minutes.

Add the chick peas to the pumpkin and mix in well to coat in oil. Return to oven for further 15 minutes.

20170322_071759

Place pumpkin mix into a bowl, add in the rice and spinach (if using) and use a fork or potato masher to crush all the ingredients together. If you want a smoother mix, use your processor or thermal cooker to combine all of the ingredients (Speed 5, in 6 seconds bursts).

20170322_124327

Cut the pastry sheets in half and divide the mixture up between the sheets.

I find it is best to place it in a line down the middle of the pastry.

Roll the pastry over the top of the mix to form long cylinders.

20170322_125548

Lay on a greased baking tray with the join side facing down (helps the join to hold together as it puffs).

20170322_133854

Cook in a preheated 200C oven until pastry is puffed and golden brown. (You can use a short burst under the top grill to get them extra golden and flaky). Takes about 30-35 mins in my oven.

20170322_134043-1

They freeze well – just reheat in an oven, not a microwave otherwise you get soggy pastry.

20170322_134054-1

Enjoy 🙂

Veggie loaded sausage rolls

Sausage rolls are a massive favourite with my kids … and husband!

They are easy to make and they are perfect for hiding lots of veggies, so it is nice to know that they are a slightly healthier option for my family 🙂  I have changed and modified my mix over time and this is the mix that I have found gives the best flavour and binds the best without egg.

I use Chevup sausages in my mix. They are a skinless, gluten free, Aussie beef sausage with about half the saturated fat of normal sausages – I feel much happier about using them than the sausage mince that is commercially available. You can find more details about them here.

The sausages I use also have a lovely flavour, so if you are using regular beef mince, there is a note below the main ingredients for a couple of extra things for you to add.

Gluten, egg, dairy, nut and soy free pastry is the next issue. There are many GF pastries out there but they are often really disappointing. Obviously use the one that suits your diet and that you enjoy.

I have used this pastry from the Gluten Free Bakery:
7-20130806_133713

And it does a pretty good job. But ….

if you live in WA you really, REALLY have to check out Busy Bees Gluten Free pastry (I buy from Weigh n Pay in Woodvale)! It is amazing! It comes in a long roll and it handles just like wheat based pastry. It is soft and easy to work with and even non GF people have been happy to eat it!

  • 8 Chevup sausages
  • 250g beef mince
  • 1/2 tsp onion flakes
  • 1 medium zucchini
  • 8-10 button mushrooms
  • Handful spinach
  • Fist sized piece pumpkin
  • 200g tinned chick peas (drained)
  • 1/2-1 cup GF bread crumbs (you can blitz rolled oats or quinoa to use here instead)
  • 4 sheets of puff pastry (1 used 3 regular and 1 ‘everything free’)

If you are not using the Chevup sausages, use

  • 700g beef mince, plus
  • 1/4 tsp mild paprika
  • 1/4 tsp garlic flakes
  • 2 tbsp GF bbq sauce

Finely grate the zucchini and pumpkin. (Speed 6 for 8 seconds, scrape down and repeat). Then add in the mushrooms, spinach and chick peas and process until the mix is fine (Speed 6, 10 seconds, scrape and repeat).

Add the additional flavourings, if using and process again (Speed 5, 8 seconds)

Add the sausages and mince, to the processor and process until it is quite smooth (Speed 6, 15 seconds at a time, scrape down in between).

Add the breadcrumbs. Start with 1/4 a cup and gradually add more if the mix is too wet. (Speed 6 for 10 seconds at a time) I used about 2/3 cup last time. The mixture should stick together quite well.

20170316_102509

Cut the pastry sheets in half and divide the mixture up between the sheets.

I find it is best to place it in a thin line down the middle of the pasty.

20170316_104105

Roll the pastry over the top of the mix to form long cylinders.

Lay on a greased baking tray with the join side facing down (helps the join to hold together as it puffs).

Cook in a preheated 210C oven until meat is cooked and pastry is puffed and golden brown. (use a short burst under the grill to get them extra golden and flaky). Takes about 35-40 mins in my oven.

20170316_142519

20170316_162347

Makes quite a lot of sausages rolls (about 45 party sized ones) … so I did have to convince my kids that they couldn’t just keep eating them because they were there.

They freeze well – just reheat in an oven, not a microwave otherwise you get soggy pastry.

Enjoy 🙂

P.S. If you wish you could enjoy sausage rolls but are after a vegan version – have a go of my Roasted Pumpkin Pastry rolls

Popeye pancakes

After the success of my Hulk muffins and with the continued abundance of spinach in my garden I thought I’d try my luck at making a super healthy green breakfast pancake.

Pancakes are a very regular breakfast in our house – I love that I can add in whole grains and great fats and protein to fill hungry tummies and power little brains for a busy day – my vanilla almond hotcakes are our standard so I thought I’d change those ones up a bit …. and cross my fingers 😉

These were incredibly well received …. to my surprise, Harry (my most avid green avoider!) ate 2 of then and then said “Hey! These are green! What did ya do to ’em?!”. I told him it was spinach and it’d make him strong like Popeye. He just shrugged and ate another 3!!!!!!! Ellie loved them so much that she has taken a couple of them to school for lunch, sandwiched together with a nice thick layer of Chocolate seed spread in the middle.

These are loaded with fibre, calcium, protein, iron, magnesium and more – What a win!!!!!

A few notes:

You’ll need a good blender/high powered processor/nutribullet/thermal cooking machine for this one.

This is a double sized batch – there’s just no point making single batches with my hungry hoards any more!!! I freeze the left overs in a zip lock bag and use them for morning tea. It makes about 45-50 pikelet sized – so go ahead and halve the recipe if you don’t need as many!

My kids are used to eating things with added spinach (even if they are not aware of it!!) so if this is a new idea for your kids, maybe start with 150-200g of spinach instead of the 250g I used.

  • 250g fresh spinach
  • 2 cup spelt flour (I did half wholemeal) OR 2 cups plain GF mix (I like half each Bob’s red mill all purpose and white wings)
  • 1 cup rolled oats/rolled quinoa/desiccated coconut
  • 1 cup pumpkin seeds
  •  1 very ripe banana
  • 8 medjool dates, deseeded
  • 1 cup boiling water
  • 2 cups milk of choice
  • 1 tsp vanilla bean paste
  • 2 tbsp fat (coconut oil melted/vegan butter/light tasting oil etc)
  • 4 tsp GF  baking powder
  • Pinch pink flaked salt
  • 1 rounded tsp mixed spice.

Place the dates in a small bowl and cover them with the boiling water, and the vanilla, then set aside.

Place the oats and seeds into your blender/processor etc and process until you have a fine flour (Speed 7, 8 seconds, scrape and repeat).

Add in the spices, salt, baking powder and flour, then process again until evenly combined. The set the dry mix aside.

Into your processor tip the spinach, the dates and their water, the milk, your fat and the banana. Blend very well until the mixture is smooth. You may need to pulse and scrape down the sides of your processor a few times. You want the mixture to be very smooth – not to have stringy bit of spinach left in it!! If you’re using a Thermal cooker, start on speed 4 for about 8 seconds, the gradually work up to speed 8 for about 20 seconds. Then scrape down and repeat.

Pour the wet mix into the dry mix and use a whisk to combine well. (I found this double batch to be too heavy for my thermal cooker, but if you are using a single batch, then add the dry mix into the wet that is in the bowl and process on speed 4 for about 10 seconds, the crape down and repeat for another 6-8 seconds).

Pour the batter into a hot, lightly greased frying pan, wait until bubbles appear on the surface, then flip and cook until both sides are golden brown.

20170308_070133

20170308_072353-1

Enjoy them warm or cold with your choice of topping.

20170308_072607-1
Crazy babies! Harry has butter and a drizzle of honey and Ellie has Chocolate Seed spread

Chocolate Seed Spread

My kiddos see their friends eating that famous store bought chocolate spread …. but since the first ingredient is refined sugar, followed by hydrogenated oil, it is not something I really want to feed them! So a couple of years ago I set about making a  sweet hazelnutty choc spread of my own – and it has been a winner (you can find it here).

However, as it is based on hazelnuts, to care for those kids who are allergic, I don’t want to send it to school. So more recently I have made a seed based version – and the kids didn’t even tell the difference! So here’s my healthy and lunchbox friendly chocolate spread – hope you like it as much as we do!

  • 1 cup sunflower seeds
  • 1 cup pumpkin seeds
  • 1 heaped tbsp cocoa (or 1 flat tbsp cacao)
  • 1 tsp vanilla bean paste
  • 1/2 tsp flaked pink salt
  • 160 mls boiling water
  • 8 medjool dates (pick the big fat juicy ones!)
  • Optional: 1-2 tbsp maple syrup OR coconut sugar

Roast your seeds first. I did mine on a tray under the grill (and watched them very carefully!!!), they only take a few minutes.

20170306_155737

While the seeds are roasting, seed the dates and cover them with the boiling water. Add the vanilla and salt to the water.

Process the seeds for 10 seconds on speed 10. (This will take longer in a food processor). Their oils release best while they’re hot so if you’ve bought roasted seeds, place them in a hot oven for a couple of minutes first).

Add in the cocoa and sugar (if you’re using it) here. Scrape down sides and use speed 6 in 45 seconds intervals, scraping down in between until you get a paste like consistency.

20170306_163700

Add the date mixture, water and all, to the seed mixture and process again until well combined (Speed 4 for 10 seconds in the gradually increase to speed 7 for 15 seconds, scrape and repeat until mixture is smooth and very well combines). Add maple syrup at the same time (if you are using it) as the date mixture.

20170306_163950

Make sure any little helpers get to ‘clean’ the bowl!

20170306_164621

Store in a clean, airtight glass jar in the fridge for a couple of weeks.

20170306_162254-1

Enjoy 🙂