Chicken Wraps

So often I have tried store-bought wraps that are gluten, egg, dairy and soy free in the hope that ‘this time they’ll be acceptable’ but every time I have been disappointed as they have been tasteless and they crumble as I’ve tried to wrap them around my dinner.

We have had a really long, hot summer and I have been really hanging out for some salad wraps so I began to experiment and the other night we had a total victory!! These wraps are a bit time-consuming to make, but they were worth it; soft and flexible and yummy.

They are adapted from a recipe that you can find at:  http://www.kerstenskitchen.com.au

  • 1/2 a cup each of white rice flour, brown rice flour and Arrowroot1-March 2013 079
  • 1 tsp guar gum
  • 1 tsp GF baking powder
  • 1/2 tsp salt
  • 4 tbsp oil
  • 1 1/4- 1 1/2 cups water
  • 1 dessert spoon of nutritional yeast flakes

Mix together all dry ingredients in a large mixing bowl.

Add the oil. Then slowly add small amount of water at a time.2-March 2013 080

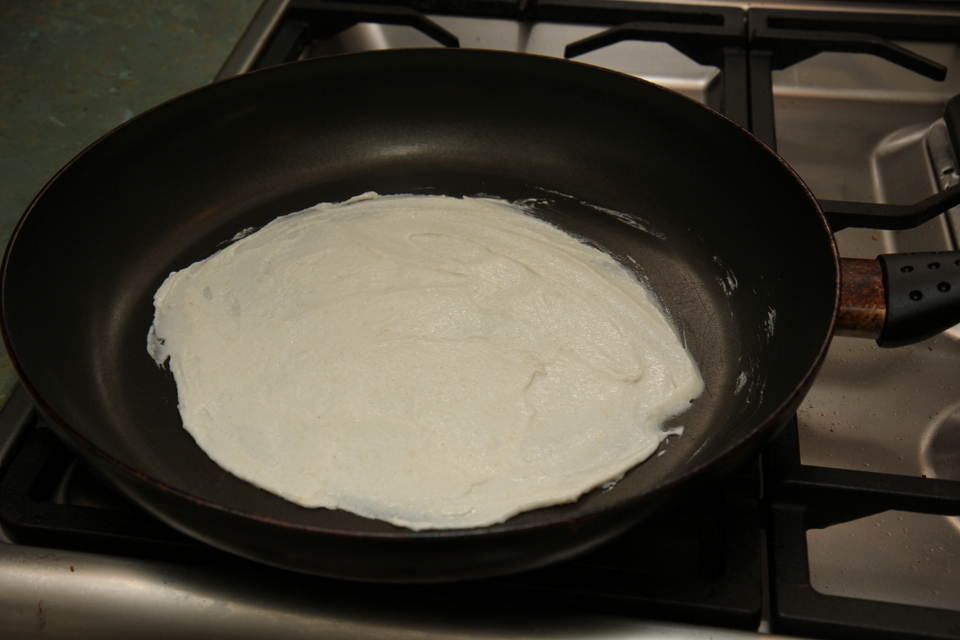
Take time to combine with a wooden spoon after each addition.

Stop adding water when the batter is smooth and glossy, with a consistency a bit like a thick pancake.

Add a heaped wooden spoon full of mixture to a cold frying pan then use a spatula to spread it out so that there is a thin layer covering the base of the pan. Don’t grease the pan – the oil in the batter is sufficient.

Turn stove on to high heat and place the pan on the element.

3-March 2013 082

Cook for about 2 minutes – turn when the mixture is firm and bubbles/puffs a little. Cook for another 2 minutes on this side.

Place on a plate and cover with tea towel. Stack each wrap on top and keep covered. The steam softens the wraps and makes them nice and pliable.

Cool off the pan in between each wrap by running cold water over the back of it. This stops the mix cooking straight away and allows you to spread it more evenly.

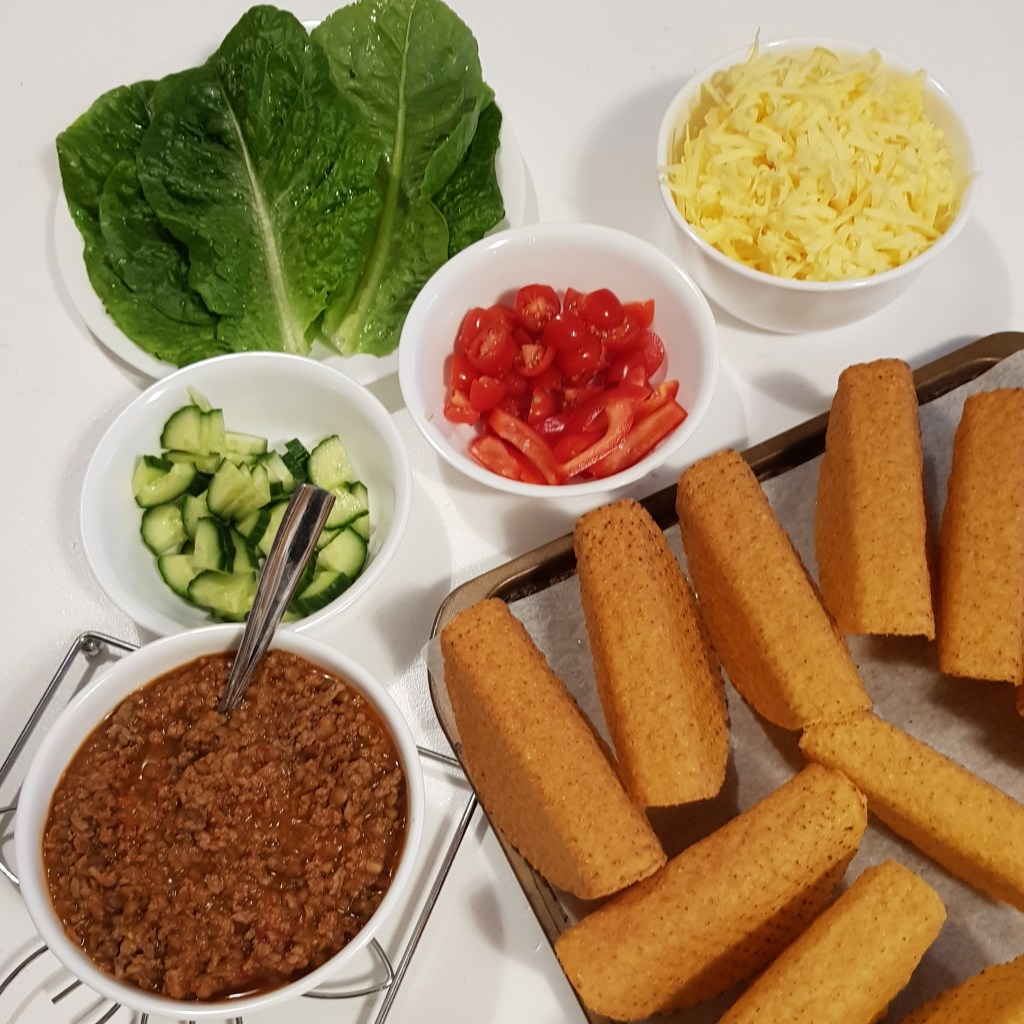
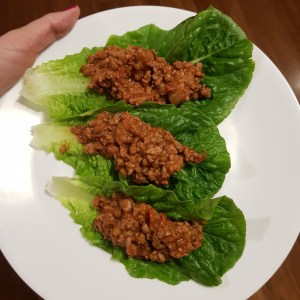
We served ours with ginger chilli chicken and salad.

To make the chicken, I used

  • 4 chicken thighs, skin removed and thinly sliced
  • 2 tbsp coconut aminos (or soy sauce if you can have it)4-March 2013 085
  • 1 tbsp rice bran oil
  • 1/2 finely chopped red chilli
  • 1 heaps tsp minced ginger

Mix the chicken with the aminos and allow to sit for about half an hour. Heat oil and add ginger and chilli, cook stirring for 2 minutes. Then add chicken, stirring occasionally until cooked.

6-March 2013 091   5-March 2013 088   7-March 2013 092

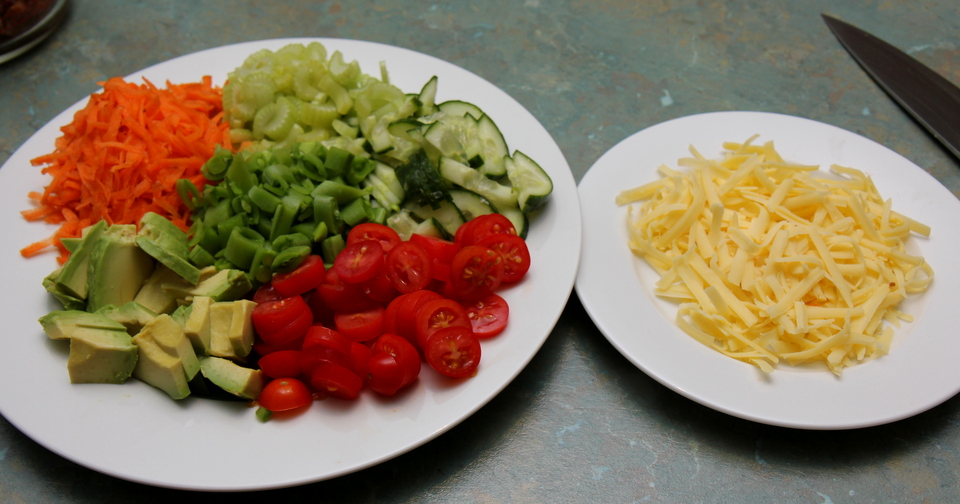
Lay the fillings in the top, centre of the wrap and top with fresh crunchy salad. (It’s best if you roll over one side, then fold up the bottom then wrap the second side over the top).

I think I will make this again when we next have a curry, but I will make it smaller and a bit thicker then top with my home-made garlic butter, for a naan type bread – mmm!

Enjoy!

Chewy muesli bars (Superhero Slice)

Most kids love muesli bars – but the ones from the shops are often filled with additives, preservatives and refined sugars. So home-made is a great option. ‘Hugh’s muesli bars’  that I have previously posted about don’t hold together so well when they are out of the fridge for long periods of time, so they aren’t the best for lunchboxes. After a bit of tinkering, I think I’m on to a delicious and chewy winner 🙂 We call this one ‘Superhero slice’ because of all the great stuff in it to give you great energy!

  • 100g dried apple
  • 100g dried apricot
  • 6 medjool dates, pitted
  • 4 tbsp each of chia seeds, flax seeds, pumpkin seeds and rolled quinoa
  • 2 tbsp psyllium
  • 250g Sunflower seed butter (half vegan butter and half seed butter works well too)
  • zest 1 lemon, finely grated
  • Juice of half a lemon
  • 70g oats or puffed rice

Mill the seeds, quinoa and pysllium together until you reach a consistency that resembles almond meal …. don’t go too far or you’ll get a paste! Set aside.

In a food processor blitz together the apple and apricots (speed 8 for about 15 seconds in a thermal cooker), then add the dates one at a time through the chute at the top (speed 4 while you are adding then up to 7 for 15 seconds).

20150731_204647

Add the milled seed mix to the fruit and process until well combined (speed 4 for 20 seconds).

Add the sunflower seed butter, zest and juice and process again until well combined (speed 4 for about 30 seconds).

Add the oats or puffed rice and process until evenly distributed (Speed 4 15 seconds).

Press down very firmly (I used my hands and then back of a fork) into a lined tin and place in a 160C preheated oven for about 30 minutes or until the top is golden.

20150731_213022

Allow to cool and cut into squares or bars and keep in an air tight container. Ours lasts 2 weeks in the fridge. Makes about 24 squares.

20150731_221253

Enjoy 🙂

Hummus

I loooove chickpeas – they’re low GI and high in fibre and protein and they are cheap 🙂 I love their nutty flavour and the crunch they have when they are roasted. I add them to casseroles and stews and eat them several times a week in my morning tea, so there’s no way I can look past hummus as my favourite dip! My little miss happily eats half her body weight in it for morning tea!

FB_IMG_1580304964032

See below the recipe for a few variations on the original too.

  • 400g tin drained and rinsed chick peas 1-February 2013 2428
  • 1 tbsp tahini*
  • 1/4 cup extra virgin olive oil
  • 1 good pinch flaked pink salt, and
  • juice from a medium lemon (use 1/2 first and taste test before adding the rest)

*If you need to be sesame free then replace tahini with equal quantities of seed butter.

Add all ingredients, except the olive oil, to the food processor and blitz until well combined. The while the processor is running, drizzle the olive oil through the top chute until well combined and creamy (In a Thermal cooker – Speed 4 for 10 seconds, the scrape down sides and use speed 5 for 15 second intervals, scraping down sides in between until you reach desired consistency).

If it is too thick for your liking, add in a few teaspoons of water.

The citric acid in the lemon will help to preserve the mix so it will store in an air tight container in the fridge for several days – but my best tip is to make a double batch and pop one in the freezer – it defrosts perfectly!!

This makes about 8 serves (a heaped dessert spoon full).

We have it with crunchy raw veggies or wholegrain rice crackers.

Enjoy!


My yummy morning tea!

For a variation on plain hummus:

  • Add in about 100g of cooked (steamed or roasted) beetroot – even the tinned variety works, plus a tsp of fresh chopped rosemary and 1/2 tsp of mince garlic. Blend to desired consistency.
  • Add in about 100g of roasted pumpkin and a handful of pumpkin seeds. Blend to desired consistency.
FB_IMG_1580304933023
The beetroot version – hooray for pink hummus!!

Chocolate Freezer fudge

ok – this is hands down the best dessert I have made to date!  If you are after a very simple but decadent, chocolatey dessert that is allergy friendly and quite healthy – then this one is for you!

  • 1/2 Cup Sunflower seed Butter1-February 2013 692
  • 1/2 Cup tasteless Coconut Oil (Room Temperature)
  • 1/2 Cup Cocoa
  • 1/2 Cup Pumpkin Puree
  • 1/3 Cup honey/maple syrup

Place all ingredients into your processor (helps if the pumpkin is still warm) and process until the mix is smooth, stopping to scrape down the sides. In a Thermal Cooker, start on Speed 5 for 20 seconds, scrape down the sides and then process again, working up to speed 7 until mixture is very smooth).

Pour in a greased 8×8 tin, cover in glad wrap and freeze for about 4 hours.

Cuts into about 16-20 pieces and needs to be stored in the freezer.

This was  a MASSIVE hit in my house and I have to confess that it didn’t last very long! They are already requesting another batch

3-February 2013 699

Hope you enjoy it as much as we did 🙂


Merry Christmas (and Royal Icing Recipe)

I love gingerbread and when put in house form with royal icing, it’s even better. Since making one a year at church Christmas events a number of years ago, I’ve tried to make one each year for our family. This year I happened to be in Ikea and checked their ingredients on their gingerbread house kits – no egg and no dairy! So I grabbed it – not having to make a house myself this year was very enticing!

[Please note that the tags for this post are to do with the royal icing not the house.]

IMG_9454
Ingredients list (apologies for the depth of field blur!)

The next issue was the royal icing – I love its lemon tang but it’s traditionally made with egg whites so I needed a replacement. I could have used No Egg but I wasn’t sure how it would go so I had a search online and found that someone else had done the experimenting for me. She decided that the glycerine worked better in the hardening factor – rather essential for a gingerbread house (less so for just decorating cookies) and since I had some in the cupboard, that’s what we went for. I did also look up whether or not it was safe to be eating something I’ve always just used in making homemade bubble mix or on dry skin but I guess if you can use it on your lips, it’s ok to ingest too!

Here’s the recipe:

IMG_9444
Mine ended up slightly more runny than I wanted it but it still worked well, even for attaching decorations

The BBC’s egg free royal icing

500g / 1lb 2 oz icing sugar (You can use icing mixture too)
2 lemons
3 – 4 teaspoons glycerine

Sift the sugar into a the bowl of a mixer.
Juice and strain the lemons.
Beating continously, gradually add the juice and glyercine to the sugar

Sourced at:
http://hoppobumpo.blogspot.com.au/p/bbcs-egg-free-royal-icing.html
Originally sourced at:
www.bbc.co.uk/food/recipes/database/eggfreeroyalicing_77309.shtml (link now defunct)

I halved this recipe and had enough for my house and decorating with a little left over.

My main tips for construction are to build the walls and wait a while for them to set before putting the roof on. Ensure you’ve reinforced the inside corners with extra icing. Hold the roof pieces for a few minutes until you are sure they won’t slide.

IMG_9455
Construction complete. Next time I will put the chimney together and then attach it to the roof instead of trying to do both at once.

Our decorations are dairy, egg, and nut free (and quite a few are wheat free too) – skittles, musk sticks, mint leaves, jelly babies, licorice (black and strawberry), marshmallows and edible glitter.

IMG_9466
Decorating with edible glitter!
IMG_9470
The final product and my cheeky monkey sneaking into view 🙂

Wishing you a Merry Christmas as we celebrate the birth of our Saviour. I’ll have a blogging break until late January.

Banana Bread

Banana bread sounds good in theory right? It’s fruit – it must be healthy.

Nope, sorry. Most banana breads that you find in cafes are pretty well just glorified cake …. don’t get me wrong – they are super delicious, but just the healthy choice people think they’re making!

This recipe is a lot lower in sugar and has lot of extra goodies added to it. Still super delicious, but I am really happy to pop this one in lunch-boxes or enjoy at brunch or with an afternoon cuppa.

See below the recipe for a coeliac friendly option.

  • 2 cups flour (Plain flour is fine but I have used mixes of spelt, barley and rye and they all work well too)
  • 1/3 cup sugar (optional, but add it in if you’re a sweet tooth!)
  • 2 rounded tsp GF baking powder
  • 1/2 tsp salt
  • 1 tsp cinnamon/mixed spice
  • 1/2 cup milk of choice (oat, almond and rice work well)
  • 1 tsp apple cider vinegar
  • 2 medium, very ripe, bananas, mashed
  • 75g vegan butter/tasteless coconut oil
  • 50g maple syrup or honey*
  • 1 tsp vanilla bean paste
  • 3 tbsp seeds (use whichever are your favourite – process these first if you’d like less obvious bits). A small handful of chopped walnuts also works well here.
  • 3 tbsp aquafaba (liquid drained from a can of chick peas) OR 1 whole egg
  • rolled oats to top (or more sliced banana)

Into a large bowl add all of the dry ingredients. I don’t do sifting (ever if at all possible!), so I use a whisk to gently mix this dry mixture until it’s even.

In a large measuring jug, mix the milk and the vinegar and whisk vigorously for a minute. It should become slightly thicker and have lots of frothy bubbles on top. Then set aside for a few (3-4) minutes. Or blitz in your blender/nutribullet for a few seconds.

To the milk mix, add the mashed banana, oil, syrup, aquafaba/egg and vanilla and whisk until well combined. (or another few seconds in the blender/nutribullet)

*If you’d like an alternative to the honey or syrup, you can blend in 6 medjool dates to the wet mix

20190720_093930

Add the wet ingredients to the dry, folding them in until just combined – don’t over mix.

Pour into a large greased loaf pan, sprinkle oats on top and bake at 180C for about an hour, or until a skewer, inserted in the middle comes out clean.

20170430_120053

Allow to cool in the tin for 10 minutes before transferring to a wire rack for another 10-15 minutes.

20190720_132446

I also make these into muffins when I don’t have as much baking time – makes 18-20.

20151106_153616

This is yummy as is, or with a bit of butter, or even toasted. It freezes and defrosts well, just slice and wrap individually before freezing.

Enjoy … as I currently am, with a cuppa 🙂

To make these coeliac friendly, use 1 2/3 cups of GF flour mix (I like Bobs Red Mill All purpose baking flour) plus 2 flat tsp of psyllium and make sure you use a gluten free milk then top with rolled quinoa or use the extra banana option.

20190720_105755.jpg

To make these in a thermal cooker:

Whisk the milk and vinegar and set aside (Speed 4, 10 seconds).

Place the bananas, oil, vanilla, aquafaba/egg and syrup in the bowl and process on speed 5 for 8 seconds.

Add in milk mixture and process on speed 4 for 8 seconds. Then set aside the wet mix.

Add all of the dry ingredients to the machine and process on speed 4 for 8 seconds.

Add the wet mix back into the dry and process on speed 4 for 6 seconds, the scrape down and repeat.

Bake as per regular method.

Gingerbread Cookies

IMG_0812

I love cooking gingerbread at Christmas time. I am looking forward to making a gingerbread house with my kids soon too! I’ve adapted an already adapted recipe based on Sheriden Rogers ‘Entertaining at Home’ (1994 p143 – I think!) that my friend gave me. After the results of my recipe, I can only imagine how yummy the ‘normal’ version is. The kids loved helping with the cookie cutters.

This gingerbread is crunchy on the outside and soft on the inside. It’s hard to even tell it doesn’t have ‘normal’ ingredients in it. This is a big amount of dough so I usually divide it in half and get about 50 small cookies (I use the Tupperware cookie cutters as pictured).

250g dairy free spread
185g brown sugar
2 eggs worth of egg replacer
300g honey
750g plain g.f. flour
pinch salt
3 tsp ground ginger
2 tsp ground cinnamon
1/2 tsp ground allspice
3 tsp bicarbonate of soda dissolved in
125ml boiling water

Preheat oven to 170 degrees Celcius (325F)
Cream dairy free spread and sugar until light and fluffy (use a large bowl and a mixmaster/kitchenaid is best)
Beat in egg replacer
Add honey and mix
Sift together dry ingredients and then add to mixture in parts alternating with dissolved bicarb soda
If dough feels too soft, add a bit more flour
Refrigerate for 2 hours – overnight
Roll dough out and cut out with cookie cutters
Place on trays with baking paper lining
Cook until lightly browned (about 20min)
Remove from oven but leave on tray for 5 mins before transferring to a wire rack.

Tips – I found the dough got easier to work with after it had been out of the fridge for a couple of minutes.
– If you are using normal flour you might need a bit more to make it into a dough. When I made it this week, I had to add quite a bit. I would add more of the spices next time too.

Overnight Oats – breakfast heaven!!

It is getting hot in the desert, which means that porridge for breakfast isn’t so appealing any more.

I am keen to stick with oats as they are a great, filling and easy, low GI breakfast, but I just don’t love muesli without cows milk.

So it is overnight oats to the rescue – they’re soaked to soften them instead of cooking.

This will be breakfast (and possibly lunch!) all summer at my place – hope you delight in it as much as we do 🙂

  • 150ml almond milk (soy/oat/rice milks work too, if nuts are out)
  • 50g oats
  • 1/2 tsp ground cinnamon
  • 1 tbps honey (agave/maple for a vegan version)
  • 1 tsp vanilla bean paste
  • 1 tbsp chia seeds, and
  • diced fruit to top (I’ve been using blueberries, strawberries and mango)

Mix the oats and milk in a glass container, then add in honey, cinnamon and vanilla and stir well.

Leave overnight in the fridge.

Just before serving in the morning mix through the chia seeds and top with fruit.

Serves 2.

I have also made this for lunch (on more than one occasion!). Just mix up in the morning and allow at least 4 hours in the fridge.

Tasty Tacos

I have never been a mince fan … and my family and friends harass me constantly for it. ‘ But it’s just so versatile’, ‘what if I just grind up a steak for you?’. There’s just something about the texture that makes me feel all squeamish.

Anyway, it turns out that I have a husband and children who adore Mexican food … hello minced meat.

Since our diet is already restricted, I figured that I needed to try and learn to eat mince so that there were some more options open to us – I find I can manage it when it is in a largely veggie based meal like this one, or in our bolognese.

Tacos are are MASSIVE WINNER in our house so we hope you enjoy them too!

**If you are after a vegan option for your tacos – check out below the main recipe for how we make the switch.

20180911_182139
My veggie loving little sous chef

  • 400g mince (beef, turkey or chicken)
  • 2 tbsp garlic infused olive oil
  • 1 finely diced brown onion
  • 1 400g tin brown lentils, drained and rinsed
  • Taco Shells
  • 1 large jar Mexican salsa
  • 2 tbsp Mexican Seasoning
  • 1 fist sized piece of pumpkin
  • Toppings – spinach, avocado, cucumber, tomatoes, corn, cheese etc etc

Heat the oil in a large frying pan and cook the onion til soft. Add the mince and brown.

Then add the seasoning and salsa. Then add the lentils and mix well.

Finely grate the pumpkin.

Add the pumpkin to the meat mix and stir to combine.

Bring to a gentle simmer for about 20 mins until the meat is cooked and the veggies are soft..

Heat Taco shells according to pack directions and while they are heating, prepare all salad ingredients.

Serve with mince mix at the bottom, salad next and sprinkle of the cheese your diet allows. It’s a great ‘make-your-own’ meal for the kids too.

20160719_134823-1

20200521_184226

**The Vegan option:

Omit the minced meat and add in 300g of finely diced firm mushrooms, use them at the same place in the recipe as the mince goes.

Then when you are adding in the lentils, add 1 more additional tin of drained and rinsed lentils.

Make sure you use a suitable plant based cheese – and that’s it! Super easy and very tasty!

This recipe makes enough meat mix for 2 family dinners for us – we freeze the other half in an air tight container – perfect for when you neeeeed tacos next time 😉

Extra Tip: If you need or want to go grain free – then using large lettuce leaves as your taco cup works really well, and you still get a lovely crunch (and messy hands!). This is also a good option if you are soy free as I’ve yet to find pre made shells without soy.

20200511_214555

Enjoy 🙂

Lemon Thyme Mushroom Linguine

A few months ago my sister-in-law came to stay, which was lovely, but she is a vegan …. so my challenge for the week she was here was to cook vegan food that was also soy and gluten-free, that satisfied my rather carnivorous husband and that actually tasted good.  A scary challenge! But we did ok and we have continued to make some of the meals we shared with her – this is now Will’s favourite dinner.

It is an adaptation of a recipe that I saw on ‘Nigella Kitchen’.

  • 50ml garlic infused olive oil
  • 500g sliced mushrooms (I use a mix of Button and Swiss Brown)
  • salt and pepper
  • 3 sprigs of thyme, leaves finely chopped
  • zest and juice of 1 large lemon
  • steamed green beans
  • GF linguine

Place the mushrooms in a large mixing bowl, add in the oil, herbs and lemon. Mix well so that the mushrooms are all coated.

Cover mushrooms and allow to infuse for a couple of hours (or at least 30mins if you are short of time).

Heat a large frying pan and tip in the mushrooms, cooking until soft.

Add steamed beans to the frying pan and stir through (don’t leave them too long because there’s a better contrast if the beans are still a bit crunchy).

Cook the linguine, drain and serve. Add mushroom mix to the top. Make sure you don’t waste any of the yummy pan juices – pour them over the top!

Serve and eat immediately.

Serves 4.