Grilled Mango Crumble

Fruit based desserts are my favourite!

I love chocolate and sweets as much as the next person but there is something about the amazing natural sweetness and huge variety in fruit which makes it such a delight… And when you can pick the fruit from your own backyard it is so much the sweeter!

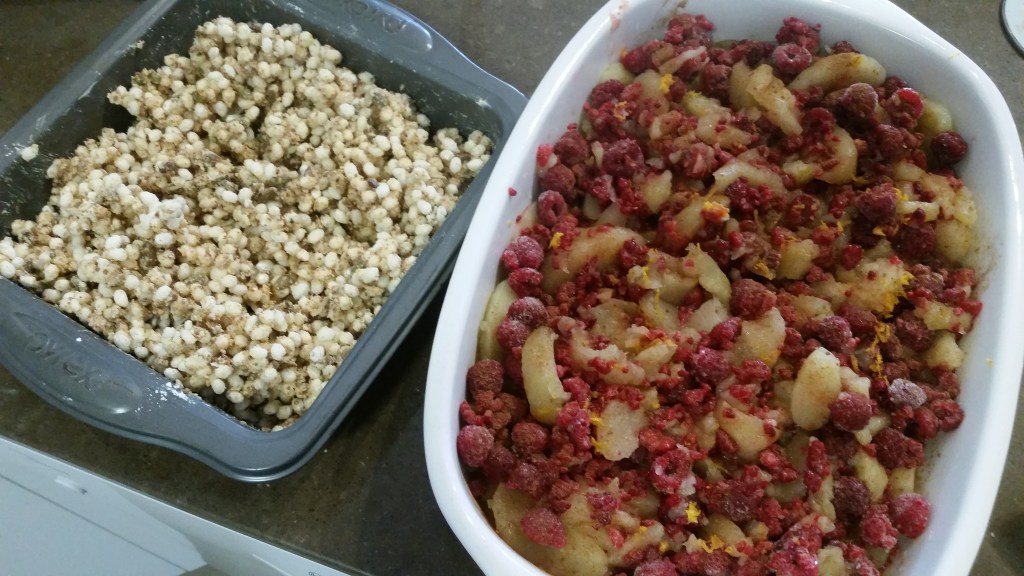
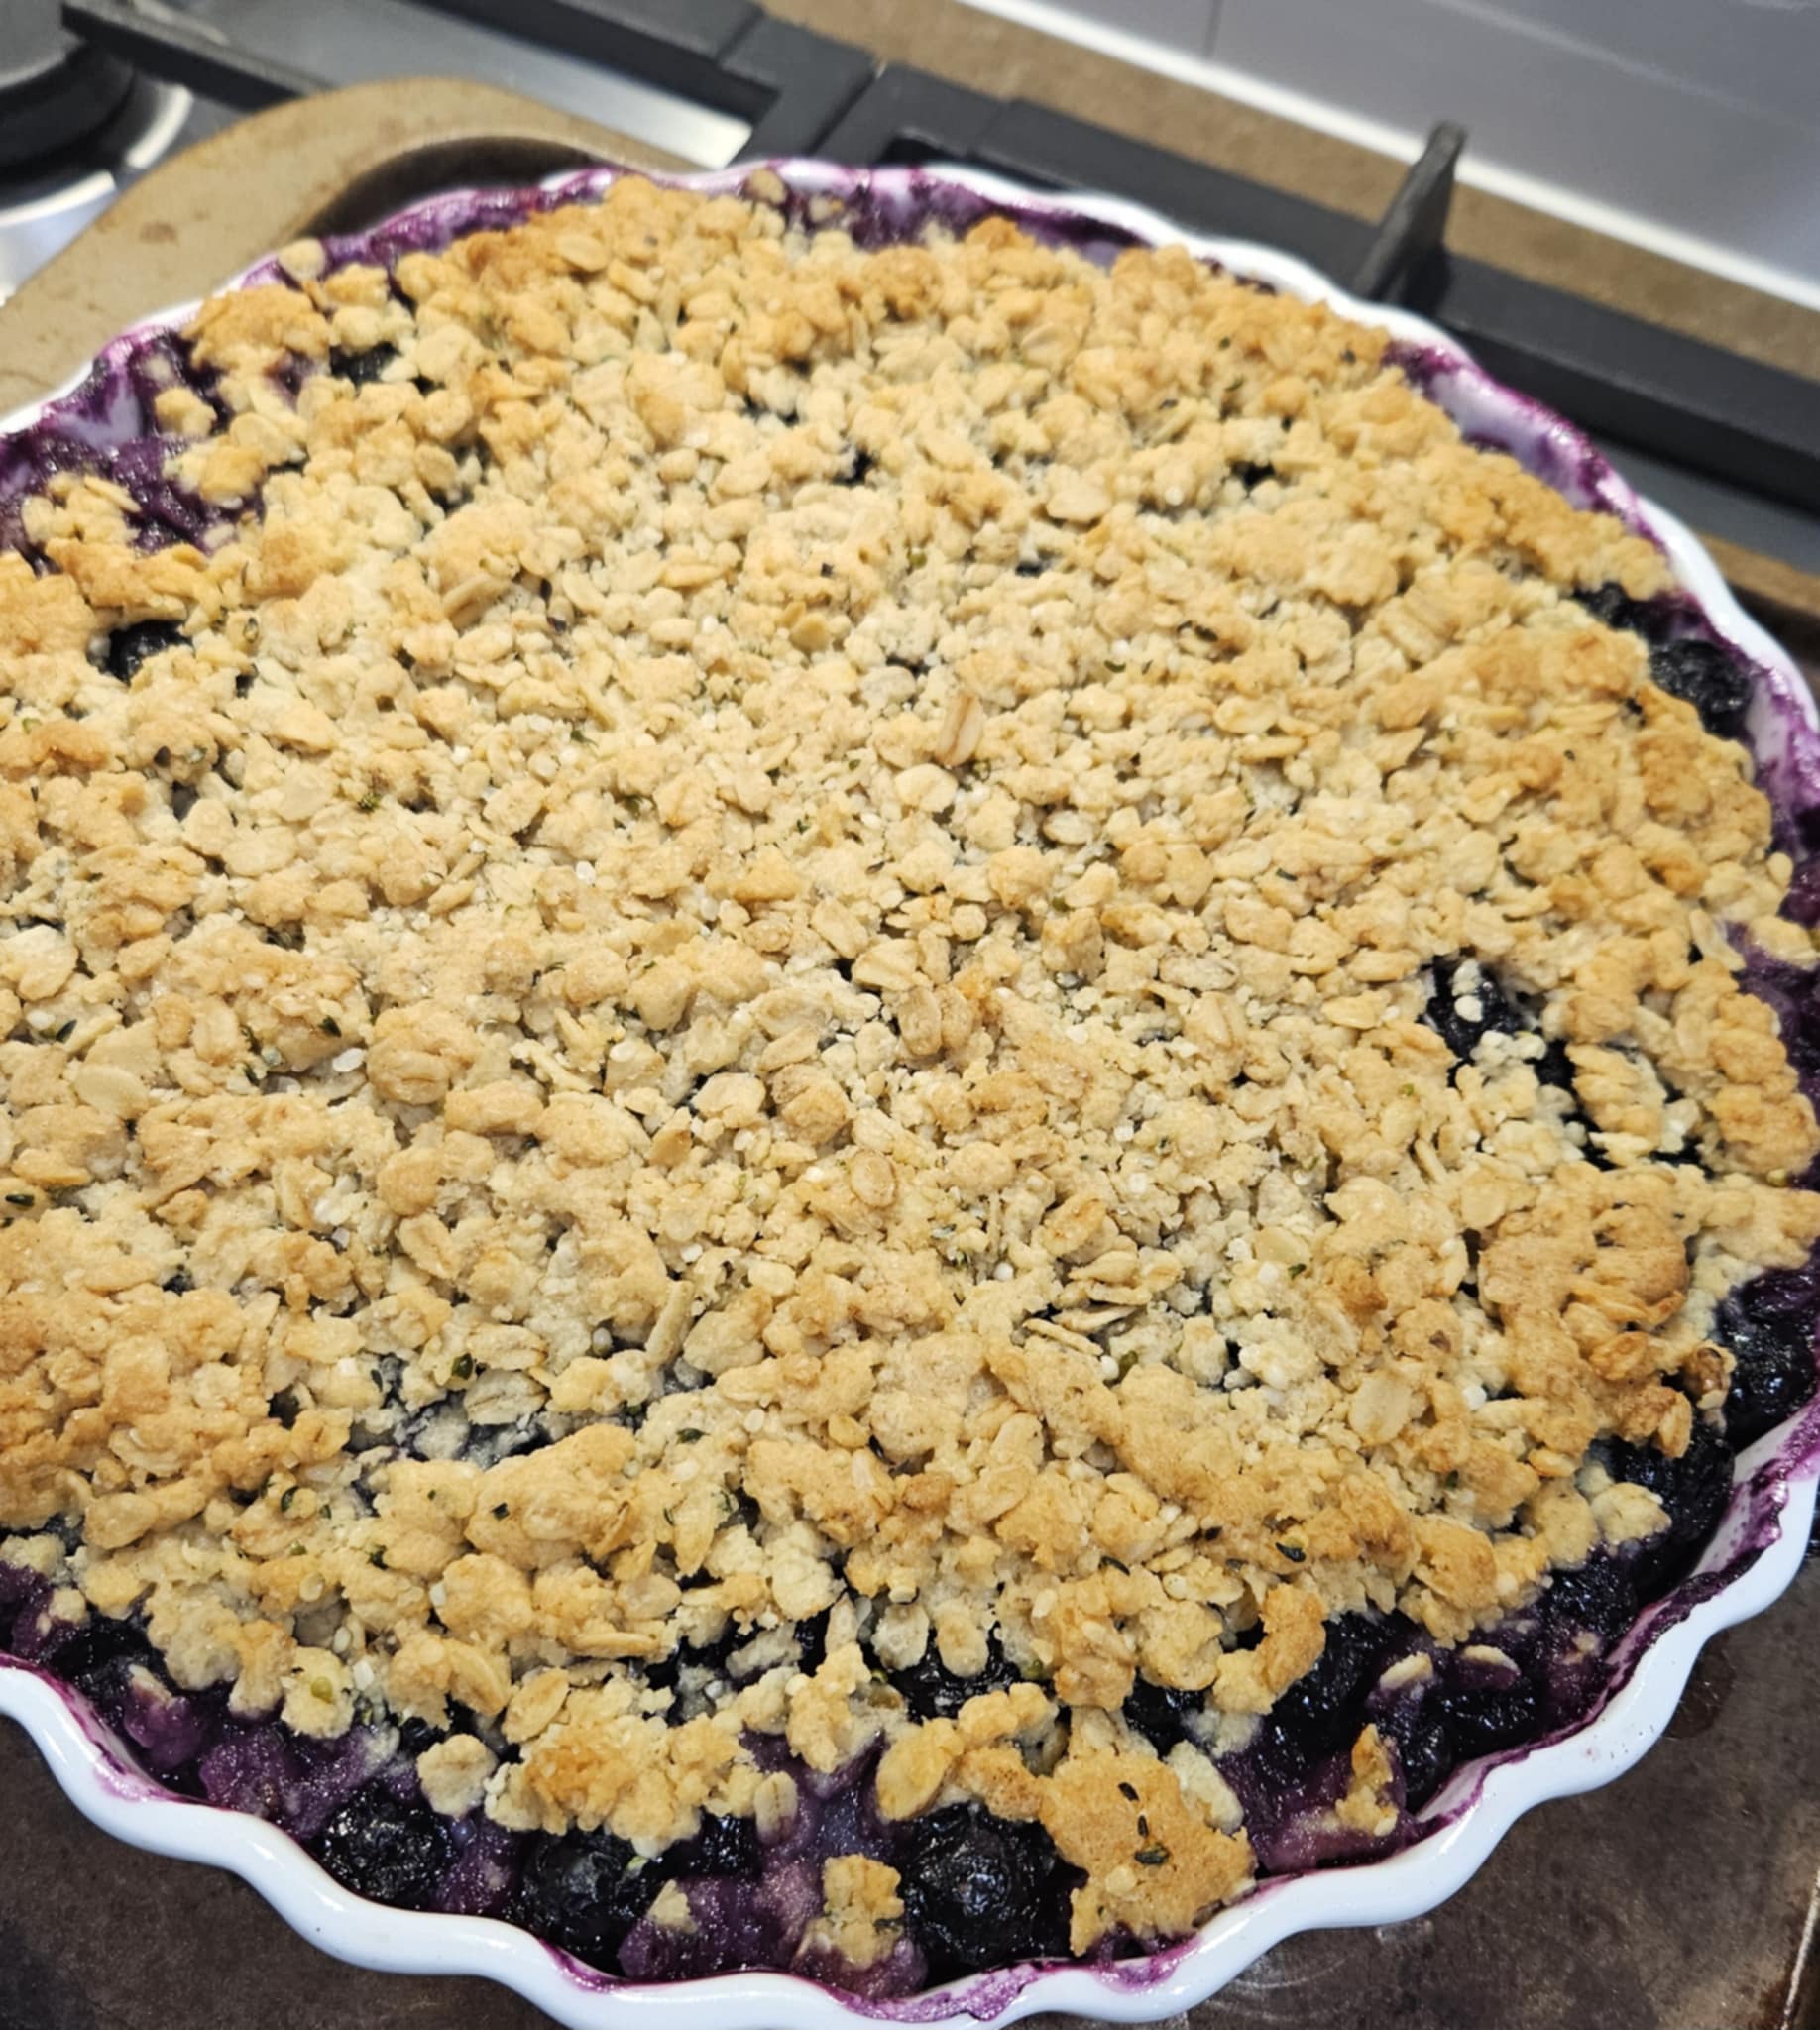
We picked our first backyard mango for the season a couple of days ago and I wanted to do somethinga little special with it. I guess this is like a faster, deconstructed version (MasterChef come at me 🤣) of my favourite apple and berry crumble

  • 2 tsp vegan butter melted/light tasting oil
  • 1/3 cup rolled oats OR shredded coconut
  • 1/3 cup puffed rice OR GF rice bubbles
  • 1/3 cup almond meal OR plain flour of choice
  • 1 tbsp coconut sugar
  • 1/2 tsp extra coconut sugar
  • 1/3 cup mixed pumpkin and hemp seeds
  • 1 tsp ground cinnamon/mixed spice
  • 2 large fresh mango cheeks
  • Yoghurt of choice (dairy and coconut both work well with the flavours)

20190405_193253

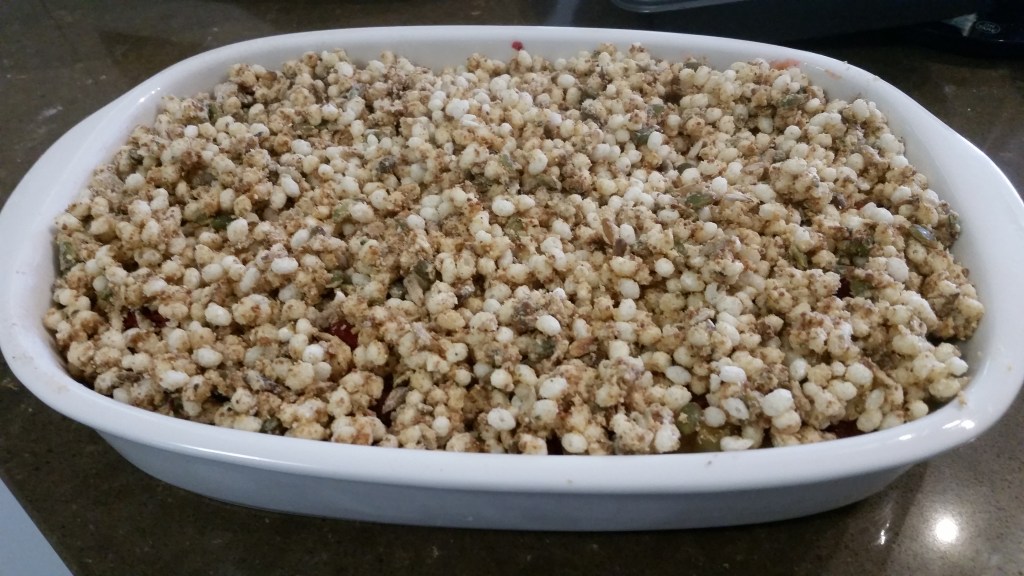
Mix together all dry ingredients and stir through melted butter until well combined.

Tip into a medium hot frying pan, and toast, stirring regularly, until golden brown and crunchy. Then remove from the heat.

20190405_193107

‘hedhehog’ your mango cheeks by scoring deeply in a grid pattern, down to the skin, but not through.

Hold the edges of the mango and push up in the middle to pop up the squares.

Sprinkle each with 1/4tsp of coconut sugar.

20190406_073800

Place mango under a hot grill. Watch it carefully! Allow the sugar to melt and start to caramelize. This only takes a few minutes.

20190406_073815

Remove from oven, top with crumble mix and serve with a dollop of natural yoghurt.
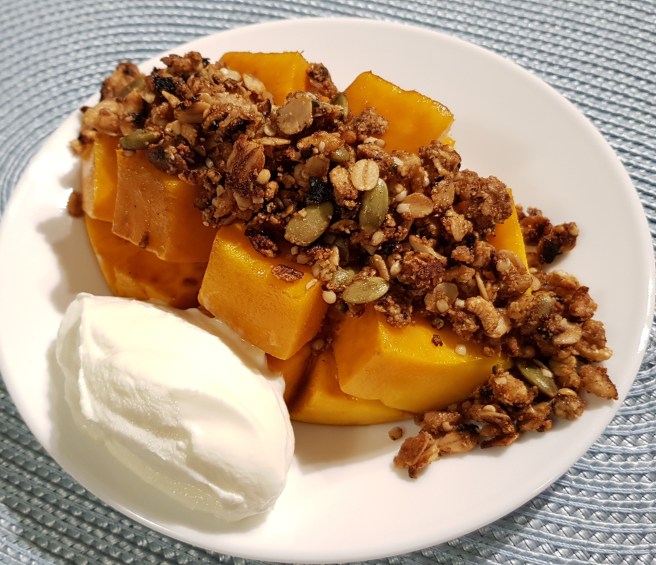
20190405_194856

Serve immediately.

20190405_194730

Enjoy 😊

Cranberry & White Choc Muesli Cookies

My big boy has been having a tough time lately. So when we have an afternoon at home (which is rare!) he is pretty keen to spend one on one time with me.

Pre-teens often don’t want to sit and talk in a formal, eye contact kind of way … so cooking and working along side each other provides a really good opportunity to talk and try to sort somethings through.

Today he asked to make cookies. We’d tried a white choc cranberry cookie from the shops recently but they were SUPER sweet and his tummy didn’t feel so great after them (probably would have been ok if he had one and not three though!!)

So we adapted our regular choc chip cookies and came up with these beauties.

  • 3/4 cup sugar (we like the caramel taste of coconut sugar)
  • 1 1/3 cup plain flour (half wholemeal) OR 1 1/4 cup GF Flour plus 1 tsp psyllium
  • 1/3 cup rolled oats OR shredded coconut
  • 1 tsp GF baking powder
  • pinch pink salt flakes
  • 1/2 tsp mixed spice or cinnamon
  • 1/3 cup dried cranberries
  • 1/3 cup pumpkin seeds
  • 1/3 cup hemp or flax seeds
  • 1/3 cup white choc chip (which ever suit your diet – Sweet William is a winner for us)
  • 150g vegan butter, melted (but not too hot or it will melt your choc chips!)
  • Optional: zest of 1/2 an orange, finely grated

In your food processor or thermal cooker place the flour, baking powder, salt, sugar, oats and cinnamon. Blitz to a coarse flour (speed 8, 8 secs)

Add in the cranberries and seeds and mix again until combined (Speed 4, 6 secs). Blitz for longer if you want less obvious ‘bits’

Add in the butter through the chute at the top whilst mixing (on Speed 4) and mix until well combined (about 10 seconds)

Add in the chocolate and mix until just combined (Speed 4, 6 seconds)

20190403_164956

Form a teaspoon full into a ball and spoon onto a lined baking tray, allowing space to spread. Press down gently.

20190403_164933

Cook in a preheated moderate oven for 14-15 minutes.

They will be soft when you remove them from the oven. Allow to cool on the tray for 10 minutes before transferring to a wire rack to cool completely. They will be crunchy on the outside and chewy on the inside.

20190403_164900

Makes about 20.

Enjoy!!

Frozen yoghurt ice creams

I don’t remember any family from my childhood that didn’t have Tupperware icy pole moulds!

There are loads of different moulds you can buy now, but whichever you choose to use, they are fabulous for making simple, healthy, tasty, waste free desserts.

This recipe is very flexible. Make it more or less creamy depending on the amount of yoghurt you use. It’ll be less ice creamy and more of an icy pole if you leave out the banana and switch to other fruit.

In our freezer we had a heap of mango left over from a self picking expedition where we went slightly (*understatement!) overboard! And then we had 2 bunches of our homegrown bananas ripen very quickly so we’d peeled and frozen them too. So when we were after dessert these were a no-brainer!

  • 4 mango cheeks, frozen or fresh (tinned peaches or apricots are a great alternative here)
  • 2 medium frozen bananas
  •  approx 400g of yoghurt of choice (dairy, soy, coconut and almond all work well)
  • Optional: 1 tbsp honey or maple syrup

Put everything in a high powdered blender/bullet/thermo machine and blitz until very smooth. If you’re using a thermo machine, make sure you drop frozen chunks of fruit through the top on to already spinning blades. Start at Speed 4 and then work up to 8 for a smooth finish.

Pour into your moulds. This quantity fills 12 of the Tupperware moulds pictured.

20190127_114004

Stick in the freezer for 4 hours, or until frozen.

20190127_182226

Enjoy!

20190127_181339

P.S. Our Dairy and soy yoghurt recipe is linked above, but if you can have tree nuts, and you want yo buy your yoghurt, we have recently found a GF, DF almond milk yoghurt that is really yummy

20190127_110228

Maple, banana and cinnamon Weetbix slice

We share supper in the evening after church each Sunday.

This week it was my turn on roster. I always try to make sure that I cater for as many food allergies and intolerances as I can so that, at least sometimes, those who might otherwise be left out can join in.

This recipe was a hit – free from gluten, eggs, dairy, nuts, soy, legumes and also vegan… but delicious enough that the non-food allergy folk enjoyed it and several requested the recipe. Winner!

Weetbix slice was a childhood favourite – a regular feature in our school lunchboxes. I’m sure the slice came about as a budget-stretching way of using up the inevitable crumbs at the end of the pack!
July 2014 377

The gluten free version of Weetbix is made with sorghum and although I’m not the biggest fan of the original as such a nutritious cereal, it fits our allergy requirements, my kids are excited and I’m pleased to be able to use them in baking!

  • 160g vegan butter, melted
  • 6 weetbix, crushed (regular or GF)
  • 1 cup plain flour of choice (I use spelt or the White Wings GF blend)
  • 1 rounded tsp GF baking powder
  • 1/4 cup coconut sugar
  • 1/4 cup flaked quinoa (or rolled oats if it suits you)
  • 2 tbsp each flax seeds and hemp seeds
  • 1/4 cup maple syrup
  • 1 tsp ground cinnamon
  • 1 medium overripe banana

Mix together all dry ingredients (Sp 4, 8 seconds).

In a separate bowl mash the banana well, add in the maple syrup then pour in the melted butter and mix until well. (Butter in first, Sp 3, 100C for 60 seconds, then add in remaining wet ingredients and use Sp 4, 20 seconds, scrape down and repeat if required)

Pour the wet mix into the dry mix and fold together until well combined (Sp 3, 15 secs).

Press firmly into a lined baking tray (mine was 20x20cm).

Bake in a preheated 180C oven for 25 minutes.

All to cool and then ice with maple icing – made with 1 tbsp soft vegan butter beaten into 2 tsp of maple syrup, a pinch of cinnamon and several tbsp of pure icing sugar (add more as required to reach your desired consistency).

20181111_164912

Slice and store in airtight container in the fridge. Makes 16-20 slices.

20181111_195058
Ready to share

Enjoy 🙂

P.S. I’ve had a query about replacing the banana … simply switch it out for about 1/3 of a cup of apple sauce … add a teaspoon more at a time if the mixture seems too dry.

Simple Cinnamon Granola

Mmmmmm granola. Fabulous crunchy texture that adds interest to breakfast.

It is so versatile and you can really load it up with great stuff to boost your fats and protein – nutrients that are missing from most store bought cereals!

I do make a yummy crunchy granola (that you can find here) but I was after an even quicker and more simple granola that I could make in bulk and have on standby in the pantry for everyday breakfast (or dessert!).

I am conscious that it is really easy to eat sweet granola, so for another option, I am using cinnamon here instead of a sweetener (although there is an option to add more sweetness if you are so inclined!). Cinnamon is so light and fragrant that it works well to give the perception of sweetness without the sugar.

I make this one in a double batch, but the ingredients listed below are for just a smaller single batch.

See below the main recipe for ideas on making this granola Gluten free and Grain free

  • 1 cup rolled oats**
  • 1 cup mixed seeds (or nuts if you like) – I love a mixture of pumpkin, sunflower, flax and hemp seeds.
  • 2 tsps good Olive oil
  • 1 tsp ground cinnamon
  • OPTIONAL: 2 tsps honey/maple syrup

Mix together dry ingredients.

Sprinkle with cinnamon then mix well to evenly coat.

20180818_161828

Drizzle over oil and mix well to evenly coated. If you’re adding honey or maple syrup, drizzle it over here, together with the oil – it helps to spread further if it is warmed first.

Place under a hot grill and bake until  golden. Shake the tray several times during

20180818_165502

Allow to cool completely before storing in an airtight container.

**To make this one coeliac friendly, use a mixture of puffed rice and shredded coconut, in whichever ratio you like best. For grain free use a mixture of buckwheat groats and coconut flakes.

Throw it in your yoghurt, eat it with milk or with some stewed fruit – my favourite is with yoghurt and a few berries!

20180820_110759

Enjoy 🙂

Apple Berry Crumble

Apple crumble was a regular dessert feature in my house growing up and I have always loved it.

My husband jokes that he knew that he was going to marry me when I brought him a bowl of it as sustenance during exam study time at uni! That was a looong time ago – tomorrow we celebrate 16 years together, so it seemed like a good time to bring this one out again 🙂

Over those many years, I have added to my mum’s recipe, adapted it to suit our diet and boosted its nutritional value. I hope you enjoy it too!

  • 2 tbsp butter/plant based butter
  • 1 cup rolled oats*
  • 1 cup puffed rice OR GF rice bubbles
  • 2/3 cup almond meal OR plain flour of choice (wheat or GF)
  • 1/3 cup sugar
  • 1 cup toasted seeds**
  • zest of 1 lemon, finely grated
  • juice of 1 lemon
  • 2 tsp ground cinnamon/mixed spice
  • 2 large tins sliced apples (or home made stewed ones if you are more organised!). Pear works well here too.
  • 2 cups frozen blueberries or raspberries

*Need it coeliac friendly? Replace the oats with an extra cup of puffed rice plus 1/4 cup rolled quinoa or shredded coconut

**I like the combination of 1/3 cup each of pumpkin, sunflower and hemp seeds – but use your favourites.

Start by mixing together the seeds and toasting them in a pan under your grill until they are golden brown – watch them carefully as they only take a few minutes. Toss them to make sure you get an even coverage.

Place apples and berries in a large greased baking dish.

Sprinkle fruit with the lemon juice, zest and the cinnamon. Then set aside.

OLYMPUS DIGITAL CAMERA

Mix together all of the dry ingredients and then pour over the almost melted butter. Stir until well combined and evenly coated.

20180707_092907

Evenly spread the crumble mix on top of the fruit mix and then place in to a preheated moderate oven for about 40 minutes, or until golden brown and the juices are bubbling.

20180707_093031
Ready for the oven

Apple Crumble

Serve warm, on its own or with the custard or ice cream your diet allows.

Crumble and yog

This makes quite a large crumble … well, because everyone loves crumble and this often comes to family gatherings – there are a lot of us! If you don’t need quite so much, it’s easily halved. Or better still, just make this size, and gradually eat it for dessert for the next few days 😉 It lasts well in the fridge, but is better reheated in the oven than the microwave as it will keep the crumble topping more crunchy.

Enjoy 🙂

Boosted Breakfast Bars

My crew are on school holidays – hooray!!!

Holidays means slower mornings, adventures, time together …. and food. So much food!

I’m always astounded at how much more my kids neeeeed to eat in the holidays, when compared to what they eat from their lunchboxes during the school term. They tell me that it is because at school they stuff in what they can super fast so that the don’t miss out on their precious play time – apparently holiday are then for catch up!

These gorgeous bars are fibre filled, have a good serve of polyunsaturated fats and with a sweetness that comes from whole fruit, they’ll satisfy you and keep you going for ages. They work well as morning tea on the run too.

  • 1 cup GF weetbix
  • 1 1/2 cups rolled oats OR 1 1/2 cups fruit free GF muesli
  •  1/4 cup wholemeal spelt flour OR plain GF flour mix plus 1/2 tsp psyllium
  • 1/2 tsp GF baking powder
  • 1 tsp ground cinnamon
  • 1 heaped tbsp each of hemp, flax and pumpkin seeds
  • 8 medjool dates, pitted
  • 1 large overripe banana
  • 1 heaped tbsp seed butter (or nut butter that suits)*
  • 1 medium egg*
  • 1 tsp vanilla bean paste
  • 1/4 cup milk of choice

*To make these vegan, remove the egg and add in a 2nd tbsp of the seed butter. Simple!

Place all of the dry ingredients together in your processor/thermal cooker/bullet and pulse a few times until the ingredients are roughly chopped and well combined. Then set aside.

Place the dates, seed butter, milk and vanilla into your thermal cooker. Cook on 90C, Speed 2 for 3 mins. Add in the banana and cook on speed 3, 90C for a further minute. Then boost up to speed 4 for 8 seconds.

To cook this one without a thermal cooker, place the dates, seed butter, milk and vanilla into a saucepan and cook over a low heat, whilst whisking regularly until the mixture is well melted – the dates will still be quite large. Add in the banana and continue to cook, whilst whisking for a further 2 minutes. Then transfer the whole mix to a blender or processor, then process until fairly smooth.

20180702_073136

Now add the dry ingredients back to the wet and process until just combined (Speed 2, about 15 seconds). If you are using an egg, add it in here. The mixture will be quite thick and sticky.

Scrape into a line 20×20 baking tray and use a spatula to smooth out and press down into the tin.

20180702_073555

Place into a preheated 180C oven and bake for 18-20 minutes until risen and golden brown.

20180702_075637

Allow to cool for about 15 minutes in the tray before moving to a cooling rack  to finish cooling before slicing in to 8 bars.

20180702_082918

These will last several days in an airtight container in the fridge, or freeze them individually to pop into lunchboxes or grab on your way to work.

20180702_083157-1

Enjoy

20180702_083126-1

Vegetable Dhal

Lentils are such an amazing food! They are really inexpensive, easy to use is a wide variety of meals and they pack a serious dietary punch when it comes to fibre and protein. They are one of the star foods for improving your gut health! A really valuable and budget friendly addition to your diet.

Like most of my meals that were inspired by other cultures, this is one you’re unlikely to find on the menu of an authentic Indian restaurant – but it is fragrant and delicious!

  • 2 cups red lentil
  • 1/3 cup French (puy) lentil
  • 2 tbsp garlic olive oil
  • 1 large brown onion, diced
  • 1/2 tsp minced ginger
  • 2 tsp ground coriander
  • 2 tsp ground cumin
  • 1 rounded tsp ground turmeric
  • 1/2 tsp chilli powder
  • 3 1/2 cups hot veggie stock (I use Massel for a store bought option)
  • 1/3 cup coconut cream
  • 2 large carrots, grated (roughly 1 rounded cup)**
  • 2 large handfuls of baby spinach, roughly chopped

**you can use an equal quantity of grated pumpkin or sweet potato here if you’d prefer

Rinse and drain your dried lentils

Heat the oil in a heavy based frying pan and add the onion, cook until soft.

Add in the ginger and mix well to combine.

Add in the dry spices and fry well until fragrant.

Add in the lentils and stir well to coat the mix. Add in the grated carrot and combine again.

20180606_161714

Add in the hot stock, stir well and bring to a simmer.

Simmer for approximately 25 minutes, stirring occasionally to make sure the lentils don’t stick to the bottom of the pan as they are absorbing the stock.

Add in the coconut cream and chopped spinach, stir well and cook until the spinach is wilted, but still bright.

20180606_172952-1

20180606_173312

Serve warm with your choice of ‘bready’ accompaniment – we used suitable wraps that we brushed with a little garlic oil, sprinkled with salt and popped under the grill until they were toasty and brown.

20180606_173307

20180606_191919-1

Makes about 4 adult serves.

Enjoy 🙂

Honey oat biscuits

Sometimes you just really need bikkies in a hurry!

This recipe doesn’t need anything special – just 4 basic pantry ingredients and they’ll be cooling on your bench less than 25 minutes after you decided you needed a bikkie!

  • 240g rolled oats
  • 260 flour of choice (wholemeal spelt or a plain gf mix)
  • 200g vegan butter
  • 200g honey or maple syrup

In a large bowl, melt together the honey and butter (Speed 2, 100C about 2 1/2 mins) – then set aside.

Place the oats in your processor/thermal appliance or even bullet and give a couple of quick pulses to roughly shop the oats.

Add in the flour and mix well until combined (Speed 4, 10 secs).

Add in the melted butter mix and mix to combine (Speed 4, 8 secs).

Scoop spoon fulls of mixture on to a line baking tray and then use a fork to slightly flatten them.

20180531_120745

Place in to a preheated 180C oven and bake for 16-18 minutes.

The biscuits will still be soft when removed from the oven. Leave them on the baking tray for 10 minutes (go ahead a ‘test’ one if you must!).

20180531_123629

Move to an airing rack to finish cooling … or just eat them warm!

Makes about 22-24.

20180531_130209-1

Enjoy 🙂

** I haven’t  made an oat free version of these ones yet. I’d start by increasing the flour mix to 300g and then using a 200g mix of rice puffs, rolled quinoa and shredded coconut to replace the oats. I’ll update with exact quantities when I do!

Mushroom and Lentil Bolognese

Bolognese has long been a favourite dinner in our house.

We have a pretty non-traditional version, but it works for us – there are always 6 empty plates and 6 happy tummies when it’s on the menu.

Easy to make, a massive serve of veggies, great fibre and it’s  a very budget friendly meal, that cooks up in bulk and freezes well too.

More recently as we are reducing the number of meals we eat that contain meat, we’ve moved from making our standard beef mince bolognese, to this vegan version.

The kids haven’t blinked an eye with the transition, in fact, Harry recently requested it as his birthday party dinner – hope you like it too!


  • 1 finely chopped medium brown onion
  • 2 tbsp garlic olive oil
  • 1-2 tsp minced chillies (depending on your heat preference)
  • 2 large carrots
  • 2 large zucchini
  • 2 400g tin kidney beans, drained and rinsed (we also use black beans)
  • 2 400g tin lentils, drained and rinsed
  • 3-4 cups mushrooms (a mixture of types is good to give textural variety)
  • a first sized piece of sweet potato or pumpkin, peeled and diced
  • 3 large handfuls spinach
  • 700 ml tomato pasata or a large tin of peeled tomatoes
  • 3 tbsp tomato paste OR preserved tomatoes
  • 1/4 cup red wine (optional)
  • 1/3 cup fresh basil leaves
  • 3 sprigs fresh rosemary
  • spaghetti or pasta that suits your diet to serve

20200118_160328


Heat the oil in a large frying pan, then add the onion and stir until soft.

Add in the chillies, mix well and turn down to low heat.

In your food processor (or with a knife if you have the patience!), pulse the mushrooms until you get a fine chop. Add the mushrooms to the onion mix in the hot saucepan. Stir them in well to coat in onion mixture.

Add in the lentils, tomato paste and red wine then stir well to combine.

Meanwhile, in the food processor blitz or grate the vegetables, spinach and beans. Add in the pasata to help bring the mix all together. Process more or less depending on how smooth you want your sauce.

Add the veggie and pasata mix to the mushroom and lentil mix in the pan and stir well. Bring to a very gentle simmer, then add the fresh herbs. I tend to finely chop the basil before stirring through, but I leave the rosemary on it’s stems, just bruising the leaves before adding it to the pot, just remove the stems when you serve. Simmer for about half an hour, stirring regularly.

20200118_160354
Adding in the preserved tomatoes to boost the flavour!

20180414_092815

Serve on your choice of pasta, zucchini noodles or a bed of steamed green beans – add cheese of choice to top if you like, or even sprinkle with nutritional yeast.

Collage 2018-04-15 11_08_03

Serves about 10 adults (freeze left over sauce in an airtight container for a couple of months)

Enjoy 🙂