Super Salmon patties

Simple salmon patties were another standard in my house while we were growing up. Sadly, when we got married, Peter wasn’t such a fan – he thought they were too bland.

But they are such a great way to get some good fish oils into kids, and they are also  great because they are the perfect finger food for little hands, super transportable for picnics and lunchboxes and they’re a very inexpensive meal option!

So I have worked at adapting them, making them allergy friendly and increasing their nutritional value and now they are a resounding success with everyone in our family. Yay!

Hope you and your little people (or just the big ones!) enjoy them too 🙂

  • 1 400g tin pink salmon (drained and skin and large bones removed)
  • 1 medium sweet potato (4-5 cups when chopped)
  • 400g tin chick peas/butter beans, drained and rinsed
  • 1 tsp fresh finely chopped dill
  • 3/4 cup nutritional yeast
  • 4 tbsp hemp seeds
  • Salt and pepper to taste
  • oil for cooking
  • Optional: a 1/2 cup corn kernels and 1/2 a grated zucchini

Peel and dice the potatoes. Place into a saucepan of boiling water and cook until soft.

Drain and rinse the chic peas, the soak them in boiling water for about 10 minutes minutes, before draining again and mashing well.

If using zucchini – grate then squeeze out all the liquid between paper towels (might take a few lots of towels). Set aside.

Drain the salmon and remove any large bones before mashing

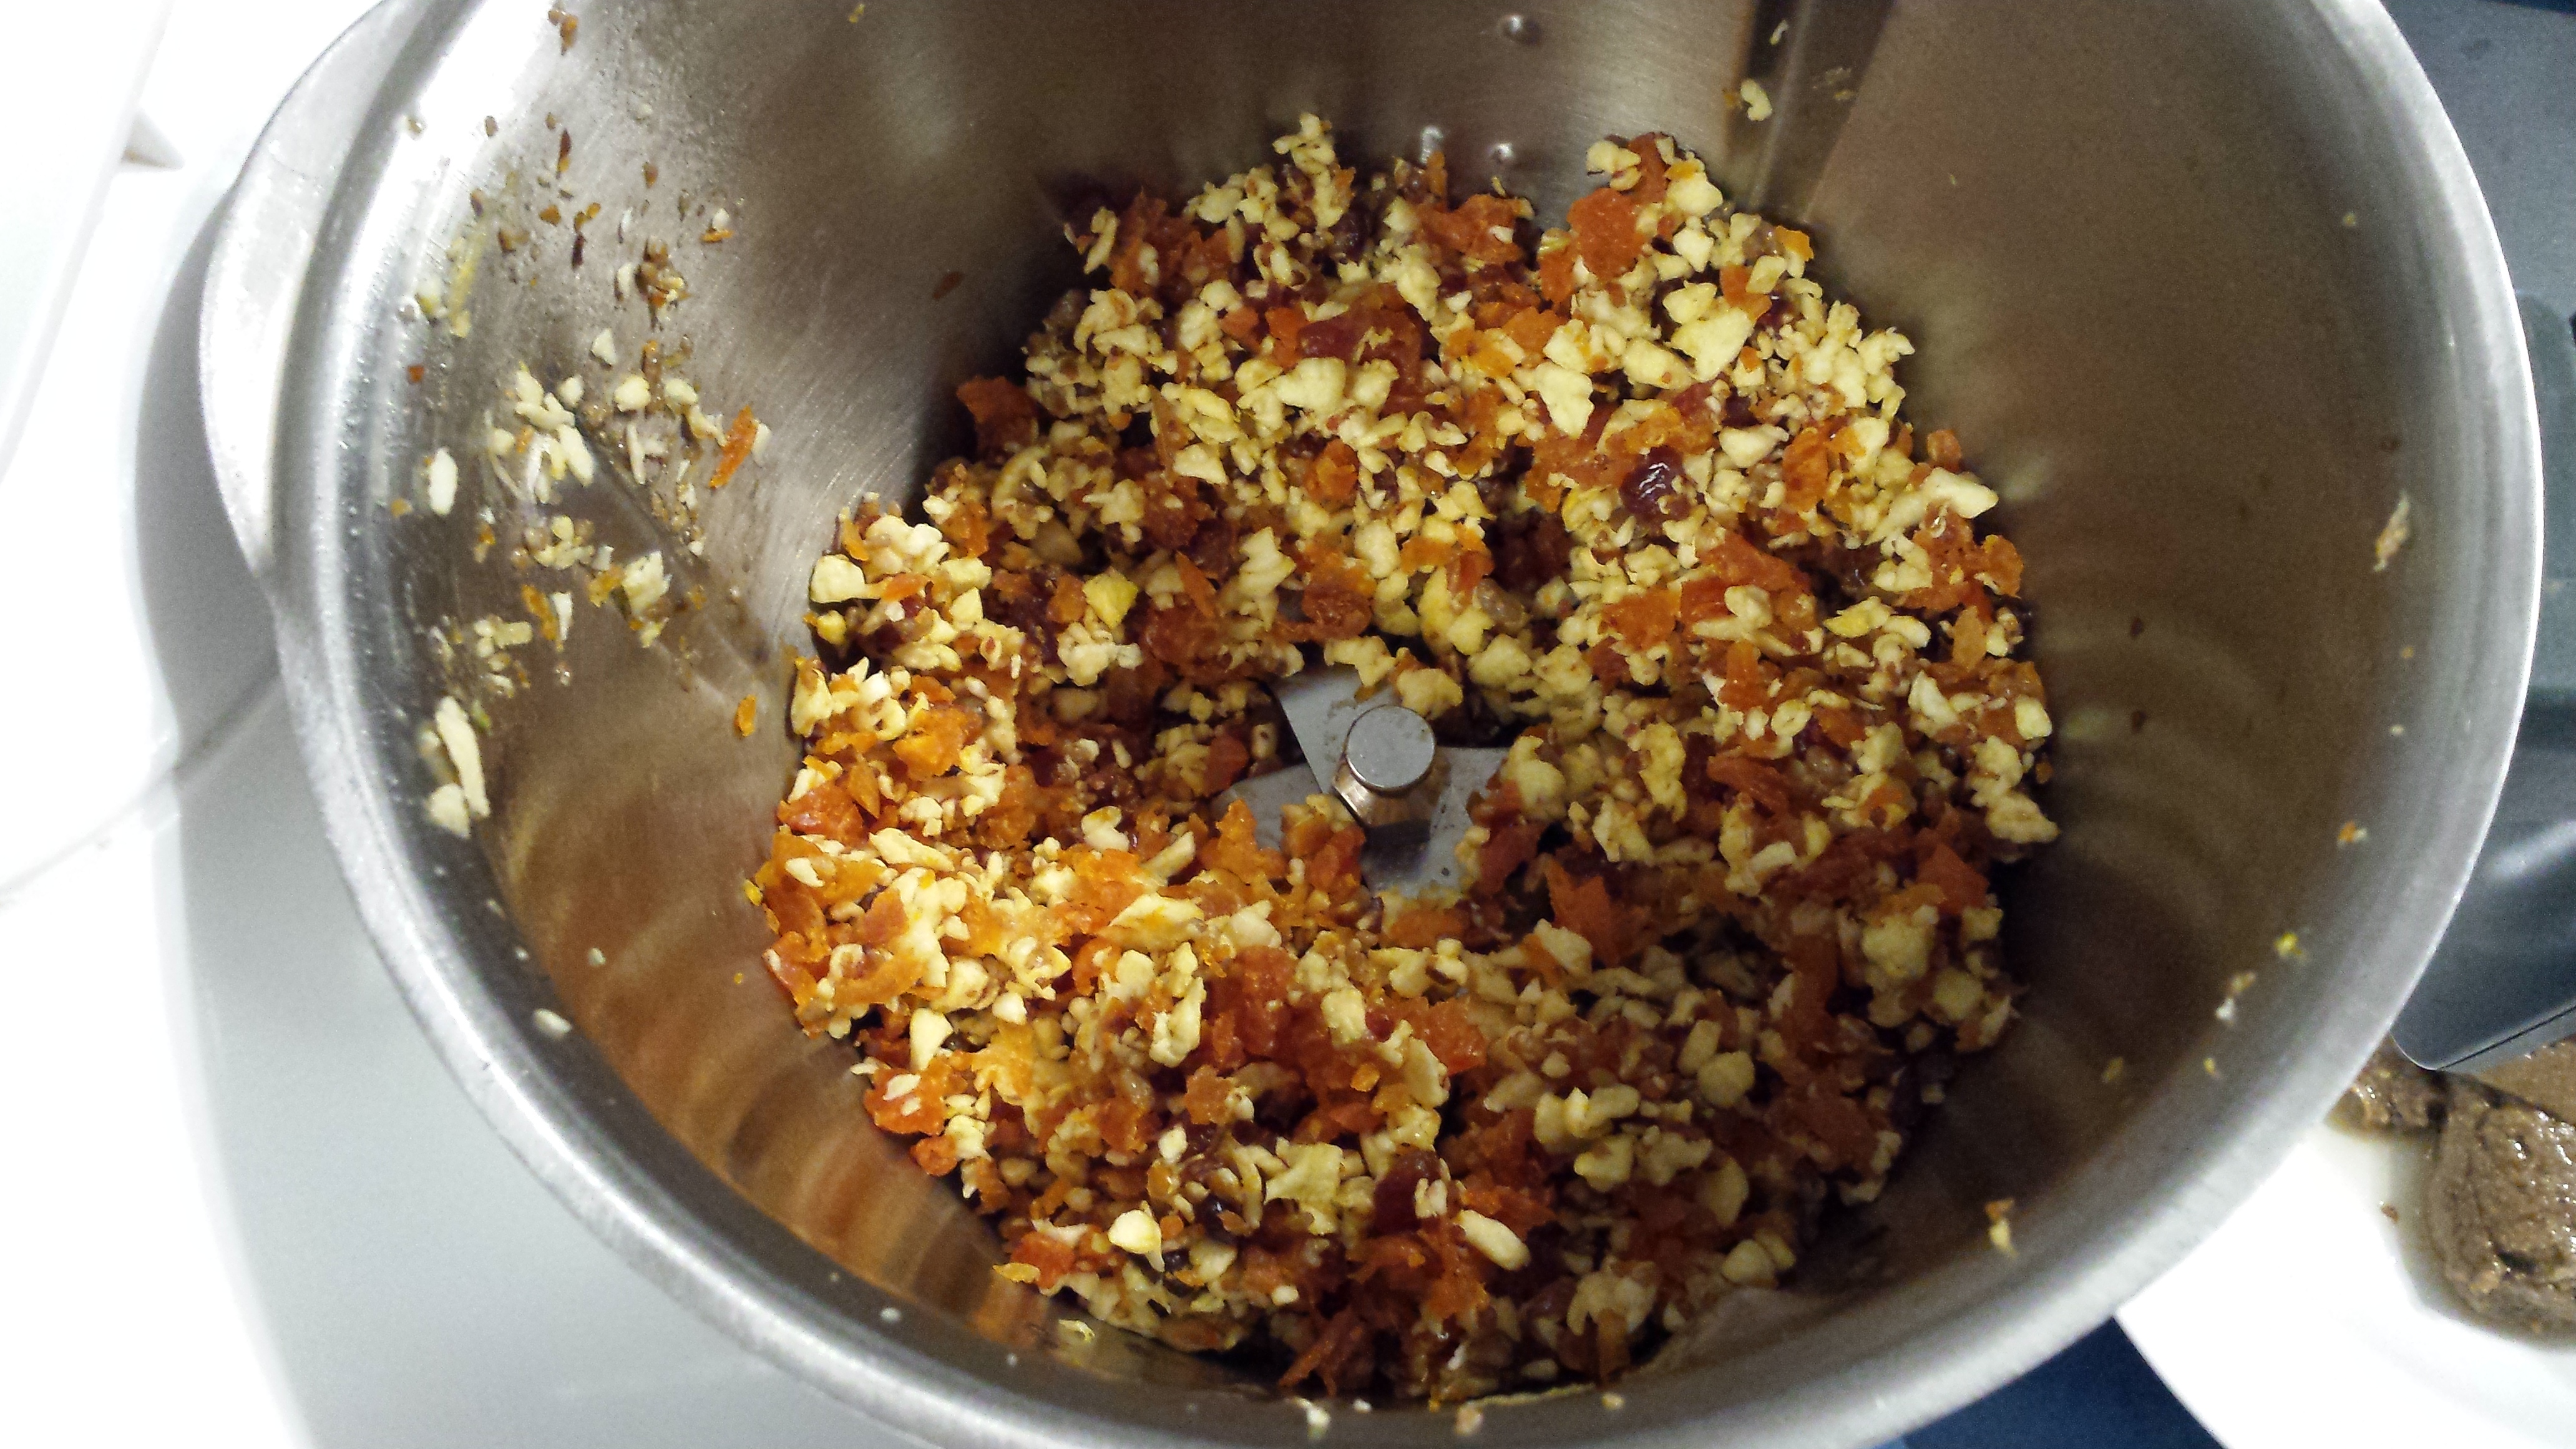
Roughly mash the potato, then mix through the mashed chick peas, followed by the salmon (plus corn and zucchini if using).

Add in the dill, salt and pepper then mix.

Add in the nutritional yeast and hemp and mix well until evenly combined.

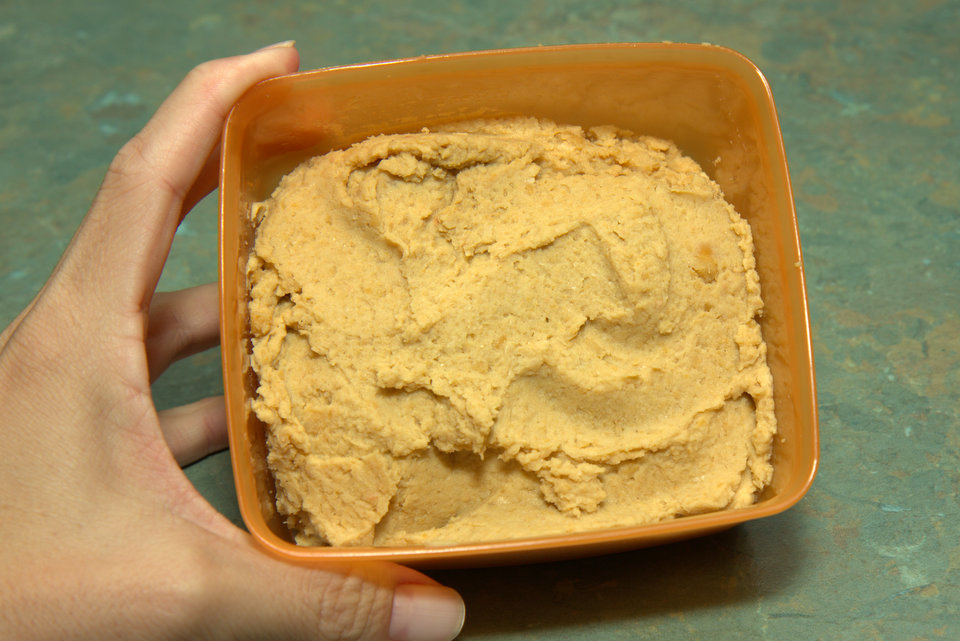
If the mixture is still too wet, then add in more of the nutritional yeast and seeds until you get a consistency that allows you to form balls, then squash down into patties – i do mine about palm sized.

Place mixture in the fridge for an hour .

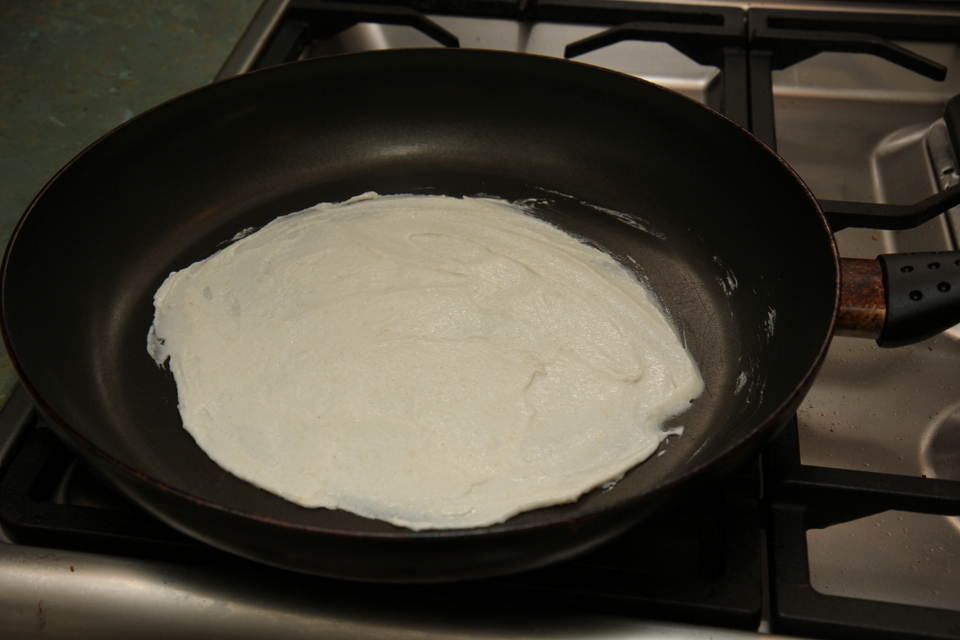
Remove from fridge (roll in some breadcrumbs or almond meal if you like more of a crispy coating), then place in a hot frying pan with some oil.

20190625_170314


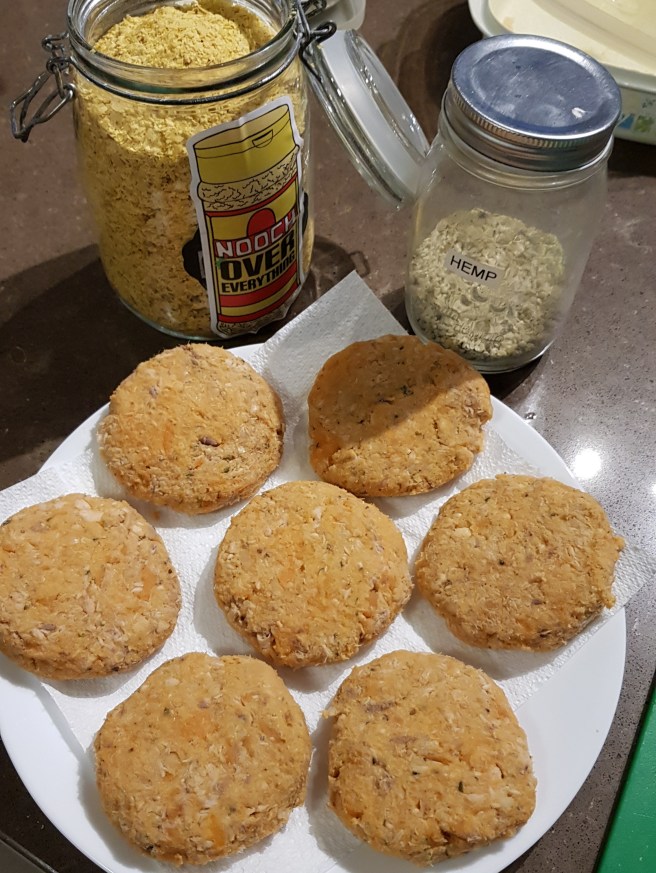
Cook until golden and then turn. About 3 minutes on each side. (You can also spray them with a little oil and bake in a preheated moderate oven for about 20 minutes per side).

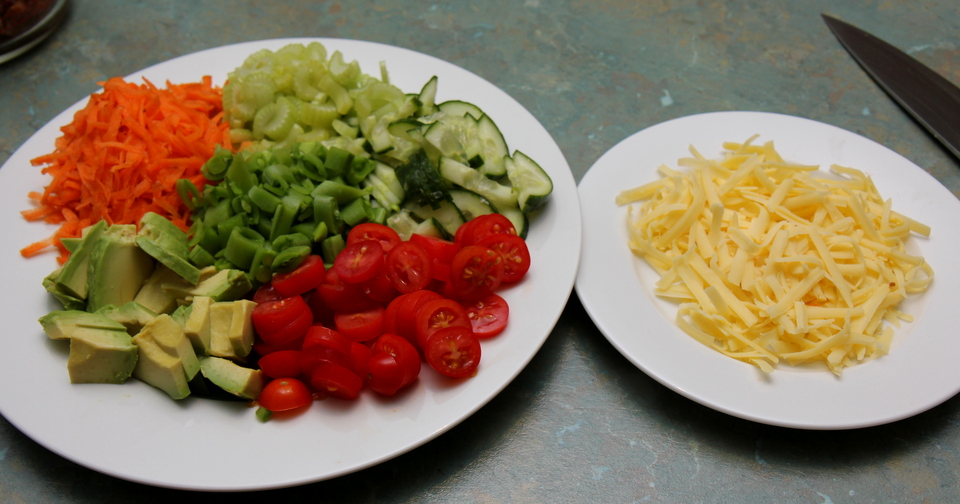
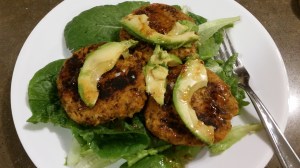
Drain on some kitchen paper; allow to cool a little and then serve, on their own, in a burger or with some extra salad or veggies.
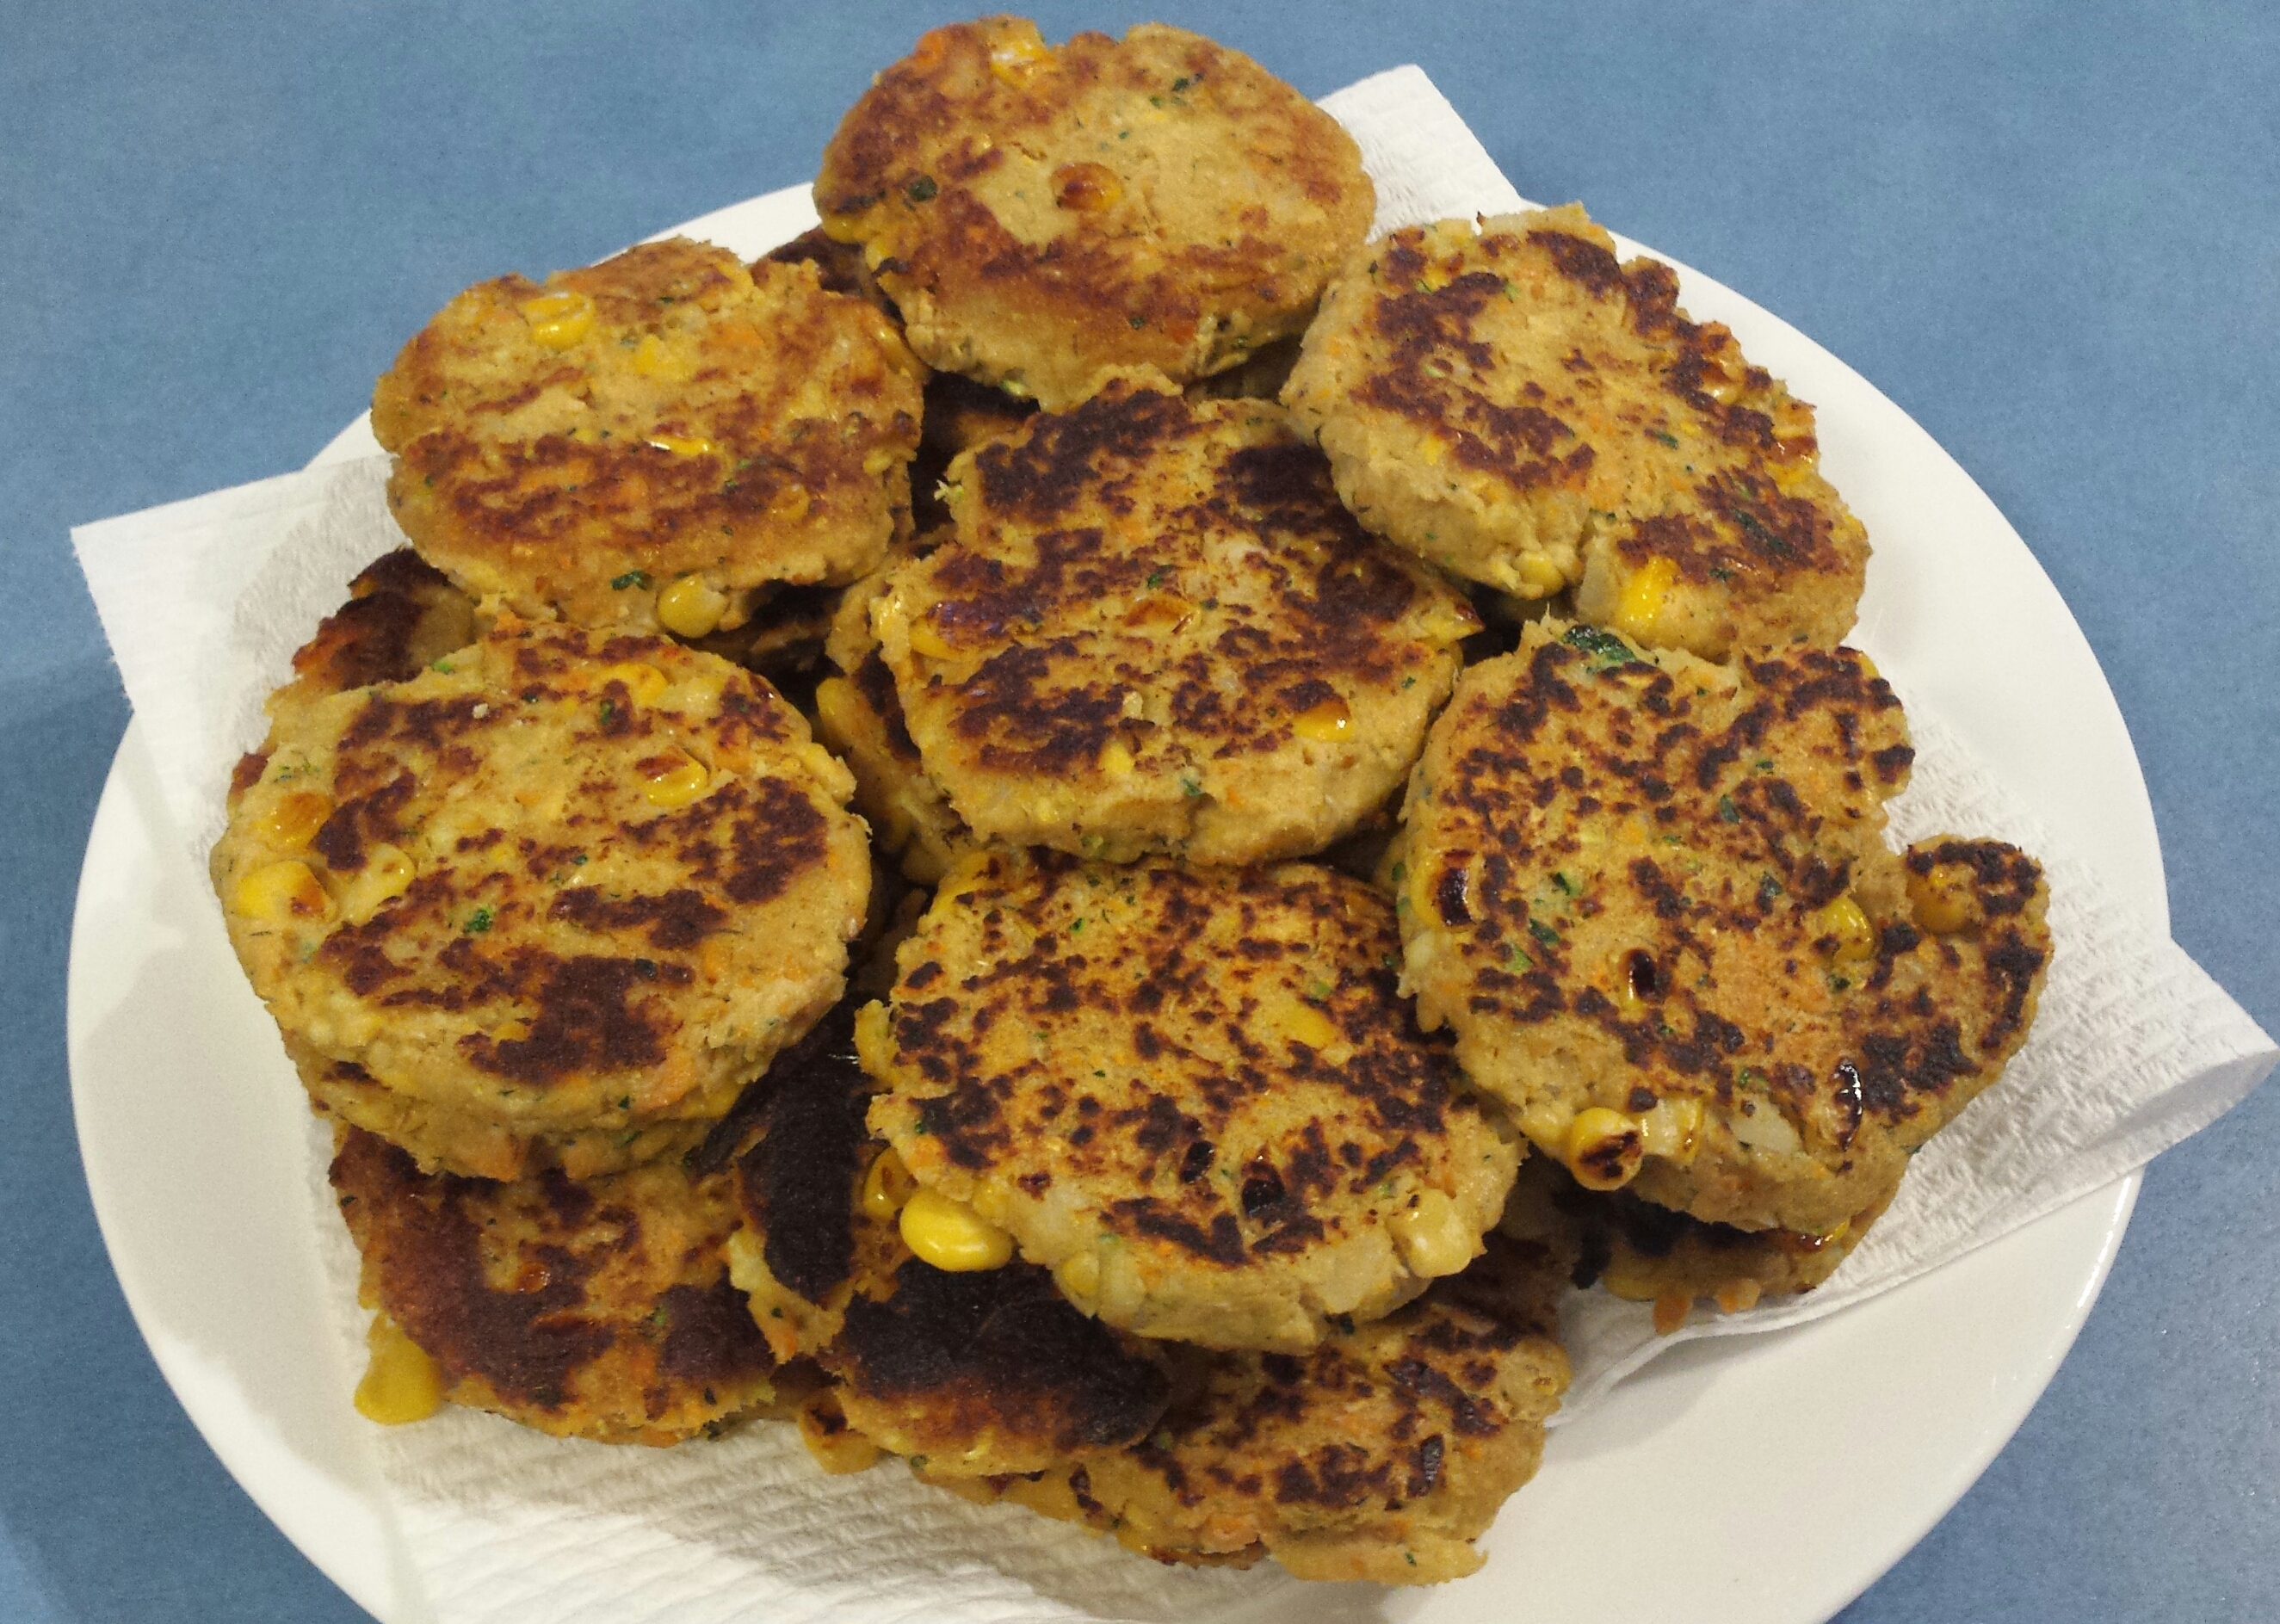
20150930_152201-1

Makes about 24

20180522_173602

These don’t freeze well, but they last a few days in the fridge and are great for easy, healthy lunches.

I think they are particularly great for lunch with some slices of avocado on top and drizzled with sweet chilli sauce 🙂

20180522_174141

**To make these into veggie patties which as great vegan option we simply leave out the salmon. The work brilliantly on their own or in a burger.

Lemon Drizzle Cake

Lemon Drizzle
Retro Mummy inspired me to go the rustic look with the baking paper and I love it!

I enjoy reading Retro Mummy’s blog and we have been loving her recent cake recipes. I adapt them to be dairy and egg (and nut when required) free and usually they turn out really well. The best so far has been the Lemon Drizzle Cake. You can see Corrie’s recipe here. I made my cake in my KitchenAid and loved using fresh lemons from our tree, saving them from ending up as balls for my kids to play with in the garden! I have a feeling that this cake would even cope with being gluten free as well – the flavours are so good.

Ingredients
  • 1 cup caster sugar
  • grated lemon rind from 2 lemons
  • 125g Nuttelex
  • 1tsp vanilla essence/extract
  • 2 eggs equivalent of No Egg, made up with water and mixed well.
  • 3/4-1 cup soy milk (or whatever milk you can have – coconut milk might work really well) I had a juicy lemon so didn’t need as much milk.
  • juice of 1 lemon
  • ½ cup or 55g desiccated coconut (I used shredded and it was good!)
  • 1½ cups/250g SR flour

Drizzle icing

  • juice of 3 lemons (2 would be enough if they were as big/juicy as the ones off my tree)
  • 1½ cups icing sugar
Method
  1. Cream the butter, lemon rind and sugar until thick and creamy.
  2. Add in vanilla and combine.
  3. Add in No Egg mixture, milk and juice of 1 lemon and mix until creamy.
  4. Add in flour and coconut and mix until well combined and creamy and fluffy. I’m not sure why mine went super fluffy but I did leave it for a little bit to attend to children so I think the No Egg really got working like eggs. Worth being distracted for!
  5. Pour into a lined cake tin and bake for about 40 minutes in a 170C/340F oven.
  6. While cake is cooking combine the icing sugar and juice of two lemons in a bowl. Leaving it for a while ensures any icing sugar lumps are dealt with by the juice.
  7. When cake is cooked, remove from tin and leave to cool
  8. Drizzle icing over the cake. I drizzled the icing over while the cake was still warm, like Corrie suggested. I think it absorbs it better too.
  9. Enjoy while still warm – mmm mmm!

Results

5 thumbs up and lots of ‘more’ signing from Miss Emmalyn!

Rich mud cake

This is the cake mix that I keep at the back of the pantry for emergencies! I find it in the alternative section at Woollies.

It is very simple to make and delicious – even for those without allergies … my Dad polished off 3 for arvo tea while we were working on the house 😉

The instructions on the back tell you to add 1/2 a cup of water, 1/2 cup oil and 2 eggs. I have found this to be too oily.

So instead I add1-July 2013 037-001

  • 1/3 cup rice bran oil
  • 1/2 a cup, plus a splash more water, and
  • 2 tsp no egg powder.

I divide in to 12 muffin pans and cook for about 20-25mins in a 160C fan forced oven.

They freeze and defrost perfectly and are wonderful to take to parties for Ellie so that she (or I ;)) don’t miss out.

Enjoy 🙂

Banana Custard

We have recently been offered and accepted a job back in Perth, so we are in the midst of packing to leave Roxby Downs. It is a time of very mixed emotions – we are very sad to be leaving behind our lovely friends and small town lifestyle here but also very excited to be moving closer to family and friends …. and not to mention the excitement of being able to have loads more choice for our foods!!

One of the things I like least about moving is the process of running down the pantry and fridge/freezer. I discovered heaps frozen overripe bananas in the back of my freezer the other day (that I had totally forgotten about!) so I have been experimenting with ways to use them up. Custard was the best of the bunch 😉

Banana Custard

  • 3 defrosted overripe bananas1-May 2013 086
  • 500ml oat milk
  • 2 heaped tsp of No Egg powder
  • 50g coconut sugar
  • 30g pure Cornflour
  • good pinch of cinnamon

Place the Bananas, sugar and cornflour in the food processor and process until smooth. (Speed 6 for 10 seconds for a thermal cooker, then scrape down).

Add in the No egg, milk and cinnamon and process again until well mixed and very smooth. (Start low and gradually build up to speed 6 for 20 seconds in a thermal cooker).

Transfer mix to a saucepan and place over medium heat, stirring for about 12 minutes until the mixture thickens. (for a thermal cooker, mix on speed 1, 100C for about 20 mins).

Serve warm or cold, topped with extra sliced banana or sprinkled with cinnamon sugar.

Makes about 6 serves.

I kept the left overs for a couple of days in the fridge in reusable squeezy containers.

If you want to make a chocolate variety, just add 1 tbsp of cocoa when you are adding the cinnamon.

If you don’t have frozen bananas just use fresh overripe ones.

🙂

Hope you enjoy your baking – I’ll be back in a few weeks from Perth!

Mum’s minestrone

We have just returned home from an 8 day family camping trip through the interior of Australia. It was just amazing …. but after 8 days of camping food I have been hanging out for some serious serves of veggies!

And since the weather is finally getting a little cooler, soups are back on the menu- Hooray!

This is my mum’s minestrone, the one that I have eaten since childhood and I still adore it … I am just sad that I can no longer sprinkle it with cheese while it’s hot!

  • 1tbsp garlic olive oil
  • 1 brown onion, finely diced
  • 4 rashers of short cut bacon, diced1-Blog 005
  • 10 cups Masssel chicken stock made with boiling water
  • 4 celery sticks, finely sliced
  • 4 carrots, finely sliced
  • 2 tins corn kernels
  • 2 tins kidney beans
  • 4 ripe tomatoes, finely diced (or 2 tins diced tomatoes)
  • spiral pasta of choice (we use a GF one)
  • 2tsp fresh ‘Italian’ herbs*, finely chopped

* I use whatever is growing in my garden; rosemary, thyme, oregano, parsley etc. You could also use a tsp of a dried Italian herb mix.

Heat oil in the base of a large saucepan (I am luck enough to own an 11L saucepan so I love making a huge batches) and fry the onion and bacon.

Add the herbs.

Add the stock and bring to the boil

Add the veggies and simmer for 15 minutes.

Add a few handfuls of pasta and cook until it is soft.

Serve hot (and sprinkle it with grated cheese if you can!).

This makes enough for about 10-12 serves and keeps in the fridge for about a week.

This one can easily be made vegan by removing the bacon

If you make huge batches of soup like I do, it’s helpful to refrigerate them individually. If you want to freeze, it is best to stop the recipe before you add the pasta as it tends to absorb too much water and get quite soggy on defrosting. Just add the pasta part when reheating.

Enjoy 🙂

Macaroni ‘Cheese’

Mmmm …. pasta and creamy sauce – so many memories from my childhood and the ultimate comfort food.

I know that most of you would be horrified – but I’m pretty sure that if I could, I’d still be happy to attack a box of the scarily orange Kraft stuff!

But sadly, not a very allergy friendly meal (or one that’s very helpful when you are caring for your body! ) … until now!!

I saw this idea on the Stay at Home Mum site and have adapted it  from there.

See below the recipe for a more simple cheese sauce idea. UPDATE: this is the one I use most of the time now, simply because it is quick!

In a large saucepan, cook

  • 2 cups of GF pasta until al dente (I used a rice and quinoa blend pasta for a bit more protein)

Then drain, rinse with cold water and place into a large bowl.

Then in the same saucepan add

  • 1 small potato, peeled and diced1-Blog 003-004
  • 1 large carrot, diced
  • 2 celery sticks, diced
  • 1 brown onion, finely diced
  • 4 cups of water.

Bring to the boil and simmer for about 15 minutes until the veggies are soft.

Drain the veggies and set aside, but retain about 1 cup of the cooking liquid.

In a food processor blitz together, until smooth;

  • 1 heaped tbsp Nuttelex
  • 1 heaped tbsp tahini
  • 1 tbsp lemon juice
  • 1 tsp salt
  • 1/4 tsp dried mild chilli powder
  • 1/4 tsp dried paprika
  • 1/2 tsp minced garlic
  • pinch of black pepper
  • 1 heaped tsp of nutritional yeast flakes’
  • 4 tsp nutritional yeast flakes’

When this mix is smooth, add the vegetables and then about 1/2 a cup of the cooking liquid. Process until smooth. You want this mixture to be a thick sauce so add a little more water if necessary. I used almost 3/4 of a cup in the end.

Add this sauce to the pasta and mix well. Then transfer to a baking dish.

Cover the top of the pasta mix with,

  • 3/4 of a punnet of cherry tomatoes cut into eighths.

In the now empty food processor add the following and process until it turns to a crumbs;

  • 1 heaped tbsp Nuttelex
  • 1 heaped tsp of Nutritional yeast flakes
  • 2/3 cup cornflake crumbs

Sprinkle the crumb mix over the top and then bake in a pre-heated moderate oven for about 25 minutes, or until the sauce is bubbling hot.

I grew up with Mac cheese being served with bacon so there is no way I could serve this without it! I diced 5 rashes of shortcut bacon and fried them, then added to the pasta at the same time as the sauce.

This made enough for all 5 of us for dinner and 2 extra lunch serves.

2-Blog 005-001

This is one meal that I make into 2 versions – I usually add some extra veggies, like mushrooms and asparagus for the grown ups.

20160211_133614

For a quicker, more simple cheese sauce recipe, but one that still hides veg, I now use this one from my lasagne.

It freezes and re-heats well.

Enjoy 🙂

P.S. Next time you make a roast, have a go at using this ‘sauce’ mix to top your broccoli and cauliflower to make a ‘Cauliflower cheese’.

Chicken Wraps

So often I have tried store-bought wraps that are gluten, egg, dairy and soy free in the hope that ‘this time they’ll be acceptable’ but every time I have been disappointed as they have been tasteless and they crumble as I’ve tried to wrap them around my dinner.

We have had a really long, hot summer and I have been really hanging out for some salad wraps so I began to experiment and the other night we had a total victory!! These wraps are a bit time-consuming to make, but they were worth it; soft and flexible and yummy.

They are adapted from a recipe that you can find at:  http://www.kerstenskitchen.com.au

  • 1/2 a cup each of white rice flour, brown rice flour and Arrowroot1-March 2013 079
  • 1 tsp guar gum
  • 1 tsp GF baking powder
  • 1/2 tsp salt
  • 4 tbsp oil
  • 1 1/4- 1 1/2 cups water
  • 1 dessert spoon of nutritional yeast flakes

Mix together all dry ingredients in a large mixing bowl.

Add the oil. Then slowly add small amount of water at a time.2-March 2013 080

Take time to combine with a wooden spoon after each addition.

Stop adding water when the batter is smooth and glossy, with a consistency a bit like a thick pancake.

Add a heaped wooden spoon full of mixture to a cold frying pan then use a spatula to spread it out so that there is a thin layer covering the base of the pan. Don’t grease the pan – the oil in the batter is sufficient.

Turn stove on to high heat and place the pan on the element.

3-March 2013 082

Cook for about 2 minutes – turn when the mixture is firm and bubbles/puffs a little. Cook for another 2 minutes on this side.

Place on a plate and cover with tea towel. Stack each wrap on top and keep covered. The steam softens the wraps and makes them nice and pliable.

Cool off the pan in between each wrap by running cold water over the back of it. This stops the mix cooking straight away and allows you to spread it more evenly.

We served ours with ginger chilli chicken and salad.

To make the chicken, I used

  • 4 chicken thighs, skin removed and thinly sliced
  • 2 tbsp coconut aminos (or soy sauce if you can have it)4-March 2013 085
  • 1 tbsp rice bran oil
  • 1/2 finely chopped red chilli
  • 1 heaps tsp minced ginger

Mix the chicken with the aminos and allow to sit for about half an hour. Heat oil and add ginger and chilli, cook stirring for 2 minutes. Then add chicken, stirring occasionally until cooked.

6-March 2013 091   5-March 2013 088   7-March 2013 092

Lay the fillings in the top, centre of the wrap and top with fresh crunchy salad. (It’s best if you roll over one side, then fold up the bottom then wrap the second side over the top).

I think I will make this again when we next have a curry, but I will make it smaller and a bit thicker then top with my home-made garlic butter, for a naan type bread – mmm!

Enjoy!

Chewy muesli bars (Superhero Slice)

Most kids love muesli bars – but the ones from the shops are often filled with additives, preservatives and refined sugars. So home-made is a great option. ‘Hugh’s muesli bars’  that I have previously posted about don’t hold together so well when they are out of the fridge for long periods of time, so they aren’t the best for lunchboxes. After a bit of tinkering, I think I’m on to a delicious and chewy winner 🙂 We call this one ‘Superhero slice’ because of all the great stuff in it to give you great energy!

  • 100g dried apple
  • 100g dried apricot
  • 6 medjool dates, pitted
  • 4 tbsp each of chia seeds, flax seeds, pumpkin seeds and rolled quinoa
  • 2 tbsp psyllium
  • 250g Sunflower seed butter (half vegan butter and half seed butter works well too)
  • zest 1 lemon, finely grated
  • Juice of half a lemon
  • 70g oats or puffed rice

Mill the seeds, quinoa and pysllium together until you reach a consistency that resembles almond meal …. don’t go too far or you’ll get a paste! Set aside.

In a food processor blitz together the apple and apricots (speed 8 for about 15 seconds in a thermal cooker), then add the dates one at a time through the chute at the top (speed 4 while you are adding then up to 7 for 15 seconds).

20150731_204647

Add the milled seed mix to the fruit and process until well combined (speed 4 for 20 seconds).

Add the sunflower seed butter, zest and juice and process again until well combined (speed 4 for about 30 seconds).

Add the oats or puffed rice and process until evenly distributed (Speed 4 15 seconds).

Press down very firmly (I used my hands and then back of a fork) into a lined tin and place in a 160C preheated oven for about 30 minutes or until the top is golden.

20150731_213022

Allow to cool and cut into squares or bars and keep in an air tight container. Ours lasts 2 weeks in the fridge. Makes about 24 squares.

20150731_221253

Enjoy 🙂

Hummus

I loooove chickpeas – they’re low GI and high in fibre and protein and they are cheap 🙂 I love their nutty flavour and the crunch they have when they are roasted. I add them to casseroles and stews and eat them several times a week in my morning tea, so there’s no way I can look past hummus as my favourite dip! My little miss happily eats half her body weight in it for morning tea!

FB_IMG_1580304964032

See below the recipe for a few variations on the original too.

  • 400g tin drained and rinsed chick peas 1-February 2013 2428
  • 1 tbsp tahini*
  • 1/4 cup extra virgin olive oil
  • 1 good pinch flaked pink salt, and
  • juice from a medium lemon (use 1/2 first and taste test before adding the rest)

*If you need to be sesame free then replace tahini with equal quantities of seed butter.

Add all ingredients, except the olive oil, to the food processor and blitz until well combined. The while the processor is running, drizzle the olive oil through the top chute until well combined and creamy (In a Thermal cooker – Speed 4 for 10 seconds, the scrape down sides and use speed 5 for 15 second intervals, scraping down sides in between until you reach desired consistency).

If it is too thick for your liking, add in a few teaspoons of water.

The citric acid in the lemon will help to preserve the mix so it will store in an air tight container in the fridge for several days – but my best tip is to make a double batch and pop one in the freezer – it defrosts perfectly!!

This makes about 8 serves (a heaped dessert spoon full).

We have it with crunchy raw veggies or wholegrain rice crackers.

Enjoy!


My yummy morning tea!

For a variation on plain hummus:

  • Add in about 100g of cooked (steamed or roasted) beetroot – even the tinned variety works, plus a tsp of fresh chopped rosemary and 1/2 tsp of mince garlic. Blend to desired consistency.
  • Add in about 100g of roasted pumpkin and a handful of pumpkin seeds. Blend to desired consistency.
FB_IMG_1580304933023
The beetroot version – hooray for pink hummus!!

Chocolate Freezer fudge

ok – this is hands down the best dessert I have made to date!  If you are after a very simple but decadent, chocolatey dessert that is allergy friendly and quite healthy – then this one is for you!

  • 1/2 Cup Sunflower seed Butter1-February 2013 692
  • 1/2 Cup tasteless Coconut Oil (Room Temperature)
  • 1/2 Cup Cocoa
  • 1/2 Cup Pumpkin Puree
  • 1/3 Cup honey/maple syrup

Place all ingredients into your processor (helps if the pumpkin is still warm) and process until the mix is smooth, stopping to scrape down the sides. In a Thermal Cooker, start on Speed 5 for 20 seconds, scrape down the sides and then process again, working up to speed 7 until mixture is very smooth).

Pour in a greased 8×8 tin, cover in glad wrap and freeze for about 4 hours.

Cuts into about 16-20 pieces and needs to be stored in the freezer.

This was  a MASSIVE hit in my house and I have to confess that it didn’t last very long! They are already requesting another batch

3-February 2013 699

Hope you enjoy it as much as we did 🙂