Growing up, my mum was famous for her chocolate cake. So much so that it was known simply as ‘The Chocolate Cake’.
It was the base for most (if not all!) of mine and my brother’s birthday cakes and it made an appearance at a lot of special family occasions. Since our diet has had to change I have so missed that cake! So since we are off to a birthday party tomorrow where we will need to take ‘safe’ cake along for Ellie … here is my attempt at living up to Mum’s cake!
See below the recipe for a coeliac friendly version.
1 3/4 cups flour (half wholemeal)**
2 tsp GF baking powder
1/2 – 3/4 cup sugar (use more or less depending on your sweet tooth!)
2 tbsp cocoa
125ml light olive oil
1 cup milk of choice
1 tsp vanilla bean paste
3 tbsp aquafaba (liquid drained from a can of chic peas)/one medium (overripe) pureed banana/ 1 whole egg
** To boost the nutritional value of this cake, I often leave out 1/2 cup of flour and replace it with 1/2 of almond meal cup or milled seeds (I like a mix of chia, flax and pepita) – the ground chia and flax also help the bind the cake without an egg present too.
Mix together the oil, milk and vanilla until well combined.
In the large bowl of your mixer mix together the flour, sugar, cocoa and baking powder.
Mix the wet mix into the flour mix and beat until to combined. While the mix is beating, add in the aquafaba or egg.
Pour into a lined cake tin or 14 regular muffin holes.
Bake in a preheated moderate oven for approx 45 minutes (for the cake) or 20 minutes for the muffins, or until a skewer comes out clean.
Allow them to cool and then ice as desired.
I have made a simple icing from 1 tbsp melted Nuttelex, 1 tsp cocoa, a splash of milk and pure icing sugar. But my kids enjoy them equally un-iced.
It’s not quite the same as Mum’s but it is a pretty close substitute and the kids seem to agree!
It freezes and thaws well too.
To adapt for a Thermal cooker:
Place the oil, vanilla and milk in the jug mix on speed 4 for 5 seconds.
Add in the sugar, baking powder and cocoa and mix on speed 4 for 15 seconds.
Add the flours and mix on speed 4 for 30 seconds. Whilst mixing, add the aquafaba or egg through the opening in the top of the lid.
Enjoy 🙂
To make this into a coeliac friendly version make sure you use an appropriate milk and replace the flour with 1 1/2 cups of a plain GF flour mix and 1 tsp psyllium husk. Reduce the mixing time when you’ve added the gf flour so that you mix just until the flour in combined.
I recently made a double mix of this cake for miss Ellie’s 3rd birthday party. And it worked well as a based for the fondant icing too.
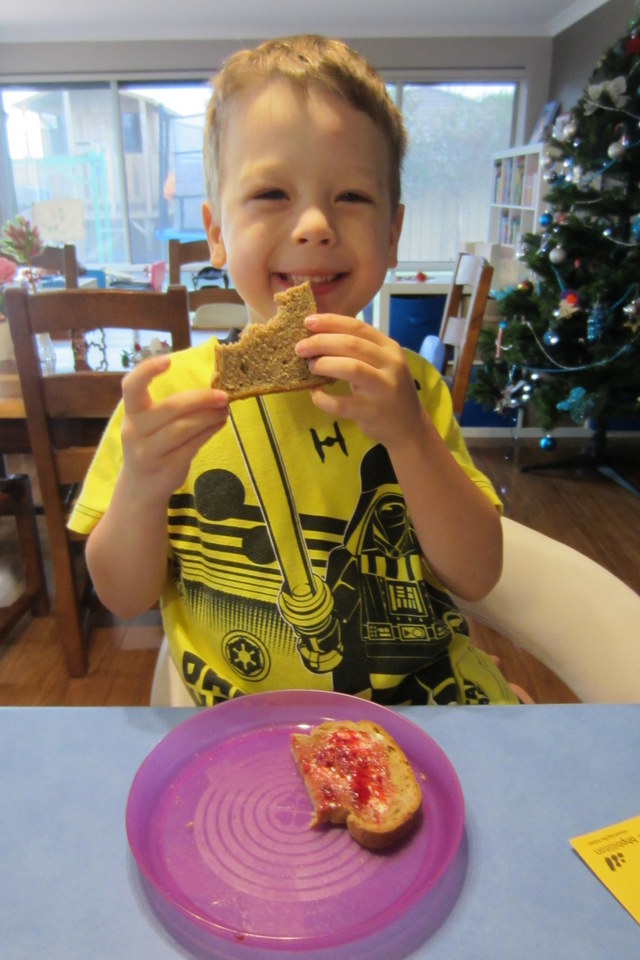
My little Harry has a serious infatuation with bread. He would eat it for breakfast, lunch and dinner every day if he was allowed! In fact recently when I was writing our menu and shopping list I asked the kids for their input and Harry’s response was “Mummy, I’ve told you what I like; bread, salt, cake, butter and enchiladas. Don’t keep asking me again, just make ALL the dinners from that!”.
However, he does not like ‘yucky seedy bits’ or ‘pooey vegetables’ … so when I served this bread up he was highly unimpressed that I had sullied his precious bread with both seedy bits and vegetables!!!
After quite a bit of encouragement he tried some … then scoffed the whole piece and promptly asked for another. Then he ate another piece with his dinner and gave me 100 out of 10 – I am claiming victory!!!
It is based on a pan bread from the ‘Multi-allergy cookbook’ by Lola Workman.
See below the recipe for a conversion for Thermal Cookers.
1 tsp sugar
2 tsp gelatin (kosher gelatin or agar-agar if you need to make it vegan)
1 tsp salt
2 tsp dried yeast
1 tbsp olive oil
4 tbsp warm mashed pumpkin
2 cups flour of choice – Wholemeal spelt or a combineation of oat and rye are great. (For GF flour mixes, use 1 3/4 cups plus 1 tsp psyllium)
1 tsp chia seeds
1 tsp flax seeds
1 tbsp sunflower seeds
1 tbsp pepitas
1 tbsp rolled oats (omit these or switch for rolled quinoa for GF)
Place 1/2 a cup of warm water in a mixing bowl and add the sugar, gelatin and yeast. Whisk until well combined
Stir in the mashed pumpkin and leave to sit for 10 minutes.
Place your seeds into a processor and process until finely chopped.
Add the flour, salt and seed mix to the pumpkin mix and fold together. Start with 3/4 of the flour and gradually add a bit more if the mix is too wet.
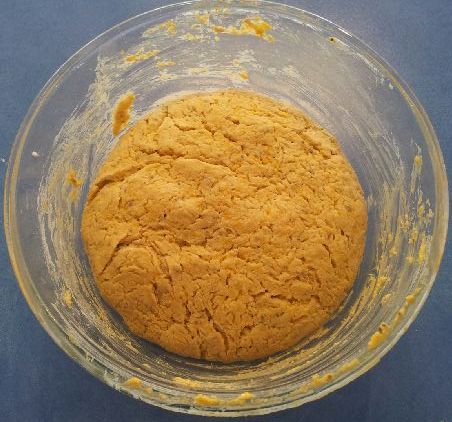
Tip the dough on to the floured board and gently knead until the flour is absorbed. Shape to a rough ball.
Pour the oil into you hands and rub it all over the ball of dough.
Place the dough back in to the mixing bowl, cover with a tea towel and leave in a warm place to rise for 20 minutes.
Before rising…
20 minutes later
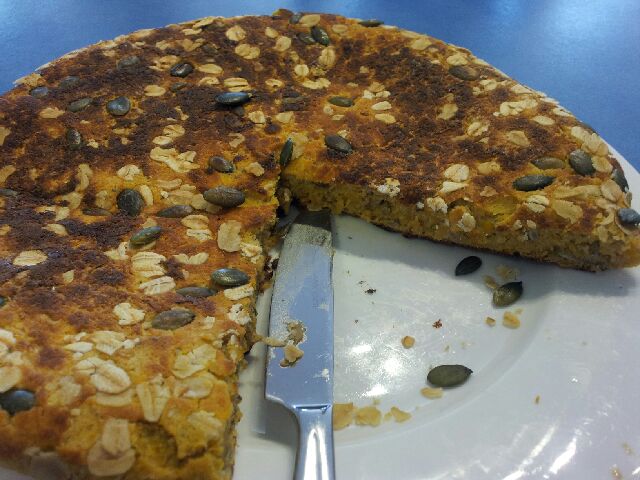
When the dough has risen, warm a heavy based pan on the stove, spray the base with some oil and sprinkle the oats and extra pepitas on the bottom.
Tip the dough into the middle of the pan and, using your fingers, spread the dough to fill the pan. Cook for 3-4 minutes, then turn the bread and cook for a further 10 minutes until both sides are golden brown and sound hollow when tapped.
Can be eaten warm or cold, on its own or with a spread.
We cut it into wedges and it makes 12 wedges.
To convert for a Thermal cooker:
Place your seeds into bowl and process on speed 6, 6 seconds. Set aside.
Place 1/2 a cup of warm water into mixing bowl and add the sugar, gelatin and yeast. Speed 2, 5 seconds. Allow to sit.
Stir in the mashed pumpkin (Speed 3, 15 seconds) and leave to sit for 10 minutes.
Add the flour, salt and seed mix to the pumpkin mix and mix on Speed 4 for 10 seconds. Start with 3/4 of the flour and gradually add a bit more if the mix is too wet.
Tip the dough on to the floured board and gently knead until the flour is absorbed. Shape to a rough ball.
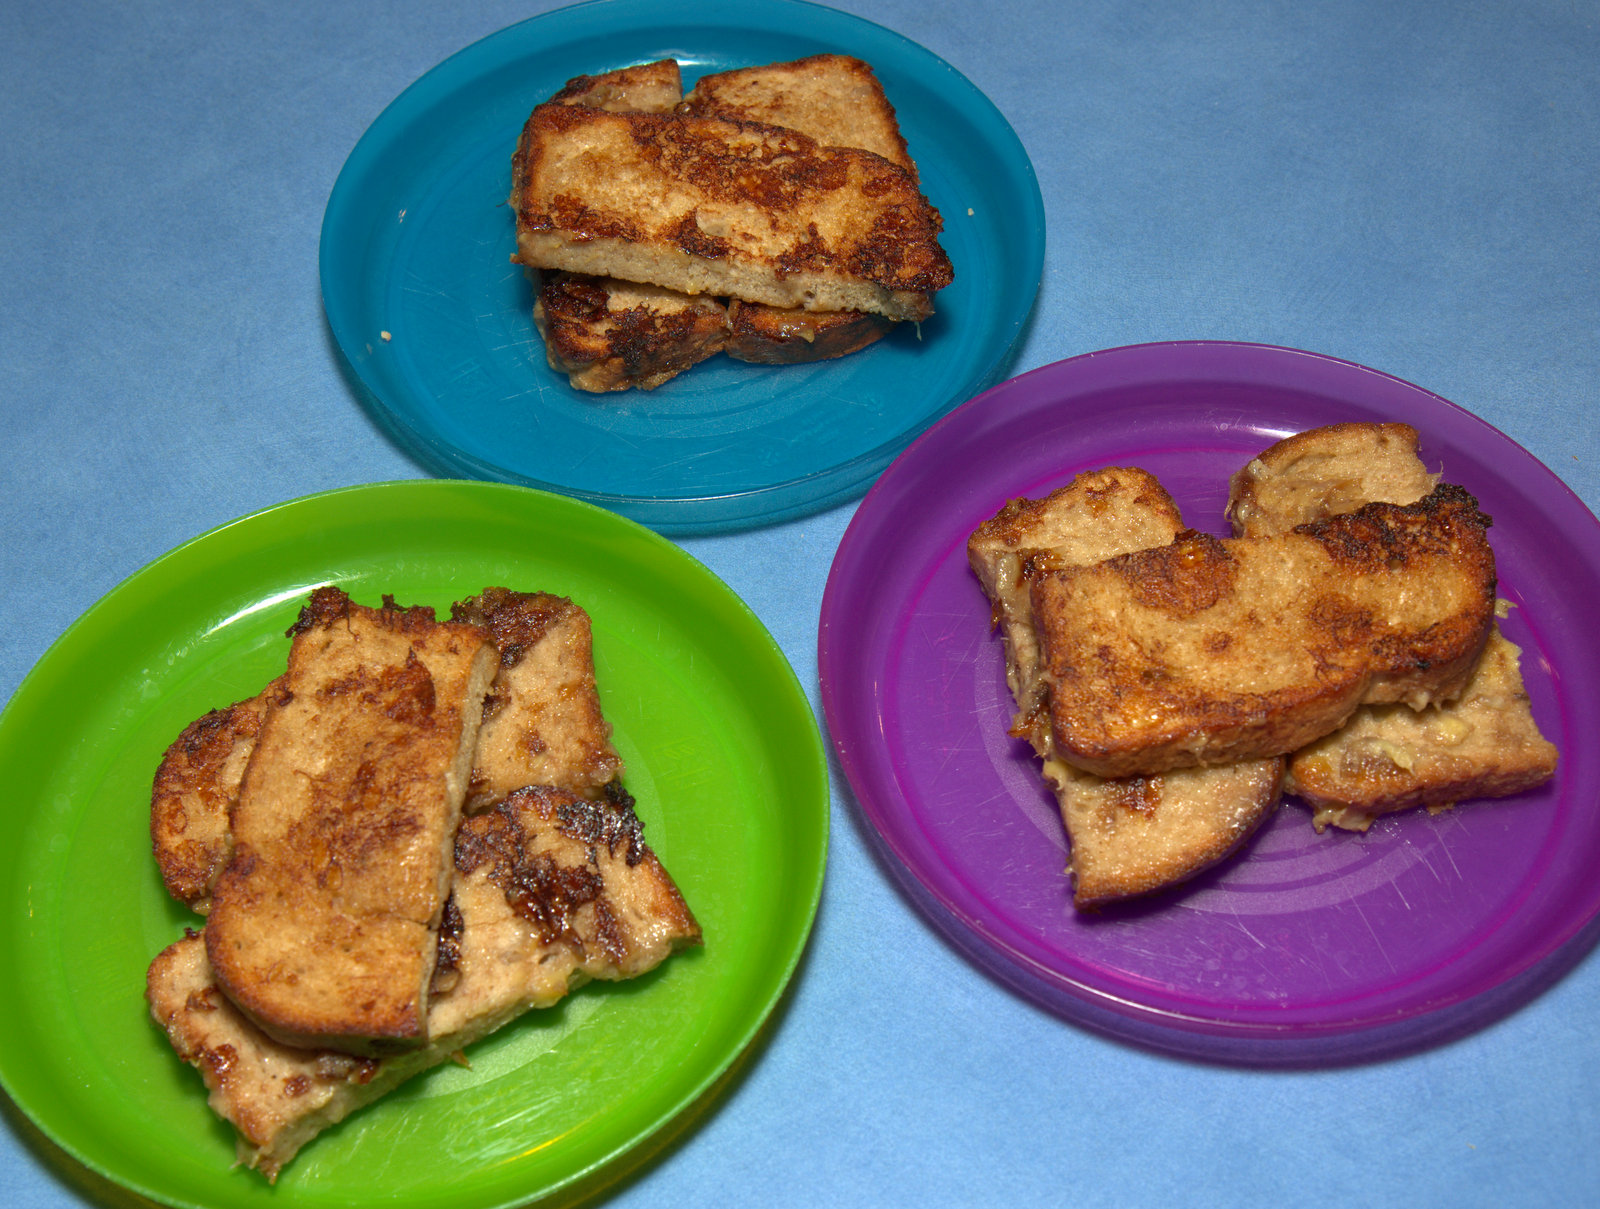
This is a recent addition to our ‘special breakfasts’ and it is a hit!
2 overripe bananas, very well mashed
1/2 tsp ground cinnamon
1 tsp honey
2 tbsp milk of choice
bread of choice
rice bran oil
Mix together the bananas, cinnamon, honey and milk. Make the mixture as smooth as you can – the smoother it is, the better the mix sticks to the bread when you turn it in the fry pan.
Place 1 tbsp of oil in the frying pan on a high heat.
Roll the bread in the mix and place in the frying pan. Turn to the next side when it is golden brown.
Serve warm, with extra sliced bananas if you’d like.
I love winter time – the cold, grey days give me energy … I know, I’m strange!
One of the things I love is making delicious comfort food that warms and fills you up. I love that I can cook huge quantities of soups, curries, stews and casseroles that are packed with veggies and freeze them for easy meals. This is one of those meals.
It is quick and easy to make (about 10 minutes to start and another 5 later), is really cheap – about $8 for the entire 6L pot and the left overs freeze and defrost really well.
800g beef soup bones
3-4 carrots, diced (skin on is fine)
3-4 large sticks of celery, diced
3 potatoes, diced (skin on too) OR 1 medium sweet potato
2 cups dried lentils
1 cup pearl barley
400g tin crushed tomatoes
1/4 cup red wine
2 sprigs fresh thyme
approx 2L water
Salt to taste
Mix all of the ingredients together in the slow cooker and fill with water to cover. Place lid on and cook on low for 8 hours.
Remove beef bones and strip the meat. Remove sprigs of thyme. Dice the meat up and return to the pot, stirring well. Add salt to taste.
You might have already guessed from many of my previous posts that I have a bit of a sweet tooth. I love bikkies and cakes and almost anything sweet, so I am always looking for ways to make yummy snacks that also have a bit of extra fibre and protein in them … these are my latest experiment and happily they have been very well received.
William says they are ‘even better than ones from a packet’ and even my husband’s work colleagues have been enjoying them, so I hope you do too!
250g Nuttelex
2 1/4 cups rolled oats
2 1/4 cups plain GF flour
1/4 cup coconut sugar
2 tbsp maple syrup
2 tsp bi-carb soda
4 tbsp boiling water
1 cup flaked quinoa
100g diced dried apricots
100g diced dried dates
In a medium saucepan melt together the Nuttelex and syrup. You don’t want it to boil, just to be all melted and well combined.
In a large mixing bowl place the oats, flour, quinoa, sugar and dried fruit. Mix well.
In a glass or small container mix together the bi-carb and boiling water. Immediately add this mix to the syrup mix. It will froth and bubble to about twice its volume.
Pour this mix into the dry mix and stir until well combined.
Place heaped teaspoon fulls on the mix onto a lined baking tray.
Press down gently with a fork before baking in a slow oven (150C) for about 25 minutes or until golden brown.
These will be soft when you take them out of the oven but will harden as you allow them to cool on the tray.
Makes about 36 (although … I suspect it might have been slightly more if it wasn’t for the quantity of dough eaten by my little helper!).
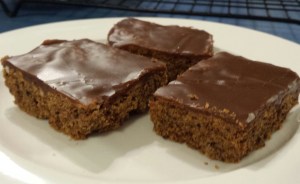
After a simple afternoon tea slice straight from the pantry? Here’s one I cooked up this week that was free of our allergens and delicious too.
(See below Libby’s recipe for a Coeliac Friendly version from Jess)
It made enough for a piece each for two afternoons with one or two left over (hmm, not sure where they went…?!) but it is easily doubled so that it lasts longer (or serves more people).
125g Nuttelex
1/2 cup sugar (I used raw sugar and just didn’t fuss that it wasn’t all dissolved)
1/2 cup oats
1/4 cup cocoa
1 cup SR flour
1. Mix cocoa and oats together in a bowl (whilst preheating the oven to 180C)
2. Melt the Nuttelex and sugar together in a saucepan until sugar dissolved (or almost!)
3. Remove from heat and pour it over the cocoa and oats and mix them together.
4. Mix in self raising flour.
5. Press into a 20cm x 15cm baking dish (I used a small pyrex dish lined with baking paper)
6. Bake for 15min at 180 degrees Celsius. Cool in the dish.
Yum! For regular people, just change the Nuttelex to regular margarine or butter.
Verdict
5 thumbs up! Crumbs devoured.
Yum. Love baked treats.
For a coeliac friendly option: replace the flour with a standard gluten free flour mix plus 1 tsp GF baking powder. Replace the oats with crushed GF weet-bix, shredded coconut, or rolled quinoa.
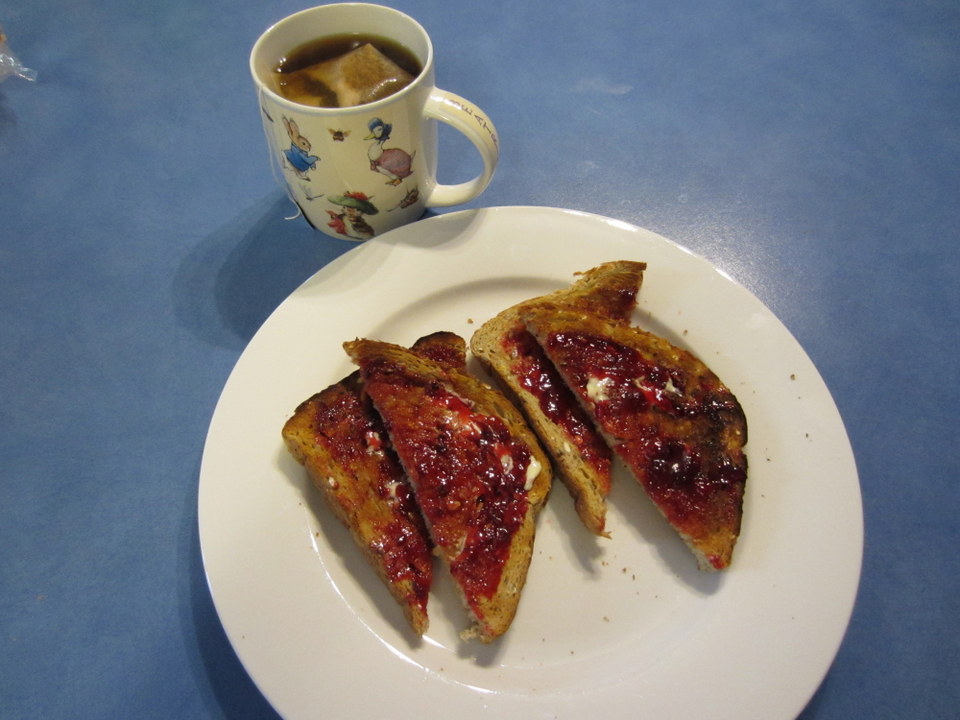
I should start this post by saying that I am a total jam novice …. this is my first ever go at making jam but it was much less scary than I thought and it tastes so yummy that I am inspired to make more.
I am very fortunate that my parents-in-law have a sprawling, very heavily laden mulberry tree in their backyard, so picking over 2kg of berries to have a go was very easy (and fun!).
I have made this one with quite ‘Christmassy’ flavours so it is another great gift to give for teachers (or even those great Aunts and second cousins once removed that are really tricky to buy for 😉 )
1.3kg Mulberries
1.5kg jam setting sugar (made by CSR, it already has some pectin in it)
finely grated zest of 2 large oranges
1 heaped tsp of ground cinnamon
juice of 1 lemon
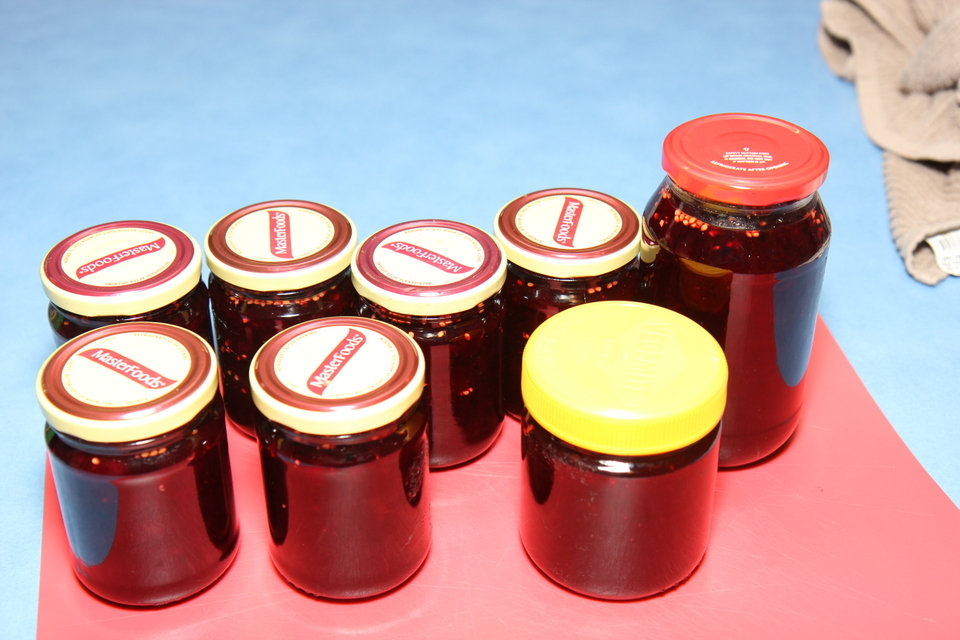
8-10 glass jars, scrubbed clean
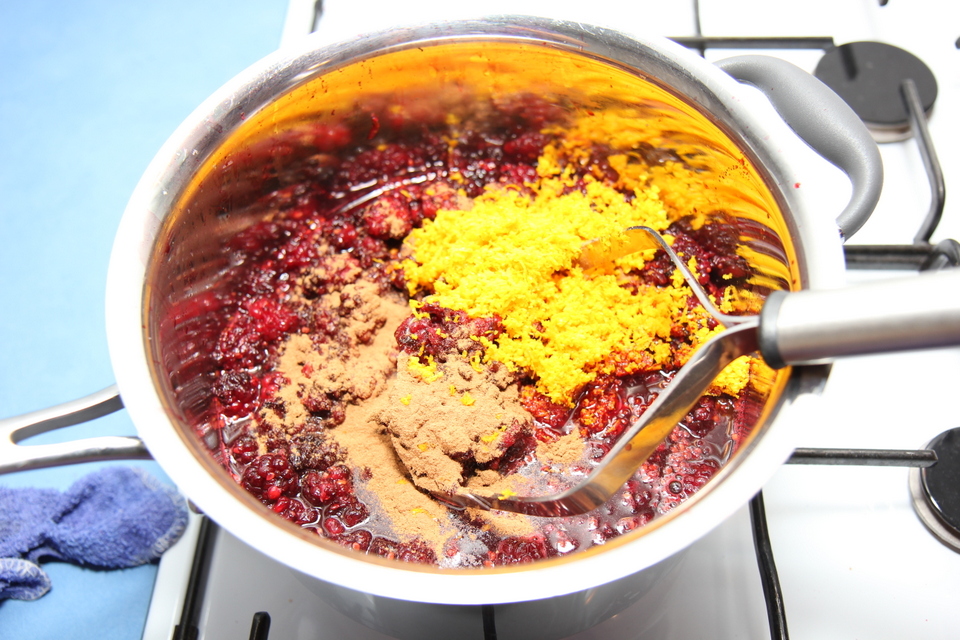
Wash berries and drain very well. Remove any obvious stems and place in a large saucepan.
Crush with a potato masher. How much you crush depends on how smooth or lumpy you like your jam … I like some lumps so I didn’t mash too much.
Tip in the zest, juice and cinnamon and mix well.
Turn on the stove to a low heat and add the sugar.
Stir continuously over low heat, until ALL of the sugar has dissolved.
Turn up the stove to a high heat and bring to a rolling boil. And continue the boil for 4 minutes.
Remove from the heat.
During these 4 minutes boil the kettle and soak the jars and lids in the boiling water. Dry the outside of the jar with a clean tea towel.
As soon as you have removed the jam from the heat, use a jug, like a pyrex style measuring jug to scoop out the jam and pour it into the jars. Please be very careful with this part … it is a really hot mixture and you will need to protect your hands.
Fill the jars, place the lids on and immediately invert them. Allow them to stand upside down for an hour. This allows the jars to reseal and keeps them airtight.
Then turn the jars up the right way and wipe them … it is a messy process! Allow to cool and set overnight – don’t put them in the fridge as you might crack the glass. Only use jars with a plastic lid if you are going to use it straight away or if you have jam seals underneath.
You can easily decorate the jars to give as gifts. We did a pretty label and some glossy red and green bows. They look great!
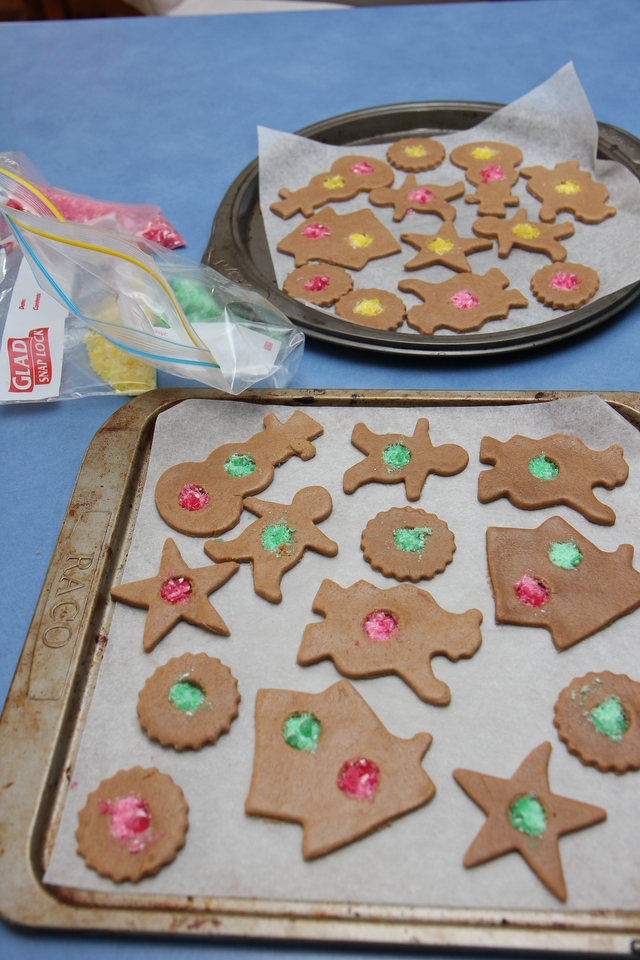
One of my favourite things to do leading up to Christmas is baking!! The kids enjoy helping and sharing their spoils too.
This year my William is in kindergarten and has asked to take in Christmas treats for all of his little friends, and I was on roster to do craft for the kids at our Bible study break up … so I made a (huge!) batch of Libby’s yummy gingerbread and we turned them into stained glass biscuits. Fun to make for the kids, yummy to eat and they make lovely presents with a bit of cellophane and bright ribbon!
Please note that the gingerbread recipe itself is soy free but there is a small amount of soy in the only boiled lollies I was able to find, so the stained glass part is not soy free.
Split the colours of the lollies up into bags then smash them up on a hard surface with a hammer. Best to have a tea towel folded around the bags so stop all spillage if you split the bags!
Remove the gingerbread dough from the fridge and cut out the gingerbread shapes.
On a lined baking tray (it must be lined with baking paper and not just greased as the boiled lollies will stick like rocks without the baking paper!) place the shapes and then use an apple corer (or similar) to cut out holes.
Fill the holes with the crushed lollies – careful not to overfill them as they will turn to liquid and overflow during baking!
Bake in a moderate oven for about 10-15 mins or until golden brown.
Leave them to cool for at least 15 minutes on the tray before attempting to remove them to a wire rack – the liquid ‘glass’ centre needs time to harden and stick to the biscuit.
Allow to cool completely before wrapping and sharing as gifts … or enjoying at Christmas parties 🙂
Last night we had a get together with a group of friends that had been months in the planning. A few sets of friends were visiting from all over the world … what better reason to get together and share a whole lot of yummy deserts?! I was asked to bring along an allergy friendly desert … and this cake what I came up with – it is almost a replacement for cheesecake.
Just before he tasted it, I was having a conversation with a friend who was telling me how it is really awful when people try to pass off ‘that avocado stuff as chocolate mousse’ … and then he ate it and loved it … so I’m counting that as a win 😀
To make the base you’ll need
2 packets of Macro gingernuts
3tbsp Nuttelex
Place in a food processor and process until the crumbs resemble damp sand.
Press the crumb down firmly with a fork into a greased springform pan.
Then make the mousse.
I used a double quantity of this recipe for the chocolate mousse
Tip the mousse on to the top of the crumb base and spread out evenly.
Place in the freezer until solid. This is a cold dessert so it is best left in the freezer until almost ready to serve.
Makes quite a large cake – serves probably 12-16.
I really enjoy the ginger flavour, but I think next time I make this I might have a go at using Rowies Anzac Biscuits so that the chocolate flavour is the more dominant one.
Hope you enjoy!
Update: I have recently been making this cake with a different base and have enjoyed it even more than the original.
Sadly, lots of kids with food allergies also have related conditions such as asthma, eczema and hayfever. We have all 3 of these in our house, which we have learned to manage fairly well.
On top of this, our Mr 3, Harry, has a very serious allergy to some cleaning products and certain chemicals. After a particularly scary reaction and a race to the emergency department just after he turned one we were given an epi-pen, which we carry at all times. However, we have since discovered that he is a super sensitive little dude and that even a visit to a recently cleaned public loo or a change in sunscreen can leave him crying in pain from the nasty burn type reaction that spreads over his body from contact.
So I wanted to share with you some of the ways that our family washes, bathes and cleans, whilst managing these allergies.
*Please keep in mind that I am NOT a doctor or dermatologist and am not suggesting that the things that work for our family WILL be the answer for yours – but we have had a long journey to work out these things and I’d love to think that it might give you a place to start if you also have an Itchin’ household that is not restricted to the Kitchen. Additionally, we are not in any way paid to endorse these products!!
My 3 beautiful reasons for changing the way we do things!
Vaccuming – Since dust mites and dust are an asthma trigger for us, and we have 3 little people and dog inside (!!), I vacuum twice a week. We have pulled up all carpet and put down bamboo and we don’t have cloth blinds/drapes to eliminate as much as we can. Lots of vacuums just stir up dirt and blow it back out again so a really good vacuum is helpful. We installed a ducted vacuum system (which you can do yourself if you are handy, like my husband, to save big $$) which means that the pipe goes straight to the motor outside in the garage and there is no dust re-circulation. I know lots of other allergy sufferers who swear by their Dyson’s too.
Dusting – I use a damp or electrostatic cloth to avoid stirring up dust. I dust weekly to keep on top of it – we live in an area where there is still quite a bit of house construction so it gets really dusty!
Mopping – When I had a tiled floor I had a great steam mop. Loved that I could get a really clean floor without any chemicals. Sadly, steam mops are a big no no on wooden floors so I have recently purchased a Norwex microfibre mop that I use with plain water. Enjo also make a similar product and there are other less expensive versions available at the supermarket.
General cleaning – Orange oil, bi-carb soda and plain white vinegar are my new best friends. I haven’t always been a fan of this type of cleaning product but as I have tried to protect my family I have also been convicted of the need to protect our environment (and our household budget as a bonus!). I use about 10 drops of orange oil in water mixed in a spray bottle to clean the bathrooms, toilets and showers. As opposed to tougher chemical cleaners, you do need to do this more frequently because it isn’t as good at cleaning up a scary build up of mould and grime, but if you keep on top of it weekly, it works well. Bi- carb and warm water is a great cleaner for most things, use it as a paste if you need more of a cream type scrub or mix with a small amount of vinegar if you want a fizzing clean. Works for cleaning kids bath toys, un-blocking drains, and de-scaling your iron and kettle. It also works for getting smells (like pet wee or vomit) out of carpets . I do have to confess that I still use a bit of bleach on the inside of my toilet bowl – it is away from contact with Harry and those ingrained ideas about germs are very hard for me to completely ignore 😉 I use white vinegar in my dishwasher as my standard rinse aid and if I run out of the dishwasher detergent I use a heaped tsp of bi-carb and 3 drops of orange oil – works beautifully!
Two of my best cleaning friends
Washing clothes and nappies – My favourite washing detergent is called ‘Rockin Green’. I haven’t found it in a supermarket yet but it is easy to order on line with a Google search. It is totally phosphate free and also free of enzymes and optical brighteners. It is particularly amazing if, as we do, you wash cloth nappies. If I don’t have the Rockin Green, I use a standard sensitive washing powder, but I use only about 1/3 of the amount specified on the pack and often do and extra rinse too. As a pre wash for cloth nappies, a teaspoon of bi carb is amazing. I also sprinkle a tsp of bi-carb into the bottom of the nappy bucket to help absorb the smells.
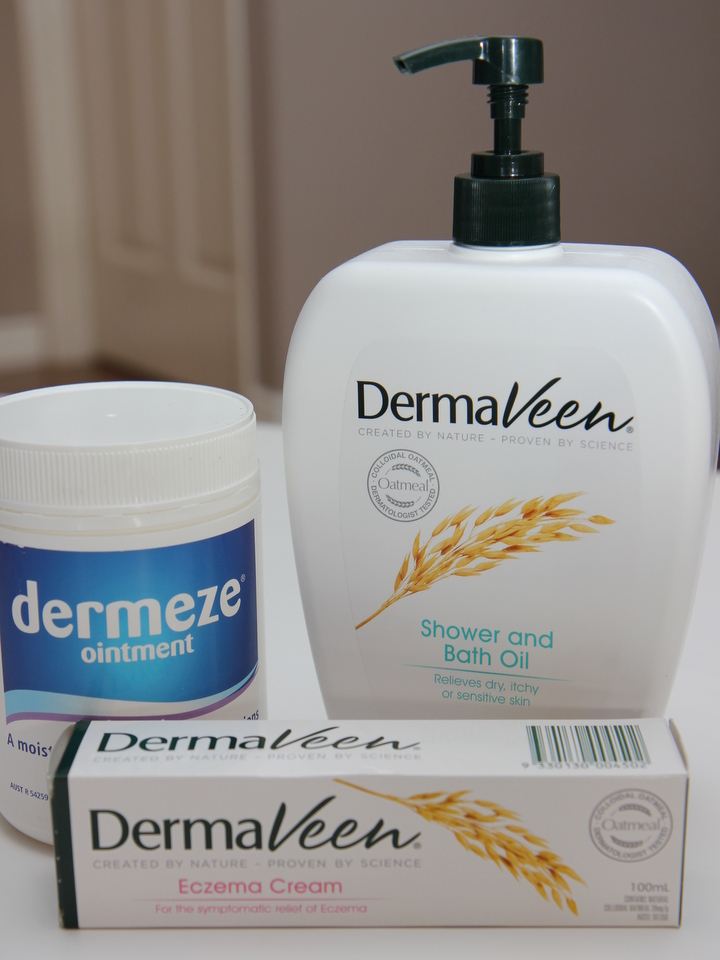
Bathing – Any kind of detergent is out for Harry, so we bath the kids nightly in warm water and a few tablespoons of Dermaveen Oatmeal Bath and Shower oil. If they are out at another house it is just plain water and a face-washer. A couple of drops of food colouring in the bath turns it a great colour if you want to make it more interesting. The oatmeal oil is beautiful and moisturizing and it is lanolin, paraben and fragrance free. Because I am in so much contact with the kids, I also use this to wash myself.
Skin care after baths – To keep on top of the rashes and scaly skin we need to make sure the kids are very regularly moisturized. We use Dermeze Ointment. It is a soft white paraffin and quite thick, but it works wonders for sore and sensitive little bodies. We also use organic rose-hip oil on sore spots if they’re not bad enough to require the really strong medicated creams we also have. Dermaveen also make a nice thick eczema cream that is lovely and relieving and not as greasy if you aren’t so dry or itchy.
Bath time and after bath skin care
Nappy Rash – This has been a big difficulty for Ellie as well as Harry, so after lost of bleeding bottoms (after only 1 acidic nappy) and doctors visits, we seem to have a routine that clears it up fairly quickly. We avoid commercial wipes and use warm water mixed with a tsp of bi-carb and wipe with a soft, chemical free, make up pad. Then when it is particularly bad, we use Hyrdozole cream (from your Pharmacist, it is a anti-fungal mixed with a cortisone) and then after a few minutes, use a very thick layer of Nappy Mate paste over the top (this was developed at the Children’s hospital in Perth for kids who were admitted to hospital with Nappy Rash, and is very thick and can be quite tricky to apply but it is by far the best healing barrier cream I have ever come across). Also let those bottoms air as much as you can … fresh air and a bit of sunshine works wonders!
I realize that all written down in one place, this looks like a lot to change – but be assured, we have done this gradually and it’s now just second nature.
Keeping your kids safe and well is always a big challenge – Good Luck and please let us know if you have any other tips for managing these things in your Itchin’ house.