Hot potato chips and any of their close cousins are a big win with my kids – in fact, with most kids I think! Ok, ok …. with me too!
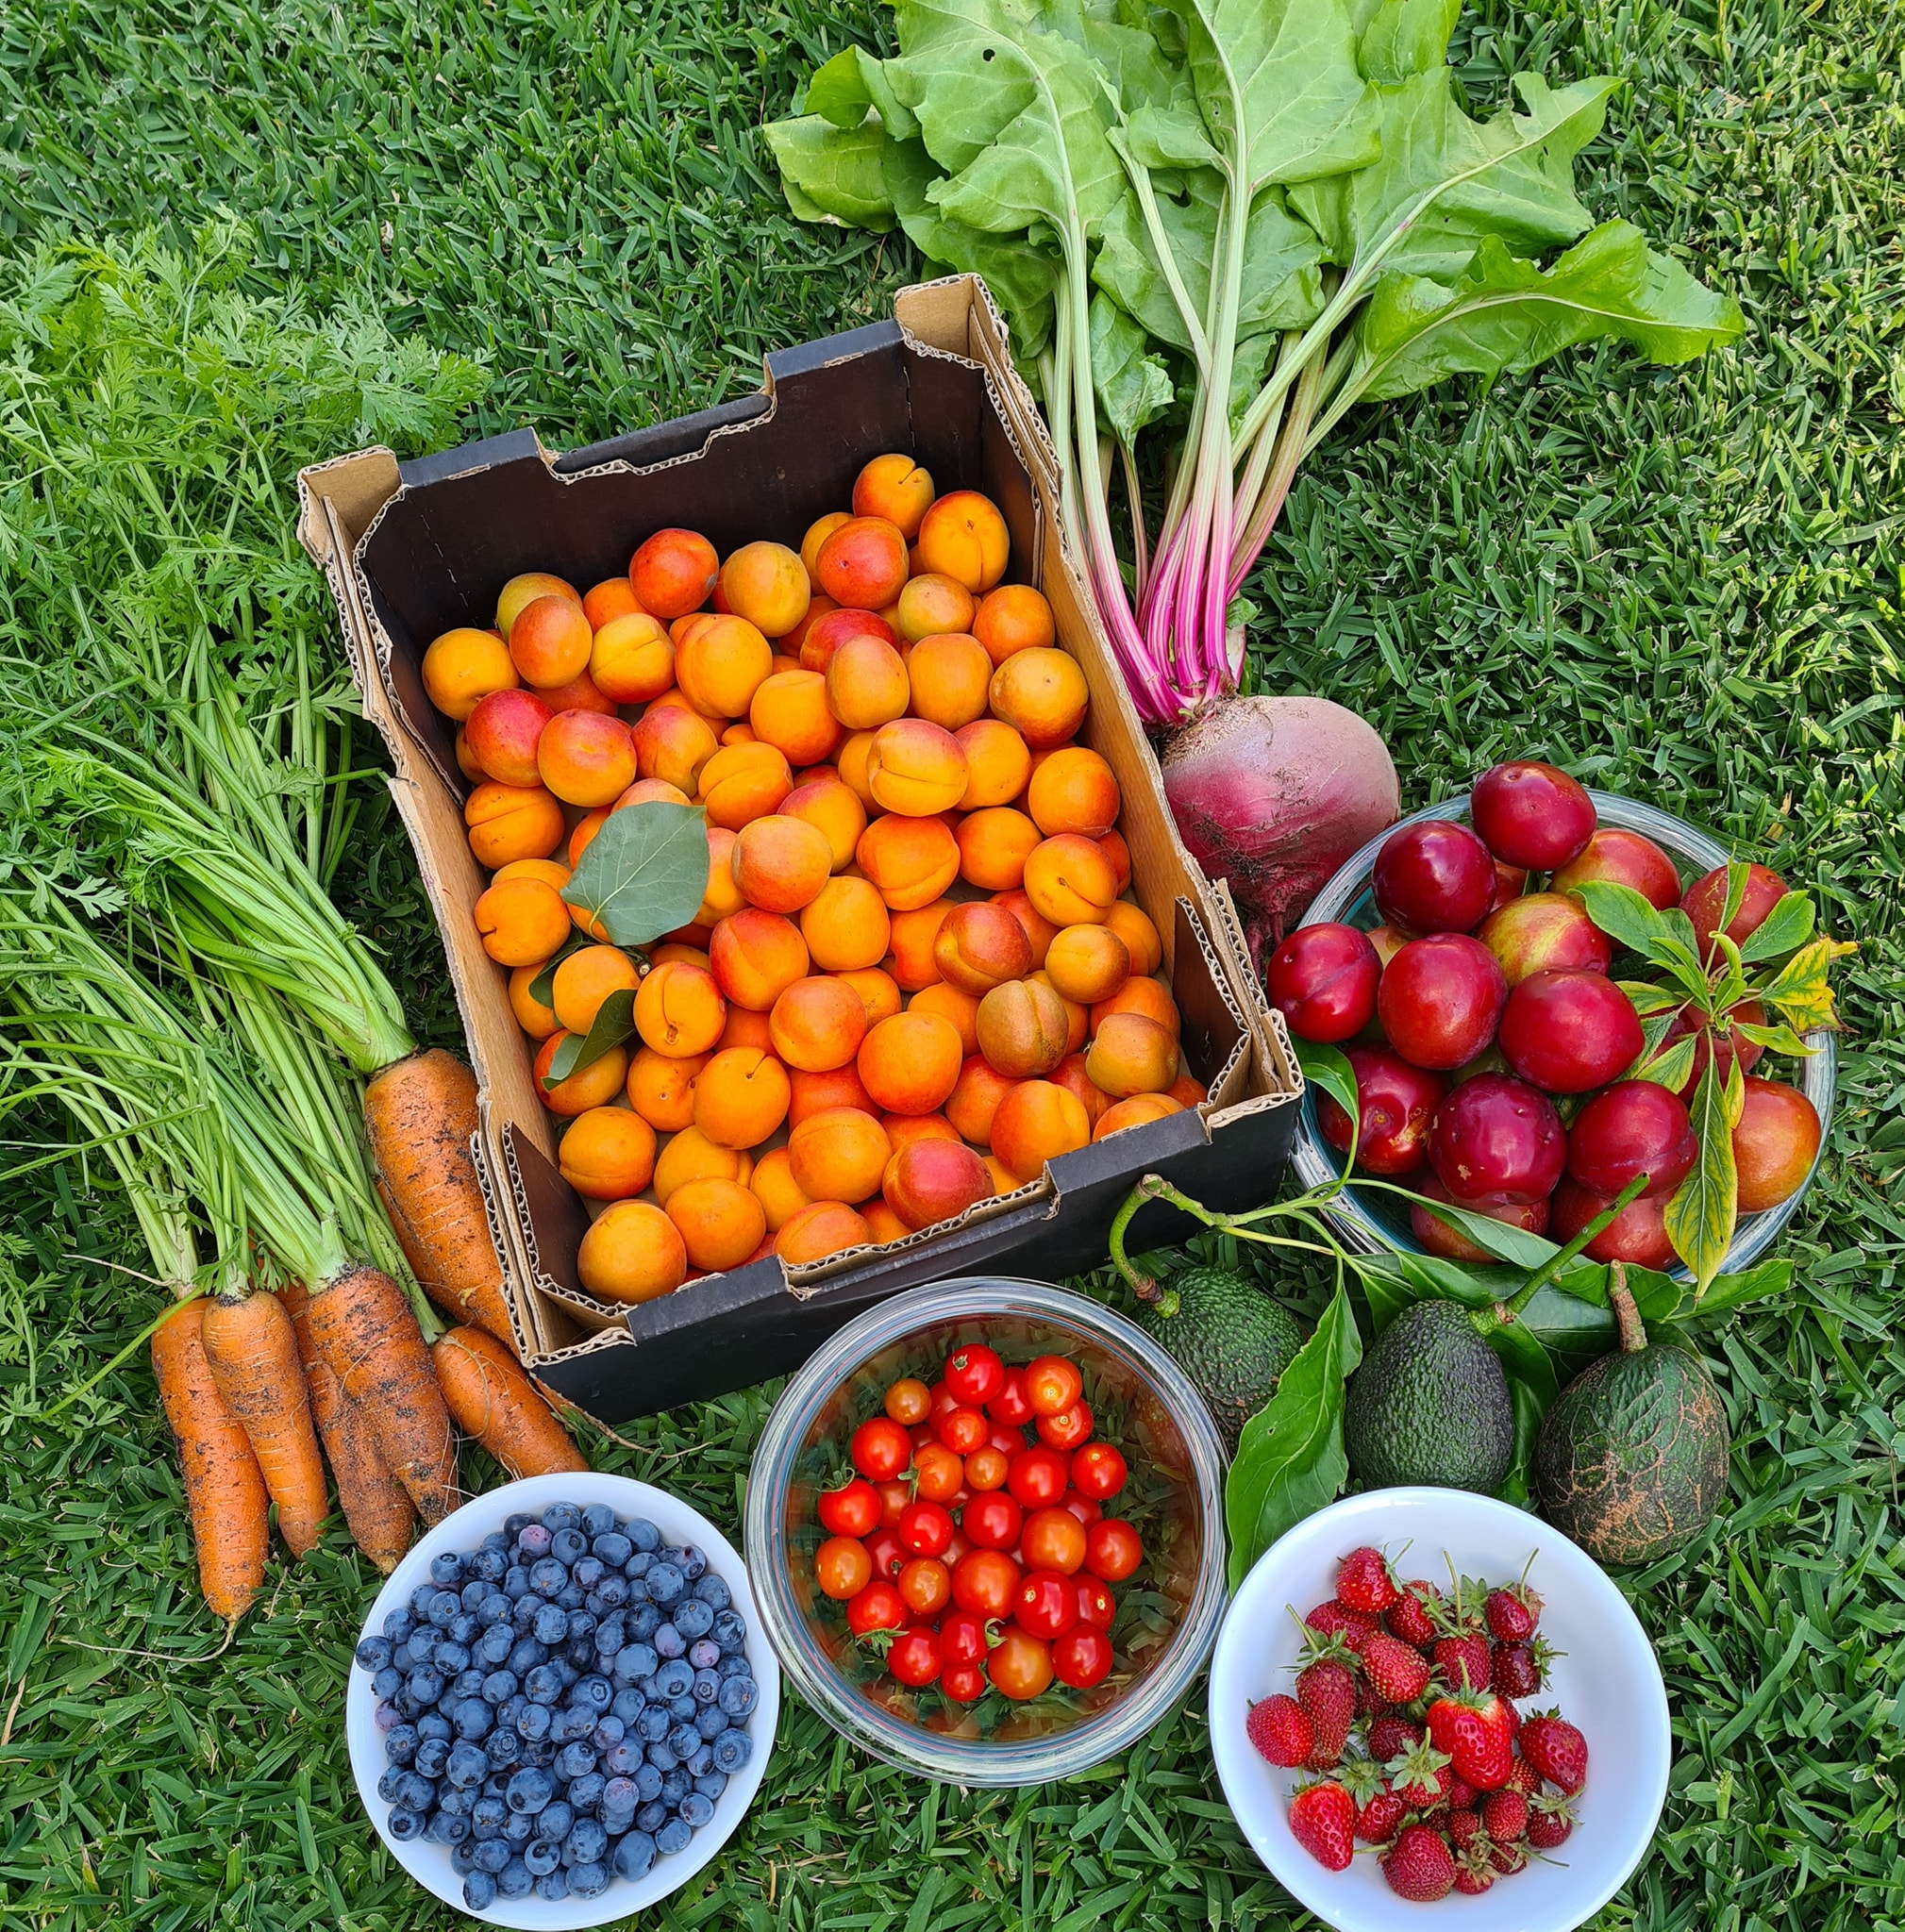
The kids occasionally have baked potato gems (Tater tots?!) with a meal, but, as with all things, I’d prefer to go with a home made, less processed version if possible. And since we’ve just had a bumper crop of potatoes what better time to give my own version a go?!
This version was hugely successful with my kids – and the biggest kid too 😉 They loved that they were eating ‘their veggies’ and I loved that they were getting the vitamins and minerals found in the potato skins. No need (or time) for peeling or grating here 😀
He was very proud of the results of his digging efforts!
5-6 baby potatoes
1/4 cup flour of choice (GF/Spelt etc)
1/4 cup GF breadcrumbs
1 tbsp nutritional yeast
1 tsp pink flaked salt
2 tbsp aquafaba (OR 1 whole egg, well whisked)
spray olive oil
OPTIONAL: any fresh chopped herbs or dried spices to complement your meal – rosemary, thyme or dill work beautifully.
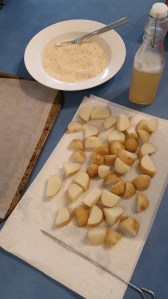
Give your potatoes a good scrub, but don’t peel them.
Cut them into bite size pieces and place into a saucepan of boiling salted water.
Boil for a couple of minutes until they are just becoming tender.
Drain and rinse well. Blot them dry.
In a separate bowl mix together the flour, crumbs and yeast. Add the herbs or spices at this point if you’re using them.
Coat the potato in the aquafaba (or egg) and then toss in the crumb mix to coat all sides.
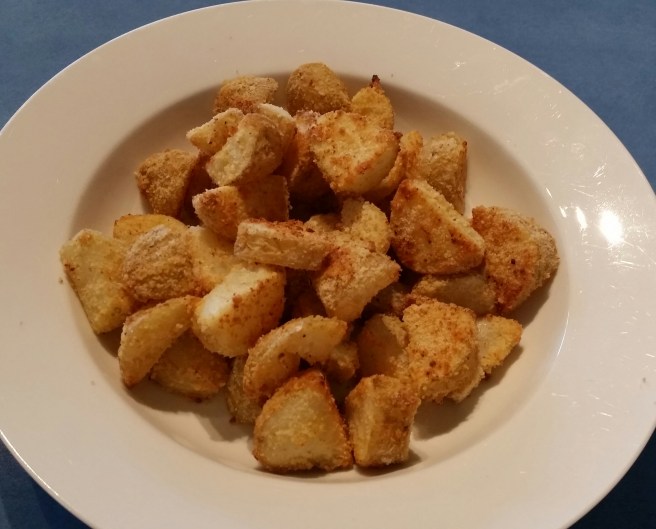
Place them pieces on a line baking tray, spray them with oil and sprinkle with the salt.
Place into a preheated, very hot (220C) oven for about 30 minutes, shaking the tray to toss them after 20 minutes.
This makes about 4 side servings.
Hope you enjoy them as much as this guy …..
‘These are even better than shop chips Mum!’The biggest kid enjoyed them too 😉
Bulk cooking/prep tip: If you have a bumper crop of potatoes like us, you can pre-prepare a heap of them, by cleaning, cutting and par boiling them, then blotting dry and freezing in an airtight bag. Then just defrost when you’re ready, add the crumb and bake away.
And since I had a mountain of rapidly deteriorating strawberries and I wanted something that would actually fill me up long enough to last until dinner, I made up these little guys. They are sweet and filling – a few tweaks on my pear surprise muffins (I made the ‘surprise’ dark chocolate part with half of the batch for the kids too).
125g stewed/tinned pears (drained from their juices)
115g ripe strawberries
50g vegan butter/tasteless coconut oil, melted
160g milk of choice (I love unsweetend vanilla almond milk here)
1 medium overripe banana
1 tsp vanilla bean paste (omit this if you use the vanilla almond milk)
1 1/2 cups wholemeal spelt flour OR 1 1/4 cups GF flour mix (I like Bob’s Red Mill All Purpose) plus 1/4 cup almond/seed meal
1/2 cup rolled oats OR desiccated coconut OR rolled quinoa (mill these first if you want to hide the ‘bits’) – you can also use nut or seed meal here
2 tbsp flax seeds (Optional)
1.5 tsp GF baking powder
pinch pink salt flakes
OPTIONAL: 2-4 tbsp coconut sugar or maple syrup – if you have a sweet tooth.
Into your blender/processor/nutribullet/thermal cooker place the strawberries, pear, banana, Nuttelex/oil, vanilla, milk and syrup (if using). Blitz until smooth (Speed 7, 12 seconds)
In a separate bowl, whisk together all the dry ingredients (Speed 4, 6 seconds)
Add the dry mix to the wet and mix to combine (Speed 4, 8 seconds, scrape down and repeat). Don’t over beat. I often just tip the wet mix into the bowl with the flour mix and combine by hand.
Spoon mix into a lined standard muffin tin and place in a preheated moderate oven for about 20 minutes or til golden and they spring back to a light touch.
Allow to cool on a wire rack … then enjoy in peace with a cuppa …wishful thinking?!
Every time I ask my kids for dinner ideas when I’m writing the monthly menu ‘enchiladas!!’ is the first thing Harry shouts at me 🙂 I honestly can’t keep up with how many he wants to eat!
Everyone else agrees with him, so they are a regular feature on our menu.
As with most of our Mexican inspired food, these are not very authentic…But they are very yummy so I hope your family enjoys them as much as ours.
Please see below the recipe for our vegan alternative
About 1kg chicken thighs (or you can use a whole chicken)
Cheese, that fits your diet (we do dairy and bio cheese), grated.
OPTIONAL: 1 large carrot, 1 large zucchini and 1 tin kidney beans.
Place chicken into the slow cooker, sprinkle over seasoning and half of the salsa.
Finely grate the veg if you are using them and then blend together with the drained and rinsed kidney beans. Add to the slow cooker and stir though well.
Place lid on slow cooker and cook on high for 4.5 hours, or 8 hours on low.
Remove and discard the skin of the chicken (if using a whole chicken) then shred the meat.
To the juices, veggies and salsa in the cooker, add in the paste and whisk to combine. Remove about 1/3 of this sauce and keep aside (for topping the tortillas later).
Then return the shredded chicken to the slow cooker and fold through the remaining sauce.
Place spoons of the chicken in the tortillas, then roll.
These ones have the added veggies and are made with seeded whole grain wraps.
Fill your baking tray with the filled and rolled tortillas, then cover with the rest of the salsa and veggie mix and sprinkle with cheese.
These are plain white tortillas without the added veggies …. They were added as a Mexican bean side salad instead!
Bake in a preheated moderate oven for about 25 minutes, until cheese is melted and the tortillas are golden.
If you’re a fan of the shredded chicken and the flavour of the meal, but would prefer a lighter option without the cheese and tortillas, then it is delicious and refreshing served with my Mexican Bean Salad.
And, if like my husband, you are a fan, go ahead and add a dollop of either dairy or soy based sour cream (it’s not my thing so I always forget it – much to his disappointment!)
To make our vegan version of these enchiladas we leave out the chicken and instead add in a large can of mixed beans and another can of kidney beans. The dish then needs to be cooked for only 3 hours on high or about 5 on low. Top with your favourite vegan cheese. I’m looking forward to experimenting with jackfruit here as another alternative too and will update the recipe when I do!
Pesto is such a yummy addition to so many meals, but with pine nuts and parmesan being a standard in most recipes, it’s normally not an option for us.
But this year my both my basil and my spinach are growing great guns so I was inspired to make a pesto that would use our fresh produce and be safe.
1 packed cup fresh basil leaves
1 packed cup fresh spinach leaves
1 tsp minced garlic
1/2 tsp pink salt flakes
Juice of half a lemon
1/4 cup pepitas (50g)
1/4 cup sunflower seeds (40g)
1/4 cup hemp seeds (40g)
50g extra virgin olive oil
Dry fry the seeds in a hot frying pan. Keep a close eye on them, stirring regularly, as it only takes a couple of minutes for them to go golden brown.
Add all ingredients, except the olive oil to your blender/processor/thermal cooker and process until quite fine (speed 8, 6 secs, scrape down and repeat).
Process again as you slowly drizzle the oil through the top opening of the machine (speed 4). Process until oil is well combined.
Use immediately or freeze in ice cubes for future use. Makes about 1 cup.
Some ideas for use:
Rub onto chicken pieces or salmon before baking
Add in a handful of sun-dried tomatoes at the processing stage and stir through pasta (Especially awesome if you top with some crispy bacon and home made garlic croutons!)
Fold through some cream cheese (soy based or dairy) or a ripe, mashed avocado as a great dip.
If you enjoy the Parmesan flavour that a lot of pesto has, add in a tbsp of Nutritional Yeast
Yesterday I did our markets shopping was seriously delighted to find a tray of strawberries for $8.
15 punnets of those bad boys – that’s a lot of berries!
We have several punnets in the fridge, I hulled 6 punnets and froze them for smoothies and baking and use another punnet in my morning muffins …. and there was still more.
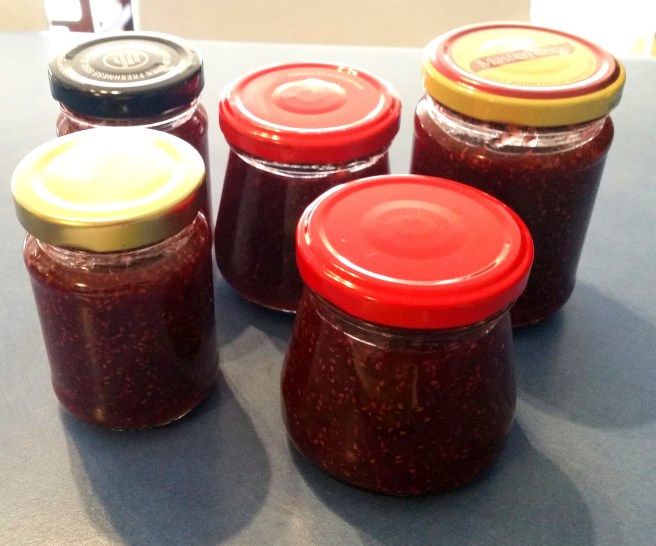
So … jam it is – why not get a head start on teacher’s Christmas gifts?!
I’ve never made a preserved jam in my Bellini (Thermal Cooker before) so this was my first go …. and it so very easy!!
Now – this is lower in added sugar than most jams, and it is unrefined sugar – but it is still a lot of sugar… so, you know – be sensible 😉
600g punnet strawberries, hulled
400g sugar of choice (I used coconut sugar)
the juice of 1 lemon
1 green apple, chopped (skin on)
1 tsp vanilla bean paste
2 tbsp chia seeds
Place the strawberries in the bottom on the machine, then add all the other ingredients, except the chia seeds.
Set the machine to 100C, Speed 2 for 15 minutes.
Then turn the temp up to ST (Steam Temp), but the speed down to 1 for a further 15 minutes.
Add in the chia seeds and and cook on ST, Speed 2 for a further 8 mins.
Check that it is ready (Check out these tips from Taste on checking for setting point)
Pour into hot sterilised jars and seal.
*If you don’t have a thermal cooking machine, check out my Mulberry jam post for a traditional jam making method*
One year for Christmas when my brother and I were about 10 and 12, Mum and Dad gave us joint presents. A milkshake maker, an air popped popcorn maker and a recipe book for kids.
What an awesome summer that was – we ate a lot, and we ate well!!
20… ahem… something years later, the popcorn maker still features regularly, now for my children. In fact we used it today for our Friday movie 🙂
I’m not sure what happened to the milkshake maker.
I suspect the recipe book is still hidden in my Mum’s recipe cupboard … But I really don’t need it anymore, since the ice coffee recipe from it is firmly cemented in my brain (along with the reminder inscribed on the inside from Mum to clean up after we cooked!!). I would make it for mum ready when she got home from work on a really hot summer’s day. Or at the weekends when my parents had been hard at work in the garden.
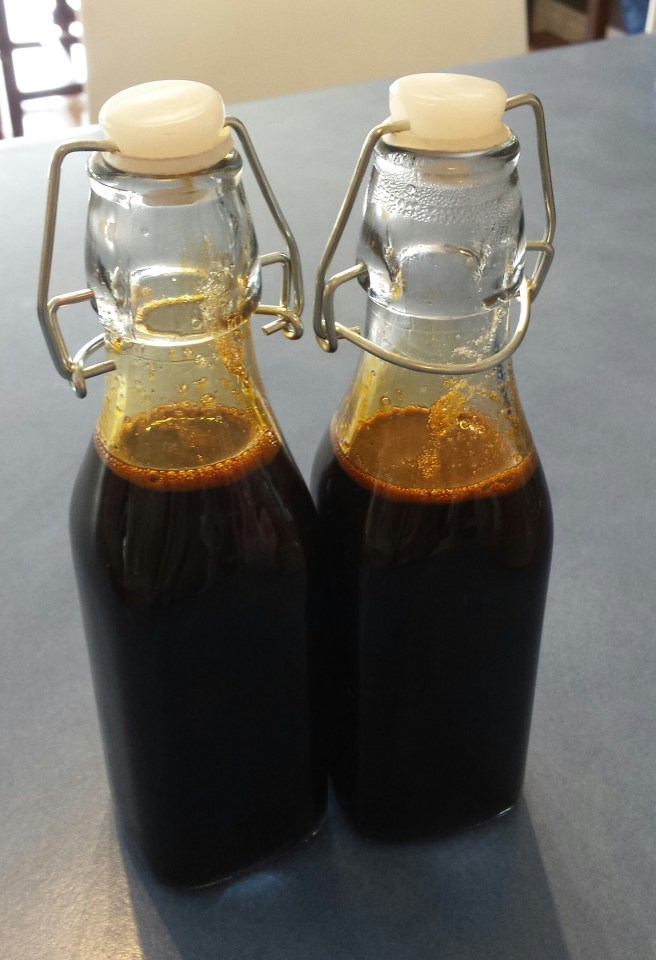
Now it is my husband who is the fan… and Will requests it in decaf form!! We’ve cut back the sugar and converted it to an unrefined form.
See below the recipe for a chocolate syrup.
1.5 cups Instant coffee (whichever brand you enjoy, but it must be instant)
2.5 cups sugar
2 tsp vanilla bean paste
1.5 cups boiling water
Mix together all ingredients into a large saucepan and bring to a simmer.
Simmer gently, stirring regularly, for about 10-12 minutes. (Or 100C, speed 2 for about 12-14 mins).
Pour into glass jars and seal.
To use the syrup mix a tablespoon or two with a glass of cold milk of your choice and some ice blocks blocks in a blender/Nutribullet/food processor/thermal cooker.
It is certainly a much cheaper option to make this at home if you are a regular buyer of the in store or cafe variety!.
If you like different flavoured coffees you can replace the vanilla with an essence of that flavour (hazelnut is particularly nice!).
During my university years I became (just slightly) coffee reliant and one of my very favourite drinks was a (large, eek!)’Very Vanilla Chiller’ from a certain popular coffee chain. There’s no way I could drink one now without feeling ill, but I have discovered that this syrup together with a handful of ice blocks and very cold unsweetened vanilla almond milk, makes a very close approximation!! Yum!
You can also use a splash of this syrup in plain buttercream icing to turn into into coffee icing for Banana cakes etc.
To make a chocolate version of this syrup follow the same method, but use:
1 cups Cocoa
2.5 cups sugar
2 tsp vanilla bean paste
1.5 cups boiling water
This version is great mixed with ice blocks and milk of choice for milkshakes or stirred through hot milk for decadent hot chocolate … make sure you add some mini marshmallows 😉
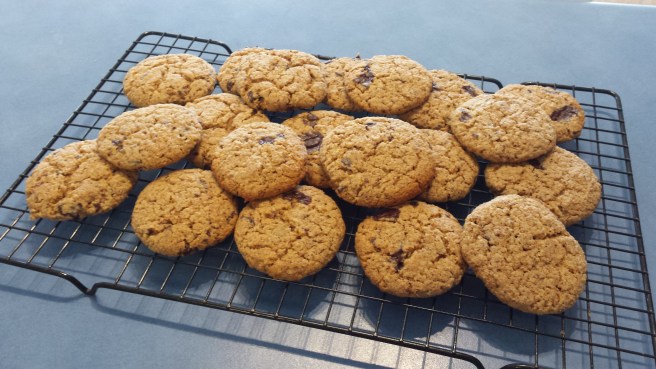
Together with the apple crumble that I’ve posted about before, these cookies (in their original form) were sustenance for my husband during exam time at uni … and he says, convinced him to marry me!
I remember making these as a ten year old for my younger brother and eating them together, while they were still warm, over school holiday movies. I must have made a hundred batches of them over the last 20 years! So the other day when my crook William asked if we could make cookies for afternoon tea, I decided to update these to make them safe for our family, and to add a few more nutrients than your standard cookie … and they are now as popular with my kids as they were with my husband, and my brother and I decades ago!
Please see below the recipe for the coeliac friendly version
120g vegan butter at room temperature
50g sunflower seed butter (or nut butter)
3/4 cup sugar
1 cup flour (half wholemeal)
1/3 cup almond/seed meal (OR use and extra 1/3 cup flour here)
1/3 cup rolled oats
1 tsp GF baking powder
1 tsp vanilla bean paste
pinch salt flakes
1 egg OR 1 egg of egg replacement
4 squares of dark chocolate, roughly chopped (about 40g) OR choc chips
In your blender/food processor/nutribullet/thermal cooker place the oats, baking powder, salt & sugar. Blitz to a fine flour (speed 8, 10 secs). You can skip this step if you’re happy with whole oats in your cookie.
Add in the flour and mix to combine (speed 4, 6 secs).
Add in the butter, seed butter, vanilla and egg then pulse a few times to roughly combine before processing to a dough (speed 4, 8secs, scrape down and repeat if required)
Fold through the chocolate. (Speed 4, 6 seconds)
To make a coeliac friendly version: This is one of those times when you can do a straight swap for a GF flour mix for the wheat flour. Replace the oats with shredded coconut.
Form a teaspoon full into a ball and spoon onto a lined baking tray, allowing space to spread. Press down gently.
Cook in a preheated moderate oven for about 13-15 minutes.
They will be very soft when you remove them from the oven. Allow to cool on the tray for 10 minutes before transferring to a wire rack to cool completely. They will be crunchy on the outside and chewy on the inside.
Makes about 20.
Lasts for a few days in an airtight container…. if you’re lucky!
Not a fan of choc chip? Weird, but ok! Use sultanas instead!
Feeding a family in this day and age is SERIOUSLY expensive 💸 😳
Living in an allergy home is even more costly – regular trips to (very expensive) allergists, dermatologists and doctors, regular updates of asthma medication, adrenaline rescue pens and stocks of antihistamines for every place they go. Creams, creams and more creams. My goodness it adds up quickly.
Then there’s the groceries ….. no options for $1 bags of pasta or flour or cheap bread. Allergy friendly options are often 8-10 times the price of standard items. And then there is the pressure of wanting to buy foods that are locally or ethically produced.
And then add in feeding multiple, LARGE, active teenage boys 😱 HOLY COW – Do they EVER stop eating?!?!
Don’t get me wrong – I am so very grateful that my husband has a stable job, as do I after 10 years with one income. We actually have many allergy friendly options in shops and that we are able to access the specialists we need to care well for our children. We are FAR better off than many.
I remember many years ago now (about 2011), following a friend do a challenge that was ‘Feed your family of 4 for $150 a week’ and it just made me giggle. She did it. I was so impressed. But, no way is that ever going to happen in this house. There are 6 of us and many many foods that we need to avoid or substitute. Not to mention it is over a decade later and food prices only continue to rise.
In 2018, we looked very carefully at our food budget, and I realise that, even though I wrote a menu for a fortnight and was a pretty good budgeter, I had fallen into into the trap of ‘just popping in’ to the supermarket to pick up some extra things for baking, or things we’d run out of …. and I had suddenly spent another $50 … how does that happen?!?! Eek!
I grew up watching my Mum take out the entire grocery budget in cash once a fortnight and when it ran out, that was it, we had to wait. And my Dad had literally sat me down with a pen and paper and taught me how to budget. What had happened to those lessons I’d learned?
So with 1 income (at the time), 4 kids who were expensive to feed, ever increasing costs, a husband who requested meat for lunch and dinner 6 days a week and a desire to eat well with minimally processed foods, I set myself a challenge:
Menu plan for a month, write my grocery list for a month, 1 big, careful shop and then that’s it – no going back.
Scary Stuff – but I did it AND I loved it! After a while I couldn’t actually imagine doing it any other way. Plus it was kind of amusing to watch the stares at my trolley in the shop 😆
*2024 UPDATE* Due to the ever growing size of my eating machines, I mean, children, I can no longer shop for a month at a time. I do not have the physical space in my home … when between 3 of them, they drink 3L of milk a day … no one has space to freeze 30, 3L bottles of milk 🤪 So still with the same principals, planning and menu, we have moved back to once a fortnight.
So, I’m not trying to convince all of you to shop for a month at a time – in fact, I know that some of you, (like me, in this 2024 update) don’t have the space …. I am incredibly fortunate that my Nanna gave us her old freezer for the garage, which made this process possible for us.
But the general ideas I think can work for everyone – so, after being asked about a squillion times for my tips, here is what works in our home:
Check what is in my pantry and freezer – write a list out – don’t be vague about it!
Write a menu (whether that be for a week, month or more), and use up what you already have for those meal plans. Plan to use similar ingredients for multiple meals. Take into account what else you have on in the evenings …. it’s no good planning to cook a 3 course meal if you’re only home for 20 minutes in between activities!
Shops in different places for different things if you are able (obviously this will be different depending on where you live).
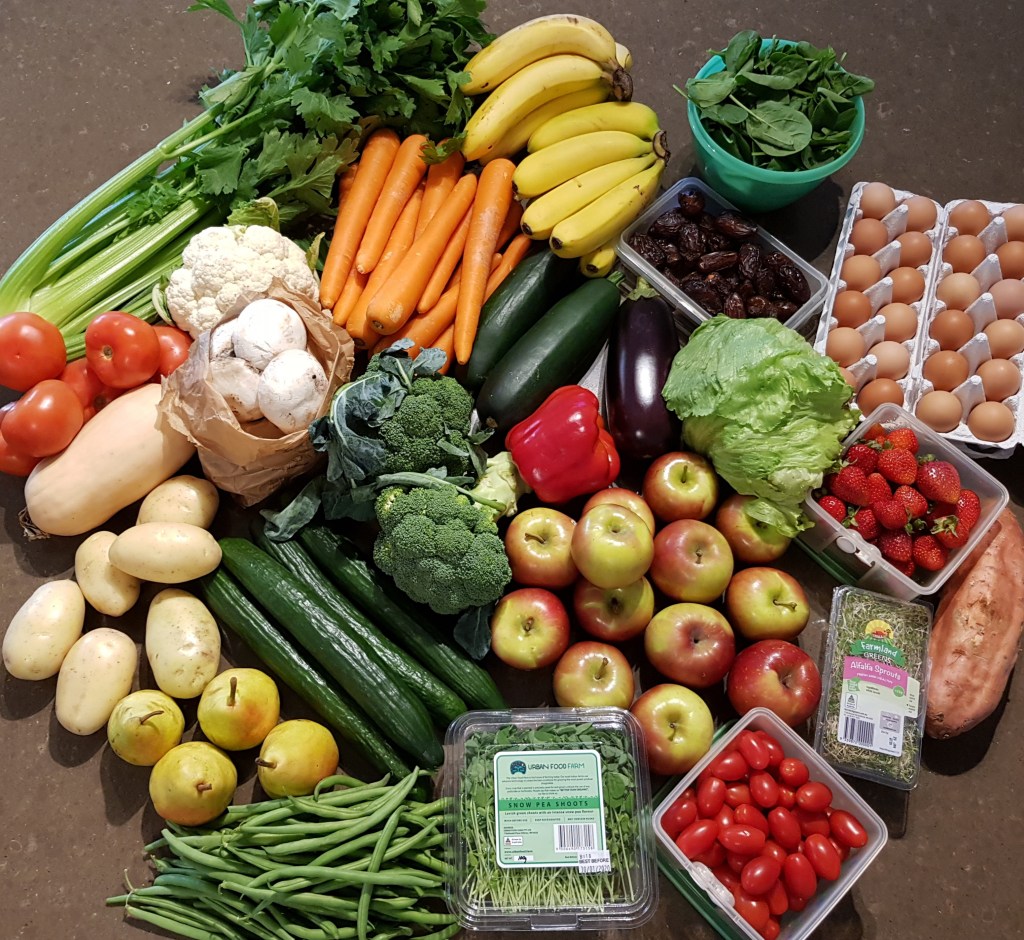
Meat, milk, honey, eggs, cheese and fresh fruit and veg might come from the farmers markets. Local, cheaper and often much better quality.
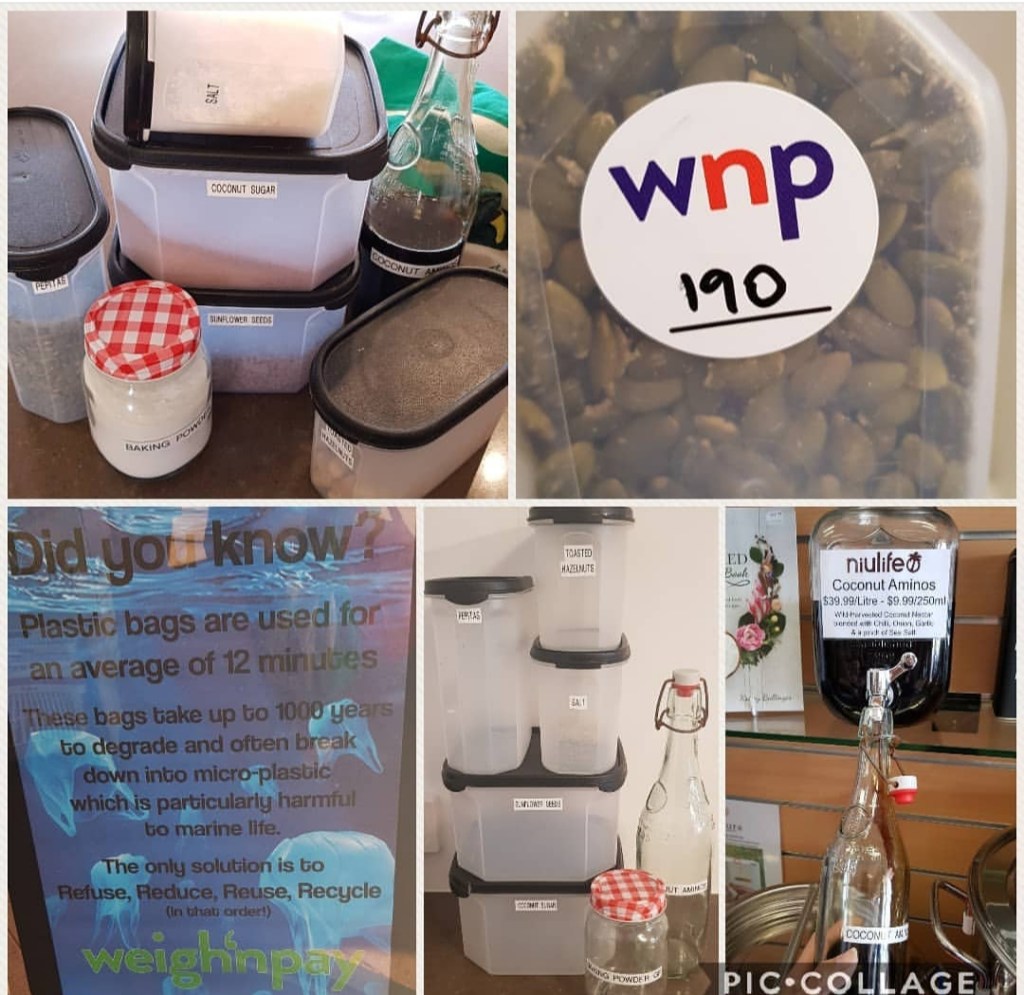
You can buy flours, nuts and seeds, salts, oil, vinegar, coconut aminos and yeast etc in bulk (my favourite online places are 2 Brothers Foods and Weigh N Pay). Or even at bulk buying places like Costco if you have access.
Don’t worry – these are all especially designed compostable bags from 2Brothers!
Taking my containers to bulk buy at Weigh n Pay in Woodvale, Perth.
Buy your packaged goods from one place (and use the rewards system to your advantage!). I currently shop mostly at Woolies. For us this includes things like tinned beans and legumes, coffee, plain cereals, frozen berries, Nuttelex, UHT milks (Oat, almond, and soy), pasta, rice, rice crackers, dried beans, dried fruit, specialist cheese, vegemite and all toiletries (this includes sanitary items, everything for washing, cleaning and use in the kitchen).
Toilet Paper is delivered by Who Give a Crap (good for your bum, the environment AND your budget!!).
Our coffee pods get delivered by Urban Brew, because they are tasty, cheaper on subscription AND compostable. We use keep cups and almost never buy coffee out.
Admittedly, when I get the groceries home – it takes a significant amount of time to put it away, so you need to factor that in. BUT then it is done for the month (or fortnight)!!!
A note about Meat: In the past few years, my carnivore husband has realised that you can actually have delicious, filling meals without meat 😉 So we have significantly decreased the amount we eat. When we do eat meat, it is not the main focus of the meal. Instead we bulk out everything with veg, lentils and mushrooms as much as we can. It is relatively easy to get enough protein in the western world … but as a nation we’re not as great at eating enough veggies to provide enough fibre for our gut and healthy functioning …. so this way of eating meat really helps – both our guts and our budget (and the environment). And it also means we don’t need quite as much freezer space to store it all!
The things that people have told me that they ‘pop’ to the shops for are bread, milk, yoghurt and snacks for the kids:
Our dairy milk gets stuck in the freezer for the week. I get the new one out at night when required and it defrosts overnight in the kitchen sink. The UHT milk we buy (soy, oat and almond) is used to drink, bake and make E’s yoghurt as required.
And bread – I used to bake it as it was required, but I just don’t have the time now! If you’re not into baking it, or you don’t have the time (or desire!) …. just buy what you need and freeze it.
Making your own snacks is SO SO much cheaper than buying them in store. Less processed, fewer additives and preservatives, less sugar and more nutrients too! Let the kids choose what kind of muffins, slices, biscuits and muesli bars they want to make with you! Freeze them ready to drop into their lunchboxes each day. Bake fest to fill up the freezer and pantry with snacks
Fruit and veg are the only exception to my no-returning-to-the-shops rule.
I buy in bulk, blanch and freeze some things when they are on special (think green beans and cauliflower etc)
some things, like green peas, I just buy frozen to start with.
I deliberately overbuy bananas and avocados to freeze ready for baking and smoothies.
I try to buy the veggies I need for my meals that week so we don’t waste. I work at being creative with what we have and don’t return to market for more until we have really used all we have.
Don’t be afraid of frozen or tinned fruit, veg and tinned beans – they are an AWESOME, and just as nutritious alternative and SO much kinder to your budget.
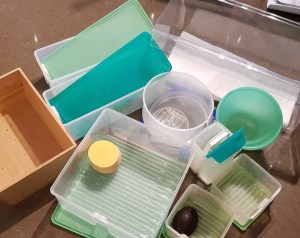
Waiting until it is ALL used up!!
Consider this fair warning …. If you shop like this, people tend to stare …. and they don’t even try to hide it. I’ve had all sorts of jokes and comments about the coming apocalypse and having a dozen children etc etc. Mostly I just smile – sometimes I tell people that it’s for a family of 6 and we only shop once a month … then they just look even more shocked!!
So where do we put it all? It goes in the fridge, freezer, pantry and …. the (now jokingly called) ‘Apocalypse Cupboard’ Under our kitchen bench. The store of toiletries (think tissues, detergent, tooth paste) all goes in the laundry cupboards. By the end of the month, they are all pretty empty and it makes it easy to start again.
If any of you are still reading, well done, and yes, I realise, as my husband lovingly tells me, I am a bit of a freak! I also love numbers so I broke down our expenditure and this is what I have discovered:
In 2024, itcosts our family, on average, about $10.35 per day, per person to live (this has increased by about 25% over the past 8 years). I suspect 2 very large teenaged boys skew this data a bit! It works out to about $435 a week for 6 people. Not remotely close the to that 2012, $150 a week challenge 🫣 This cost is all of our food (every meal, snack and coffee), all of our toiletries, washing goods and consumables etc etc.
Some of my other ways for making our budget stretch are:
Cook in bulk and deliberately freeze meals
Plan to buy ingredients that can be used across multiple meals
Again – don’t be afraid of frozen or tinned fruit, veg and tinned beans – they are an AWESOME, and just as nutritious alternative and SO much kinder to your budget.
Try growing some of your own (even if it just some fresh herbs in pots!),
Don’t throw out fruit that is a bit sad – use it to made a dessert crumble or stick it in some baked goods. Veggies past their best can be turned into a soup, or collected in a freezer bag until you have enough to make stock. And,
Have a go arranging homegrown swaps with like-minded friends – some communities have dedicated Facebook groups for this. We have swapped propagated plants and excess veg, or homemade flavoured salts and oils for honey, eggs, lemons, chillies, garlic etc – awesome for encouraging others and building community too!
So – that’s how we do it in our family – I’d love to hear if you have any other tips for making your budget work!
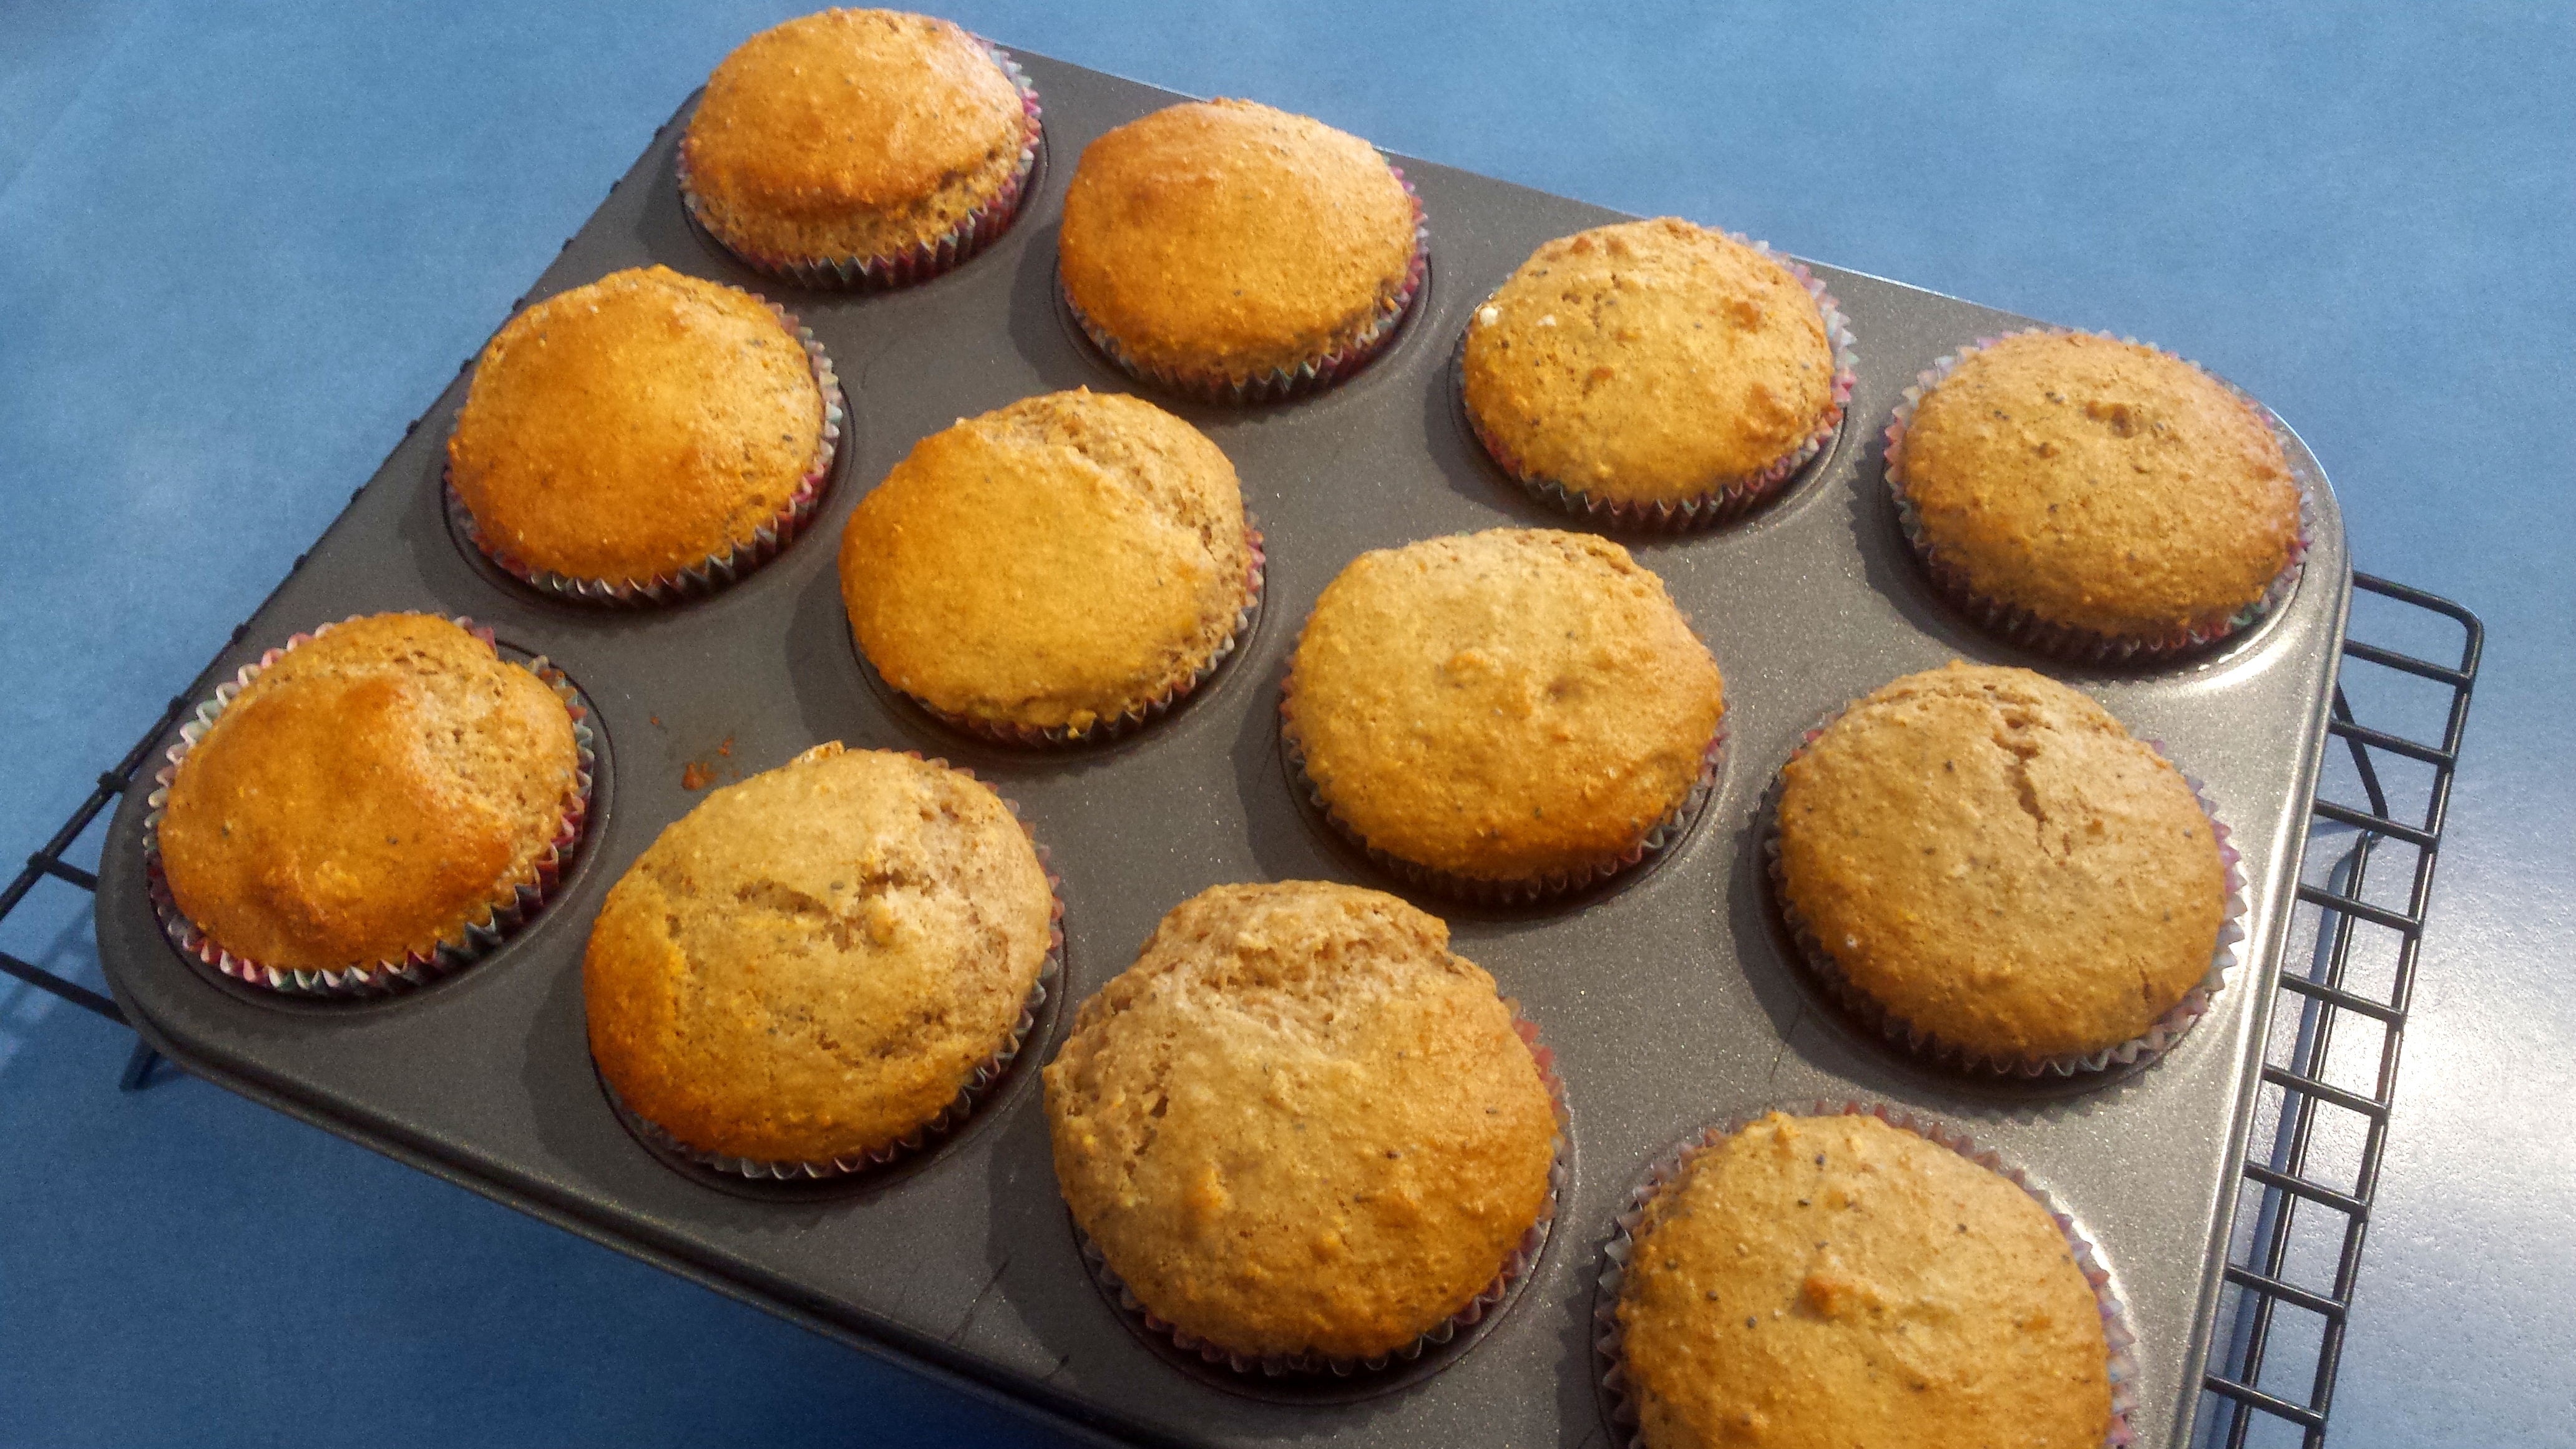
These muffins are super easy to make (quick enough that we’ve had them fresh for breakfast!), they are light, moist and sweet but low on sugars, they freeze well for lunchboxes, and best of all – my little people love them!
See below the recipe for the Coeliac friendly version.
300g spelt flour (half wholemeal)
3 heaped tbsp of your favourite seed (mill these first if you want to hide them!)
1/3 cup rolled oats (mill these too if you need to hide ‘bits’)
220ml milk of choice (I love unsweetened vanilla almond milk here)
1 tsp vanilla bean paste
pinch pink salt flakes
Into your blender/processor/nutribullet/thermo cooker place the banana, Nuttelex, vanilla, milk and honey. Blitz until smooth (Speed 7, 10 seconds)
In a separate bowl, whisk together the baking powder, salt, oats, seeds and flour.
Add the dry mix to the wet and mix to combine (Speed 4, 10 seconds, scrape down and repeat). Don’t over beat. I often just tip the wet mix into the bowl with the flour mix and combine by hand.
Spoon into muffin pans (lined or well greased) and bake in a preheated moderate oven for about 20 mins or until they are well browns and spring back when gently pressed.
Makes 14-6.
Enjoy 🙂
For an even more nutritious muffin, I reduce the flour by 50g and add in another 50g of almond or seed meal.
To make these ones Coeliac friendly I replaced the spelt with 1.5 cups GF flour and 1/2 cup almond/seed meal mix, then replace the oats with equal measure of rolled quinoa or desiccated coconut. Increase the milk by an additional 2 tbsp.
** If you want to cut back on your oils, 1 heaped tbsp of sunflower seed butter (or other nut butter) plus 2 tbsp of aquafaba work well here to replace the 3 tbsp of oil.
This warm gooey pudding seems to be a bit of an Aussie ‘classic’ for dessert, and one I have enjoyed at my Mother-in-law’s home many times. But my little miss has always missed out … until now.
“Pleeeeeeease can we make cake for dessert?!”.
Well, it’s Friday – sure! 5 minutes to whip it up and it baked while we ate our dinner. Yummo!! One happy little girl … who wants the left overs in her lunchbox … um, maybe not flossy-dot!
Pudding:
80g neutral tasting oil (I’ve used rice bran or melted Nuttelex)
100g sugar (increase to 130g if you are a sweet tooth)
3/4 cup SR flour
1/4 cup almond meal
1/4 tsp baking powder
130g milk of choice
2 tbsp cocoa
1 tsp vanilla bean paste
1/4 tsp salt
3 tbsp aquafaba (liquid drained from a can of chick peas) OR 1 whole egg.
Optional: handful finely chopped dark chocolate or choc chip of choice
Sauce:
2 tbsp cocoa
2 tbsp sugar
350ml boiling water
In a large mixing bowl, use a whisk to mix together the flour, nut meal, sugar, baking powder, salt, and cocoa.
In a smaller bowl whisk together the milk, oil, egg/aquafaba and vanilla.
Add the wet mix to the dry and whisk together until well combined. Stir in the chocolate peices if using.
Pour into a greased baking dish.
Mix together the cocoa and sugar for the sauce and sprinkle it evenly over the top of the cake batter.
Pour the boiling water evenly over the top of cake, but do not mix it.
Place the dish into a preheated moderate oven for about 30-35 minutes or until the cake is well risen.
Oops – forgot to take a pic before we dug in!
Serve warm, on its own, or with a little ice-cream of choice.
Serves 6-8
Want it gluten free? use 160g of a good all purpose GF SR mix (I like Bob’s Red Mill) with 1 tsp of psyllium, and increase the milk to 150ml.
Want it nut free? Replace the almond meal with another 1/4 cup of SR flour and omit the baking powder
Need it for a bigger crowd? The recipe doubles perfectly.