Wacky Cake

This cake is based on one that 2 special friends have given me over the years (Hi Elena and Mary!). One of them lived in India, the other in Nepal, and at times, both struggled to get ‘normal’ cake ingredients, like butter and eggs, so it is made from super simple pantry staples.

There are a lot of versions around. I’ve seen them called Wacky cake, 3 Hole Cake or Depression Cake (as in, from the era of the Great Depression …. eating it will not make you feel sad!). This is my version.

See below the recipe for cupcake details and also a vanilla version.

  • 1 1/3 cups plain GF flour (250g)
  • 1 tsp psyllium OR 1 heaped tbsp almond/seed meal (20g)
  • 1/2-1 cup coconut sugar (depending on your sweet tooth – I do 1/2)
  • 1 tsp baking soda
  • 1/2 tsp salt
  • 3 tbsp cocoa
  • 1 tbsp white vinegar
  • 5 tbsp rice bran oil (or tasteless coconut oil/vegan butter melted, works too)
  • 2 tsp vanilla bean paste
  • 275ml cool water

(if you want to use regular wheat flour or spelt, omit the GF flour and psyllium/almond meal and replace with 1 1/2 cups plain wheat flour)

In a large baking dish, place all of the dry ingredients and use a whisk to combine evenly. (or speed 4, 6 seconds – then pour into a greased baking dish/tin)

Then make 3 holes in the mix and into each hole, add 1 of the following; vinegar, oil & vanilla. (Add in all wet ingredients together, including water, then, speed 4 for 15 seconds)

Pour water over the top and mix well (you skip this step if you are using a Thermal cooker, since you have already added the water above)

Cook in a pre-heated, moderate oven for about 30-35 mins, or until a skewer comes out clean.

20151216_111552

Rich Chocolate Icing

  • 1 tbsp Nuttelex
  • 1/2 cup dark choc chip of choice
  • 3 tbsp milk of choice
  • approx 1 cup GF icing sugar (more if required)

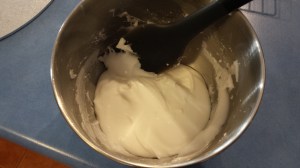
In a saucepan, gently melt the Nuttelex, choc chips and milk. (Speed 2, 100C, approx 2 mins)

Add the icing sugar and whisk until well combined and smooth. (Speed 4, 15 seconds at a time, scraping down in between)

Allow the cake to cool before icing.

20151216_131026-1

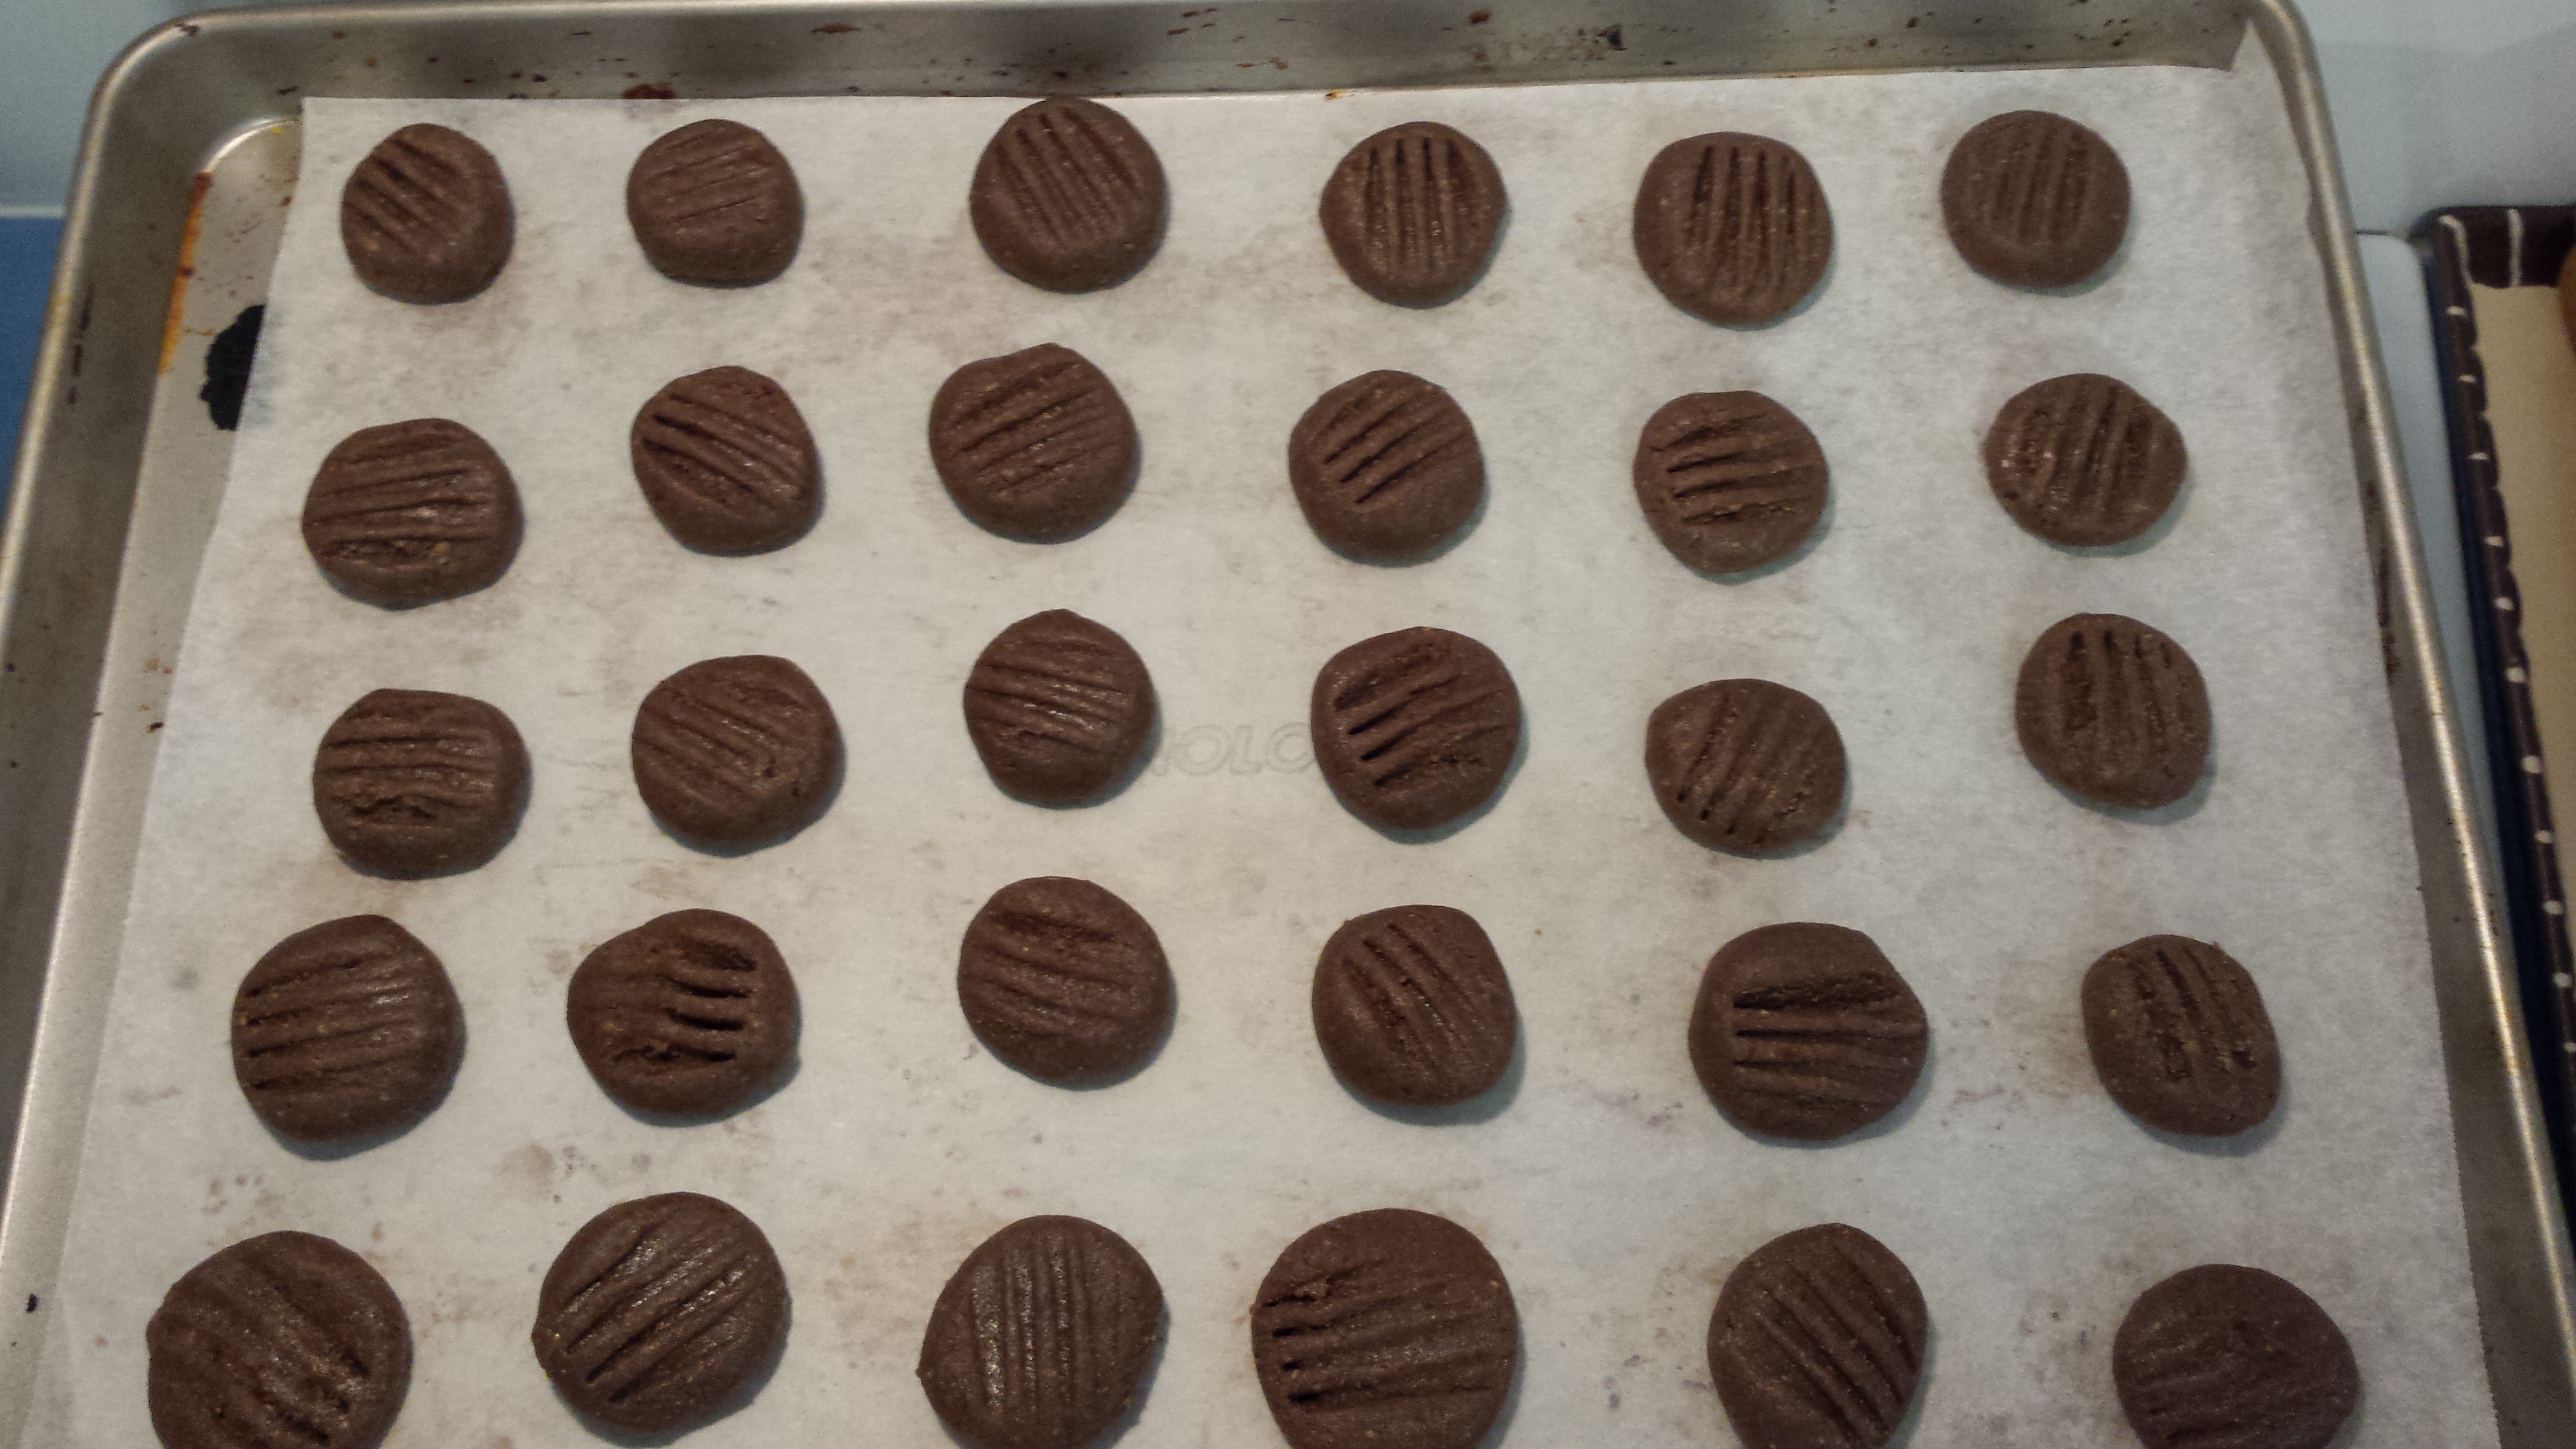
We also make this cake into cup cakes  – makes about 12 and they take about 17-20 minutes to bake.

20151216_110358

We also make a vanilla version of this cake by omitting the cocoa, then adding 2 extra tbsp of flour and 1 tbsp more of almond meal, plus 1 more tsp of vanilla bean paste. If you want them to be whiter cupcakes, use white sugar instead of the coconut sugar, as it gives a caramel colour.

20151216_134634

I have even seen recipes for this kind of cake made without cocoa and some oil removed, added mashed banana and half of the water replaced with coffee, but I’m yet to give that one a go!

Maybe it could even be turned into carrot cake with lemon icing?! Let me know if you come up with any other varieties 😀

Enjoy!


Chocolate Tarts

My precious girls turns 4 this week.

That tiny, fragile bundle that arrived into such a boisterous house has had massive impact on our lives. Despite her size (which she will quite happily stamp her foot and tell you is ‘just the right size for me!’) she is strong, feisty, fiercely determined and independent as well as being funny, clever and kind. She is an absolute delight and the way that she deals with all of the challenges life has thrown at her is admirable to say the least!

She requested a High Tea for her Birthday … so an Ellie Safe High Tea it was. Watching her be able to serve herself and hearing her squeal ‘I can eat EVERYTHING!’ was worth every second of baking!

We had Chocolate Truffles, Mini Doughnut Muffins, Blueberry friands, Sweet and Salty Puffed corn, Chevup Sausage rolls, Gingerbread muffins, Chocolate tarts, Cucumber and soy cream cheese rye sandwiches (crust off of course!) and wholegrain rice crackers piped with hummus.

Don't think she could be any happier!
Don’t think she could be any happier!

The chocolate tarts were new to us and they were very tasty!

I used the vegan version of my Sweet Shortcrust Pasty. Half the quantity in the recipe makes 12 mini tart cases.

Use a large scone cutter to make circles of pasty, then press into a lined muffin tin and bake in a preheated moderate oven for about 12-15 minute.

20151211_211349

20151211_211719

Remove from oven and allow to cool before removing from patty pan.

While the cases cool, make the chocolate custard.

I made the chocolate version of my Thick Custard, but I used chocolate almond milk this time for a bit more flavour. Reduce the cornflour to 25g. (The 12 tart cases use only half the quantity of custard made by this recipe).

As soon as custard is ready, pour it into the cooled tart cases and place in the fridge for 2 hours to set.

20151212_110833

Dust with icing sugar to serve.

20151215_200555

Makes 12 and they last (if there are any left!) for several days in an airtight container in the fridge.

Enjoy 🙂

Choc chip Gingerbread Muffins

I love any excuse to bake … and Christmas provides SO many opportunities!!!

These delicious little morsels are a cross between my doughnut muffins and my Christmas pancakes.

See below the recipe for a gluten free Coeliac friendly version too.

  • 200g flour (half wholemeal if you like)
  • 80g sugar
  • 1.5 tsp ground ginger
  • 1/2 tsp ground cinnamon
  • 1 tsp No Egg powder OR 1 whole egg
  • 1.5 tsp GF baking powder
  • 65g melted butter of choice
  • 240g milk of choice
  • 1/4 cup choc chips (we use dark chocolate dairy free chips)

In a large bowl place the flour, sugar, salt, spices, egg replacer and baking powder. Use a whisk to combine the dry mix. (or Speed 4 for 6 seconds)

In a separate smaller bowl whisk together the butter and milk.

Pour the wet mix into the dry mix and whisk vigorously to combine mix until smooth. (Speed 5, 8 seconds)

Fold through the choc chips (speed 4, 5 seconds)

Place into lined/greased muffin pans and bake in a preheated 180C oven for about 20 minutes.

20151207_142627

Mini muffins take 12-15 minutes.

20151207_143120-1

To make these Coeliac friendly replace the spelt flour with 200g of a gluten free flour mix plus 1 tsp of psyllium.

Makes 12 regular or 24 mini muffins.

These freeze and defrost really well.

**If you’re looking for a fun gift, make up a large glass jar of all of the dry ingredients in layers, then add a tag with instructions about the wet ingredients to add and the baking directions.

Enjoy 🙂

“This recipe has been included by Twinkl among their top picks for Delicious Christmas Dessert Recipes

Gingerbread (that will also stand up in houses!)

A few years ago Libby posted this amazing Gingerbread recipe and it has been my go to Christmas cookie recipe ever since.

20151204_194651

Everyone loves this gingerbread, but it can be a little soft for construction work! Since we make our own Gingerbread houses, I’ve been playing around with the recipe to come up with a slightly harder gingerbread that can stand up to the building process a little better but still meets all of our allergy requirements and this is it.

If you are making this mix in a Thermal Cooker, you will need to be mindful of the weight capacity limit of the machine – I do only a half batch at a time in my Bellini. This recipe does make a large quantity of dough, and half is more than enough for a house and some cookies.

  • 250g vegan butter
  • 180g brown sugar
  • 2 eggs worth of egg replacer (or 5tbsp aquafaba)
  • 300g golden syrup
  • 800g plain GF flour mix (or closer to 900g of you use wheat flour)
  • pinch salt
  • 6 tsp ground ginger
  • 4 tsp ground cinnamon
  • 1 tsp ground allspice
  • 2 tsp bicarb soda
  • 120ml boiling water

In your stand mixer, cream dairy free spread and sugar until light and fluffy (Speed 5, 10 seconds, scrape down and repeat twice).
Add in the egg replacer. If you are using the aquafaba here, you need to add in this extra step: in the small bowl of your mixer place the aquafaba and beat it until frothy – you don’t need to go quite as far as sort peaks forming. Add this mix into the beaten sugar mix and beat to combine. (Speed 4, 8 seconds)

Add in the syrup then mix well (Speed 4, 12 seconds)

Dissolve the bi carb in the boiling water.

Mix together dry ingredients and then add to the wet mix mixture in parts, alternating with the bicarb water. Start with 800g of flour then add more 1 tbsp at a time if the mixture feels too soft. I used a full 900g last time. (Set machine on speed 4 for about 3 minutes to allow you to add mix through the measuring cup opening while the machine mixes). *Note that the mix will still be fairly soft when it is ready to go in the fridge – it is not a really stiff dough.
Wrap in plastic wrap and refrigerate for 2 hours – overnight
Remove dough from fridge and allow to sit for 5 minutes, then roll dough out (use a little pure cornflour to dust the surface) and cut out to shape.

Lay on lined baking trays and place in a preheated 170C (or 160C fan forced) oven for about 15 minutes.

They will be browned and still slightly soft to touch when removing from oven
Remove from oven but leave on tray for 5 mins before transferring to a wire rack.

20191210_223840
For your reference – this is a big quantity of dough – it makes about 130 small gingerbread men!!

Then if you’re making a house you just need to get building!

For a fabulous egg free Royal icing (to use as your cement) check out this one. I made and used 2/3 of this recipe to construct and decorate our house. (For a thermal cooker: place icing sugar in bowl and set machine to speed 4 for about 2 minutes, add lemon juice and glycerine through the measuring cup opening in the top. Mix until thick and well combined … you probably won’t need all of the 2 minutes!)

20151205_154002

My 3, 5 and 7 year old decorated ours this year and they are very proud of the outcome!

December 2015 031

December 2015 023

Hope you are enjoying Christmas baking as much as I am 🙂


Salted Caramel Bliss Balls

I guess it’s no surprise to you by now that I’m posting more salted caramel flavoured recipes!

These bliss balls came about because I had some almond milk dulce de leche left over and I want to stop myself eating it from the jar with a spoon!

See below the recipe for nut free and coeliac options.

  • 150g rolled oats*
  • 30g rolled quinoa
  • 20g flax seeds
  • 3/4 tsp Himalayan salt
  • 1 tbsp sunflower seed butter
  • 1 tbsp maple syrup
  • 1 tbsp almond milk dulce de leche (or use an extra tbsp maple syrup)
  • 1tsp vanilla bean paste
  • 12 pitted medjool dates

Place oats, quinoa, flax and salt in the bowl of your processor and blitz until fine (Speed 8, 12 seconds).

Add in seed butter, syrup, vanilla and dulce de leche. Process until well combined. (Speed 7, 8 seconds, then scrape down sides).

Add in dates one at a time through the top chute, on to spinning blades then process until date is finely chopped and evenly distributed.  (Speed 4 whilst you are adding dates, then up to speed 7 for 15 seconds).

Use teaspoons of mix and roll into balls.

20151102_140031

Makes about 22.

Store in airtight container in the fridge for up to 2 weeks.

*To make these coeliac friendly: remove the oats and bulk up the quinoa to 60g and add in 1 cup sunflower seeds.

Enjoy!

Chocolate Protein Drink (‘Milo’ Substitute)

My big boys love Milo. My husband loves Milo … and quite frankly, I’d quite happily eat it straight from the tin too if it wasn’t for the health concerns …. I suspect all Aussie kids would have done it at one time in their lives 😀

But it’s not an option for my little miss and I’d really rather that my boys weren’t getting the refined sugar, oils and additives from it either. So I’ve been trying to find a way to make a home made version that we could all enjoy.

This is a pretty good approximation. I have to tell you that it is not like eating the original (for obvious reasons!), so please don’t expect an exact replica, or you will be a bit disappointed! But it is sweet, chocolatey and has crunchy bits when mixed with cold milk. So if you are you missing a chocolately drink or you just want a healthier version, then this is a good place to start!

For us, it is also a simple way to make sure that our biggest boy gets the weekly Hazelnut quota that he requires after his nut challenge.

I based my mix on this one from Changing Habits.

  • 3 tbsp each of sunflower, pumpkin, chia and flax seeds
  • 1/2 cup roasted almonds
  • 1/2 cup roasted hazelnuts (skin off)
  • 1/2 cup cacao powder OR 3/4 cup cocoa
  • 1 cup coconut sugar

Place nuts and seeds in high power processor and process until fine – be careful not to overdo it and wind up with a butter! (Speed 8, 8 seconds).

Add in cacao and sugar and process again to combine (Speed 4, 6 seconds).

20151025_130237

Store in airtight jars. Makes 2 large jars.

Use as you would use Milo. I doesn’t completely dissolve in cold milk because of the nuts and seeds, but the cacao and sugar do giving the milk a chocolatey appearance whilst leaving the crunchy bits, typical of Milo. Don’t use with hot milk – the chia and flax seeds give a gelatinous mix if you do!

We use it in milkshakes, on top of porridge, in pancakes or even sprinkled on to frozen banana ‘ice cream’. Yum!!

20151025_130724-1

2 out of my 3 bigger kids drank it and loved it. Harry wasn’t convinced with just plain milk, but we have discovered that he loves it in a milk shake (you can find his favourite milkshake recipe at the end of the post!). My husband drank it and enjoyed it although knew that it was different to ‘the real stuff’! Ellie and George … well … they likes to eat it by the spoonful!

If you want a really fine mix, try using the milling blade in a smaller bullet type blender (like a Nutribullet).

For a nut free version:

  • 3 tbsp each of chia and flax seeds
  • 3/4 cup roasted sunflower seeds
  • 3/4 cup roasted pumpkin seeds
  • 3/4 cup cacao powder
  • 1 1/4 cups coconut sugar

To dry roast the seeds, place them in a large baking tray under the grill, on the shelf furthest away in the oven. Watch them carefully … it only takes a few minutes! Flip seeds in tray a few times during cooking process to ensure even cooking coverage.

Allow seeds to cool before adding to processor with chia and flax. Follow above method for remainder of recipe.

Enjoy 🙂

Harry’s Choc Shake:

  • 1 frozen banana
  • 1 tbsp drinking chocolate mix
  • 1 tbsp rolled oats
  • 1 tsp Sunflower seed butter
  • 1 cup cold milk of choice.

Place all ingredients in a high powered blender/processor and blend until very smooth.

Drink immediately – Harry says it’s best with a blue straw 🙂

Teff cookies

As is often the case, my wonderful and delightful (but cheeky and determined!!) little miss is the source of inspiration for my baking experiments.

We are struggling to get enough protein into her, but she is quite a fan of baked goods. So I have been trying to find higher protein flours to work with and Teff came up.

Apparently, according to my research, it is the world’s tiniest grain. It originated in Ethiopia where is has long been a staple in their diet. Compared with other grains, it has a higher percentage of bran and germ which makes it higher in fibre and protein. It’s also go the highest calcium content of all grains … another deficiency we struggle with. It has quite a light flavour and is naturally gluten free – wins all ’round!

So now …. what do I make with it?

Well, I bought a packet (of Bob’s Red Mill Teff) and on the back there was a recipe for teff and peanut butter cookies.

This is my adapted version.

  • 1.5 cups teff flour
  • 1/2 cup maple syrup (honey or rice malt works too)
  • 1/2 tsp himilayan salt
  • 175g sunflower seed butter
  • 6 large medjool dates
  • 3/4 tsp GF Baking powder
  • 1 tbsp coconut oil/vegan butter
  • 1 tsp vanilla bean paste

In your processor mix together syrup, seed butter, vanilla and oil. Process until completely combined (Speed 5, 10 seconds)

Remove the seeds from your dates and drop them, one at a time, through the chute of the processor on to spinning blades, then process until dates are very finely diced and well mixed in (Speed 4 while you are adding the dates then up to speed 7 for 15 seconds).

Add in the baking powder, salt and flour and process to combine into a thick dough (Speed 5 for 15 seconds, scrape down sides and repeat).

Use a teaspoon to scoop out the mixture and roll in to walnut sized balls, then press down with the back of a fork on to a lined baking tray.

20151023_121652

20151023_122102

Place in a preheated 180C oven and bake for 15 minutes. They don’t spread out much, but do rise a little.

The cookies will still be soft when removed from oven but they will harden as they cool.

20151023_124056

Makes about 30-35 cookies. Store in an air tight container or pop them in the freezer.

Enjoy!

Lemon and Blueberry tart

A little while ago I saw this amazing looking recipe for a Lemon and Blueberry shortbread slice and I couldn’t stop thinking about how I wanted to make something similar in an allergy friendly and low sugar version.

After recently having discovered ‘Aquafaba’ as an egg replacer I thought it might be a good way to add some lightness and rise to the filling of a tart. You can find out more about this amazing discovery at aquafaba.com

So after having a little play, this is my tart.

(See below the recipe for a nut free version)

  • 180g Plain Gluten Free flour
  • 160g almond meal
  • 3 tbsp Rice Malt Syrup
  • 3 tbsp coconut oil
  • juice and finely grated zest of 4 medium lemons
  • 80g Stevia
  • 50g pure cornflour
  • 1 tbsp Nuttelex
  • 1/2 the drained liquid from a 400g tin of chic peas
  • 100g fresh blueberries

To make the crust place the flour, almond meal, syrup and oil in a food processor. Process to combine well and until it resembles wet sand (Pulse twice, then speed 5 for about 15 seconds in a Thermal Cooker).

20151017_133814

Grease a 26cm round spring form pan and tip the base mix into the bottom. Use your hand to press the mix down to cover the bottom and a little bit up the sides.

20151017_134519

Cover with baking paper and add blind baking weights (rice or beans work well) and place in a preheated 180C oven and bake for about 12 minutes. Remove from oven and remove the weights and paper and return to oven for a further 5 minutes then remove from oven and set aside. Turn the oven down to 160C.

20151017_134634

In a large saucepan place the zest, juice, stevia, cornflour and Nuttelex and heat over a gentle heat, whisking regularly to avoid lumps, until the curd begins to thicken. Remove from heat.

20151017_141132

While to curd is heating, place the chic pea liquid drained into a stand mixer and whip on a high speed until fairly stiff peaks form (not as stiff as a meringue). This will take about 4-5 minutes.

20151017_141215

Fold the whipped mix through the lemon curd mix – don’t over mix it.

Pour the lemon mix on top of the crust.

20151017_141544

Place blueberries on top and place in a preheated 160C oven for about 40 minutes. The top will be golden and beginning to crack.

20151017_141750-1

20151017_151152-1

The filling of the tart will still be quite soft when you remove it from the oven but will become firmer as it cools.

Cut and serve – lovely warm or cold.

20151017_163249

We took this one to share with family for afternoon tea and it was thoroughly enjoyed by everyone – even those without any food restrictions!

20151017_163232

Enjoy 🙂

For a Nut Free Version; replace the almond meal with equal quantity sunflower seed meal or omit the almond meal and use gluten free flour plus 1 heaped tsp of psyllium (to help with flexibility).

Egg free Meringue

It is always good to have clever friends … and it is extra great when they are vegan ‘foodies’ who are prepared to share their clever tricks with you!!

A little while ago I was chatting to my friend Dan and she told me about an egg replacer called ‘Aquafaba’ … the liquid drained from a can of chic peas. Um, what?

Yep – this stuff:

20151016_105959

Apparently the clever vegans have been on to it for a while … I’ve just been a bit slow catching up 😉 It is the proteins in egg whites that help them to whip up all frothy and go stiff – which is why this replacement works well – the proteins from the legumes. Who knew?! And I promise you that there isn’t even a hint of a taste of the legumes. They look, feel and eat just like the real thing.

Here is the link to the original recipe for meringues.

I used

  • The drained liquid from 1 400g can of chic peas (do not buy the no salt version!)
  • 1/3 cup sugar (or about 1/4 cup powdered Stevia), milled to resemble icing sugar
  • 3/4 tsp vanilla bean paste
  • pinch cream of tartar
  • Optional – sprinkles to top (I use the Hoppers brand that is allergies friendly and is also free of artificial colours and preservatives) and a few drops of natural food colours (Madam’s request is for pink next time!).

Place the liquid in a very clean bowl of your stand mixer and turn on to a high speed (Mine is a Sunbeam Mixmaster and goes up to 12 and I used speed 10).

Beat until doubled in size and very frothy.

Add the cream of tartar and continue to beat until soft peaks form. This took about 5 minutes.

20151016_110655

Continue to beat and gradually add in the sweetener.

Beat until stiff peaks form.

20151016_111035

Add in the vanilla and colour if you are using it.

Spoon on to a lined baking tray (and add sprinkles if you wish) and place in a preheated 100C oven to bake for about 1.5 hours.

20151016_111730-1

20151016_111740-1

Do not bake any hotter because you are essentially drying out the mixture rather than baking it (kind of like a fruit leather). Low and slow is the best option.

Remove from oven and allow to cool.

20151016_125421-1

Store in an airtight container for a week.

20151016_131427

Makes 24.

Enjoy!!

Crunchy Quinoa Biscuits

I love crunchy bikkies …. dunking them in a hot cuppa was always a  favourite!

These delicious bikkies definitely meet my sweet and crunchy requirements.

My kids (and husband!) all love them. They are simple to make, the kids love choosing their own shapes and they are really easy to adapt to meet most allergy requirements.

  • 100g rolled quinoa (or you can mill the whole grain)
  • 160g plain flour OR GF flour
  • 1/2 tsp bicarb soda
  • 1 tsp mixed spice
  • 70g of sunflower seed butter OR nut butter**
  • 1 tsp vanilla bean paste
  • 150g maple OR golden syrup

**You can use half seed butter and half butter here, or even all butter – all combinations work well!

In a saucepan, over a medium heat, stirring, melt together the seed butter, syrup and vanilla (100C, speed 2 for 2 11/2 mins or until completely melted). Remove from stove

Mix together all of the dry ingredients (speed 5 for 10 seconds). Then add in the wet mix and mix gently until combined (speed 4, 10 seconds. Scrape down and repeat if required)

Wrap dough and place in fridge for about 20 minutes.

Roll out, to about 3mm thick and cut into shapes. The thinner you roll them the quicker they cook and the crunchier they are.

20200214_074532

Place on lined baking trays and bake for about 9-10 minutes, or until golden brown, in a preheated 180C oven.

20200214_075549
The tri coloured grains milled for this batch

They will be soft when removed from the oven and will crisp up on cooling.

20200214_081718

Makes about 60 small cookies – depending on the size of your cutters.

When completely cooled, store in an airtight container for up to a week.

20200214_081729
Watch out for the Cookie Monster!

Enjoy!