Nigella’s Spanish Chicken

I am a bit of a fan of Nigella Lawson.

Lately I have been enjoying watching the re-runs of her Kitchen series on iview while I do Ellie’s dream-feed.

Usually I can only dream of eating most of the things she cooks, but then the other night I saw her make this meal and was so excited that I could make it with only a few changes that I re-watched the episode and wrote it down after Ellie was back in bed.

It was very well received in our house, despite initial objections from the two fusspots!

  • 8 skinless chicken thighs, left whole
  • 4 spicy chorizo sausages cut in to bite size pieces (check they meet your allergy requirements as they all have different ingredients)
  • 2 large potatoes cut in to bite size pieces
  • approx 1 tsp dried oregano, and
  • zest of 1 orange, finely grated.

Place all ingredients into baking pan. Make sure they are packed in quite tightly as you want it all to roast in the spicy oils from the chorizo.

Sprinkle with oregano and zest, then place in a pre-heated oven at 200 degrees for about an hour, or until chicken and potatoes are golden brown. Using tongs,  turn the meat and veg after about half an hour to make sure they are evenly covered.

I served with a salad of baby spinach leaves and diced roma tomatoes, dressed with extra virgin olive oil, a splash of red wine vinegar and a pinch of salt flakes.

This serves about 6 adults.

Tasty Tacos

I have never been a mince fan … and my family and friends harass me constantly for it. ‘ But it’s just so versatile’, ‘what if I just grind up a steak for you?’. There’s just something about the texture that makes me feel all squeamish.

Anyway, it turns out that I have a husband and children who adore Mexican food … hello minced meat.

Since our diet is already restricted, I figured that I needed to try and learn to eat mince so that there were some more options open to us – I find I can manage it when it is in a largely veggie based meal like this one, or in our bolognese.

Tacos are are MASSIVE WINNER in our house so we hope you enjoy them too!

**If you are after a vegan option for your tacos – check out below the main recipe for how we make the switch.

20180911_182139
My veggie loving little sous chef
  • 400g mince (beef, turkey or chicken)
  • 2 tbsp garlic infused olive oil
  • 1 finely diced brown onion
  • 1 400g tin brown lentils, drained and rinsed
  • Taco Shells
  • 1 large jar Mexican salsa
  • 2 tbsp Mexican Seasoning
  • 1 fist sized piece of pumpkin
  • Toppings – spinach, avocado, cucumber, tomatoes, corn, cheese etc etc

Heat the oil in a large frying pan and cook the onion til soft. Add the mince and brown.

Then add the seasoning and salsa. Then add the lentils and mix well.

Finely grate the pumpkin.

Add the pumpkin to the meat mix and stir to combine.

Bring to a gentle simmer for about 20 mins until the meat is cooked and the veggies are soft..

Heat Taco shells according to pack directions and while they are heating, prepare all salad ingredients.

Serve with mince mix at the bottom, salad next and sprinkle of the cheese your diet allows. It’s a great ‘make-your-own’ meal for the kids too.

20160719_134823-1

20200521_184226

**The Vegan option:

Omit the minced meat and add in 300g of finely diced firm mushrooms, use them at the same place in the recipe as the mince goes.

Then when you are adding in the lentils, add 1 more additional tin of drained and rinsed lentils.

Make sure you use a suitable plant based cheese – and that’s it! Super easy and very tasty!

This recipe makes enough meat mix for 2 family dinners for us – we freeze the other half in an air tight container – perfect for when you neeeeed tacos next time 😉

Extra Tip: If you need or want to go grain free – then using large lettuce leaves as your taco cup works really well, and you still get a lovely crunch (and messy hands!). This is also a good option if you are soy free as I’ve yet to find pre made shells without soy.

20200511_214555

Enjoy 🙂

Salmon and roast vegetable quinoa

My friend Amy introduced me to quinoa (pronounced ‘keen-wah’) a couple of years ago as I was desperately searching for some allergy friendly variety for our diets … and I am SO glad she did!!

It is an amazing seed – a real super-food; high in amino acids and full of protein, iron and calcium and a great source of low GI gluten-free fibre. For all of these reasons it has become a regular feature on our menu. Quinoa has a lovely nutty taste – almost like a mix between the chewiness of barley and the fluffiness of cous cous. It can have a bitter taste, but that is easily fixed by soaking and rinsing before you cook it.

This is one of my favourite quinoa recipes;

Salmon and roast vegetable quinoa.

  • 1.5 cups quinoa (I use the white variety, but it also comes in black and red)
  • spray oil
  • 2 tbsp extra virgin olive oil
  • salt and pepper
  • 2 tsp Massel chicken stock
  • dill (to taste)
  • 1 large tin of salmon, bones and skin removed, flaked
  • 1 large zucchini
  • 1.5 punnets cherry or grape tomatoes
  • pumpkin

Place the quinoa in a large saucepan and cover with about 2L of water. Allow to soak for at least an hour (mine often sits for a few hours before I get back to it!), then drain and rinse well.

While the quinoa is soaking, cut up the vegetables (leave the tomatoes whole) and place in a large baking dish. Spray with oil and season with salt and pepper. Roast in a pre-heated 180 C oven for about an hour, or until they are just cooked (you don’t want them to get too squishy).

Return the drained quinoa to the saucepan and cover in 4 cups chicken stock. Bring to a boil and then reduce to a simmer for about 15 mins. Drain the excess stock.

Add the salmon, dill and olive oil to the saucepan and gently mix through on a low heat.

Serve the quinoa into bowls and top with the roast veggies.

Serves 4-5

Lemon Thyme Mushroom Linguine

A few months ago my sister-in-law came to stay, which was lovely, but she is a vegan …. so my challenge for the week she was here was to cook vegan food that was also soy and gluten-free, that satisfied my rather carnivorous husband and that actually tasted good.  A scary challenge! But we did ok and we have continued to make some of the meals we shared with her – this is now Will’s favourite dinner.

It is an adaptation of a recipe that I saw on ‘Nigella Kitchen’.

  • 50ml garlic infused olive oil
  • 500g sliced mushrooms (I use a mix of Button and Swiss Brown)
  • salt and pepper
  • 3 sprigs of thyme, leaves finely chopped
  • zest and juice of 1 large lemon
  • steamed green beans
  • GF linguine

Place the mushrooms in a large mixing bowl, add in the oil, herbs and lemon. Mix well so that the mushrooms are all coated.

Cover mushrooms and allow to infuse for a couple of hours (or at least 30mins if you are short of time).

Heat a large frying pan and tip in the mushrooms, cooking until soft.

Add steamed beans to the frying pan and stir through (don’t leave them too long because there’s a better contrast if the beans are still a bit crunchy).

Cook the linguine, drain and serve. Add mushroom mix to the top. Make sure you don’t waste any of the yummy pan juices – pour them over the top!

Serve and eat immediately.

Serves 4.

Roast Lamb

I love a good roast … trouble is, that as well as being a bit of an organise freak, I am also somewhat of a clean freak … which means that I don’t like letting my oven get dirty! So when I discovered how simple it was to cook a huge leg of lamb outside in the bbq I was very excited!

I use quite a large leg (about 2.5kg), then when it is cooked I carve it all up and freeze it in a couple of separate batches. It thaws well and it is great to be able to have a roast ready at such short notice!

  • Leg of lamb
  • 2 tbsp olive oil
  • ground salt
  • ground black pepper
  • fresh rosemary (before I had it growing in my garden, I used the dried variety and it works just fine)

Pre-heat the covered bbq to approx 180 degrees C.

Place the lamb in large baking dish, mix together the oil, salt, pepper and rosemary and rub into the lamb.

Place the baking dish on the bbq plate and turn off the burners that are directly underneath it. (I place the dish on the bbq plate on the left and only use the burners under the grill on the right going), then close the cover.

Leave to cook for about 30mins per 500g for a medium cooked roast. Do 5 mins less for 500g for a rare roast or 5 mins more for well done. Try to avoid lifting the cover of the bbq as you lose a lot of the heat each time.

The roast is cooked to medium when you stick a knife in and the juice runs out clear.

After cooking, cover in foil and leave to sit for 20-30mins before carving.

Serve with roast veggies and gravy.

Now all I need to do is learn how to carve properly 😉

Nut -free Satay Chicken

My husband calls my satay sauce ‘frautay sauce’ (fraudulent satay‘).

To be honest, I don’t really mind what he chooses to call it because it is really yummy and everyone loves it … we have even had dinner guests eat it and then look at my kids in horror and say ‘Oh no – but they can’t eat peanuts!’, not realising that it was this substitute.

See below the recipe for a Thermal Cooker method.

  • 1tsp olive oil
  • 1 sml brown onion, finely chopped
  • 2 cloves garlic, crushed
  • 1 small fresh red chilli, finely chopped (remove the seeds if you don’t want too much heat)
  • 3 tbsp Sunflower seed butter
  • 1/3 cup water
  • 2 tbsp lemon juice (about 1/2 a lemon)
  • 1 tsp balsamic vinegar, and
  • 1/2 tsp coconut sugar

Heat oil in a small saucepan over medium heat. Add onion and cook, stirring until onion is soft and golden.

Add garlic and chilli and cook for 1 minute.

Remove from heat and seed butter and stir to combine.

Return to low heat and add water, lemon juice, vinegar and sugar.

Cook, stirring for about 3 minutes until sauce thickens.

To make the satay chicken, I just wait until the sauce cools, then put about 1/3 of it aside. Use the remaining 2/3 to marinate strips of chicken thigh and leave covered in the fridge for 2 hours.

Thread chicken strips on to bamboo skewers (soak them in water before hand so that they don’t burn when cooking) and cook on the bbq.

I serve with steamed veggies on a bed of rice and top with remaining sauce.

The sauce makes about 3/4 of a cup and I use about 400g of chicken thighs, which is enough to feed all 5 of us, with one or two left over for lunch the next day.

To adapt for a Thermal Cooker:

Place onions, garlic and chilli in bowl and use speed 6 for 8 seconds.

Scrape down sides and add oil. Saute on 100C, speed 1 for about 4 minutes, or until onions are soft and golden.

Add in the sunflower seed butter and mix on speed 4 for 10 seconds.

Add water, lemon juice, vinegar and sugar. Cook on speed 1, 90C for about 6 minutes to allow the sauce to thicken.

(Not so) Fried Rice

‘The best dinner in the whole world of ever time’ …. This is how Will describes my fried rice.  So nice when you get something right!!

This is a fairly regular feature on our menu because; it’s a meal that everyone loves, is easy to make, can be easily adjusted to cater for allergies, you can make most of it in advance, you can make it in bulk, it freezes well for emergency dinners later on and it is a muuuuch healthier option than the Fried Rice you’d get in a restaurant! What is not to love?!

  • 2 cups brown rice*
  • 4 cups of finely chopped veggies (peas, corn, carrots and bean shoots are our regulars)
  • 200g sliced mushrooms
  • 3-4 diced chicken thighs
  • 6 rashers short cut bacon, diced
  • finely grated, fresh ginger, to taste
  • 1/2 brown onion, finely chopped
  • 1/3 cup coconut aminos
  • 2 tbsp garlic olive oil
  • 1/2 cup chicken stock (Massel for a store bought variety)

We have recently been increasing the veg to 6 cups and leaving out the chicken, to make this a cheaper meal. To make it a completely vegan meal we simply leave out the meat and double the mushrooms.

*We prefer to eat Brown rice, but if your family prefers white, go with Basmati.


20161112_173856

The night before (if possible, but even a couple of hours before is ok), cook the rice so that it is just tender, rinse and drain it well, then spread it out evenly in a baking dish and refrigerate.

Heat the oil in a large frying pan, add the onion, chicken and bacon and cook for a few minutes. Then add the ginger and aminos. Cook until the chicken is browned, then add in the sliced mushrooms. Continue to cook, stirring, until the chicken is cooked through.

Separately, steam veggies and keep aside.

Just before dinner (if you’ve made up to this point in advance), reheat meat in the frying pan, add rice,  stock and warm over low heat for a couple of minutes. Stir in meat, mushrooms and veggies.

If your diet allows, you could also mix through some fried and chopped up egg.

It takes a few minutes to all warm through. This quantity easily makes 2 meals for all 6 of us.

20170519_171345

Hugh’s muesli bars

I mostly pack my own snack for our morning outing when I pack the boys lunch boxes the night before, that way there’s not as much temptation to cave in and buy pre prepared stuff that isn’t so great for me – especially when I know how yummy the snacks ready waiting for me are.

To aid in my baking adventures, I was given the River Cottage ‘Everyday’ cookbook for mother’s day (I have to confess that I am a little bit in love with Hugh and I often wish I lived at River Cottage … but given that I live in the middle of the desert and that I am a real veggie growing novice, I am just making do with some of his amazing recipes for now!). This muesli bar recipe is adapted from one of the recipes that I first saw on his show.

It is probably more of a ‘grown ups’ recipe but I have taken to packing some for my boys when I have them because otherwise they just pinch mine!

  • 250g nuttelex/butter
  • 250g Sunflower seed butter 
  • 1/2 cup honey/maple syrup
  • zest of 2 oranges and 2 lemons (I mix and match with lime too, depending on what’s hiding in my fridge)

Mix all above ingredients in a large saucepan and cook over low heat until all melted and mixed together.

Remove from heat and add;

  • 2 1/2 cups diced dried fruit (I’ve just used sultanas, dates, apricots and cranberries)
  • 75g sunflower seeds
  • 100g pumpkin seeds
  • 75g flax seeds
  • 75g chia seeds, and
  • 400g rolled oats.

Stir in thoroughly, press the mixture down firmly into a greased baking pan and cook in a preheated oven at 160 C for approx 45 mins, or until golden.

Allow to cool completely before cutting into bars.

I find it’s best to leave it in the fridge for an hour or so before I cut it up, then store it in the fridge in an airtight container and it keeps well for a fortnight.

This makes a large batch and it is quite calorie dense, but because of all the protein and good fats it is filling and you don’t need a huge serving to be satisfied. Great for school lunchboxes when you’re at a ‘nut-free school and it can also serve as a quick and filling breakfast.

To make this Coeliac Friendly replace the oats with equal weight of a mix of puffed rice, rolled quinoa and desiccated coconut.

Chicken Risotto

My kids aren’t terrific at eating pieces of meat, so meals that have everything mixed in together usually go down well – and this risotto is no exception. It gets scoffed down by everyone – in fact, after a torturous few months it was the very first meal that my Harry ate when he was 9 months old!

It’s easy to make and easy to adapt with whatever veg you have left and lastly (and possibly best of all!) it sticks together well, so it stays on spoons when little people are learning to feed themselves 😉

See below the recipe for the vegan option

  • 5 cups chicken stock (for an instant variety I use ‘Massel’ stock powder)
  • 70g nuttelex/vegan butter
  • 1 tbsp olive oil
  • 1/2 brown onion, finely diced
  • 2 cloves crushed garlic
  • 2 tsp fresh thyme leaves (or about 1/2 tsp dried)
  • 1 1/2 cups arborio rice
  • 2 cups steamed veggies (green beans and corn or pumpkin and broccoli are popular combinations in our house, but you can use whatever your family enjoys)
  • Approx 300g coarsely chopped cooked chicken.

Bring the stock to boil in a saucepan

In a large frying pan, melt the butter and oil and cook onion, garlic and thyme, stirring until onion is soft.

Add rice and stir for about 1 minute, ensuring the rice in coated with the herb mix.

Add approx 1/2 cup of stock at a time and stir consistently over a low/medium heat until the liquid is absorbed and the rice is creamy and just tender.

Remove from heat and stir through the chicken and veggies. Serve immediately. Feeds 5-6 adults.

If your diet allows it, you could also stir though 80g of finely grated parmesan cheese before the chicken. Or use 1/4 cup of Nutritional Yeast for a cheesey flavouring.

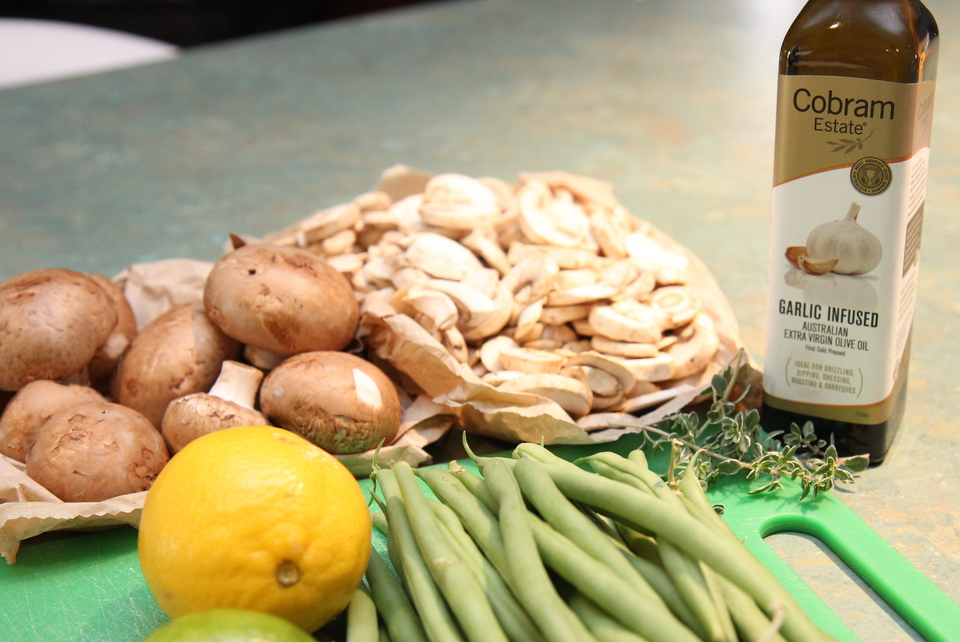
For a vegan option for this dish, remove the chicken and use 2-3 cups of sliced button mushrooms. Don’t wait until the end to add them in though. Add them to the meal about 2 minutes after the onion and garlic go into the pan.

Total cooking time will be about 25-30mins.

I’m not sure about your house, but in mine, the half hour before dinner is filled with bathing, dressing and wrangling 3 hungry little people, so standing in front of the stove for 30 mins doesn’t work very well!

So I’ve experimented a bit and I’ve found that an hour or 2 before dinner, when I have a bit more time, I can follow all steps through until there is about 1- 1 1/2 cups of stock remaining in the saucepan. Turn off both pans and leave them covered. Then just before dinner, bring the stock to the boil and put the risotto on a low heat and finish adding the stock before following the final steps.

This one isn’t really suitable for freezing. If you do have leftovers, you could reheat it the next day, but add a bit of stock (a couple of tbsps) before you zap it.

Hope you enjoy it as much as we do!

Fish Fingers

Fish Fingers

I spent many years of my childhood living in beautiful Broome (the North West coast of WA), where I got pretty used to eating fish like Red Emporer and Snapper (with my mum’s amazing beer batter!) as standard – how lucky!! Now we live in the middle of the desert and getting the goodness of fresh fish into our kids is a bit tricky! I try to include fish in our diet once a week, but it is often tinned salmon … and there is only so much of that, they’ll take!

So how about fish fingers? They are a kid favourite … but the very thought of eating the ones out of a packet turns me off, So here is a really easy recipe for allergy free fish fingers that even adults will enjoy 🙂

  • approx 400g fresh white fish fillets (I have been using flathead), skin off and de-boned.
  • equivalent of 2 eggs made up of ‘no egg’/2 beaten eggs/4 tbsp aquafaba
  • 1 lemon for the juice and zest
  • thyme to taste (I used the dried variety and used about 1/2 tsp)
  • 1/3 cup polenta (or blitzed rolled quinoa)
  • some oil to fry

Place the fish fillets, lemon juice, zest and thyme in the food processor and blend until quiFish Fingerste smooth.

Spoon mix into an oiled baking dish (the one I use is 14cm x 23cm), spread evenly and press down firmly.

Refrigerate for an hour, or until firm and cold. Cut into fingers (I do them quite big – 8 to this pan).

Coat the fingers in your egg replacer, I find that the easiest way to do this is to brush the mix on with a pastry brush before turning them and repeating.

Then roll the fingers in the polenta or quinoa crumb so that they are evenly coated, and pop them in a couple of tbsps of oil in a hot frying pan. Cook for a couple of minutes on each side, or until fish is white all the way through.

Serve with veggies … and of course tomato sauce!

Enjoy 🙂