Mulberry Jam

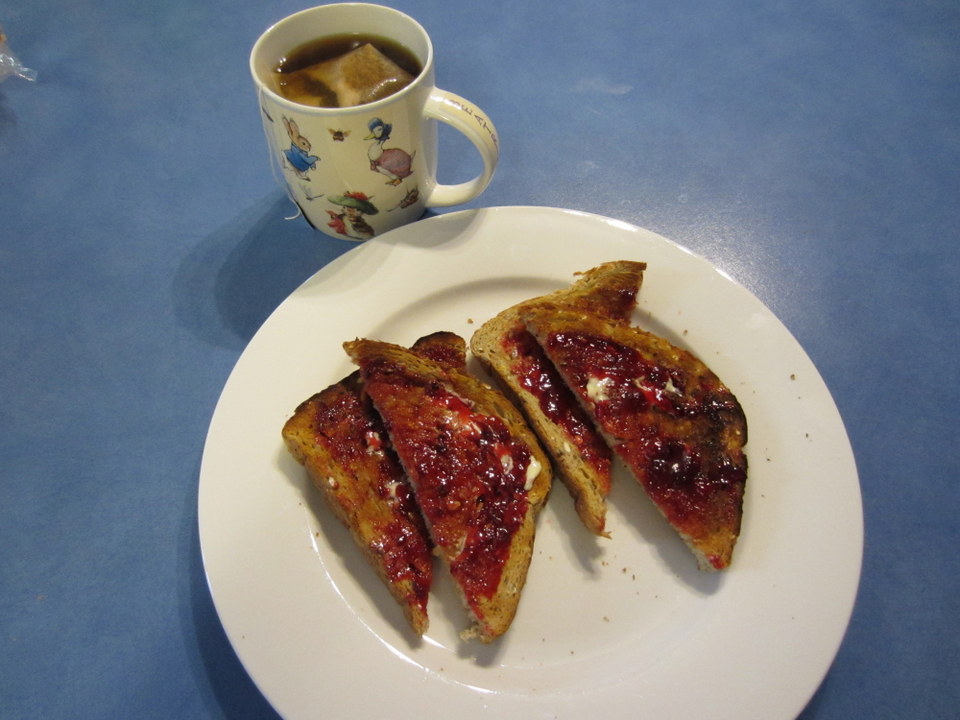
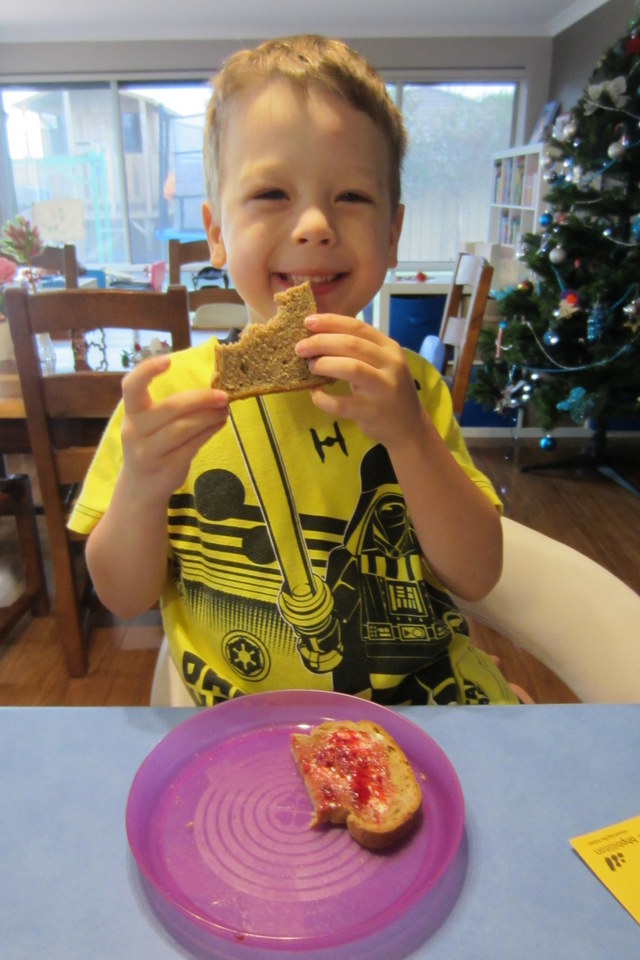
I should start this post by saying that I am a total jam novice …. this is my first ever go at making jam but it was much less scary than I thought and it tastes so yummy that I am inspired to make more.

I am very fortunate that my parents-in-law have a sprawling, very heavily laden mulberry tree in their backyard, so picking over 2kg of berries to have a go was very easy (and fun!).

I have made this one with quite ‘Christmassy’ flavours so it is another great gift to give for teachers ย (or even those great Aunts and second cousins once removed that are really tricky to buy for ๐Ÿ˜‰ )

  • 1.3kg Mulberries
  • 1.5kg jam setting sugar (made by CSR, it already has some pectin in it)
  • finely grated zest of 2 large oranges
  • 1 heaped tsp of ground cinnamon
  • juice of 1 lemon
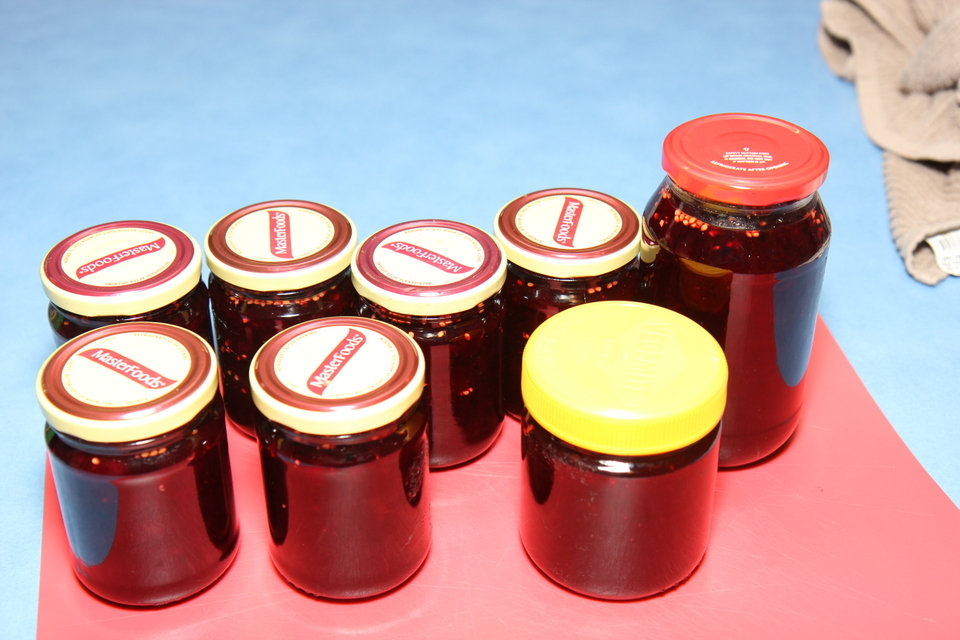
  • 8-10 glass jars, scrubbed clean

Wash berries and drain very well. Remove any obvious stems and place in a large saucepan.

1-Blog 078

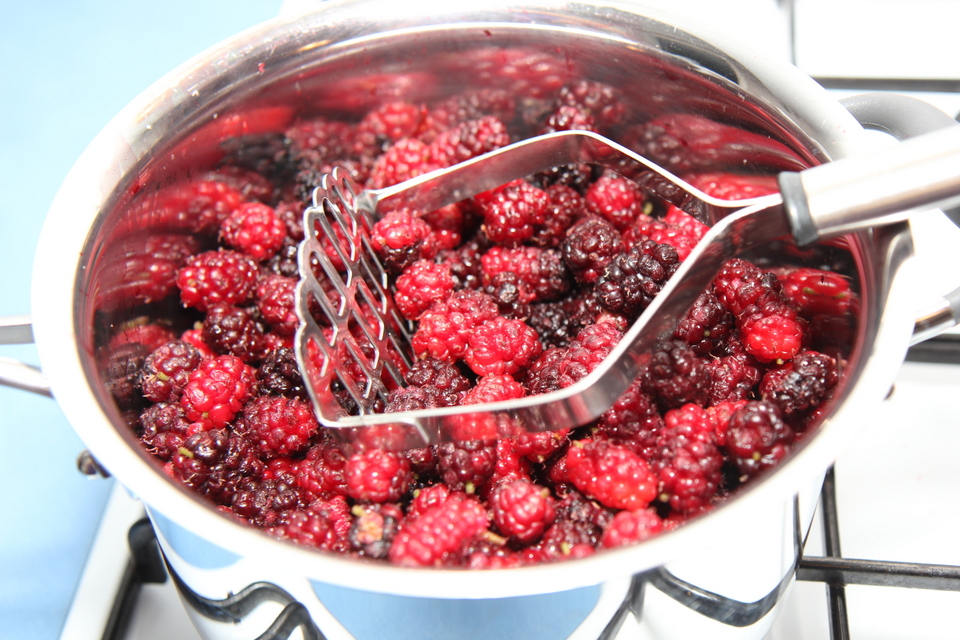
Crush with a potato masher. How much you crush depends on how smooth or lumpy you like your jam … I like some lumps so I didn’t mash too much.

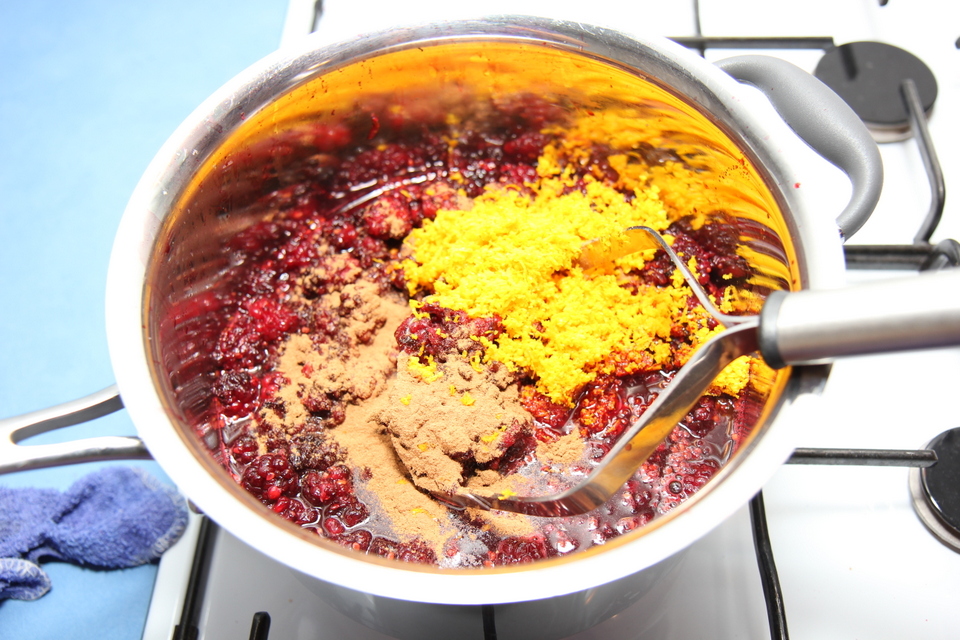
Tip in the zest, juice and cinnamon and mix well.

2-Blog 080

Turn on the stove to a low heat and add the sugar.

Stir continuously over low heat, until ALL of the sugar has dissolved.

Turn up the stove to a high heat and bring to a rolling boil. And continue the boil for 4 minutes.

3-Blog 082

Remove from the heat.

During these 4 minutes boil the kettle and soak the jars and lids in the boiling water. Dry the outside of the jar with a clean tea towel.

As soon as you have removed the jam from the heat, use a jug, like a pyrex style measuring jug to scoop out the jam and pour it into the jars. Please be very careful with this part … it is a really hot mixture and you will need to protect your hands.

Fill the jars, place the lids on and immediately invert them. Allow them to stand upside down for an hour. This allows the jars to reseal and keeps them airtight.

Then turn the jars up the right way and wipe them … it is a messy process! Allow to cool and set overnight – don’t put them in the fridge as you might crack the glass. Only use jars with a plastic lid if you are going to use it straight away or if you have jam seals underneath.

4-Blog 084

You can easily decorate the jars to give as gifts. We did a pretty label and some glossy red and green bows. They look great!

Delightful!
Delightful!
He has waited a looong time for this jam!

Stained Glass gingerbread

One of my favourite things to do leading up to Christmas is baking!! The kids enjoy helping and sharing their spoils too.

This year my William is in kindergarten and has asked to take in Christmas treats for all of his little friends, and I was on roster to do craft for the kids at our Bible study break up … so I made a (huge!) batch of Libby’s yummy gingerbread and we turned them into stained glass biscuits. Fun to make for the kids, yummy to eat and they make lovely presents with a bit of cellophane and bright ribbon!

Please note that the gingerbread recipe itself is soy free but there is a small amount of soy in the only boiled lollies I was able to find, so the stained glass part is not soy free.

You will need 2 packets of boiled lollies and gingerbread as per this recipe:ย https://itchinkitchen.com/2012/12/03/gingerbread-cookies/

Split the colours of the lollies up into bags then smash them up on a hard surface with a hammer. Best to have a tea towel folded around the bags so stop all spillage if you split the bags!

4-crushed lollies

Remove the gingerbread dough from the fridge and cut out the gingerbread shapes.

On a lined baking tray (it must be lined with baking paper and not just greased as the boiled lollies will stick like rocks without the baking paper!) place the shapes and then use an apple corer (or similar) to cut out holes.

1-Blog 070

Fill the holes with the crushed lollies – careful not to overfill them as they will turn to liquid and overflow during baking!

2-Blog 071

Bake in a moderate oven for about 10-15 mins or until golden brown.

Leave them to cool for at least 15 minutes on the tray before attempting to remove them to a wire rack – the liquid ‘glass’ centre needs time to harden and stick to the biscuit.

3-Blog 072

Allow to cool completely before wrapping and sharing as gifts … or enjoying at Christmas parties ๐Ÿ™‚

1-snow man stain glass

Chocolate mousse cake

Last night we had a get together with a group of friends that had been months in the planning. A few sets of friends were visiting from all over the world … what better reason to get together and share a whole lot of yummy deserts?! I was asked to bring along an allergy friendly desert … and this cake what I came up with – it is almost a replacement for cheesecake.

Just before he tasted it, I was having a conversation with a friend who was telling me how it is really awful when people try to pass off ‘that avocado stuff as chocolate mousse’ … and then he ate it and loved it … so I’m counting that as a win ๐Ÿ˜€

To make the base you’ll need1-October 2013 379

  • 2 packets of Macro gingernuts
  • 3tbsp Nuttelex

Place in a food processor and process until the crumbs resemble damp sand.

Press the crumb down firmly with a fork into a greased springform pan.

Then make the mousse.

I used a double quantity of this recipe for the chocolate mousse

Tip the mousse on to the top of the crumb base and spread out evenly.

Place in the freezer until solid. This is a cold dessert so it is best left in the freezer until almost ready to serve.

2-November 2013 002

Makes quite a large cake – serves probably 12-16.

I really enjoy the ginger flavour, but I think next time I make this I might have a go at using ย Rowies Anzac Biscuits so that the chocolate flavour is the more dominant one.

Hope you enjoy!3-Blog 067


Update: I have recently been making this cake with a different base and have enjoyed it even more than the original.

  • 2 packets of Leda’s Arrowroot biscuitsOctober 2014 1398
  • 1 tbsp flaked quinoa
  • 1 tbsp almond meal
  • 8 fresh dates, pitted
  • 1 1/2 tbsp tasteless coconut oil.


Aussie Meat Pies

With the AFL Grand Final this weekend, it feels almost compulsory to add a recipe for meat pies. Doesn’t every Aussie watch the footy eating a pie?!

The problem for me is that with my mince aversion, there is just no way I could possibly eat a shop bought meat pie that is full of miscellaneous animal parts and gristly bits – ick!

So here is my recipe for slightly healthier Aussie meat pies. We have a friend that insists that tomato sauce is all the salad you need to go with pies, and with the veggies snuck into this one, I have no problem with that ๐Ÿ˜€

  • 600-800g casserole beef, diced fairly small (about 1cm cubes)
  • 2 small carrots (mine was massive so I just used 1)
  • 1 small sweet potato
  • 1 cup peas
  • 1 tbsp each of bbq sauce, tomato sauce and cocnut aminos1-Blog 034
  • 3/4 tbsp Vegemite
  • 1.5 cups very hot water
  • 1 tsp minced garlic
  • 1 tbsp Orgran gravy powder.
  • Short crust pastry of choice.
  • Milk of choice

Place the meat into the slow cooker and place on low to heat up while you prepare the veg and sauce.

Finely grate the carrots, peel and grate the sweet potato and mix with the peas. Set aside.

In a large mixing jug, mix together the sauces, garlic, gravy mix and Vegemite. Then add the hot water and mix well until it is all dissolved and well combined.3-Blog 040

Pour the sauce over the meat and then add the veggies. Mix until well combined. It won’t look veryย saucy at this stage, but it will get more so as the veggies cook down.

Return the lid to the slow cooker and set to high for 4 hours. About 3/4 of an hour before cooking timeย is up, remove the lid and allow the meat to keep cooking whilst some of the liquid evaporates. If you forget this step, you can always add another bit of gravy powder to thicken the juices a bit.

Line either a pie dish or muffin trays with pastry, then fill with meat mix and place a lid of pastry on the top.

Use a fork to press down the edges and join the top to the base, brush with milk of choice and cut small vent holes.

For those who are Gluten Free, ย I used this pastry. I used a puff pastry because I knew from past experience that it didn’t puff hugely and I didn’t want them to be too stodgy.1-20130806_133713

You could also use a puff pastry top if you wanted a lighter finish for your pies.

Cook in a preheated oven at about 200C for 35-40 mins or until the pastry is golden brown and crunchy.

The meal can be frozen once the pastry is on, but before you cook in the oven. Defrost well before cooking and cook as normal for the final step.

This made a quite a large amount, enough for dinner for 6 adults.

1-Blog 044

Enjoy your pies and cheering for your team (or in my case – a substitute Western Australian Team because my beloved team didn’t make the finals … this year!!)

A very happy first time pie eater!

Garlic Honey Chicken

This is such a lovely fresh and crunchy dinner – quick and easy to make and well received by all in out house – win all ’round!

  • 400g chicken thighs, sliced
  • 2 small carrots, finely sliced1-June 2013 471
  • handful snow/sugar snap peas, finely sliced
  • 2 cloves minced garlic
  • 5 tbsp coconut aminos
  • 1 tbsp honey
  • 1 tsp olive oil
  • rice to serve.

Heat the oil in a large frying pan, add the garlic and fry gently for a minute, add the aminos and honey and stir to combine.

Add in the chicken strips and cook, stirring occasionally until almost cooked through.

Then add the veggies and stir through, cooking for about 2 minutes – not too long, you want the veggies to still be fresh and crunchy.

Serve on a bed of rice, or quinoa … and don’t forget to add the pan juices!

Serves 2 adults and 4 little people

Enjoy ๐Ÿ™‚

Satay Beef

Another slow cooker favourite ๐Ÿ™‚

This one uses the ‘satay’ sauce from hereย .

I make a double batch of the sauce, then pour it over 700-800g of diced casserole beef and cook in my slow cooker on low for 5-6 hours.

Delicious served on a bed of rice and with some steamed veggies.

1-July 2013 076

Enjoy ๐Ÿ™‚

Super Salmon patties

Simple salmon patties were another standard in my house while we were growing up. Sadly, when we got married, Peter wasn’t such a fan – he thought they were too bland.

But they are such a great way to get some good fish oils into kids, and they are also ย great because they are the perfect finger food for little hands, super transportable for picnics and lunchboxes and they’re a very inexpensive meal option!

So I have worked at adapting them, making them allergy friendly and increasing their nutritional value and now they are a resounding success with everyone in our family. Yay!

Hope you and your little people (or just the big ones!) enjoy them too ๐Ÿ™‚

  • 1 400g tin pink salmon (drained and skin and large bones removed)
  • 1 medium sweet potato (4-5 cups when chopped)
  • 400g tin chick peas/butter beans, drained and rinsed
  • 1 tsp fresh finely chopped dill
  • 3/4 cup nutritional yeast
  • 4 tbsp hemp seeds
  • Salt and pepper to taste
  • oil for cooking
  • Optional: a 1/2 cup corn kernels and 1/2 a grated zucchini

Peel and dice the potatoes. Place into a saucepan of boiling water and cook until soft.

Drain and rinse the chic peas, the soak them in boiling water for about 10 minutes minutes, before draining again and mashing well.

If using zucchini – grate then squeeze out all the liquid between paper towels (might take a few lots of towels). Set aside.

Drain the salmon and remove any large bones before mashing

Roughly mash the potato, then mix through the mashed chick peas, followed by the salmon (plus corn and zucchini if using).

Add in the dill, salt and pepper then mix.

Add in the nutritional yeast and hemp and mix well until evenly combined.

If the mixture is still too wet, then add in more of the nutritional yeast and seeds until you get a consistency that allows you to form balls, then squash down into patties – i do mine about palm sized.

Place mixture in the fridge for an hour .

Remove from fridge (roll in some breadcrumbs or almond meal if you like more of a crispy coating), then place in a hot frying pan with some oil.

20190625_170314


Cook until golden and then turn. About 3 minutes on each side. (You can also spray them with a little oil and bake in a preheated moderate oven for about 20 minutes per side).

Drain on some kitchen paper; allow to cool a little and then serve, on their own, in a burger or with some extra salad or veggies.

20150930_152201-1

Makes about 24

20180522_173602

These donโ€™t freeze well, but they last a few days in the fridge and are great for easy, healthy lunches.

I think they are particularly great for lunch with some slices of avocado on top and drizzled with sweet chilli sauce ๐Ÿ™‚

20180522_174141

**To make these into veggie patties which as great vegan option we simply leave out the salmon. The work brilliantly on their own or in a burger.

Slow Cooked Beef Stroganoff

I am very thankful to finally have my lovely big slow cooker out of storage! We have had a few weeks of ongoing illness in our house so I have really appreciated not needing to cook too much right before dinner time.

This meal gets some mixed reviews at our place – Peter and I really enjoy it, as does George. Harry and Will quite enjoy it after initial convincing to get them to try it, but Ellie flat out refuses to try anything but the pasta. Oh well, we’ll keep trying!

  • 1kg diced casserole/gravy beef
  • 1/2 tbsp plain GF flour
  • 1 heaped tbsp my French Onion soup dry mix1-July 2013 090
  • 1/2 tsp paprika
  • 2 tbsp tomato paste
  • 1/4 cup red wine
  • 1/2 cup very hot water
  • 4 cups sliced mushrooms
  • Optional: 50g cream cheese (dairy or soy) or 100g coconut cream

In a plastic bag (double bag is best to avoid mess!) mix together the dry ingredients. In batches add in the beef and shake to coat, then transfer to the slow cooker before continuing with next batch.

In a separate container, mix together the tomato, garlic, wine and water. Pour over the beef, replace lid and cook on low for 4 hours. (Occasionally, at this point I also add in 4-5 large, chopped carrots … to make the side veg prep easier at serving time).

Add sliced mushroom, stir well. Return lid and cook for a further 2 hours. It will initially look like too many mushrooms – be patient!!

20160216_131248
When the mushrooms first go in
20160216_135936
Only an hour later …. the mushrooms, cook down so much!

Just before serving, if you want a creamier sauce, stir in coconut cream, or cream cheese then serve on a bed of mashed sweet white potatoes or GF pasta (this is cause of great debate in our house!) and with steamed veg.

20160216_181524
One with mashed sweet potato (surely this is the right way?!) and one with GF pasta ๐Ÿ˜‰

This makes a big batch, enough for 2/3 serves so I freeze the remaining meat mix. Love cooking in bulk!

Enjoy ๐Ÿ™‚

Beef and red wine casserole

This is a recipe that came about because I had 3 sick munchkins, was feeling awful myself and couldn’t bear the thought of going out in the cold and pouring rain to do the grocery shopping! So dinner had to come from the pantry/freezer dregs!

It is delicious, but really simple and it took me about 7 minutes to make the whole thing – bonus!!

  • 800g diced casserole beef1-August 2013 005
  • 1 tin crushed tomatoes
  • 1/2 tin red wine
  • 2 tsp Massel beef style stock powder
  • 2 tsp minced garlic
  • 3 medium carrots, roughly chopped
  • 2 cups sliced mushrooms

Place the beef in the bottom of the slow cooker.

Mix together the tomatoes, wine, stock powder and garlic and pour over the beef.

Mix in the carrots.

Place the lid on the slow cooker and cook for 5 hours on low.

Mix in the mushrooms and stir well then return the lid and cook for another 2 hours on low.

Serve on a bed of mashed potato (it’s particularly nice with sweet potato) and steamed greens.

Perfect comfort food for a cold wintery night!

Serves about 6 adults and freezes well.

Enjoy

Salsa Chicken

This is now a long term family favourite in our house!

It was adapted from a recipe on the Slow Cooker site I belonged to, called ‘My Slow Cooker Recipes!!!’. *Check out the notes at the bottom of the recipe of you want a stove top version.

  • 6 large chicken thighs, skin removed
  • 2 tbsp Mexican Seasoning
  • Mexican salsa (2/3 of this quantity)2-July 2013 117
  • 1 x 420g tin corn kernels, drained*
  • 1 x 420g tinย  kidney beans, drained
  • 1 x 420g tin black beans, drained
  • 1 bag plain corn chips
  • Grated Cheese of choice, optional
  • 1 tbsp coconut cream (use the solid part at the top of the tin), optional
  • 1 400g tin refried beans, optional**

*If you don’t wish to eat the corn, replace it with equal quantities of extra beans.

**The refried beans are great if you are using this dish in any kind of wrap as it makes the sauce thicker.

Place chicken in the bottom of the slow cooker.

Sprinkle over the seasoning, then add the salsa and all of the beans.

Replace lid on slow cooker and cook on low for 8 hours.

If you are using corn, stir it through about an hour before the end.

Just before serving, stir though the coconut cream if you want a creamier sauce.

Serve on a bed of corn chips and sprinkle with a cheese that fits your diet.

(If you are avoiding corn chips, I have really enjoyed a scoop of the meat and veg mix topped with 1/2 a sliced ripe avocado and a sprinkle of fresh coriander). Or serve on wild rice.

20151102_174117

This makes a large batch, enough for about 8 adult sized meals. I freeze the left over half of the chicken mix and it defrosts really well.

If you don’t want as much spice, use the mild version of taco salsa.

1-July 2013 119

*Stove top method:ย Place chicken in a hot oiled pan (preferably use a pan with a lid). Brown one side then sprinkle over the seasoning, brown the second for a further 2 minutes and then cover with the salsa.

Place lid on the pan and simmer very gently for 25 minutes, or until chicken is cooked through.

Remove the chicken and dice.

Place the corn and beans in the hot salsa mix, stir through and return the lid, cooking for 2 minutes before returning the diced chicken to the pan and mixing through.

Stir through the coconut cream if desired.

Enjoy ๐Ÿ™‚

P.S you can change this one up a bit by using gravy beef in place of the chicken.

20160808_180032

20200223_100714
The no corn option with added refried beans makes a great filling for Burritos, Enchiladas and Tacos!