OPTIONAL – 1 tsp maple syrup (I tend to leave this out for me)
Place the oats on the processor and blitz until fine (Speed 9, 8 seconds)
Place the banana, syrup (if using), salt, seed butter and about 25mls of milk in the processor/blender and pulse a few times.
Scrape down the sides. Then while the processor is running, add in the dates one at a time. Process for a further 20 seconds (Speed 4 during the addition then up to 7 for 10 seconds).
Add in the rest of the milk and the ice blocks (through the chute whilst running) and process until well combined and fairly smooth. (Speed 6)
Serve immediately.
If you’re using a bullet style blender, use half of the ingredients in each of 2 large cups.
*I’ve recently been using cow’s milk as my husband’s taste preference. I use 1/4 full cream milk and 3/4 cold water.
Once a fortnight on a Sunday morning my husband plays with all the kids and I have a massive baking session to prepare for the lunchboxes in the weeks to come.
One of the things that the kids love to eat is Cheese and vegemite scrolls … and then I stumbled across this yoghurt dough from Kidspot.
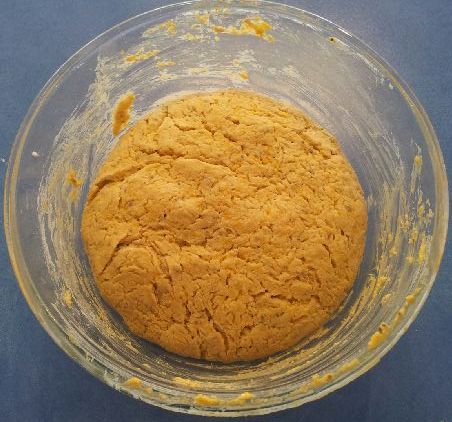
It is delicious and SO fast to make. I’ve found the best way to get it to the right consistency is the measure the weights, rather than cups, and to make it in the food processor or thermocook machine.
My take on the orignal, calls for
470g SR flour (or 420g GF flour together with 1tbsp psyllium husk). We often use spelt flour or do half wholemeal
*BOOST IT? Add 1/4 cup hemp seeds and 4 tbsp nutritional yeast to the flour. You’ll also need to add another tbsp or 2 of yoghurt.
Process all ingredients until it forms a dough, knead together and roll out into a large rectangle, no more than 1cm thick, on floured surface. (Speed 5, 15 seconds).
NOTE: If the dough is too sticky, add in 1 tsp of extra flour at a time and process to combine …. I have found that I often need to add more flour when I work with homemade soy yoghurt.
That’s it! Simple.
To make scrolls, I roll out into a rectangle, top with vegemite and grated cheese (or tomato paste, chopped ham off the bone and grated cheese). Roll into a tight log, cut into even slices and bake in a pre-heated oven at 200C for about 20 minutes.
It freezes and defrosts beautifully so I make a big batch of scrolls and pop them in the freezer – makes weekday lunches lots easier.
It makes an great pizza base too – 2 large ones from this quantity. Just add paste and toppings then bake in a preheated oven at 200C for about 15 minutes.
This recipe was my attempt at replicating something like the doughy bread rolls you can buy from major supermarkets and bakeries that have the cheese and bacon baked on top.
They are a quick bread rather than a long rising yeast dough which makes for much simpler, speedy lunches.
It is VERY popular, especially with my big boys, and so is another of the recipes that I make to freeze for the lunchboxes. I make 2 versions.
The ‘regular’ version:
2.5cups SR flour
1 cup milk
1 tbsp butter
1 cup grated cheese
Optional – about 120g ham, roughly chopped
For the more allergy friendly version:
2.5cups spelt flour (half wholemeal)
2.5tsp GF baking powder
1 cup milk of choice
1 tbsp vegan butter (ghee or coconut oil work well too)
1/2 cup grated Bio cheese (or 1/2cup of nutritional yeast*)
about 120g GF ham, roughly chopped
*If you’re not using the cheese, but the nutritional yeast, add an extra tsp of butter.
If you are leaving out the cheese or ham in either of these mixes, add in a pinch of salt.
In a food processor, pulse together the flours, butter, milk, and baking powder (if required). Process for about 20 seconds until a rough dough forms.
Add in the cheese (and ham) and process again until combined.
For thevegetarian/vegan option, I omit the ham and add some chopped chives and some pepper, or some sundried tomatoes.
Tip dough onto a lightly floured surface and knead gently to bring together.
Break dough into 8 portions and form into a roll shape.
To make these look more like the store bought ones I sometimes use only half of the cheese in the dough and reserve the rest with the ham and a smear of tomato paste for the top.
Place on a lined baking tray and bake in a preheated 200C oven for about 15-20mins or until the bottoms are golden brown and sound hollow when tapped.
Especially delicious served warm.
Makes 8 rolls – and any left overs freeze and defrost well.
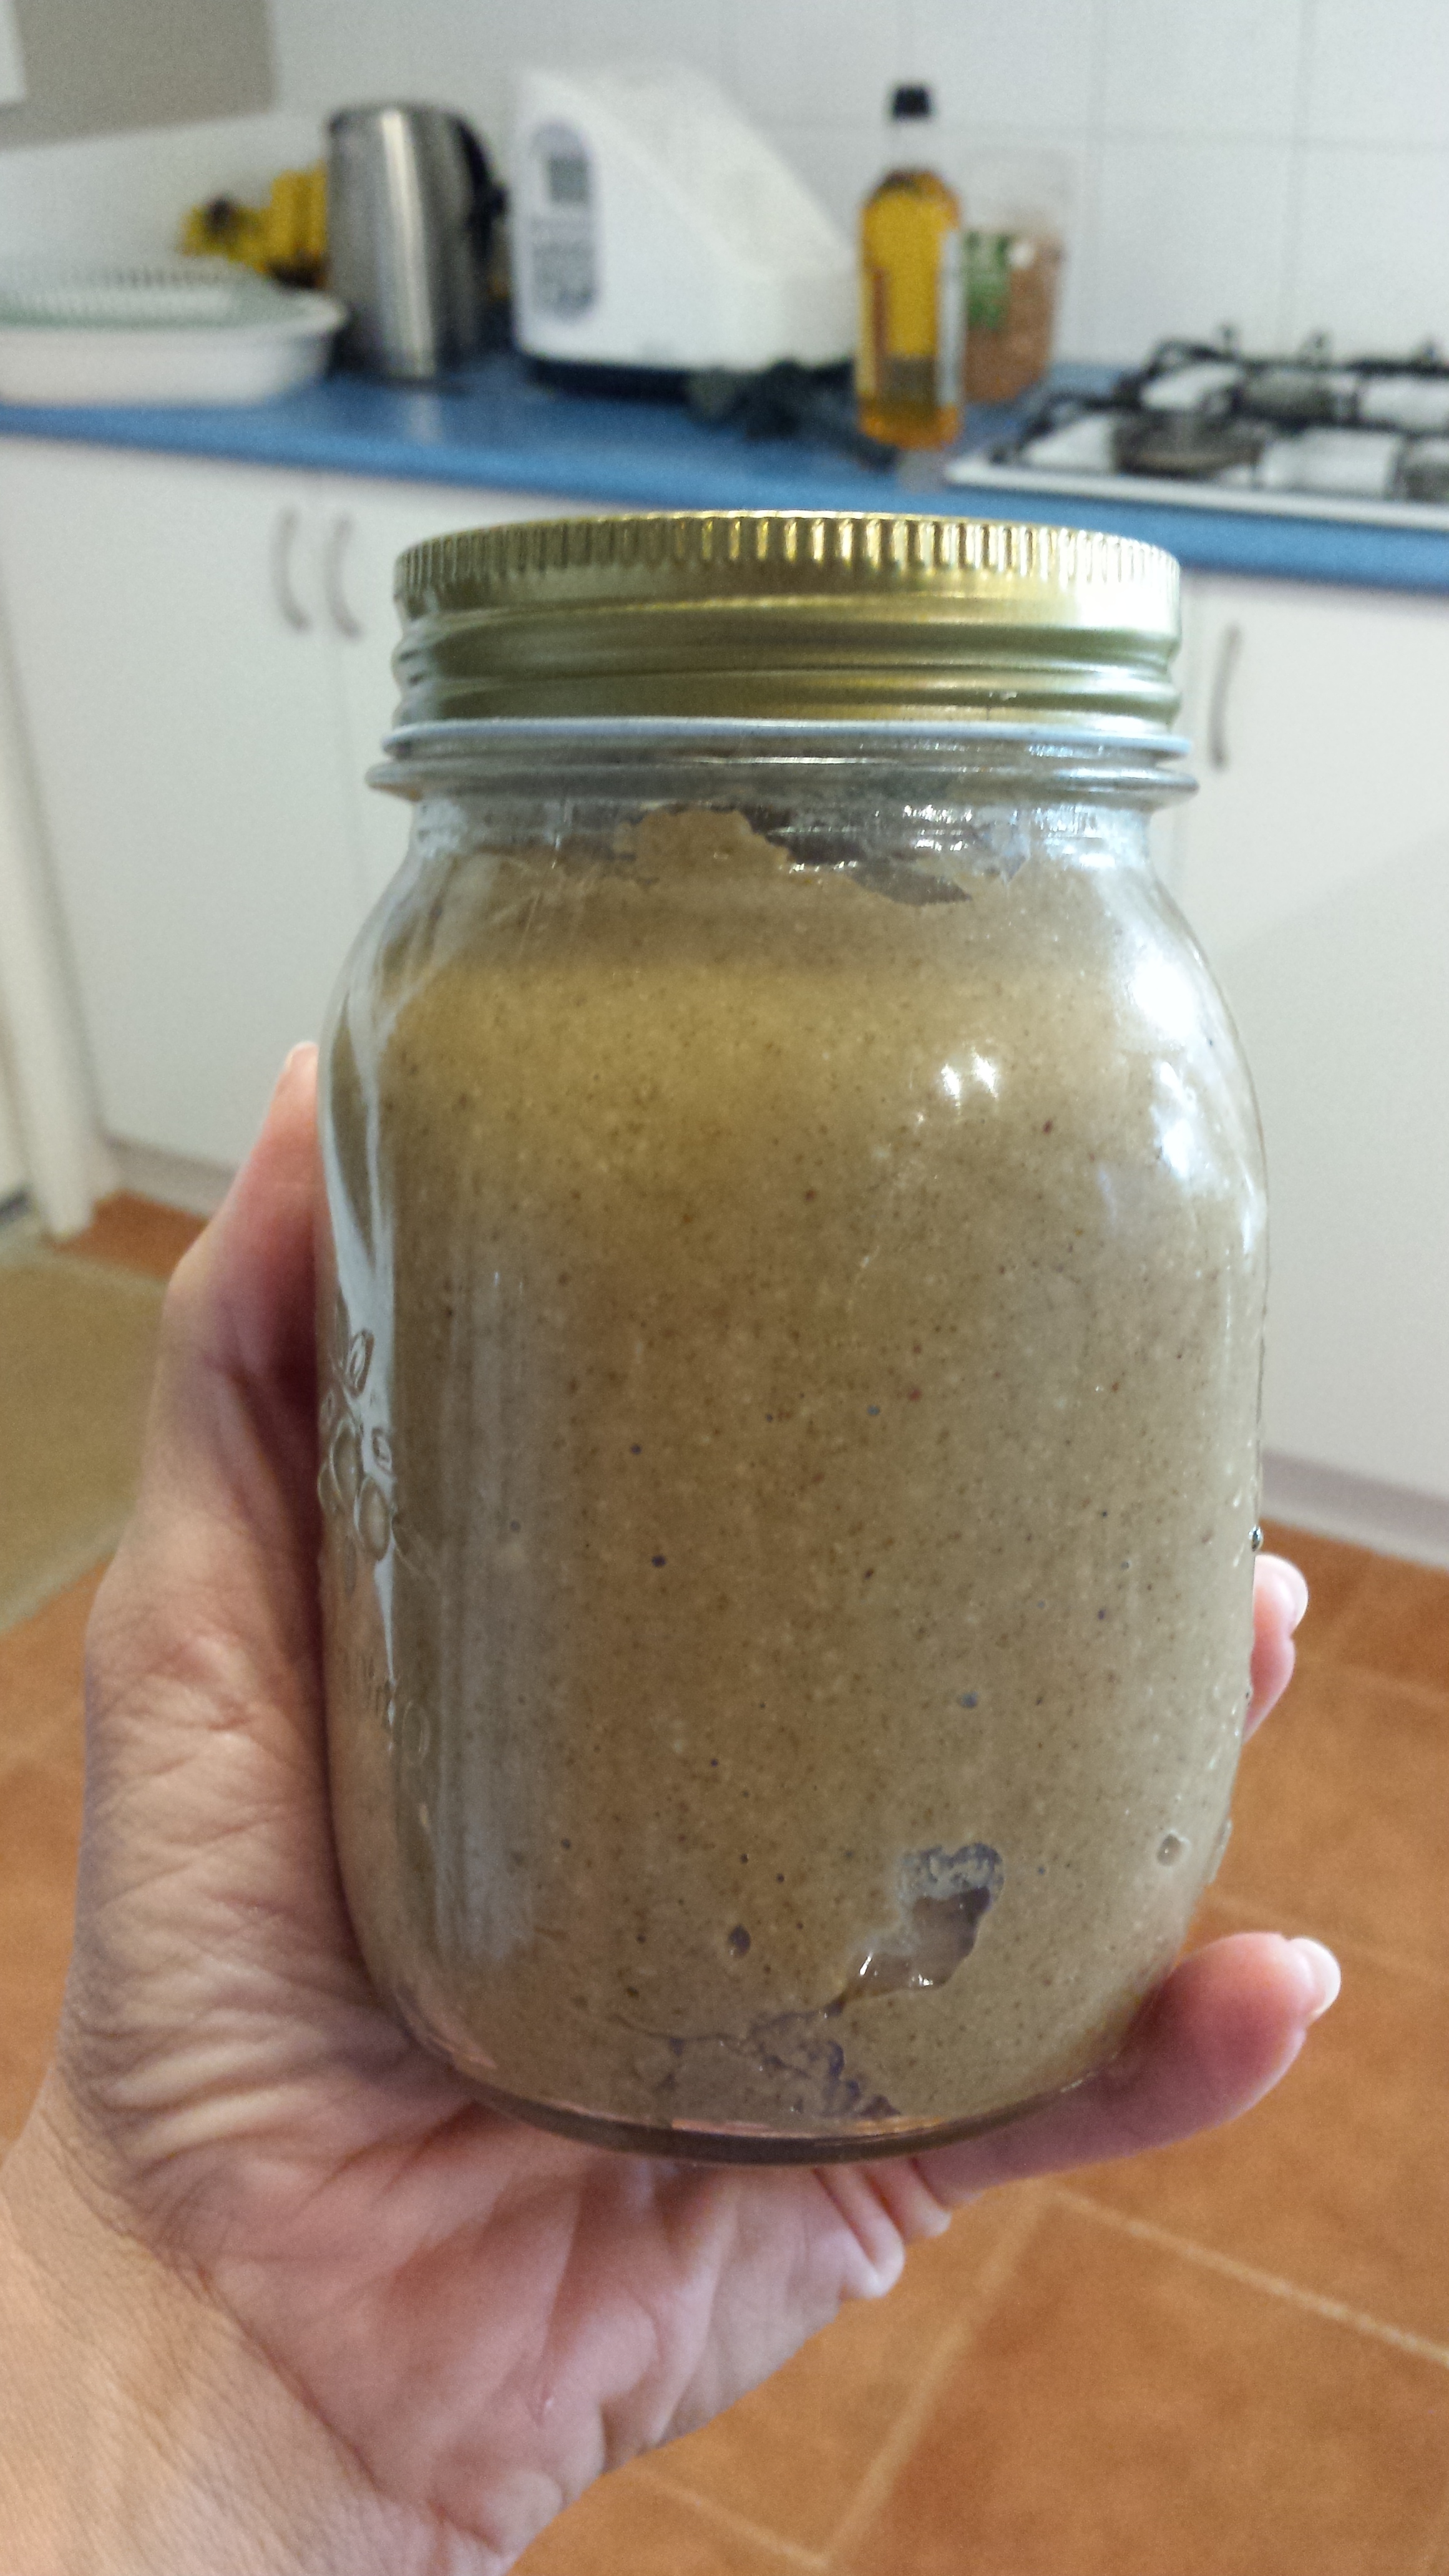
Peanut butter was a staple for me growing up – I loved it and have missed it a lot since out house went peanut free. Then I discovered Free Nut Butter, made by Eskal. It is an amazing substitute, made from roasted sunflower seeds.
Sadly there has been some difficulties with supply in Australia recently. It is back in stock in some places, but it is difficult to find and now costs between $11-$12 for a jar – eek!
We use it a lot in our house as the base for nut free satay, cookies, ice cream and just in sandwiches and on fruit etc. The new price was becoming quite prohibitive, so I decided to have a go at making my own, guesstimating the quantities and ingredients from the list on an old jar and was pleasantly surprised by how well it worked!
I have done this in my food processor, a borrowed Thermomix and my Bellini – The food processor wasn’t able to get a smooth butter, but worked well to give a crunchy spread.
550g sunflower seeds, dry roasted*
Optional additions:
1/2-1 tbsp sugar or maple syrup (depending on your sweet tooth)
1/2 tsp flaked salt
Roast the seeds. I do this on a lined baking tray under the grill in my oven. Watch them very carefully. They only take a few minutes. Mix and turn the seeds and return them to the oven (a couple of times if necessary) so that they seeds are golden brown all over. Allow to cool for a few minutes.
Place seeds in machine and blitz on speed 10 for 30 secs.
Scrape down sides then add sugar and salt if you’re using them.
Blitz in speed 10 for about 40 secs, stopping once to scrape down sides.
Continue to blitz on speed 8 at 30 sec intervals until you get desired consistency. I did another 90 seconds this time.
This makes a large jar, about double the quantity of the jars in store.
*to add some variety to your spread, swap out some of the sunflower seeds and add in your favourite nuts or seeds. Just stick to the same dry weight in total.
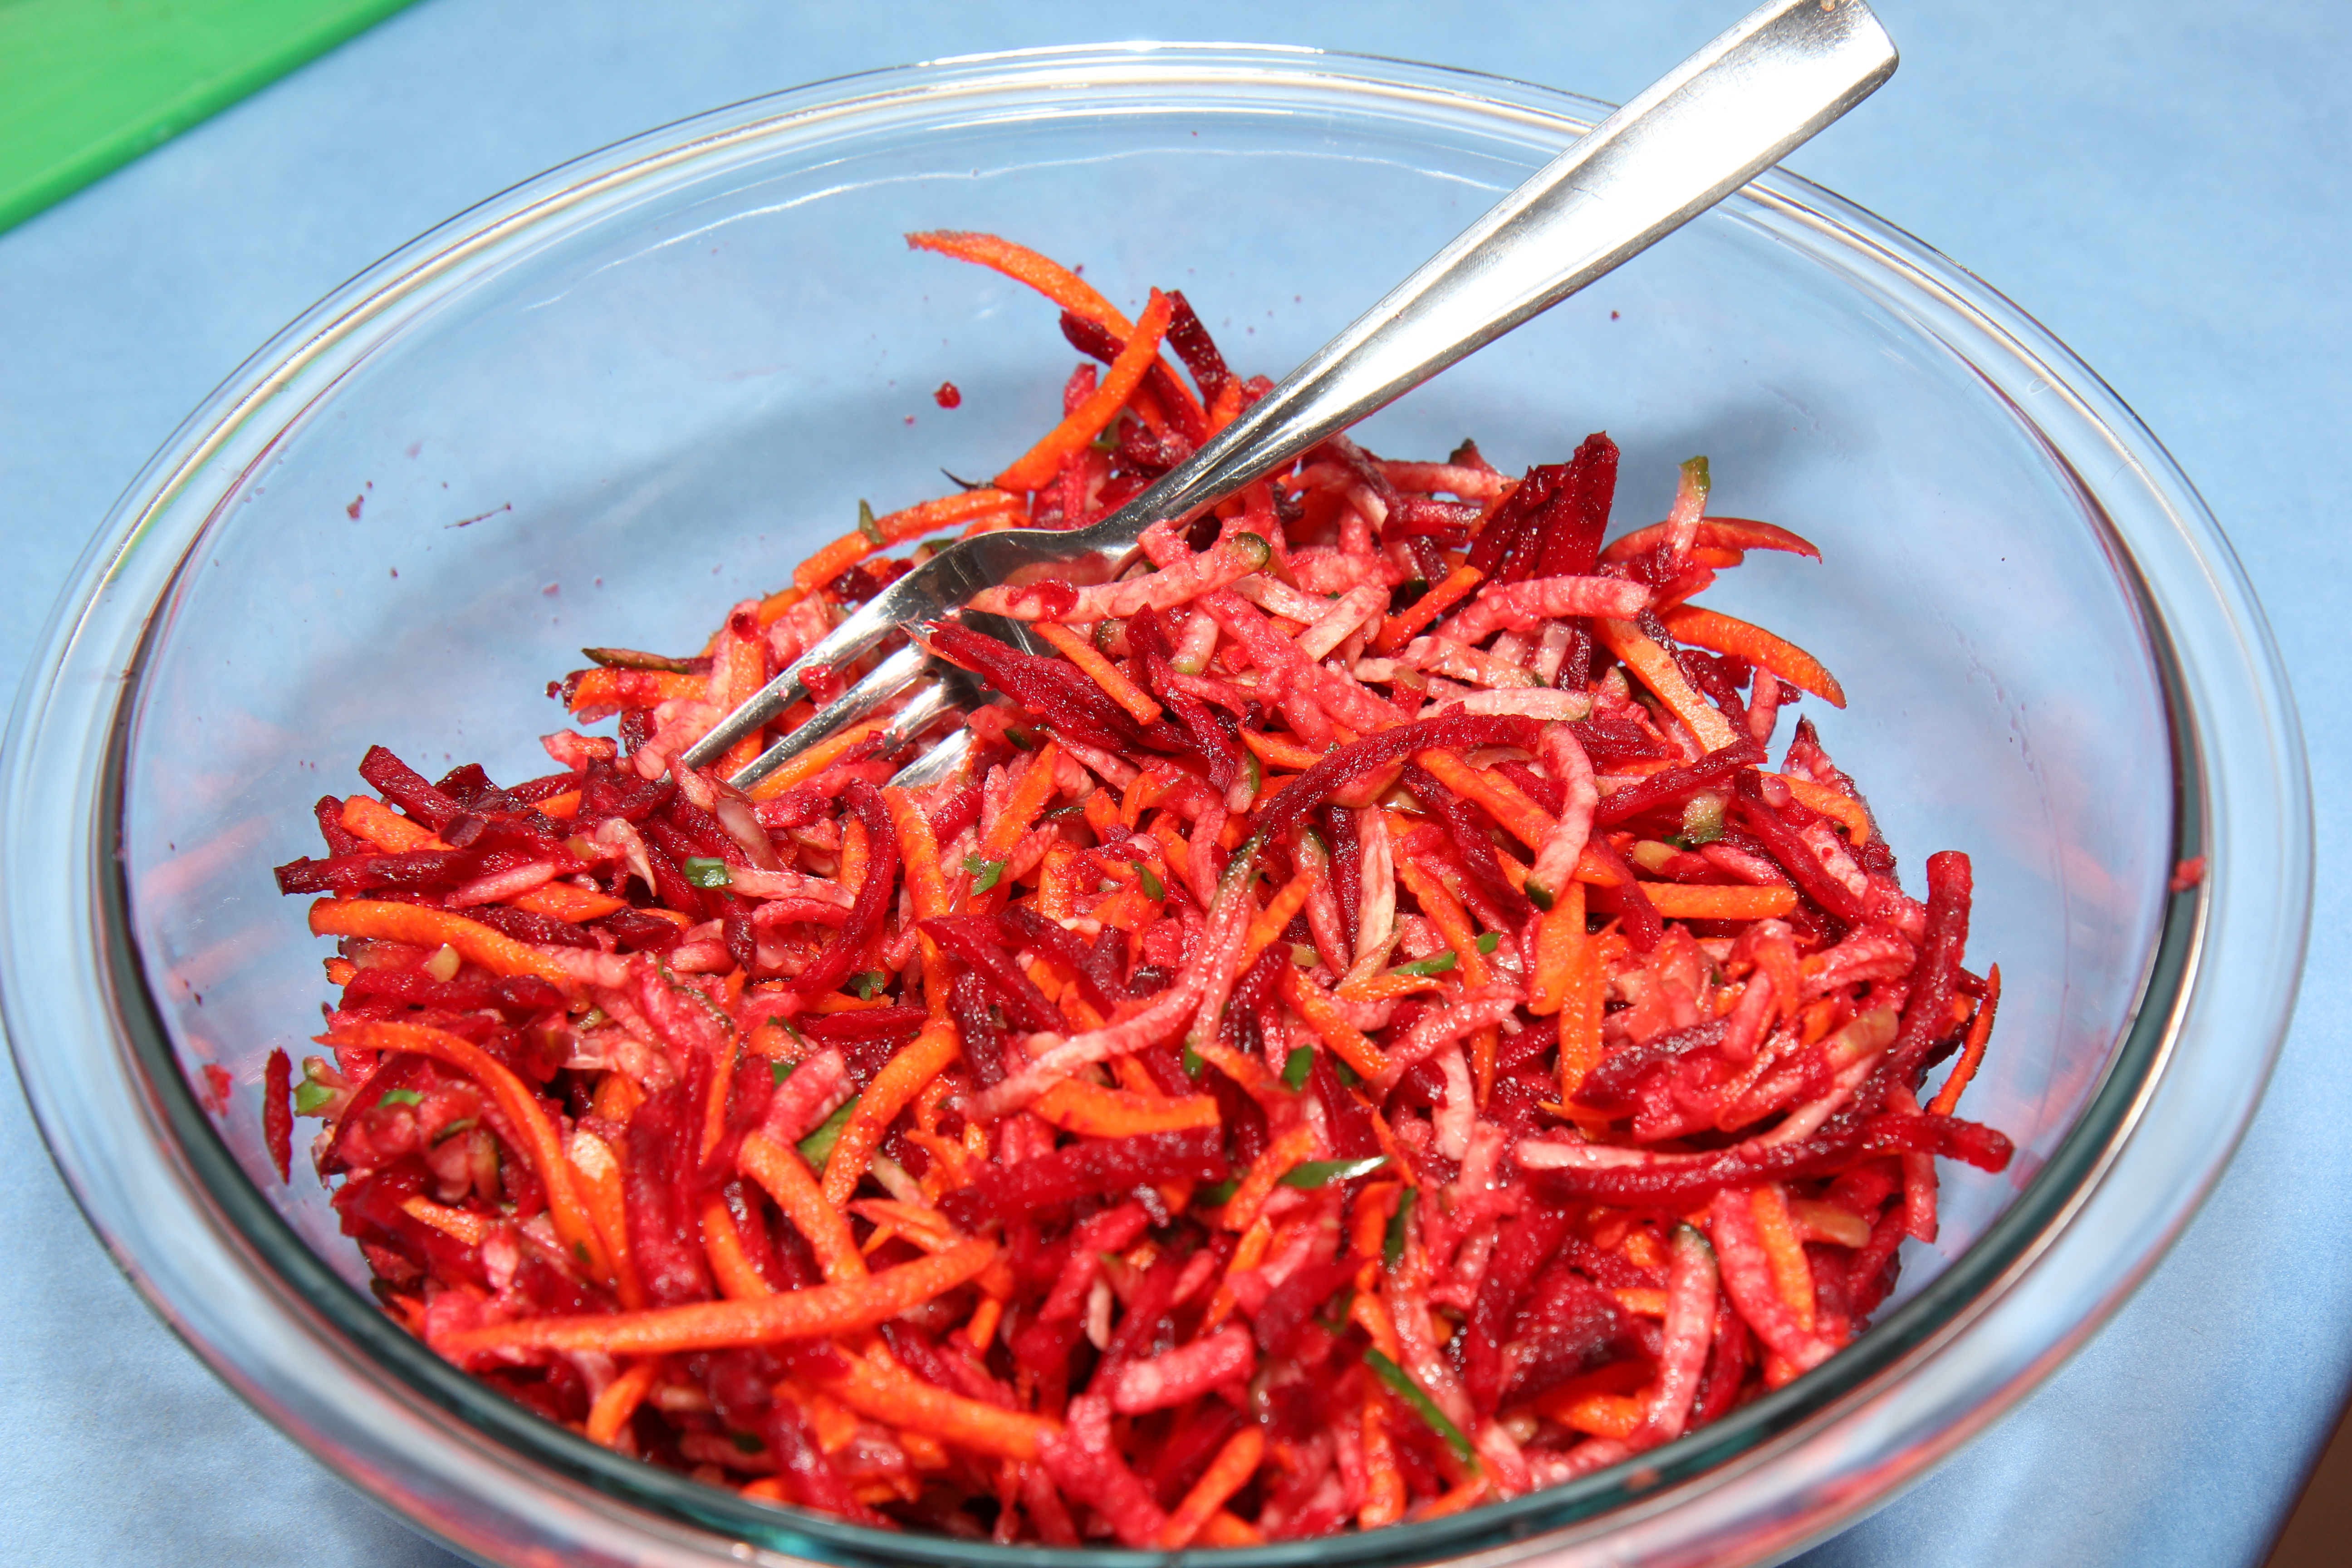
We had a particularly successful crop of beetroot from our veggie garden this year – and I was a bit stuck as to what to do with them. My friend, Kym, put me on to a lovely raw beetroot salad.
I have tweaked it a bit – but you can find the original here: http://www.allergyfreealaska.com/2013/01/22/raw-beet-carrot-apple-salad-with-ginger-lime-dressing/
2 beetroots
2 apples (I like Fuji’s and that’s what grows on our fruit trees – or pears to be safe for William)
2 carrots
a large piece of cucumber
2 tsp freshly grated ginger
2 tbsp lime juice
1 tbsp olive oil
1 tbsp honey/maple syrup
Grate the fruit and veg – food processor is easiest.
In a jar, add the ginger, lime, honey and oil and shake until well combined.
Place the salad in a bowl and mix well, then dress.
I have served this on it’s own as a side dish at BBQ’s, but my two favourite ways to eat it are with some crumbed chicken or with a good handful of spinach and some lemon pepper salmon.
If you are making the salad ahead of time, I suggest keeping the beetroot separate until closer to serving time so it doesn’t bleed quite so much and turn everything very pink 😉
This makes about enough for 8 and it keeps well in the fridge for a few days (I often make a half mix and have it for lunch over 4 days).
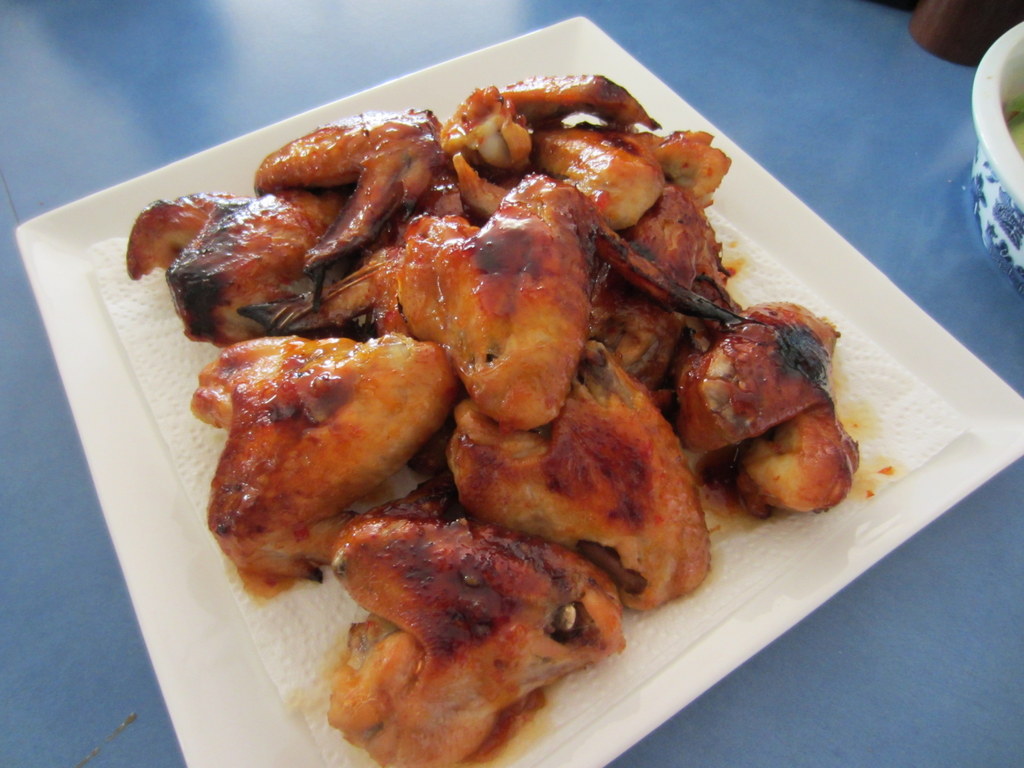
Only 2 ingredients required and last time I made them I did it one-handed in 5 minutes whilst I was holding a sad baby … so it gives you an idea of how easy they are!
You’ll need
chicken wings (or drumsticks)
a bottle of sweet chilli sauce.
Place the sauce in a bowl and roll the chicken in the sauce, making sure it is thickly coated.
Place the chicken into a large, lined baking tray and transfer to a preheated oven. Cook at 200C for about an hour, turning the pieces after about 40mins and spooning the sauce from the bottom of the dish back over the chicken.
Serve warm or cold with a fresh garden salad – enjoy 🙂
This is a super-easy idea that I pinched from my Mum. Sadly the kids don’t enjoy it much but Peter and I have loved it … and its left overs for multiple days afterwards!
My little Harry has a serious infatuation with bread. He would eat it for breakfast, lunch and dinner every day if he was allowed! In fact recently when I was writing our menu and shopping list I asked the kids for their input and Harry’s response was “Mummy, I’ve told you what I like; bread, salt, cake, butter and enchiladas. Don’t keep asking me again, just make ALL the dinners from that!”.
However, he does not like ‘yucky seedy bits’ or ‘pooey vegetables’ … so when I served this bread up he was highly unimpressed that I had sullied his precious bread with both seedy bits and vegetables!!!
After quite a bit of encouragement he tried some … then scoffed the whole piece and promptly asked for another. Then he ate another piece with his dinner and gave me 100 out of 10 – I am claiming victory!!!
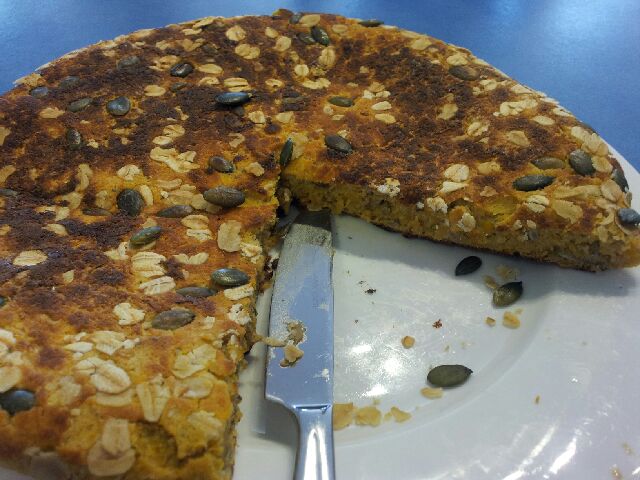
It is based on a pan bread from the ‘Multi-allergy cookbook’ by Lola Workman.
See below the recipe for a conversion for Thermal Cookers.
1 tsp sugar
2 tsp gelatin (kosher gelatin or agar-agar if you need to make it vegan)
1 tsp salt
2 tsp dried yeast
1 tbsp olive oil
4 tbsp warm mashed pumpkin
2 cups flour of choice – Wholemeal spelt or a combineation of oat and rye are great. (For GF flour mixes, use 1 3/4 cups plus 1 tsp psyllium)
1 tsp chia seeds
1 tsp flax seeds
1 tbsp sunflower seeds
1 tbsp pepitas
1 tbsp rolled oats (omit these or switch for rolled quinoa for GF)
Place 1/2 a cup of warm water in a mixing bowl and add the sugar, gelatin and yeast. Whisk until well combined
Stir in the mashed pumpkin and leave to sit for 10 minutes.
Place your seeds into a processor and process until finely chopped.
Add the flour, salt and seed mix to the pumpkin mix and fold together. Start with 3/4 of the flour and gradually add a bit more if the mix is too wet.
Tip the dough on to the floured board and gently knead until the flour is absorbed. Shape to a rough ball.
Pour the oil into you hands and rub it all over the ball of dough.
Place the dough back in to the mixing bowl, cover with a tea towel and leave in a warm place to rise for 20 minutes.
Before rising…
20 minutes later
When the dough has risen, warm a heavy based pan on the stove, spray the base with some oil and sprinkle the oats and extra pepitas on the bottom.
Tip the dough into the middle of the pan and, using your fingers, spread the dough to fill the pan. Cook for 3-4 minutes, then turn the bread and cook for a further 10 minutes until both sides are golden brown and sound hollow when tapped.
Can be eaten warm or cold, on its own or with a spread.
We cut it into wedges and it makes 12 wedges.
To convert for a Thermal cooker:
Place your seeds into bowl and process on speed 6, 6 seconds. Set aside.
Place 1/2 a cup of warm water into mixing bowl and add the sugar, gelatin and yeast. Speed 2, 5 seconds. Allow to sit.
Stir in the mashed pumpkin (Speed 3, 15 seconds) and leave to sit for 10 minutes.
Add the flour, salt and seed mix to the pumpkin mix and mix on Speed 4 for 10 seconds. Start with 3/4 of the flour and gradually add a bit more if the mix is too wet.
Tip the dough on to the floured board and gently knead until the flour is absorbed. Shape to a rough ball.
I love winter time – the cold, grey days give me energy … I know, I’m strange!
One of the things I love is making delicious comfort food that warms and fills you up. I love that I can cook huge quantities of soups, curries, stews and casseroles that are packed with veggies and freeze them for easy meals. This is one of those meals.
It is quick and easy to make (about 10 minutes to start and another 5 later), is really cheap – about $8 for the entire 6L pot and the left overs freeze and defrost really well.
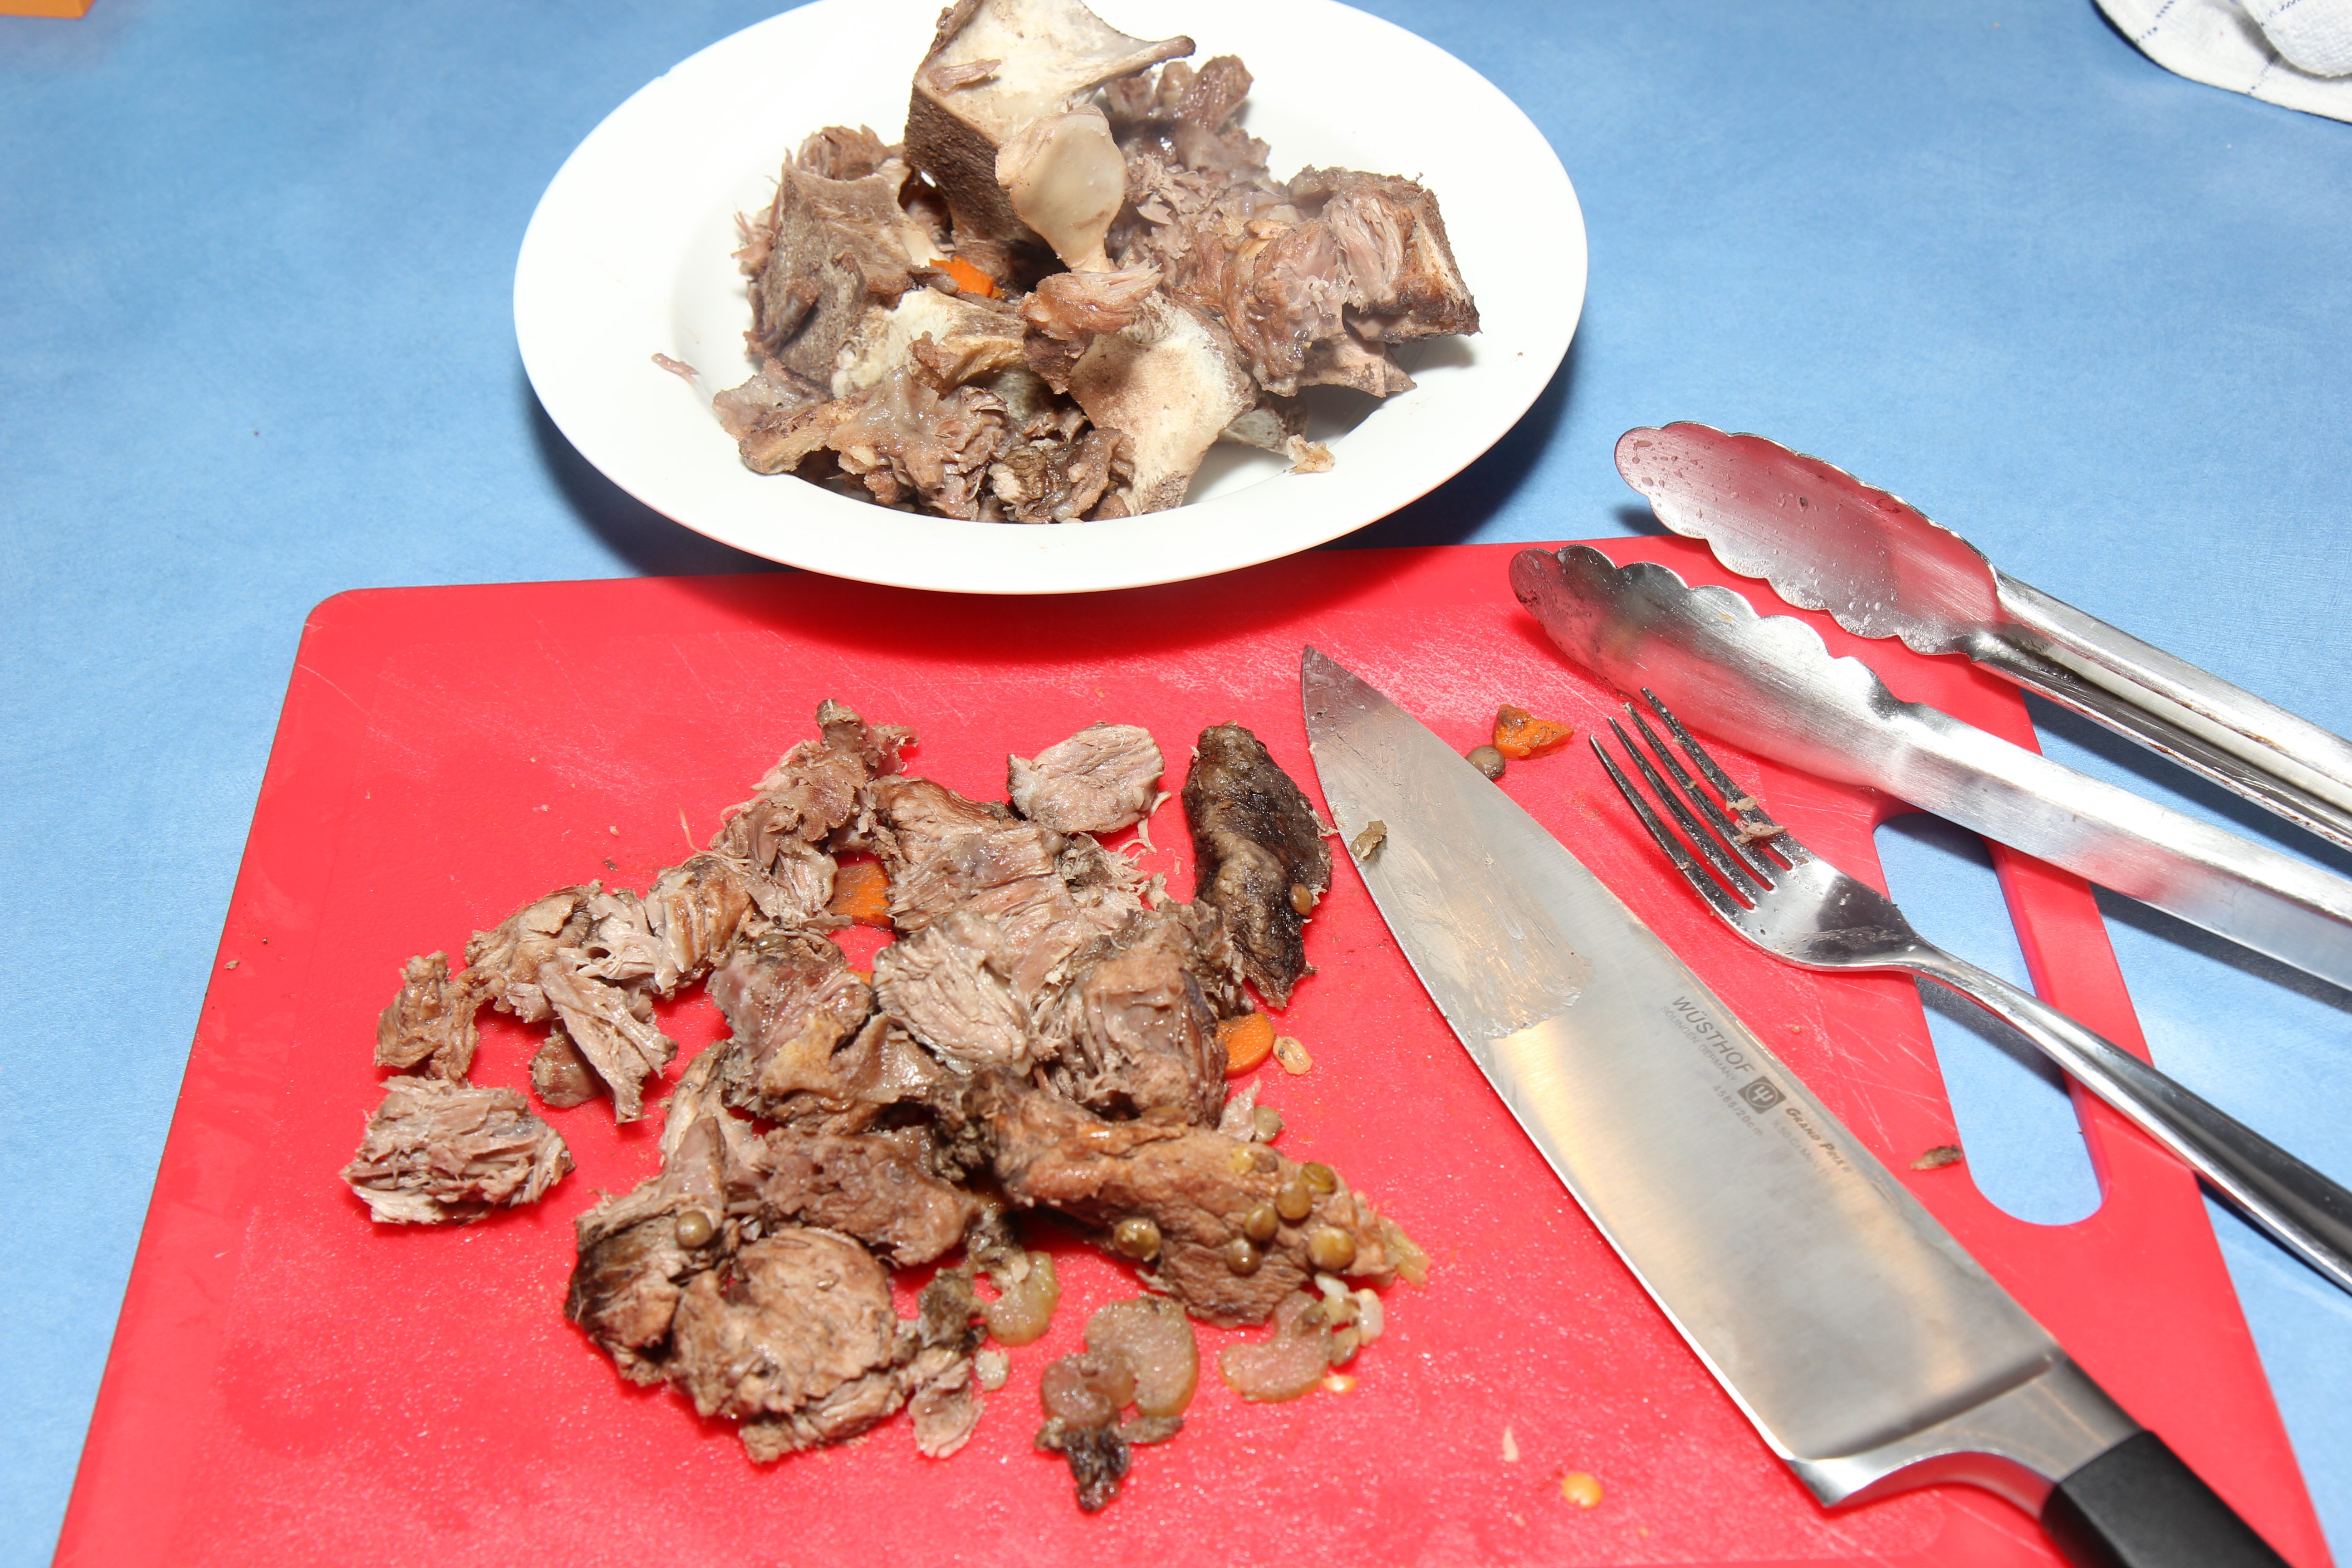
800g beef soup bones
3-4 carrots, diced (skin on is fine)
3-4 large sticks of celery, diced
3 potatoes, diced (skin on too) OR 1 medium sweet potato
2 cups dried lentils
1 cup pearl barley
400g tin crushed tomatoes
1/4 cup red wine
2 sprigs fresh thyme
approx 2L water
Salt to taste
Mix all of the ingredients together in the slow cooker and fill with water to cover. Place lid on and cook on low for 8 hours.
Remove beef bones and strip the meat. Remove sprigs of thyme. Dice the meat up and return to the pot, stirring well. Add salt to taste.