Chocolate Freezer fudge

ok – this is hands down the best dessert I have made to date!  If you are after a very simple but decadent, chocolatey dessert that is allergy friendly and quite healthy – then this one is for you!

  • 1/2 Cup Sunflower seed Butter1-February 2013 692
  • 1/2 Cup tasteless Coconut Oil (Room Temperature)
  • 1/2 Cup Cocoa
  • 1/2 Cup Pumpkin Puree
  • 1/3 Cup honey/maple syrup

Place all ingredients into your processor (helps if the pumpkin is still warm) and process until the mix is smooth, stopping to scrape down the sides. In a Thermal Cooker, start on Speed 5 for 20 seconds, scrape down the sides and then process again, working up to speed 7 until mixture is very smooth).

Pour in a greased 8×8 tin, cover in glad wrap and freeze for about 4 hours.

Cuts into about 16-20 pieces and needs to be stored in the freezer.

This was  a MASSIVE hit in my house and I have to confess that it didn’t last very long! They are already requesting another batch

3-February 2013 699

Hope you enjoy it as much as we did 🙂


Menu Planning and Keeping my sanity!

Several times in the last 4.5 years on our food allergy journey I have made mistakes or oversights that have led to my kids having reactions … and trust me – it feels awful 😦

So I wanted to share with you some of our tips for how we cope in our home in the hope that it might help you too.

Menu

  • Have lots of safe snacks on stand by. Individually wrapped and frozen slices, muffins and breads are really handy. I always have some fruit or rice crackers in my nappy bag so I can feed Ellie if we get caught out somewhere for longer than I had expected.
  • We all eat the same thing at meal time as much as possible to avoid cross contamination (and it’s easier for me!)
  • We all use Nuttelex instead of butter or margarine so that there aren’t any remnants in spread jars.
  • Different face-washers each day for Ellie and the boys so that we’re not wiping allergens on her if the boys have been eating them.
  • Will’s allergy to most nuts is potentially life threatening so, as a blanket rule they are not allowed in the house, and Harry isn’t allowed to eat them when he’s out because he’s in such close contact with Will (we may need to rethink how we deal with this one as they get older).
  • Always check labels on packaged foods – ingredients change, even between versions of the same brand (eg plain or grain packet bread mix). I recently made the mistake of buying a home brand version of a cereal that is normally fine for Will only to have him break out in hives after eating only a tbsp. Turns out the home brand version had vitamin A extracted from peanuts in it!
  • I don’t love doing dishes so I try not to use 2 lots of utensils when cooking, so if we aren’t eating exactly the same thing, I tend to do Ellie’s first. Eg, drain the GF pasta first then use the same drainer for the regular pasta afterwards, or cut Ellie’s bread on the bread board and then when hers is on the plate, do the regular bread next.
  • Baking paper in the sandwich press is easily switched so that there’s no contamination from crumbs or cheese etc.
  • Make sure faces and hands are washed after meals and snacks and before kids play with toys.
  • Lastly we talk to our kids regularly about allergies. The boys are 2 and 4 and they know to always ask about nuts and eggs before they eat food from anyone else. Fortunately (in some ways) Ellie’s reaction to some things are quite instant so they have seen the welts pop up when they kiss her after drinking milk etc. And they know not to feed her anything unless they’ve checked with me – and even tell their little friends when we are out and about.

Do you have any other allergy survival tips to share?

Slow Cooked Chicken (plus Stock and Gravy)


We all really enjoy chicken in our family, so I am always on the look out for new recipes that are cheap, easy and healthy.

I know that they are significantly cheaper than pieces, but I haven’t really cooked whole chickens much, partly perhaps because my Mum didn’t, but honestly, it is mostly because I didn’t want to make a mess in my oven!!! So when I heard people talking about how they cooked chickens in their slow cooker I was keen to experiment and we have now been cooking this way for years.

This is a super easy way to cook a chicken, the flavour is lovely and gentle and the meat is delightfully soft and just falls off the bone – which means my kids ate it really well. And I can make both stock and gravy from the left overs – such a win for the budget!! See below the main recipe for these recipes.

  • 2 cloves minced garlic
  • 1 lemon or lime
  • whole chicken
  • Optional – a few sprigs of thyme

Grate the zest off the fruit and set aside.

Wash the chicken inside and out and pat dry.

Cut the ends off the fruit and place inside the cavity, then place breast side up in the slow cooker.

20160608_063155

Sprinkle the zest and garlic (and thyme) over the chicken, then place the lid on and cook on low for 6 hours.

You don’t need to add a rack or any liquid as the chicken will cook in its own juices. It won’t have the browned crispy skin of oven roasted chicken but it is amazingly tender.

20160608_125356

Allow to rest for half an hour before carving (or pulling apart with a fork like I did! 😉 )

To get the crispy skin of a traditional roast chook,  transfer to a baking dish and place it into a preheated 240C oven for about 12-15 minutes.

20160608_131113.jpg

Serve with salad or veggies.

Enjoy!

If you are keen to use your chicken to the max, here’s an easy recipe for stock, using the carcass.

Remove the fruit from the cavity (or leave it in if you want to add a lemony flavour!), place the carcass in a large saucepan, add a pinch of black pepper and a couple of salt, a bundle of favourite herbs (I do rosemary and thyme from my garden), then  add a roughly chopped brown onion, 2 carrots and 3 or 4 sticks of celery. Add enough water to cover the chicken (just over 2L for my saucepan), bring to the boil and then reduce the heat and simmer slowly for 1.5-2 hours. Strain the stock (just over 3 cups) and store for use in soup, risotto etc. Keeps well in the freezer for a month or two.

To make a delicious gravy for your chicken and make that dollar stretch even further….

Make a simple roux (1 tbsp of nuttelex and 1 tbsp GF flour), then gradually whisk in the juices from the bottom of the slow cooker. Yum!! The best part is that the flavours of your gravy will reflect and enhance the flavours of your chook!

20160608_130851


Enjoy 🙂

Lazy Bolognese-y

Hello!

Hope that you have had a lovely Christmas and school holiday break. We had a wonderful time – 5 weeks with our families, split between a remote caravan park, a beach house and my family home in Perth.

While it was delightful being away, the kids ate more refined and packaged foods and sweets than they would normally have, so I have been finding it difficult to get them back into their regular eating routine – especially with Harry and vegetables.

So when I made spag bol the other night, instead of just grating in the veggies like I normally do, I then blitzed them in the food processor before adding them to the meat which made a really nice thick sauce … without obvious pieces of ‘pooey vegetables’ (my lovely 2 year old!). Harry was so excited to see how much ‘meat’ he had on his spaghetti that he practically inhaled the bowlful – win for Mummy!!

See below the recipe for a link to our meat free bolognese.

  • 500g beef mince
  • 1 brown onion, finely chopped
  • 2 tbsp garlic olive oil
  • 1-2 tsp minced chillies (or 1/2 tsp dried, ground chilli)
  • 1 large carrot
  • 1 large zucchini
  • 1 tin (420g) beans, drained and rinsed (kidney beans, black beans or a 3 bean mix)
  • 1 tin (420g) lentils, drained and rinsed
  • 10-12  button mushrooms
  • Fist sized piece of sweet potato or pumpkin
  • 1 large jar of tomato passata (approx 700g)
  • 3 tbsp tomato paste
  • 1/4 cup coconut aminos (or you could use red wine)
  • 1 tsp beef stock powder (we use the Massel brand)
  • spaghetti or fettuccine (we use the gluten free versions)

Heat the oil in a large frying pan, then add the onion and cook, stirring, until soft and golden

Add the mince and break it into small pieces as it browns, add the passata, paste, aminos/wine and stock. Mix well and turn down to low heat. Add in the lentils.

Meanwhile, in the food processor blitz or grate the vegetables, beans and mushrooms. Process more or less depending on how smooth you want your sauce.

Add the veggie mix to the meat mix in the saucepan and stir well. Bring to a very gentle simmer for about half an hour, stirring regularly. I leave the saucepan lid on but cracked open.

Serve on the cooked pasta or a bed of steamed green beans – add grated cheese of choice to top if you like.

This makes a large batch. The Bolognese freezes and thaws well.

20170209_153036

Enjoy 🙂

If you are a fan of bolognese, but you’d like a meat free option, check out our yummy mushroom and lentil bolognese.

Optional – Add in a few tablespoons of my tomato confit for an extra flavour boost.

20170209_150614-1

UPDATE : This recipe remains a firm favourite in our home (12 years after I originally posted this recipe!). But these days there are 6 mouths to feed and 2 of those mouths belong to very big teenage boys and another pre-teen who is entering his eating era! So I only ever make this in a double batch – thank goodness for a 12L saucepan!! Because the meal is filling, high protein, high fibre, an excellent way to contribute to veg consumption and allergy friendly, it is very common for this to also go to school in a lunchbox thermos – so a double batch never goes to waste!

Chicken and Lentil Curry

I have to admit that this was another meal originally concocted on the spot to avoid having to make a trip to the shops, well after my menu plan was over.

I know that it doesn’t look pretty, but man it tastes good! I think it’s my personal favourite of the moment – Peter agrees, Ellie squeals when you stop shovelling it in and even the boys both ate and enjoyed it  😀  Happy Mummy!

*When I have a really busy day and this curry is on the menu, I switch to my slow cooker version  – see below the main recipe for the details!

  • 8 chicken thighs, diced (approx 1kg)
  • 1 brown onion, finely diced
  • 2 cloves garlic, crushed
  • 1 medium red chilli, finely diced
  • 800g tin crushed tomatoes
  • Optional: 600g pumpkin, diced
  • 140g coconut cream
  • 2 x 400g tin brown lentils, drained and rinsed
  • 1 400g tin of black beans
  • 1 tsp Massel chicken style stock powder
  • 2 tbsp ground coriander
  • 2 tbsp ground cumin
  • 2 tsp ground turmeric
  • 2 tsp ground ginger
  • 2 tbsp olive oil
  • water

Heat the oil in a large frying pan. Fry the onion for a minute or two before adding the garlic and chilli. Cook, stirring for about a minute before adding the chicken.

Sprinkle the chicken with stock powder, plus other hers and spices and stir well. Allow it to brown.

If you’re using  in the pupmkin add here and stir well to combine. Cook for 5 minutes, stirring occasionally.

Add the lentils, beans and tomatoes plus about 1/4 a tin of hot water.

Reduce heat to low and allow to simmer for about 15 minutes.

Stir in the coconut cream and simmer for another 15 minutes (or longer if you’d like a thicker sauce).

Serve with brown or wild rice. Or try a bed of spinach if you need a lower carb option.

20171231_192958.jpg


20200210_181823
Slow cooked version on spinach

This makes enough for 10-12 adult dinner serves and it freezes and thaws really well.

Enjoy!!

*SLOW COOKER VARIATION*

  • 8 chicken thighs (approx 1kg)
  • 1 tsp onion flakes
  • 1/2 tsp garlic flakes
  • 1/2 tsp red chilli flakes
  • 2 x 400g tin brown lentils, drained and rinsed
  • 1 400g tin of black beans
  • 1 tsp Massel chicken style stock powder
  • 2 tbsp ground coriander
  • 2 tbsp ground cumin
  • 2 tsp ground turmeric
  • 2 tsp ground ginger
  • 800g tin crushed tomatoes
  • Optional: 600g pumpkin, diced
  • 140g coconut cream

Place chicken in the bottom of the slow cooker.

Mix together all of the herbs and spices and sprinkle over the chicken.

Top with the pumpkin (if you’re using it) and all of the beans and lentil.

Add in the tinned tomatoes, plus 1/4 cup water and give it a gentle mix so that some of the liquid makes it to the bottom of the slow cooker.

Place on the lid and cook on low for 7 hours.

Remove the lid and use 2 forks to shred the chicken, then stir in the coconut cream and allow to keep cooking, lid off, for another hour.

20200210_181533

Serve as ususal.

Slow cooker Silverside

I have always loved silverside – in fact, when I was younger it was often my request for my birthday dinner … my mum makes a mean cauliflower cheese to go with it 🙂

I enjoy this meal because it is so easy to make, tasty, the meat is very tender so my little people wolf it down, I can cook it in bulk and the leftovers freeze well. Wins all around!

  • approx 2kg silverside piece1-December 2012 825
  • 2tbsp honey
  • 8 cloves
  • splash white vinegar

Remove the meat from the plastic and rinse it off. Place in the slow cooker, fat side up.

Drizzle the honey over the top, then press the cloves in to the meat.

Fill with enough water to cover and add a good splash of vinegar to the top.

Place lid on and cook on low heat for about 4 hours.

Turn off slow cooker, but allow meat to sit in the cooker for a further hour. After this, remove the meat, place on a board and cover in foil, allowing to rest for another hour before slicing. The longer you leave it to cool, the thinner you can slice the meat.

Serve with salad or veggies.

2-December 2012 859

This makes enough meat for about 3 meals for all 5 of us. I slice the whole piece, then divide and freeze in air tight containers.

Enjoy 🙂

What’s in my kitchen?

This post is to help give you an idea of the kinds of things you might need/want in your kitchen if you are a family with multiple food allergies who is looking for what you CAN eat!

(Update: As our kids are getting older and we have fewer allergies to contend with, this is still how we eat to fill them up and meet our nutrition needs)

After a horrible mouse plague when we lived in the desert (we’d sometimes kill more than 20 in a night inside!!), everything needed to be airtight so we have A LOT of Tupperware. You can check out my fridge and pantry in more detail out below:

20200216_125731

20200125_144417

IN THE FRIDGE we have:

Nuttelex: We use Nuttlelex (a vegan butter) for the dairy free option, especially in baking. A separate knife is always used in this.

Butter: Plain butter for the non dairy free.

Milks: Full cream cows milk for 3 of our family, lactose free UHT for one, another drinks UHT oat milk and I whilst I don’t really enjoy any kind of milk, I use high protein almond milk in smoothies. We also use soy milk in baking. It’s quite the selection!

Yoghurts: I don’t make our dairy yoghurt any more (it is a time issue) but we buy a natural, high protein greek yoghurt. This is the best at filling the kids and is the most flexible for us to flavour and sweeten in the different ways we prefer. E’s yoghurt is always homemade soy. Both recipes are here.

Eggs: 5 of the 6 of us can eat eggs now (YAY!).

Cheese: Dairy Cheese and Bio Cheese. I buy 1kg blocks of the fairy cheese and grate in my food processor to save money. Pre-sliced cheese also helpful for a little portion distribution when teens make their own food!!

Medjool dates: I buy them in bulk as they are the base for many of things we make.

Dips and spreads: Cream Cheese (soy and dairy), sunflower seed butter & hummus,

Herbs/Spices: minced garlic, ginger and chilli, coconut aminos, thai chilli paste, lemongrass (when our garden allows)

Extras: Tahini for making hummus, lemon juice, maple syrup and a constant supply of hemp seeds. There is always a container of bliss balls on the go too.

We always have loads of in season fruit and vegetables on hand for easy snacks.

IN THE FREEZER we have:

I am lucky enough to have a big freezer. It is split into 6 labelled drawers (Yup, I’m a massive nerd!).

Drawer 1: Loaves of sliced light rye bread, wraps (usually whole grain, seeded or high protein), wholemeal pizza bases.

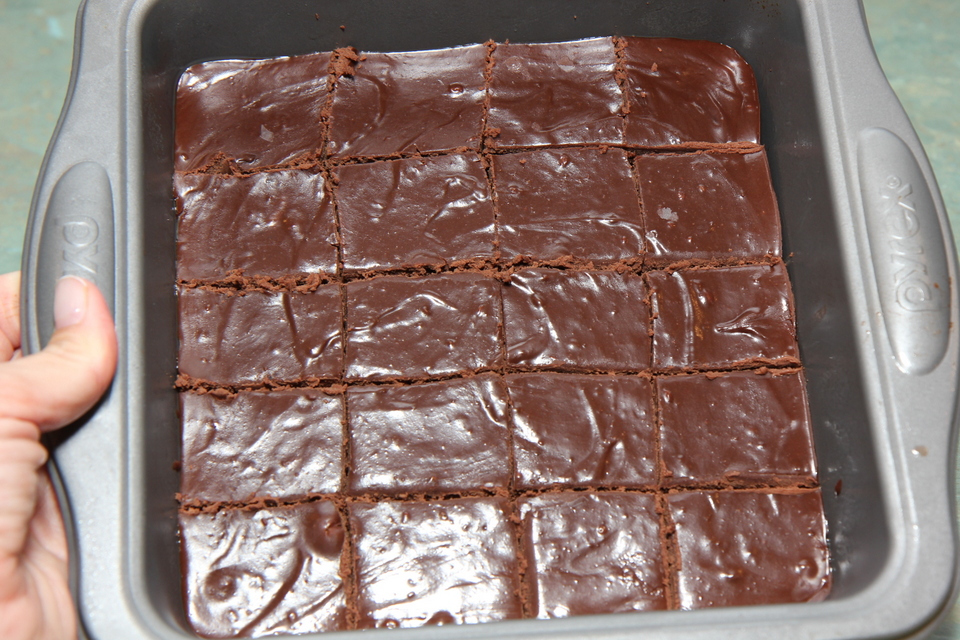
Drawer 2: Baked goods like scrolls, pizzas and, portioned cakes, pikelets or muffins. These are cut and frozen in ziplock bags, to pull out easily for making lunch boxes each night.

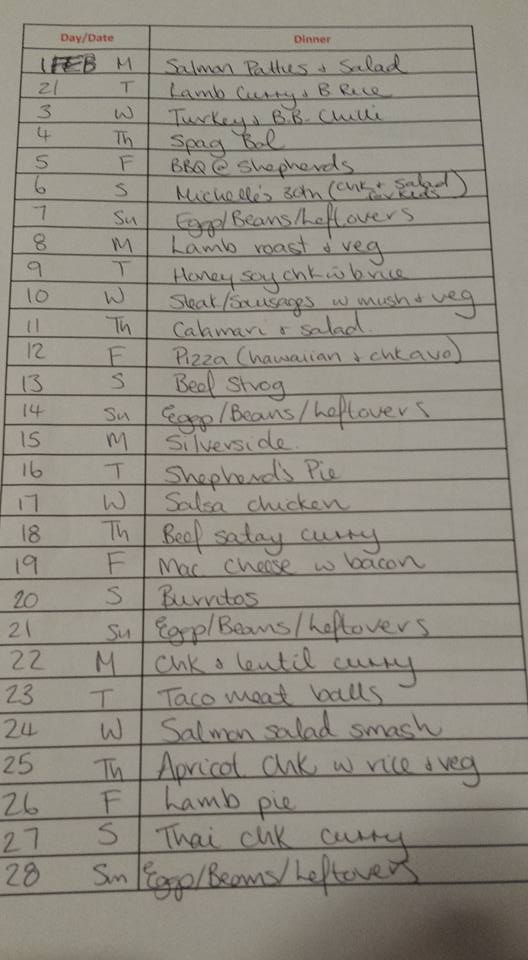
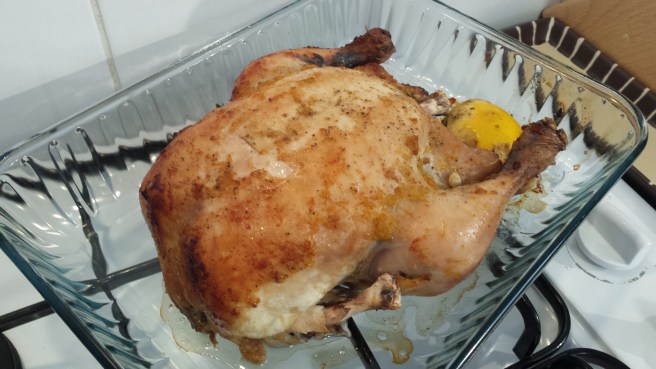
Drawer 3: Meat. I buy for a month at a time based on our menu and portion it out and label it before freezing.

Drawer 4: Pre-made meals. I cook in bulk and freeze the additional portions. Also here I have homemade gravies (in reusable squeeze pouches), jars of salsa, apple sauce and ice cubes of aquafaba (for replacing eggs in baked goods).

Drawer 5: Frozen fruits & herbs. Peeled, overripe bananas, peeled and seeded avocados, mangoes, berries, and extra herbs from my garden.

Drawer 6: Frozen Veg – always a BIG bag of mixed frozen veg, plus peas, corn, spinach (I freeze half the bag if I buy it fresh), green beans etc.

We have an additional freezer in our garage (yes – VERY lucky!) that we use to buy and store extra loaves of bread and bottles of milk – this saves us making unnecessary trips back to the shop. Also portioned meat if we happen to find a very good sale.

IN THE PANTRY we have:

Flours: A few different kinds but we largely use spelt, a 50% of white/wholemeal self raising or a store bought GF mix. 20151023_212005

Sweeteners: Honey, golden syrup, rice malt syrup, raw sugar, also icing sugar for cakes. I used to use coconut sugar a lot as I liked the caramel taste, but to save cost, we no longer use it.

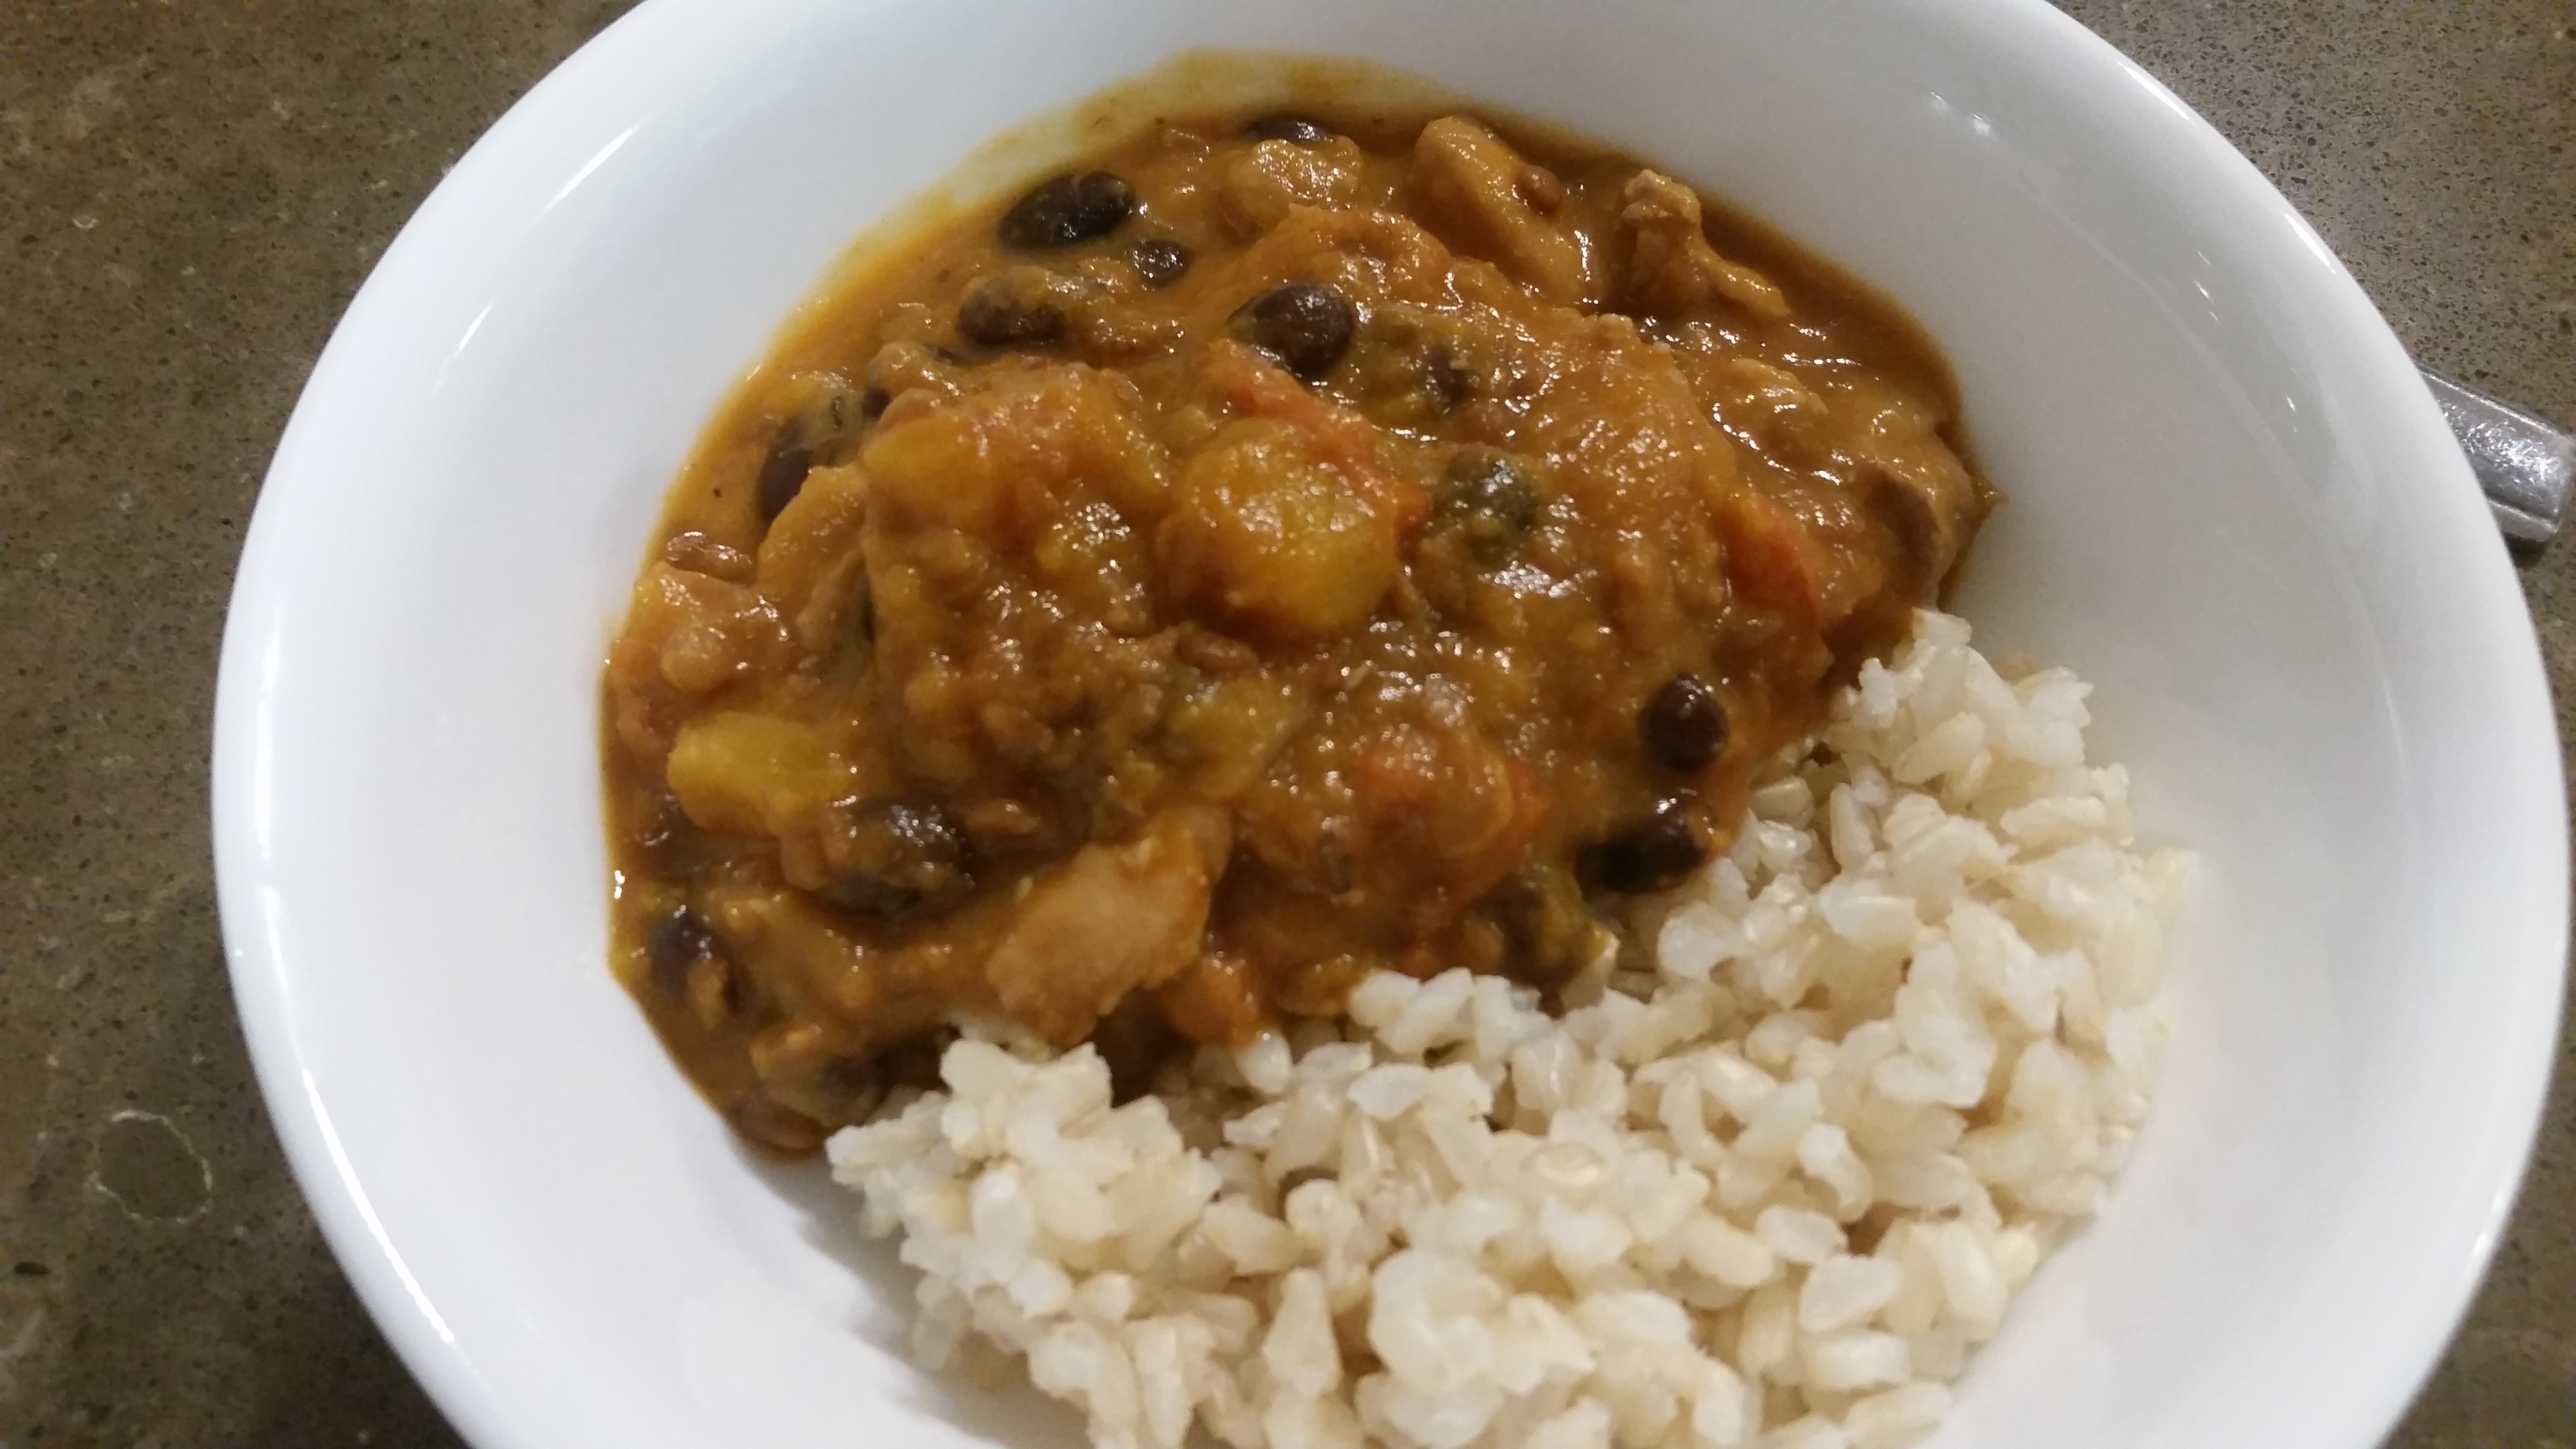
Carbohydrates: We use mostly mix of GF pasta & spaghetti, including lentil and veggie based pasta. Also brown rice, quinoa, corn couscous and sometimes arborio rice for risotto.

No egg: a powdered egg replacer made by Orgran

Cereals: We make porridge or overnight oats made with plain rolled oats, but we also make our own muesli (with a mix of seeds and dried fruits) or granola and have some allergy friendly cereals like puffed rice, cornflakes and oat bran flakes. GF weetbix is a massive favourite (we’re desperate for a bigger sized box!) … and occasionally, when it is half  price, the generic version of Nutrigrain (that is a new addition with teenage boys 🤨).

Condiments etc: salt and pepper, dried herbs and spices (galore!), tomato, bbq, (homemade) sweet chilli sauce and coconut aminos. We use balsamic, red wine, white and apple cider vinegars, Massel stock powder (chicken and beef style). The oil we use is mostly extra virgin olive oil. We love the lemon, garlic and chilli flavoured olive oil to add a flavour boost. I make my own Mexican Spice mix and French Onion Soup mix. Nutritional yeast features heavily too.

Spreads: Honey (we are very lucky to get most of our honey from my mother in law’s hives), vegemite (in the biggest vat we can find!) and of course there is always a huge jar of Sunflower Seed Butter. We also like to make almond and walnut butter.

Dried fruits: Sultanas, apricots and prunes are the staples. Dried mango when it is on sale, and occasionally dried apple.

For baking: GF baking powder, bi-carb, glucose syrup, vanilla bean paste, cocoa/cacao, cinnamon, ginger and other fragrant spices.

Seeds and nuts: Our regular stock is: sunflower seeds, hemp seeds, pumpkin seeds, flax seeds and chia seeds. Raw and dry roasted almonds, dried chick peas or dried broad beans. A dried soup mix that I make by mixing red and french lentils, yellow and green split peas and barley. We also have white and black dried beans ready to soak. The nuts we can have in our house are almonds, walnuts and pine nuts. Macadamias are also safe .. but who can afford those 🤣

Crackers and biscuits: Multi-grain rice/quinoa squares, and wholegrain sa-ka-ta rice crackers. Biscuits are normally homemade but we keep a backup packet of allergy friendly ginger nuts as a back up too.

Tins: Beans and legumes – allll of the beans, coconut cream, baked beans. Crushed tomatoes, tomato paste and passata. Tins of salmon, flavoured to add to lunches and plain for recipes. Tinned fruit (in juice rather than syrup), especially pineapple and stone fruits like peaches or apricots that are often too expensive in their fresh form.

Snacks and special items: Organ makes a good custard powder. Mini marshmallows or Sweet William chocolate or choc chips, also ‘Free From’ Cake mix sometimes on standby. Popcorn kernels – so cheap and easy!! Packaged items like choc covered chickpeas (from the Happy Snack company) and Harvest Snaps peas (Calbee) and roasted edamame (The Only Bean company), and sometimes banana chips.

If it is available and our budget allows, I buy Australian grown/made when possible. I admit that this is getting harder and harder with the rapidly increasing cost of living.

Banana Bread

Banana bread sounds good in theory right? It’s fruit – it must be healthy.

Nope, sorry. Most banana breads that you find in cafes are pretty well just glorified cake …. don’t get me wrong – they are super delicious, but just the healthy choice people think they’re making!

This recipe is a lot lower in sugar and has lot of extra goodies added to it. Still super delicious, but I am really happy to pop this one in lunch-boxes or enjoy at brunch or with an afternoon cuppa.

See below the recipe for a coeliac friendly option.

  • 2 cups flour (Plain flour is fine but I have used mixes of spelt, barley and rye and they all work well too)
  • 1/3 cup sugar (optional, but add it in if you’re a sweet tooth!)
  • 2 rounded tsp GF baking powder
  • 1/2 tsp salt
  • 1 tsp cinnamon/mixed spice
  • 1/2 cup milk of choice (oat, almond and rice work well)
  • 1 tsp apple cider vinegar
  • 2 medium, very ripe, bananas, mashed
  • 75g vegan butter/tasteless coconut oil
  • 50g maple syrup or honey*
  • 1 tsp vanilla bean paste
  • 3 tbsp seeds (use whichever are your favourite – process these first if you’d like less obvious bits). A small handful of chopped walnuts also works well here.
  • 3 tbsp aquafaba (liquid drained from a can of chick peas) OR 1 whole egg
  • rolled oats to top (or more sliced banana)

Into a large bowl add all of the dry ingredients. I don’t do sifting (ever if at all possible!), so I use a whisk to gently mix this dry mixture until it’s even.

In a large measuring jug, mix the milk and the vinegar and whisk vigorously for a minute. It should become slightly thicker and have lots of frothy bubbles on top. Then set aside for a few (3-4) minutes. Or blitz in your blender/nutribullet for a few seconds.

To the milk mix, add the mashed banana, oil, syrup, aquafaba/egg and vanilla and whisk until well combined. (or another few seconds in the blender/nutribullet)

*If you’d like an alternative to the honey or syrup, you can blend in 6 medjool dates to the wet mix

20190720_093930

Add the wet ingredients to the dry, folding them in until just combined – don’t over mix.

Pour into a large greased loaf pan, sprinkle oats on top and bake at 180C for about an hour, or until a skewer, inserted in the middle comes out clean.

20170430_120053

Allow to cool in the tin for 10 minutes before transferring to a wire rack for another 10-15 minutes.

20190720_132446

I also make these into muffins when I don’t have as much baking time – makes 18-20.

20151106_153616

This is yummy as is, or with a bit of butter, or even toasted. It freezes and defrosts well, just slice and wrap individually before freezing.

Enjoy … as I currently am, with a cuppa 🙂

To make these coeliac friendly, use 1 2/3 cups of GF flour mix (I like Bobs Red Mill All purpose baking flour) plus 2 flat tsp of psyllium and make sure you use a gluten free milk then top with rolled quinoa or use the extra banana option.

20190720_105755.jpg

To make these in a thermal cooker:

Whisk the milk and vinegar and set aside (Speed 4, 10 seconds).

Place the bananas, oil, vanilla, aquafaba/egg and syrup in the bowl and process on speed 5 for 8 seconds.

Add in milk mixture and process on speed 4 for 8 seconds. Then set aside the wet mix.

Add all of the dry ingredients to the machine and process on speed 4 for 8 seconds.

Add the wet mix back into the dry and process on speed 4 for 6 seconds, the scrape down and repeat.

Bake as per regular method.

Overnight Oats – breakfast heaven!!

It is getting hot in the desert, which means that porridge for breakfast isn’t so appealing any more.

I am keen to stick with oats as they are a great, filling and easy, low GI breakfast, but I just don’t love muesli without cows milk.

So it is overnight oats to the rescue – they’re soaked to soften them instead of cooking.

This will be breakfast (and possibly lunch!) all summer at my place – hope you delight in it as much as we do 🙂

  • 150ml almond milk (soy/oat/rice milks work too, if nuts are out)
  • 50g oats
  • 1/2 tsp ground cinnamon
  • 1 tbps honey (agave/maple for a vegan version)
  • 1 tsp vanilla bean paste
  • 1 tbsp chia seeds, and
  • diced fruit to top (I’ve been using blueberries, strawberries and mango)

Mix the oats and milk in a glass container, then add in honey, cinnamon and vanilla and stir well.

Leave overnight in the fridge.

Just before serving in the morning mix through the chia seeds and top with fruit.

Serves 2.

I have also made this for lunch (on more than one occasion!). Just mix up in the morning and allow at least 4 hours in the fridge.

Nigella’s Spanish Chicken

I am a bit of a fan of Nigella Lawson.

Lately I have been enjoying watching the re-runs of her Kitchen series on iview while I do Ellie’s dream-feed.

Usually I can only dream of eating most of the things she cooks, but then the other night I saw her make this meal and was so excited that I could make it with only a few changes that I re-watched the episode and wrote it down after Ellie was back in bed.

It was very well received in our house, despite initial objections from the two fusspots!

  • 8 skinless chicken thighs, left whole
  • 4 spicy chorizo sausages cut in to bite size pieces (check they meet your allergy requirements as they all have different ingredients)
  • 2 large potatoes cut in to bite size pieces
  • approx 1 tsp dried oregano, and
  • zest of 1 orange, finely grated.

Place all ingredients into baking pan. Make sure they are packed in quite tightly as you want it all to roast in the spicy oils from the chorizo.

Sprinkle with oregano and zest, then place in a pre-heated oven at 200 degrees for about an hour, or until chicken and potatoes are golden brown. Using tongs,  turn the meat and veg after about half an hour to make sure they are evenly covered.

I served with a salad of baby spinach leaves and diced roma tomatoes, dressed with extra virgin olive oil, a splash of red wine vinegar and a pinch of salt flakes.

This serves about 6 adults.